Talking with @graeme the other day inspired me to get the soldering iron out and put together an inductive annealer to take advantage of the excellent case-to-case consistency they are capable of.
A quick play with various coil configurations quickly showed that for heating brass a gapped ferrite used to concentrate the magnetic flux would allow annealing with quite a low input power, and that could be run from a benchtop power supply. Importantly I was able to get away without the need to water cool the induction coil.
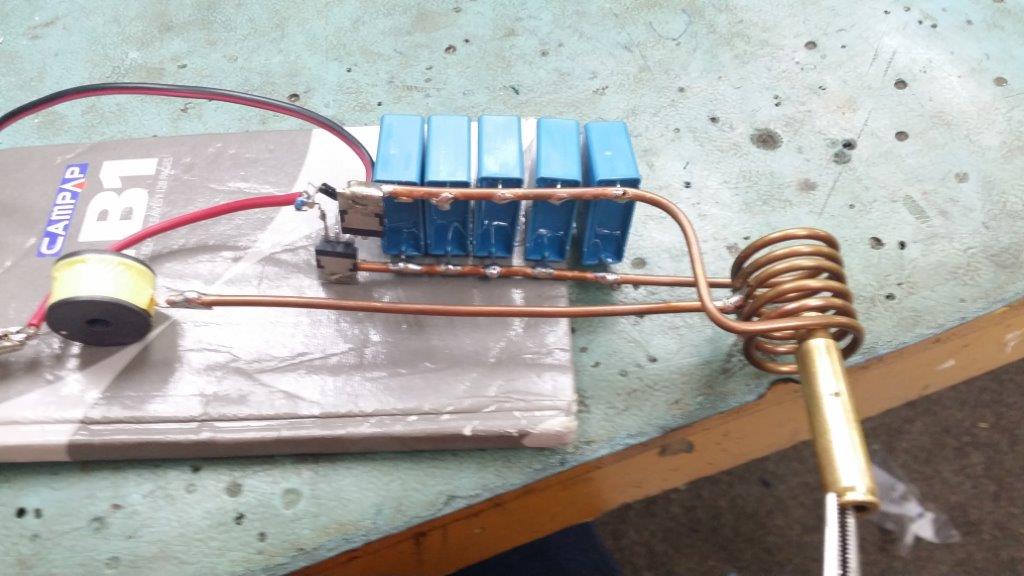
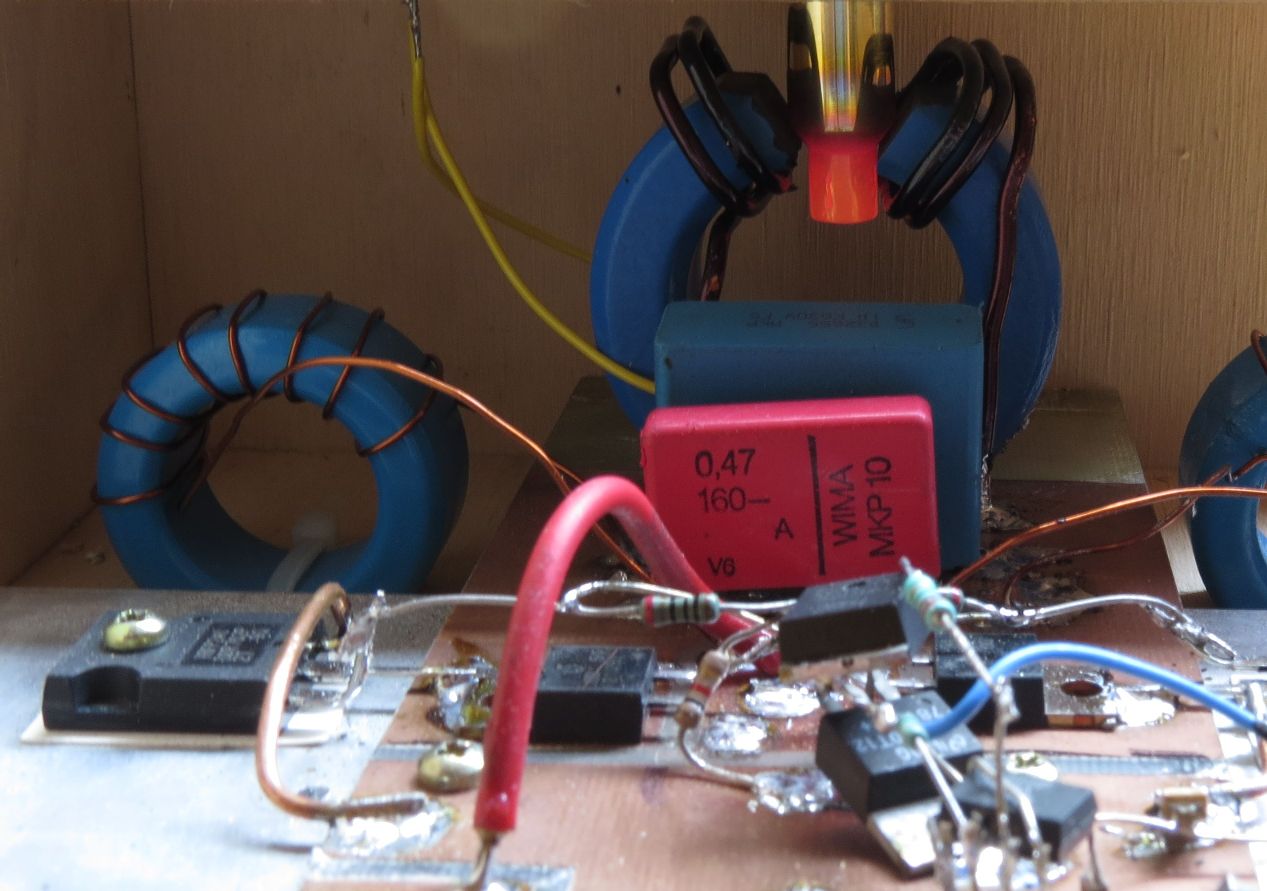
I threw it all together on a piece of plywood along with some timing circuitry, so now – similar to the Annealing Made Perfect units - the case is hung in position using a shell holder, and then it all happens with timed precision at the press of a button.
First a picture of the workings with a case being overheated for effect.
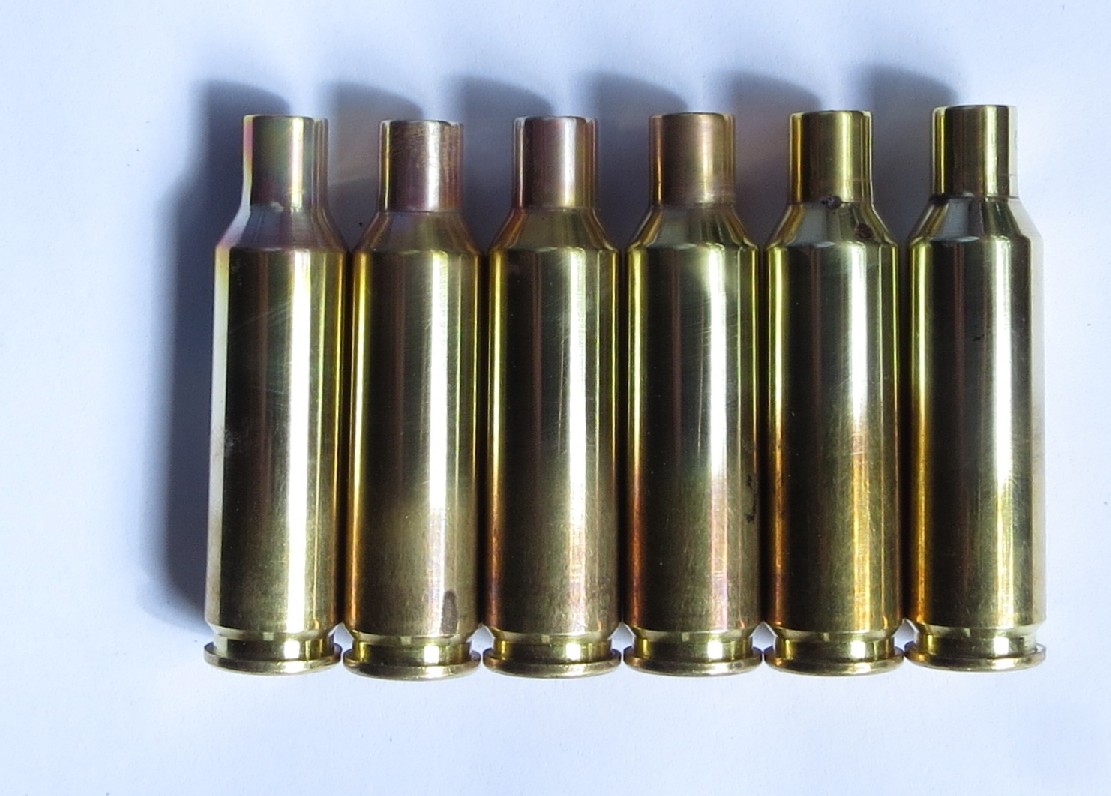
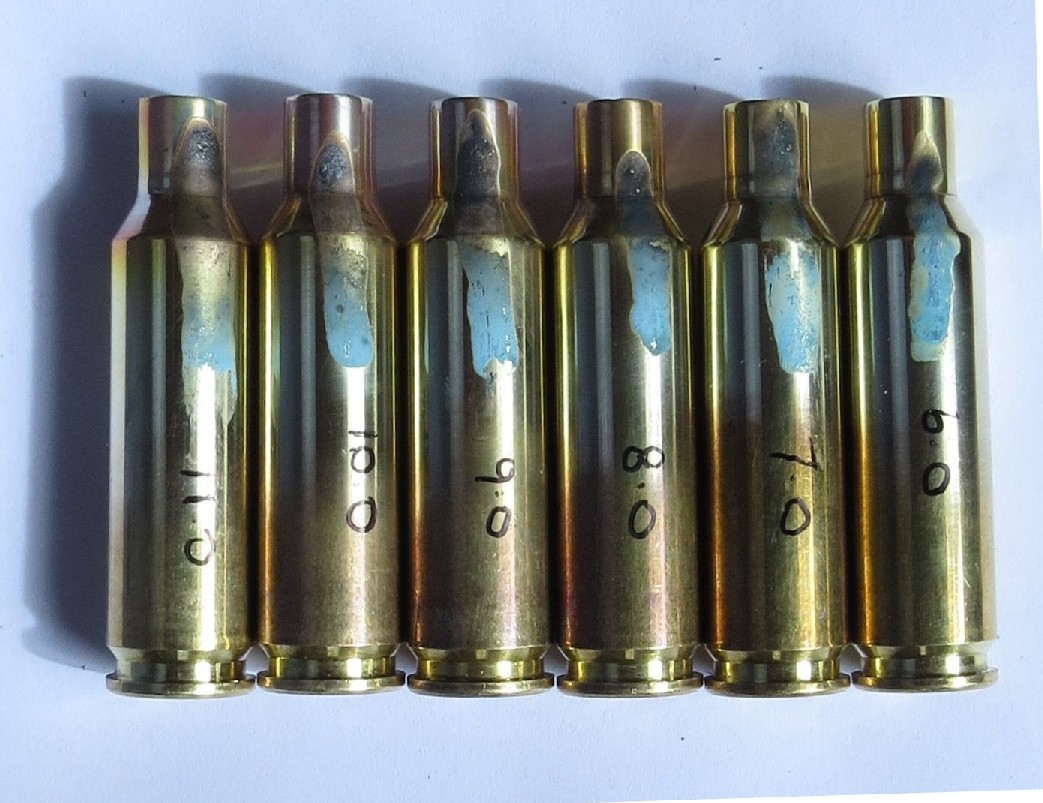
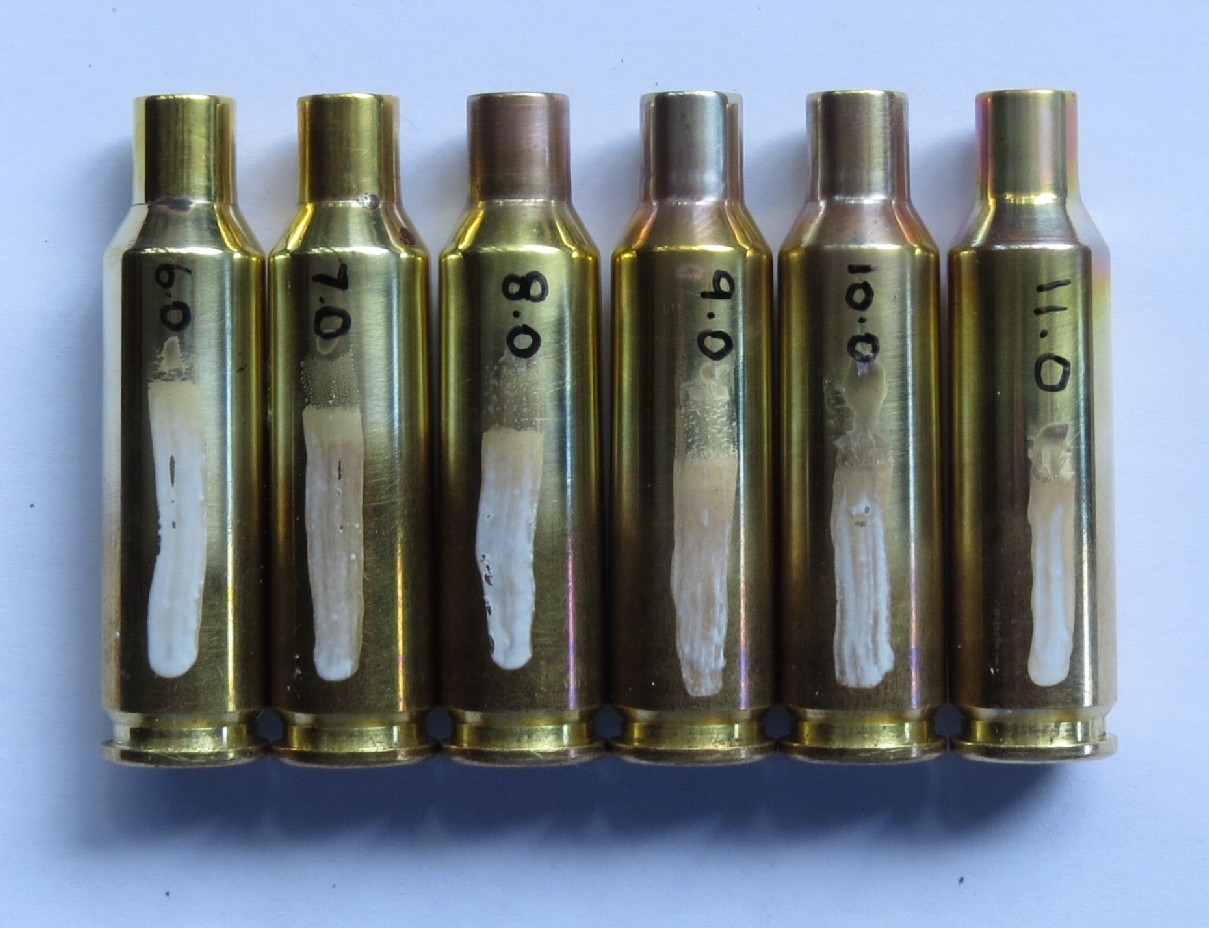
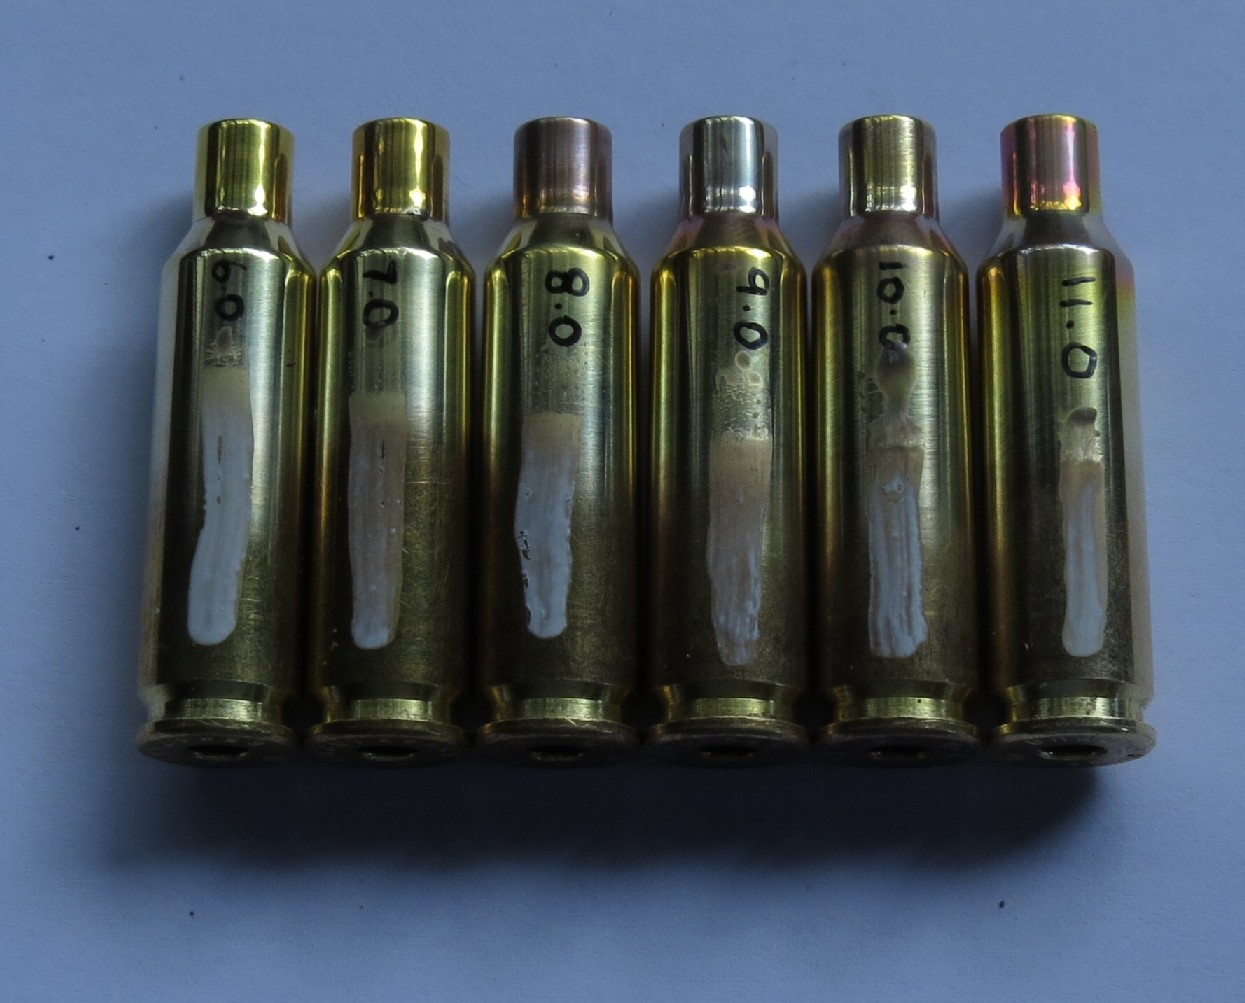
I then ran six cases through, annealing for between 6 seconds and 11 seconds at a set supply voltage, and checked the resulting colour of the brass, and where the induced heating had reached with 450F and 750F tempilaq. One advantage of the inductive method of heating is that tempilaq can be used on the outside of the cases without any risk of burning it off with elevated flame temperatures above that of the brass.
Below, blue 750F ( 400C ) tempilaq.
At 9 seconds the necks just starts to emit in the dark. At 11 seconds the glow is clearly visible in low light conditions.
Grey 450F ( 230C ) indicating the safety margin towards the case head.
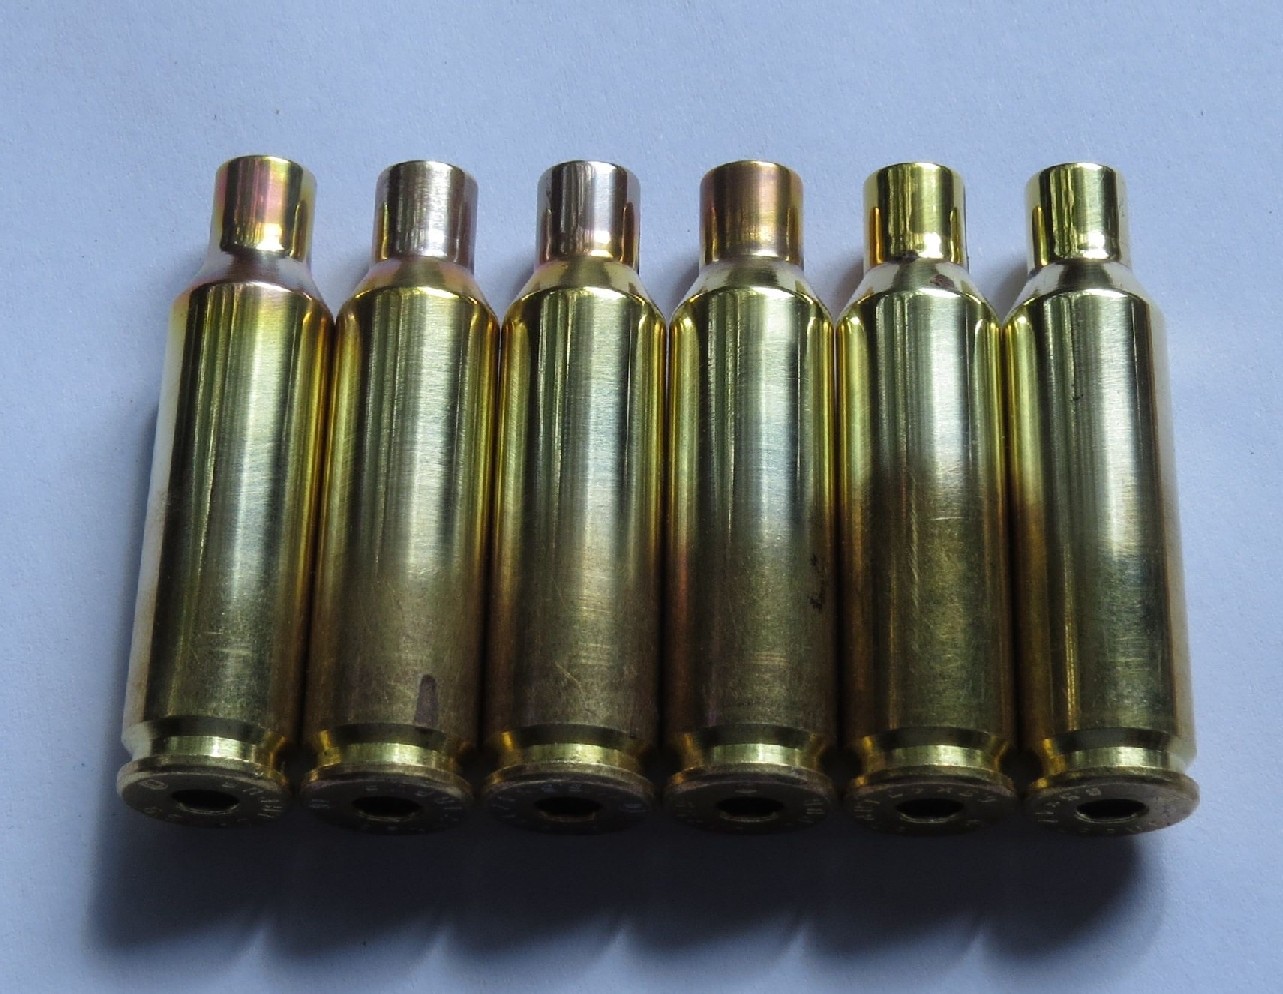
And three photos for reference showing the colour of the necks with different light angles. Sorry the order of the cases is swapped in a couple of these.
6 seconds: slightly darker gold than the original brass,
7 seconds: deep gold,
8 seconds: pink gold
9 seconds: stainless steel
10 seconds: straw
11 seconds: pink/purple, and colour extends around the shoulder onto the body
Again there is the benefit of knowing that these colours are not influenced by any flame effects.
Welcome guest, is this your first visit? Create Account now to join.
Welcome to the NZ Hunting and Shooting Forums.
Search Forums
User Tag List
+ Reply to Thread
Results 1 to 15 of 18
Thread: DIY Inductive Annealer
-
27-03-2017, 03:59 PM #1
DIY Inductive Annealer
Last edited by Puffin; 27-03-2017 at 04:08 PM.
-
-
27-03-2017, 04:07 PM #2Member

- Join Date
- Jun 2015
- Location
- christchurch
- Posts
- 18,533
great results on the cases, would love the cct diagram.
but to be honest you need more practice soldering, its ok but not great
-
27-03-2017, 04:49 PM #3
Simple DIY Induction Heater - RMCybernetics
Mine was a bit more agriculteral, and has not progressed further
 Trust the dog.........................................ALWAYS Trust the dog!!
-
27-03-2017, 05:04 PM #4
I'm currently building one of these: http://forum.accurateshooter.com/thr...redux.3908353/
Sent from my SM-T800 using Tapatalk
-
27-03-2017, 05:25 PM #5
Good work @Puffin

I'd be interested in building one too, if you'd like to share.
I'm pretty handy with a soldering iron and can easily follow drawings but really suck at designing circuits.
Cheers
PeteArguing with an Engineer is like Wrestling a Pig in Mud.
After awhile you realise the Pig loves it.
-
27-03-2017, 05:45 PM #6
Theres no need to design anything
You can buy a kit on the link I posted
Power supply for the Induction coil
Ultra Compact Induction Heater Circuit - Power Resonator - CRO-SM1
Coil
Induction Heater Coil
Coil is water cooled so you will need a small pump, raidator for cooling and 12V15A power supply as wellTrust the dog.........................................ALWAYS Trust the dog!!
-
27-03-2017, 06:00 PM #7
-
27-03-2017, 06:04 PM #8
-
27-03-2017, 07:15 PM #9
Awesome projects, it would be nice to get away without the water cooling.
-
27-03-2017, 07:24 PM #10Member

- Join Date
- May 2015
- Location
- Parahaki, Whangarei
- Posts
- 1,274
The soldering might be less than 'professional', but the cases look pretty neat.
Not ready for annealing any of my cases, but would be interested in the cct diagrams/componentry list.
Cheers
-
27-03-2017, 07:24 PM #11
A question then for the experienced annealers amongst us please: which of these cases looks to be the ideal for developing consistent neck tension?
-
27-03-2017, 07:55 PM #12
I have reservations about posting lots of electronics detail on the site.
PM me and I'll reply individually with a schematic and component details & availability.
-
27-03-2017, 08:00 PM #13
-
27-03-2017, 08:05 PM #14
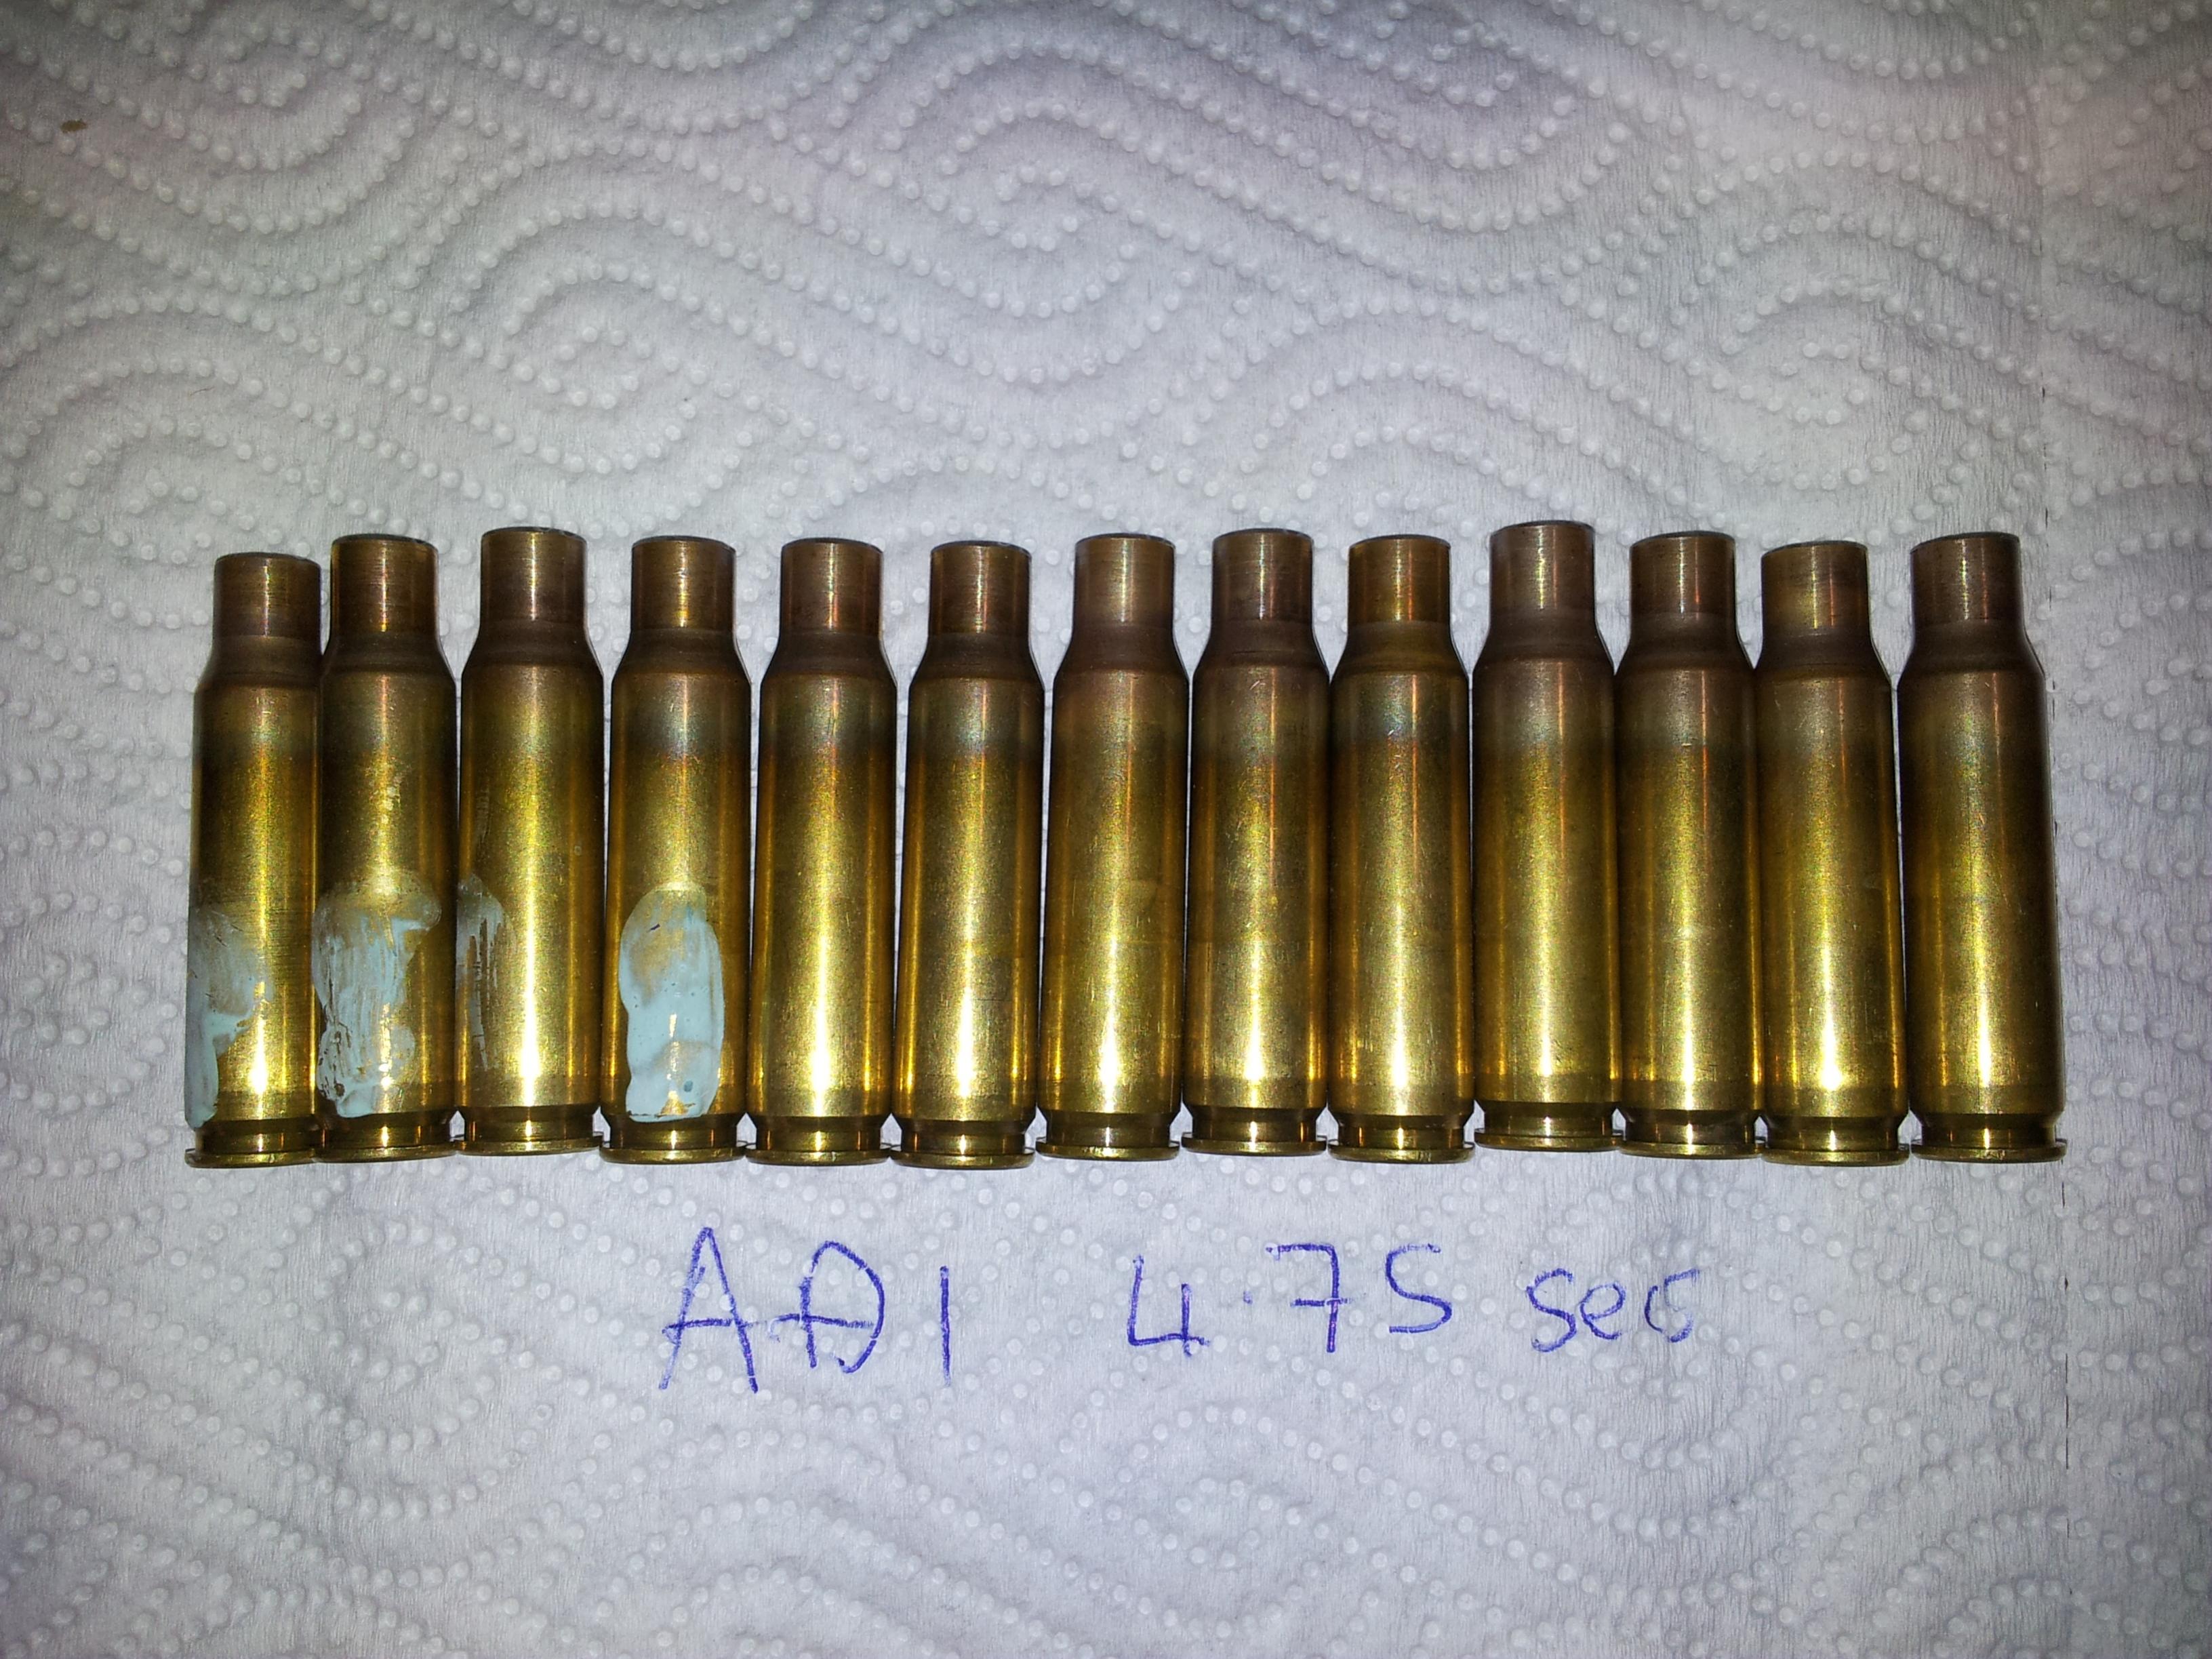
This is the residual pattern (a la Lapua) left on mine. 350 lacquer on the left hand cases. Done with gas though, not induction. Had some done a couple of years ago in an induction machine and they came out the same in appearance as my gas ones. Don't know if any lacquer was used to set up the induction machine though.
-
27-03-2017, 08:16 PM #15
And these are some that I took thru to ruination, just get a feel for the times involved. Again 350 lacquer, which of course is much more reactive than yours.
The glowing is a reference to what was happening when viewing inside the neck. Not sure you could do the same assessment with an induction machine.
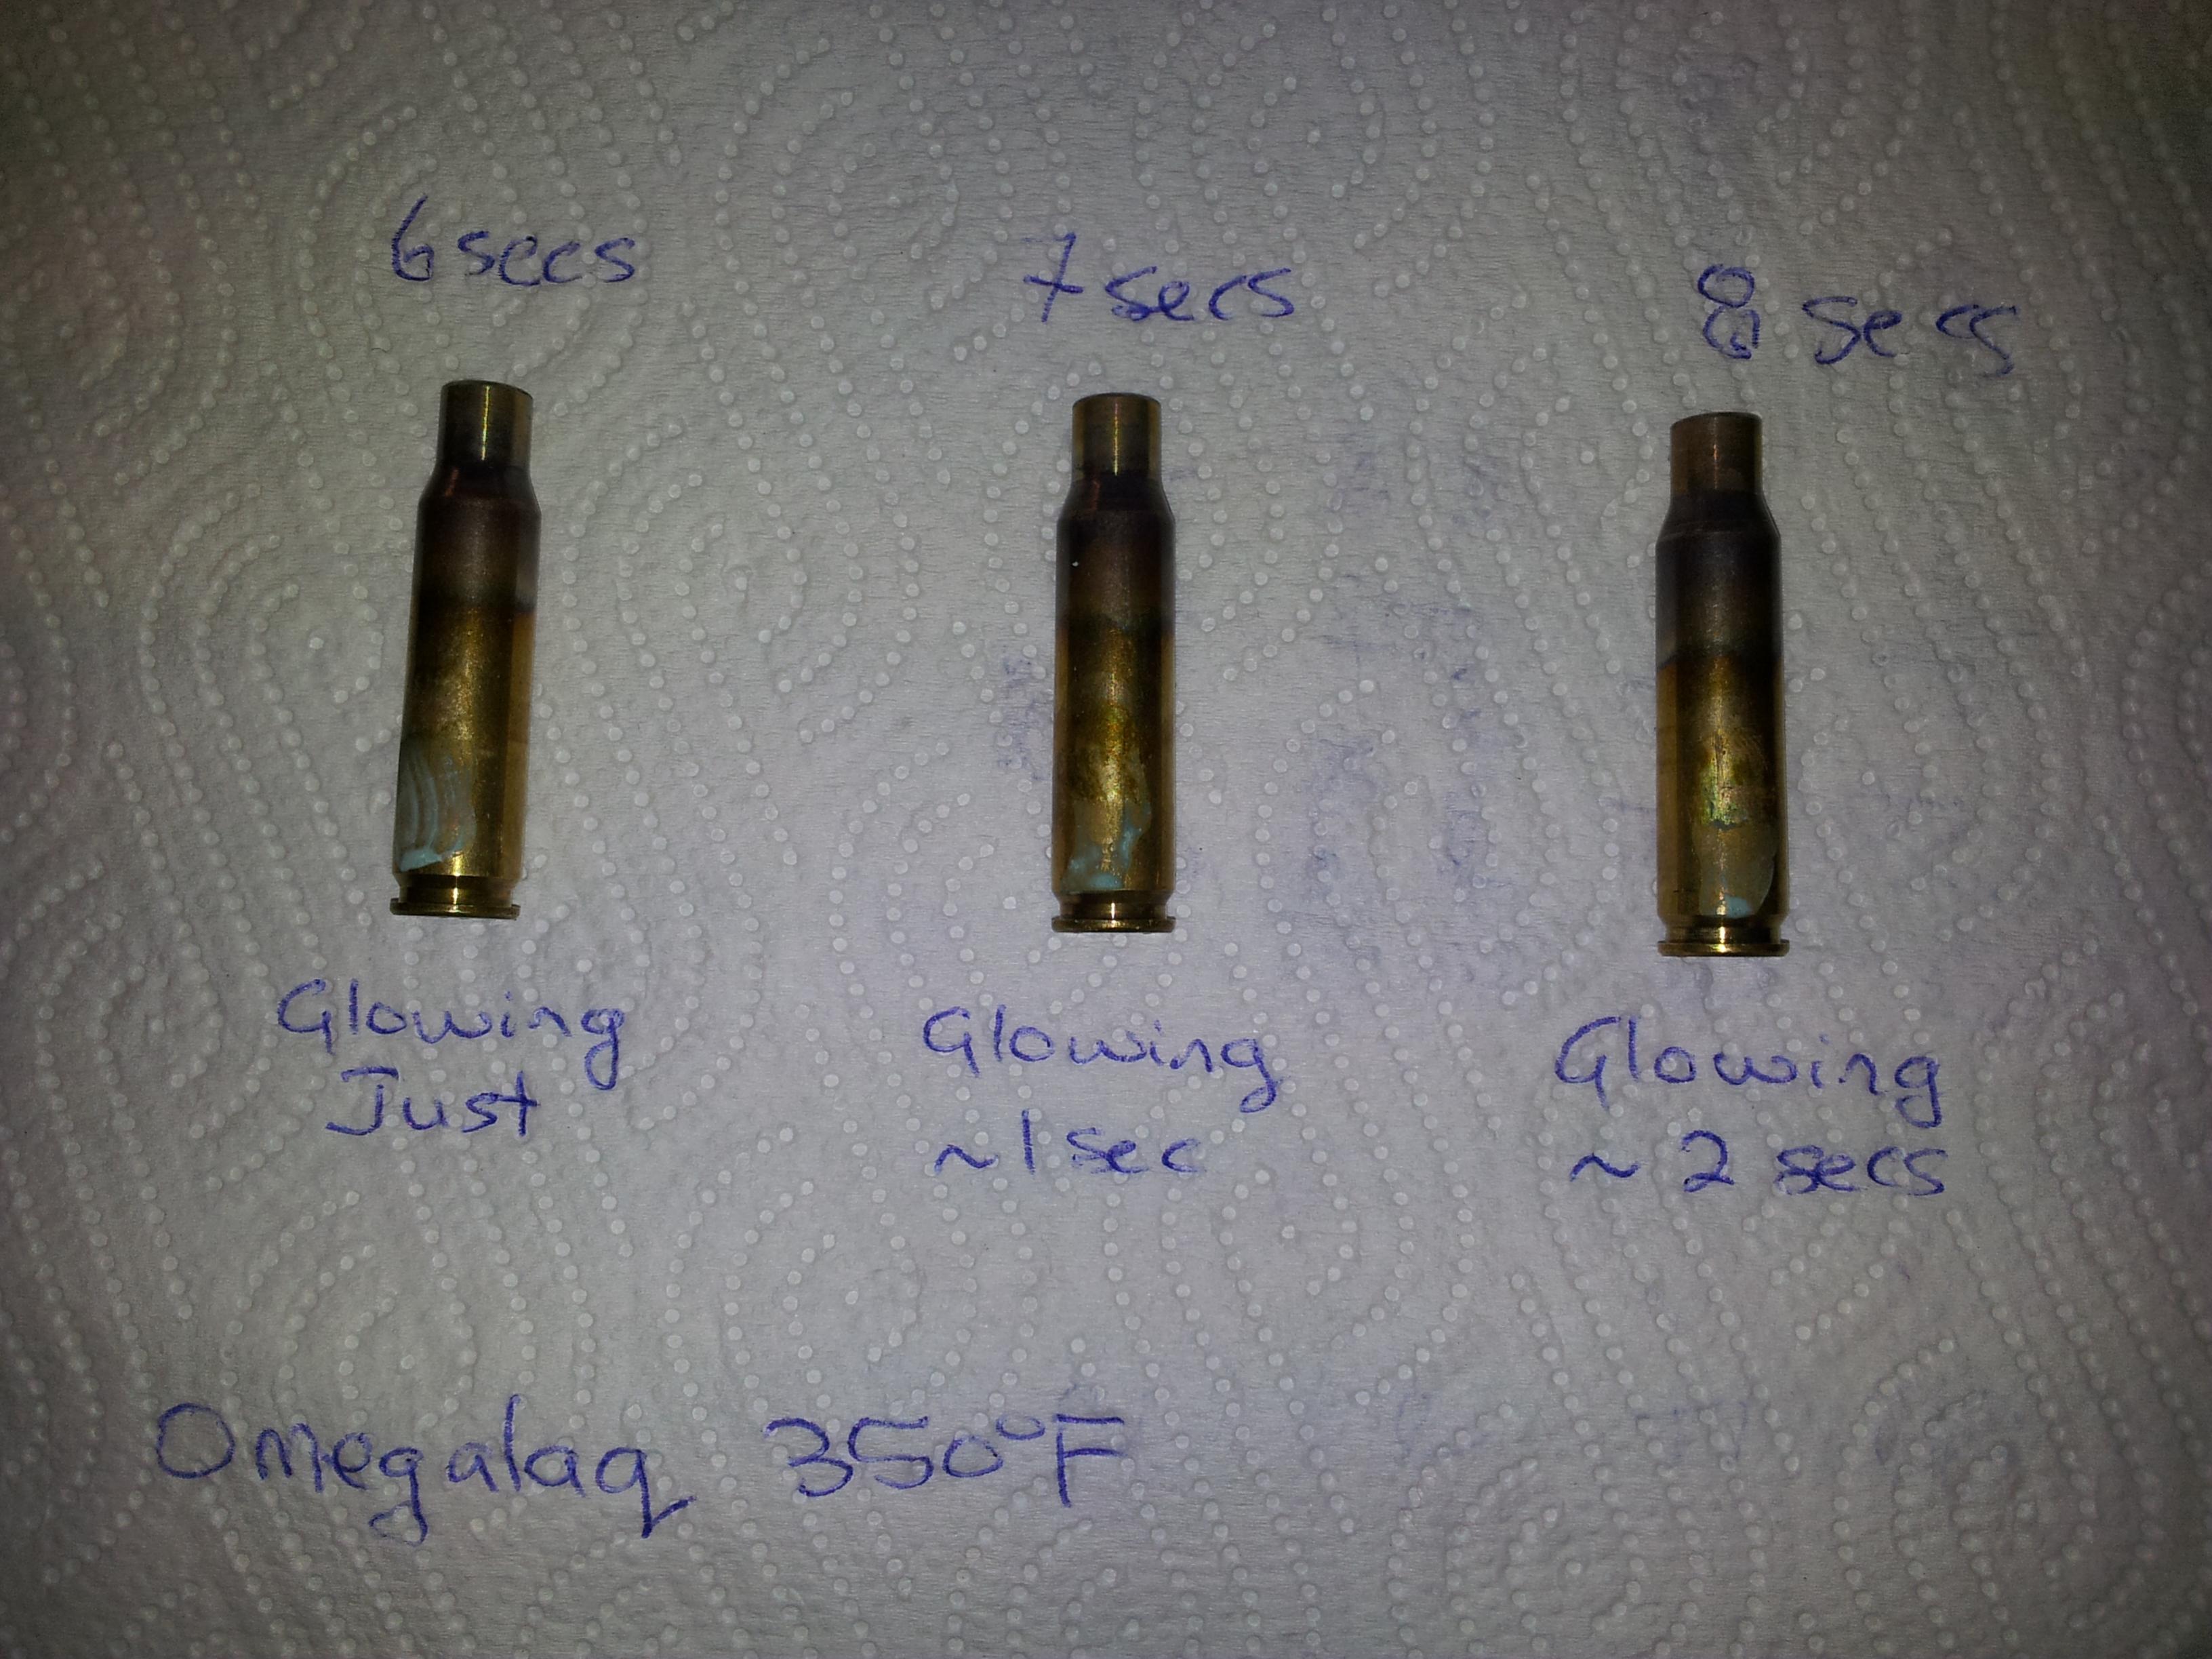
Low temp lacquer started off with a strip from base to just under the shoulder.High temp is out of sight on the opposite side but all glazed.
Similar Threads
-
Best Case Annealer
By 7mmsaum in forum Reloading and BallisticsReplies: 13Last Post: 07-09-2012, 05:09 PM
Tags for this Thread
Welcome to NZ Hunting and Shooting Forums! We see you're new here, or arn't logged in. Create an account, and Login for full access including our FREE BUY and SELL section Register NOW!!


 24Likes
 LinkBack URL
 About LinkBacks


 Reply With Quote


Bookmarks