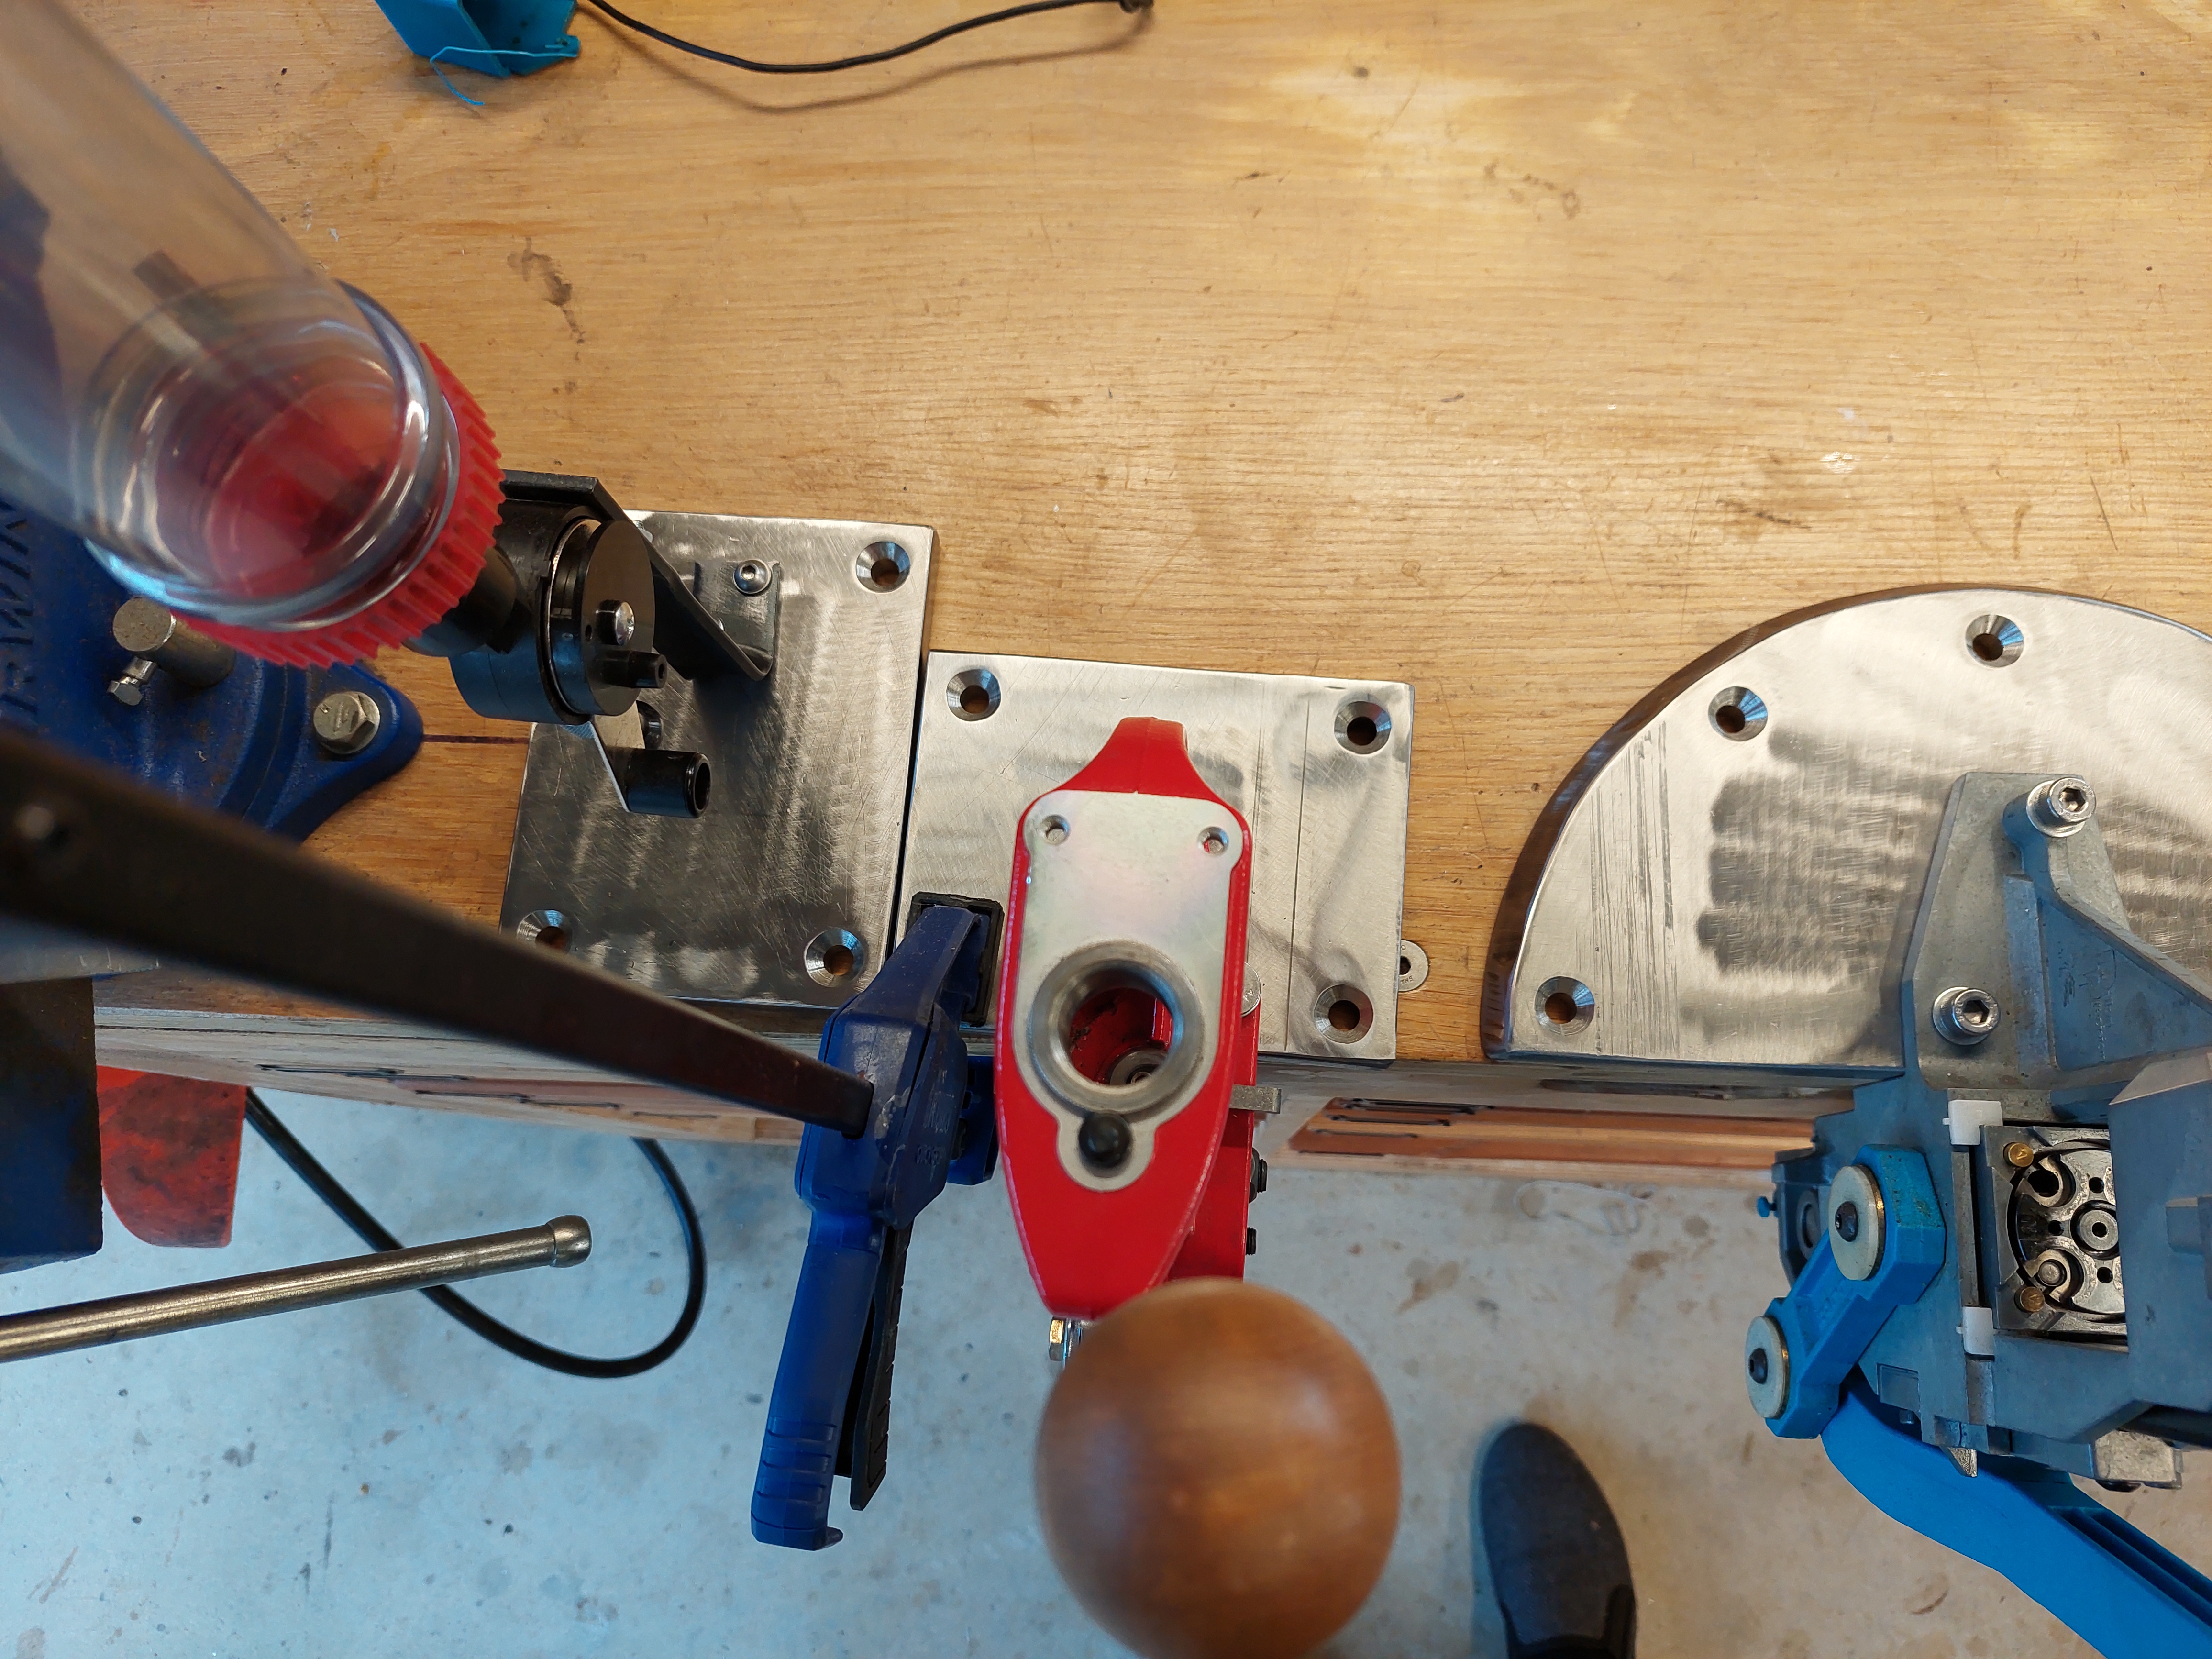
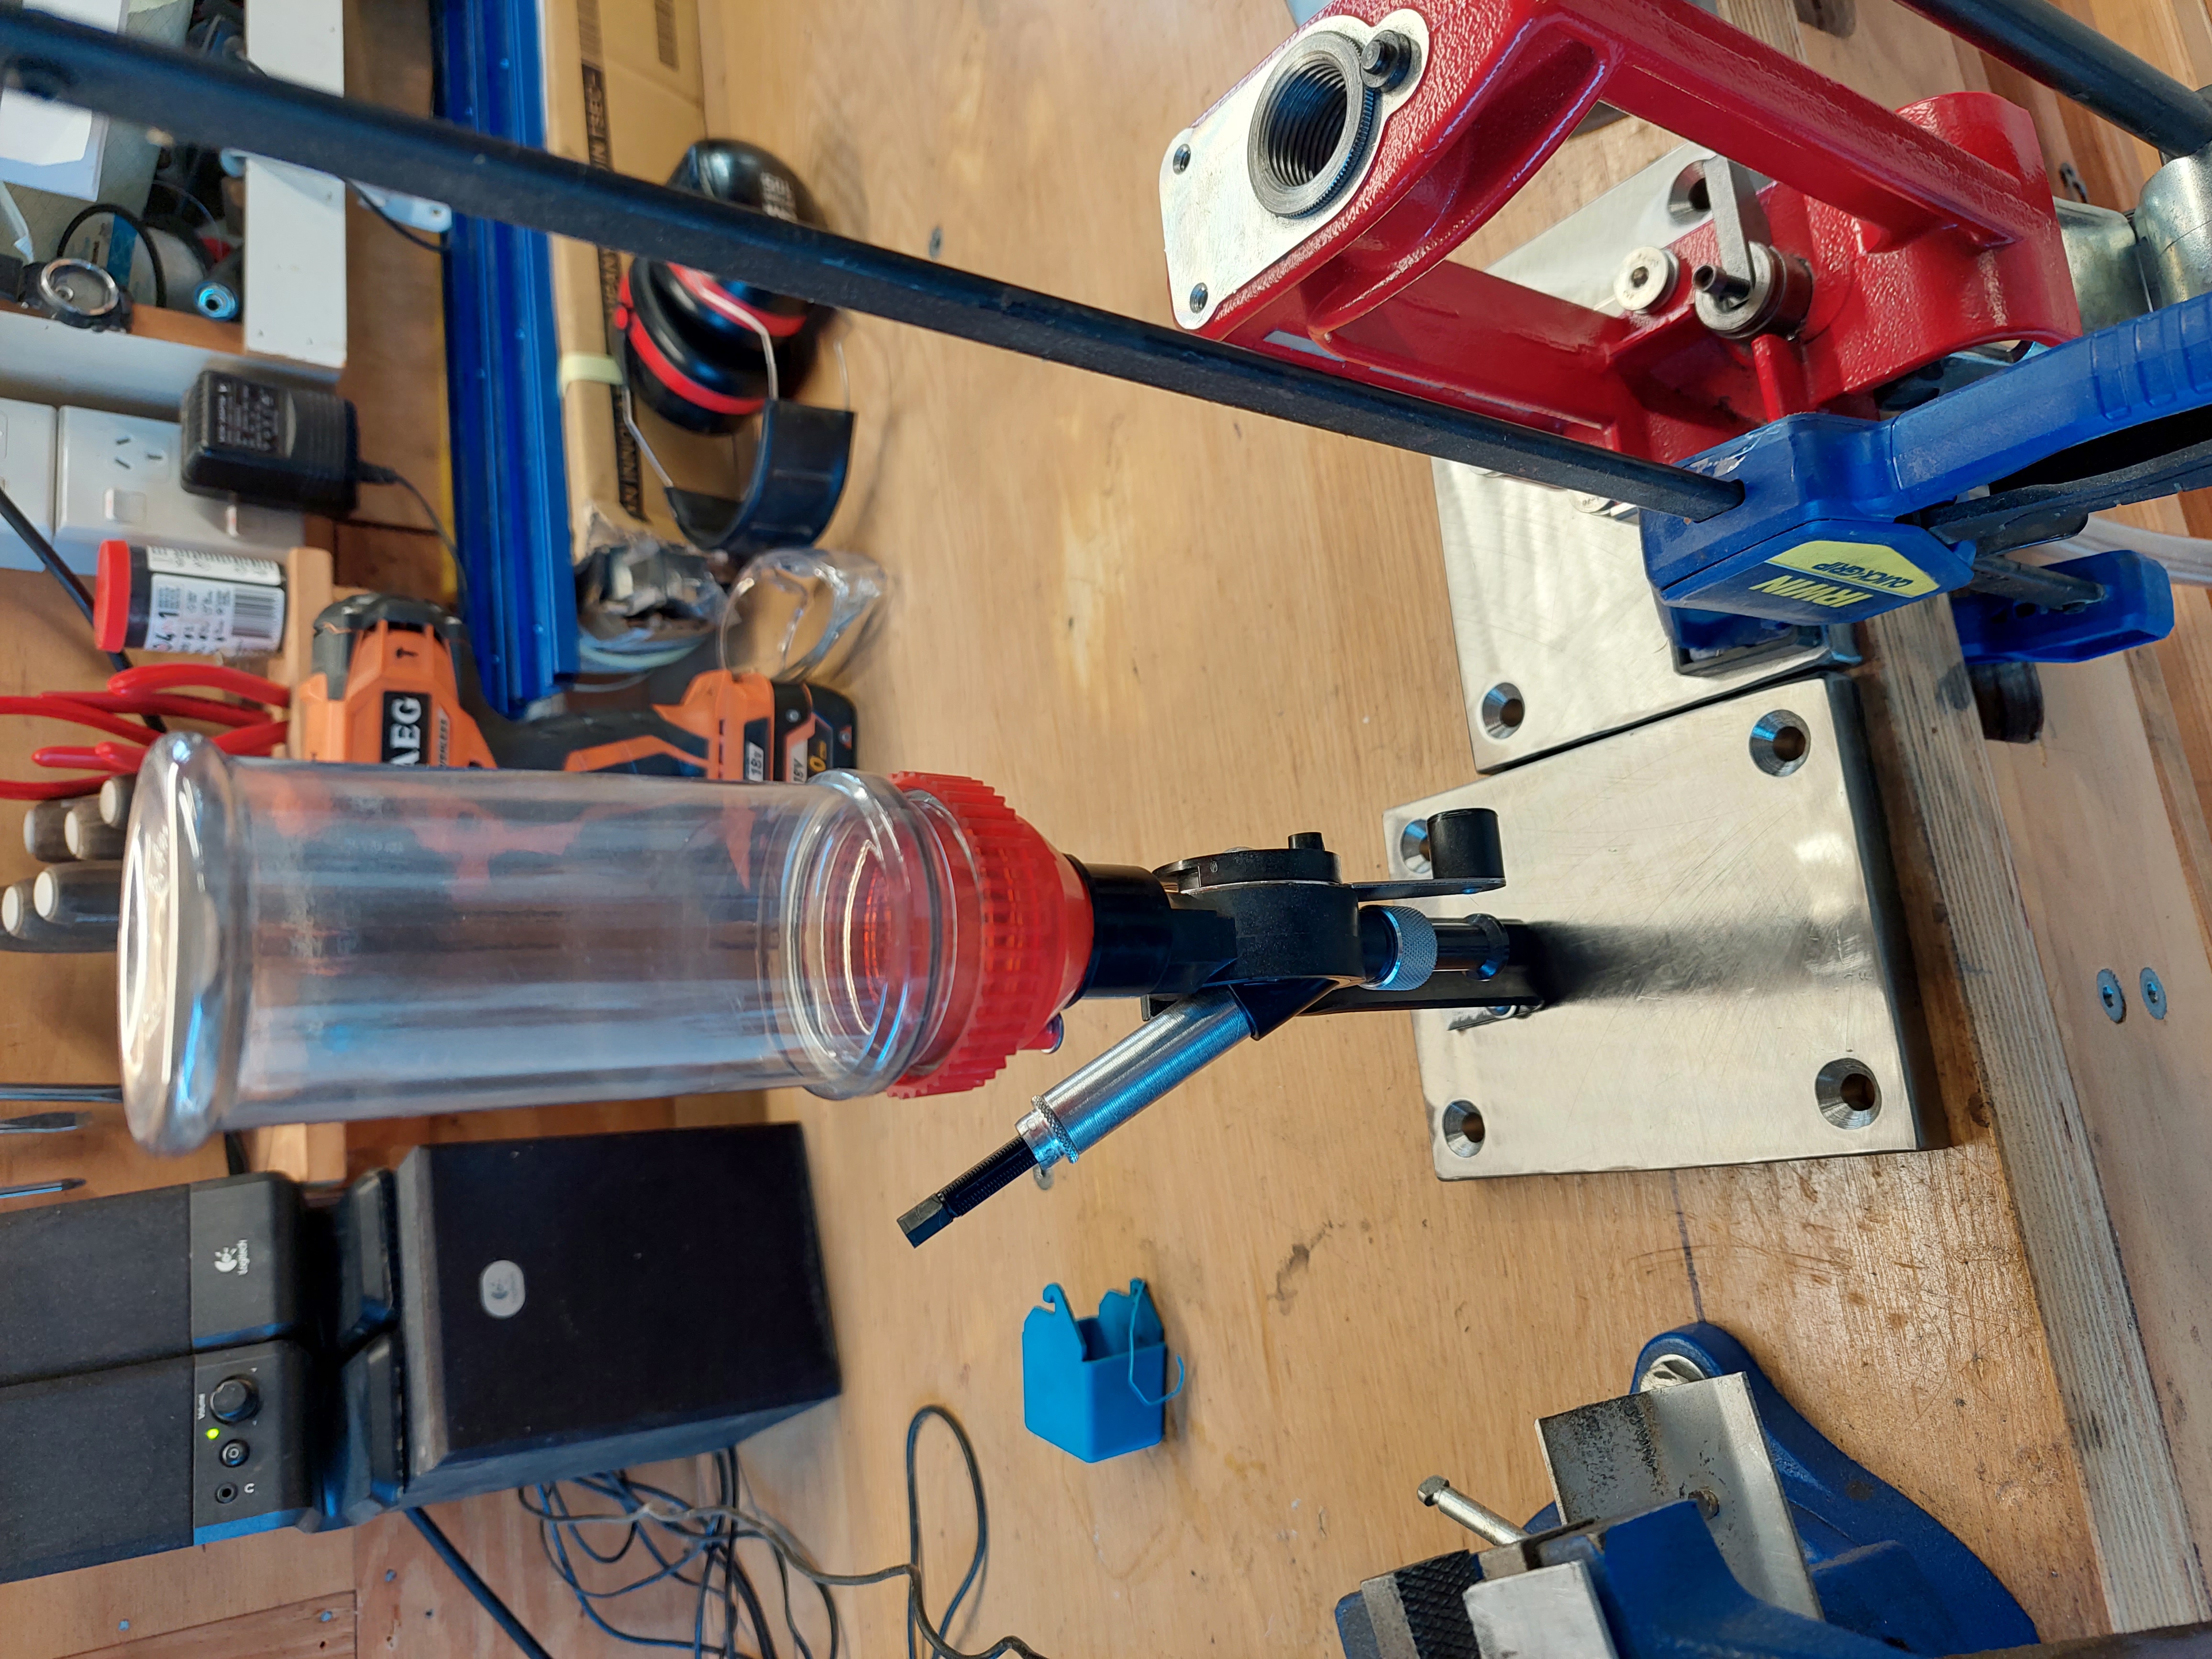
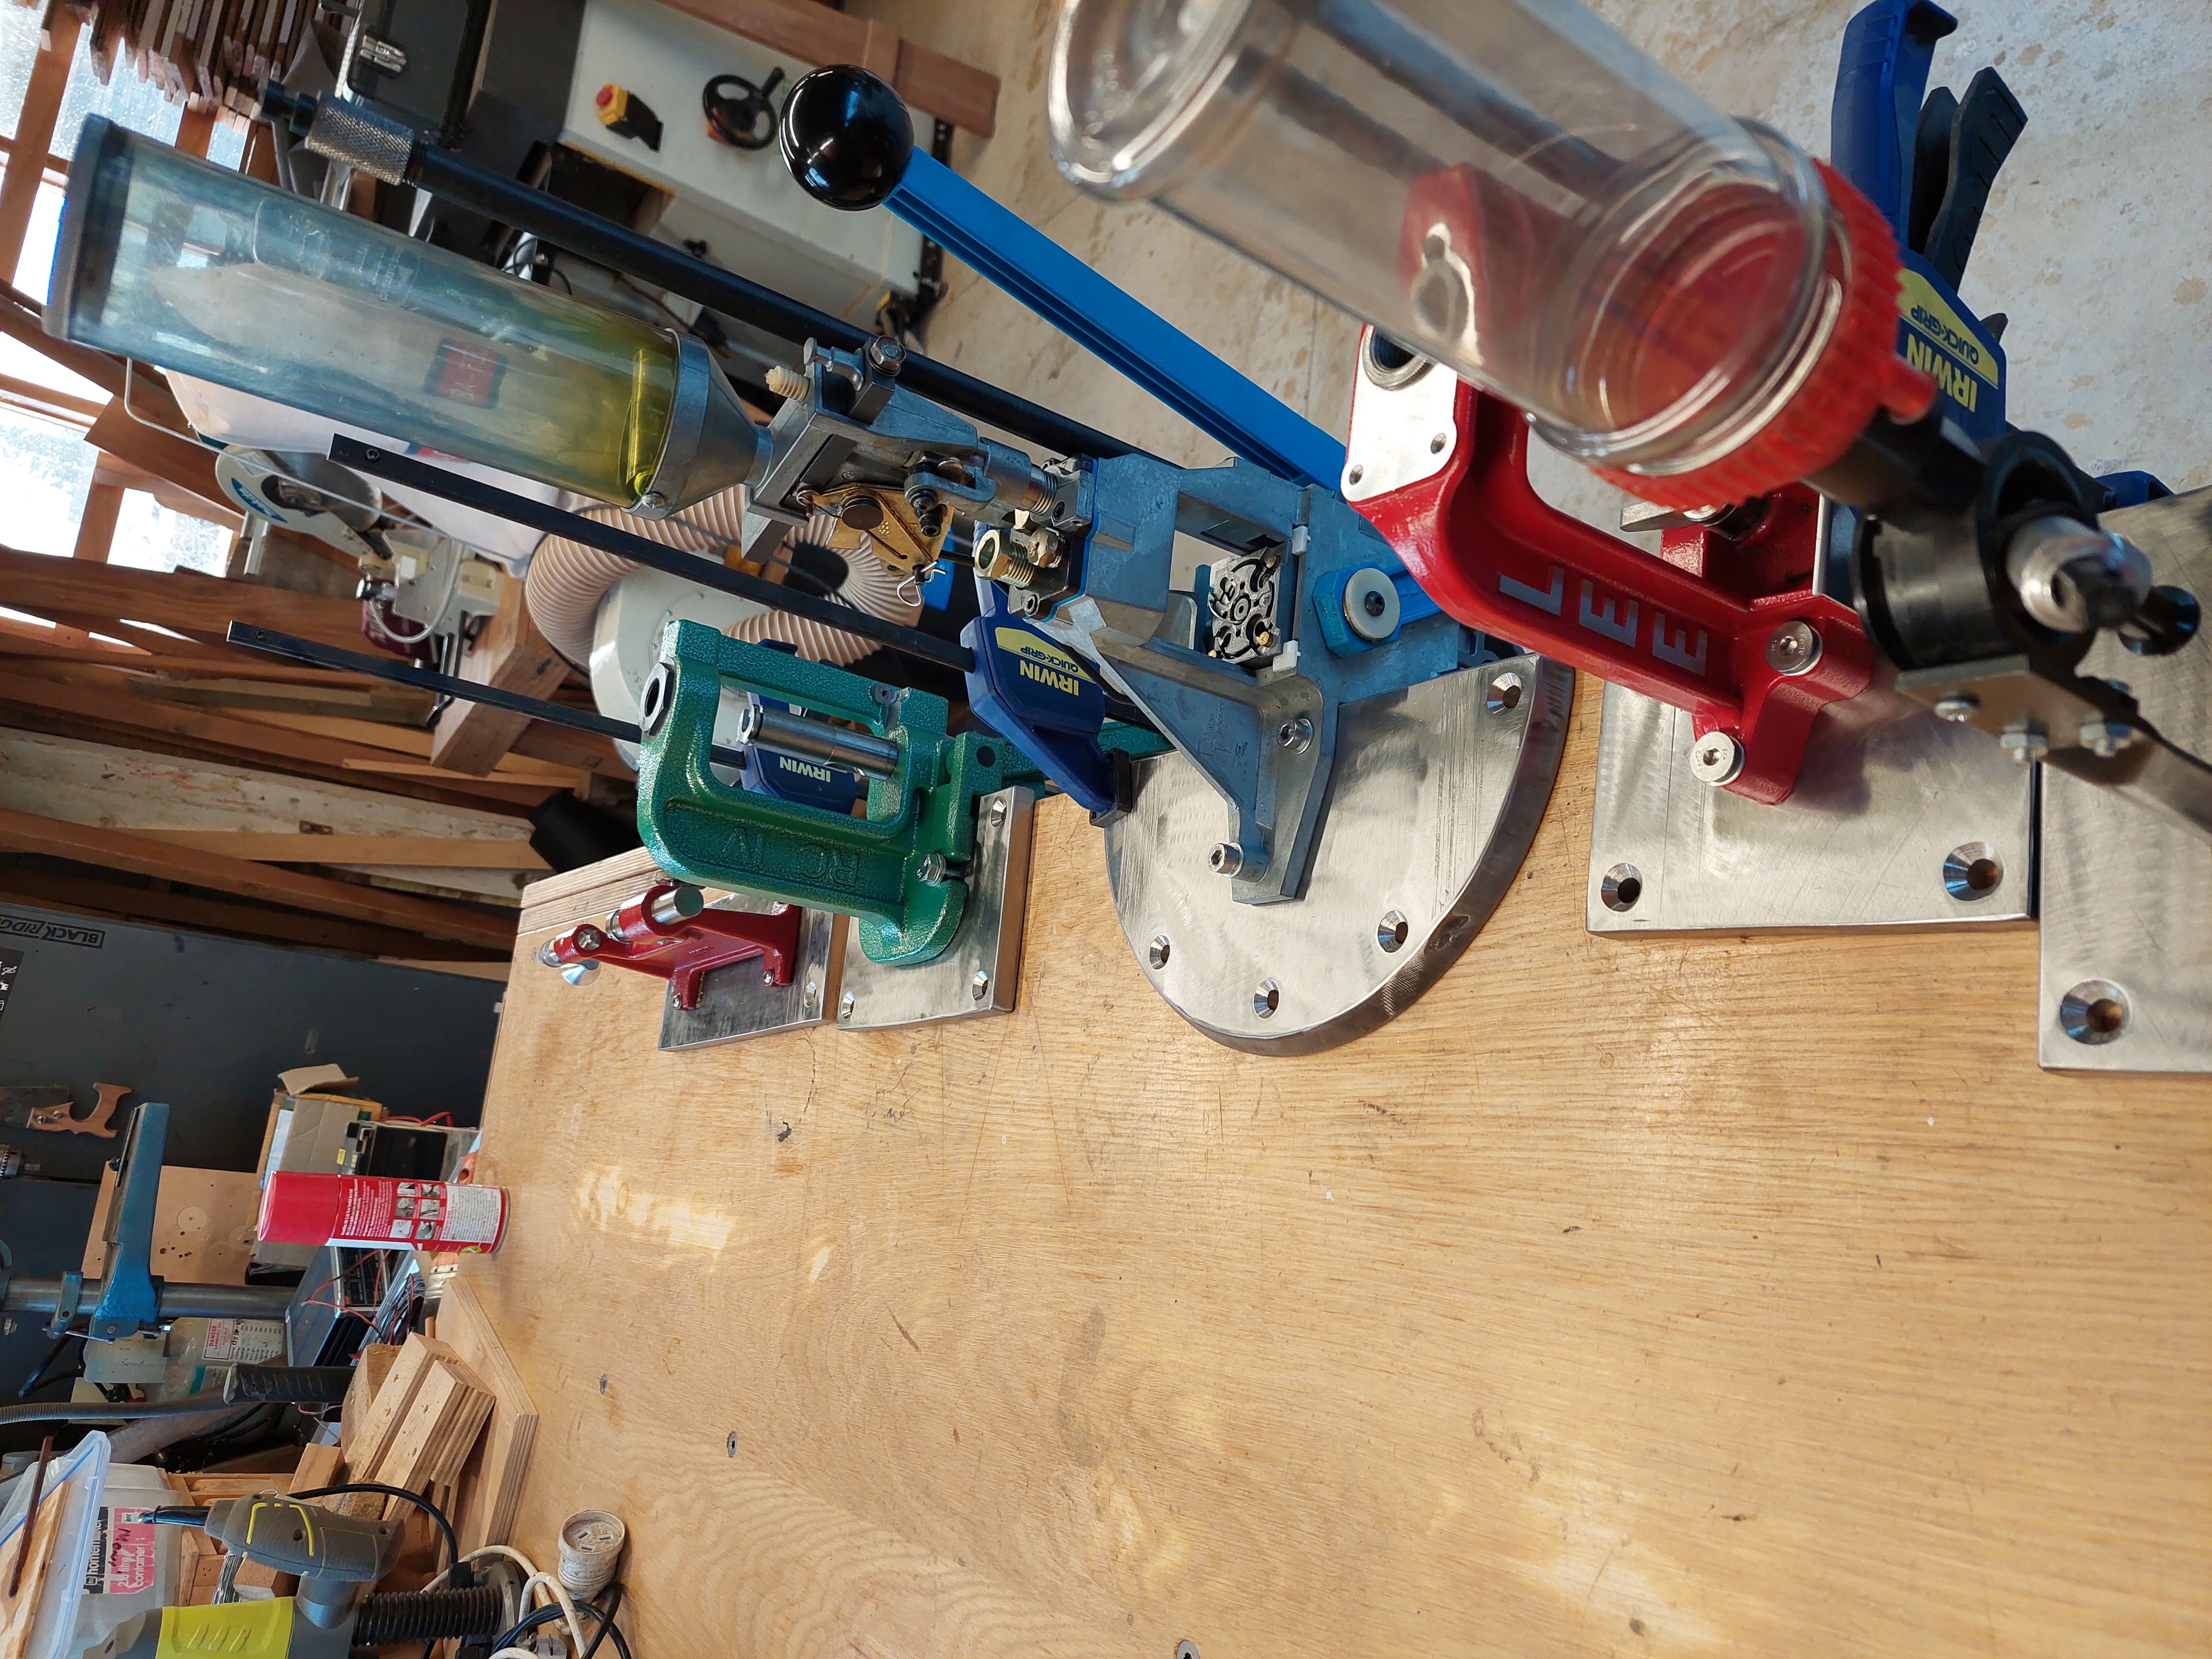
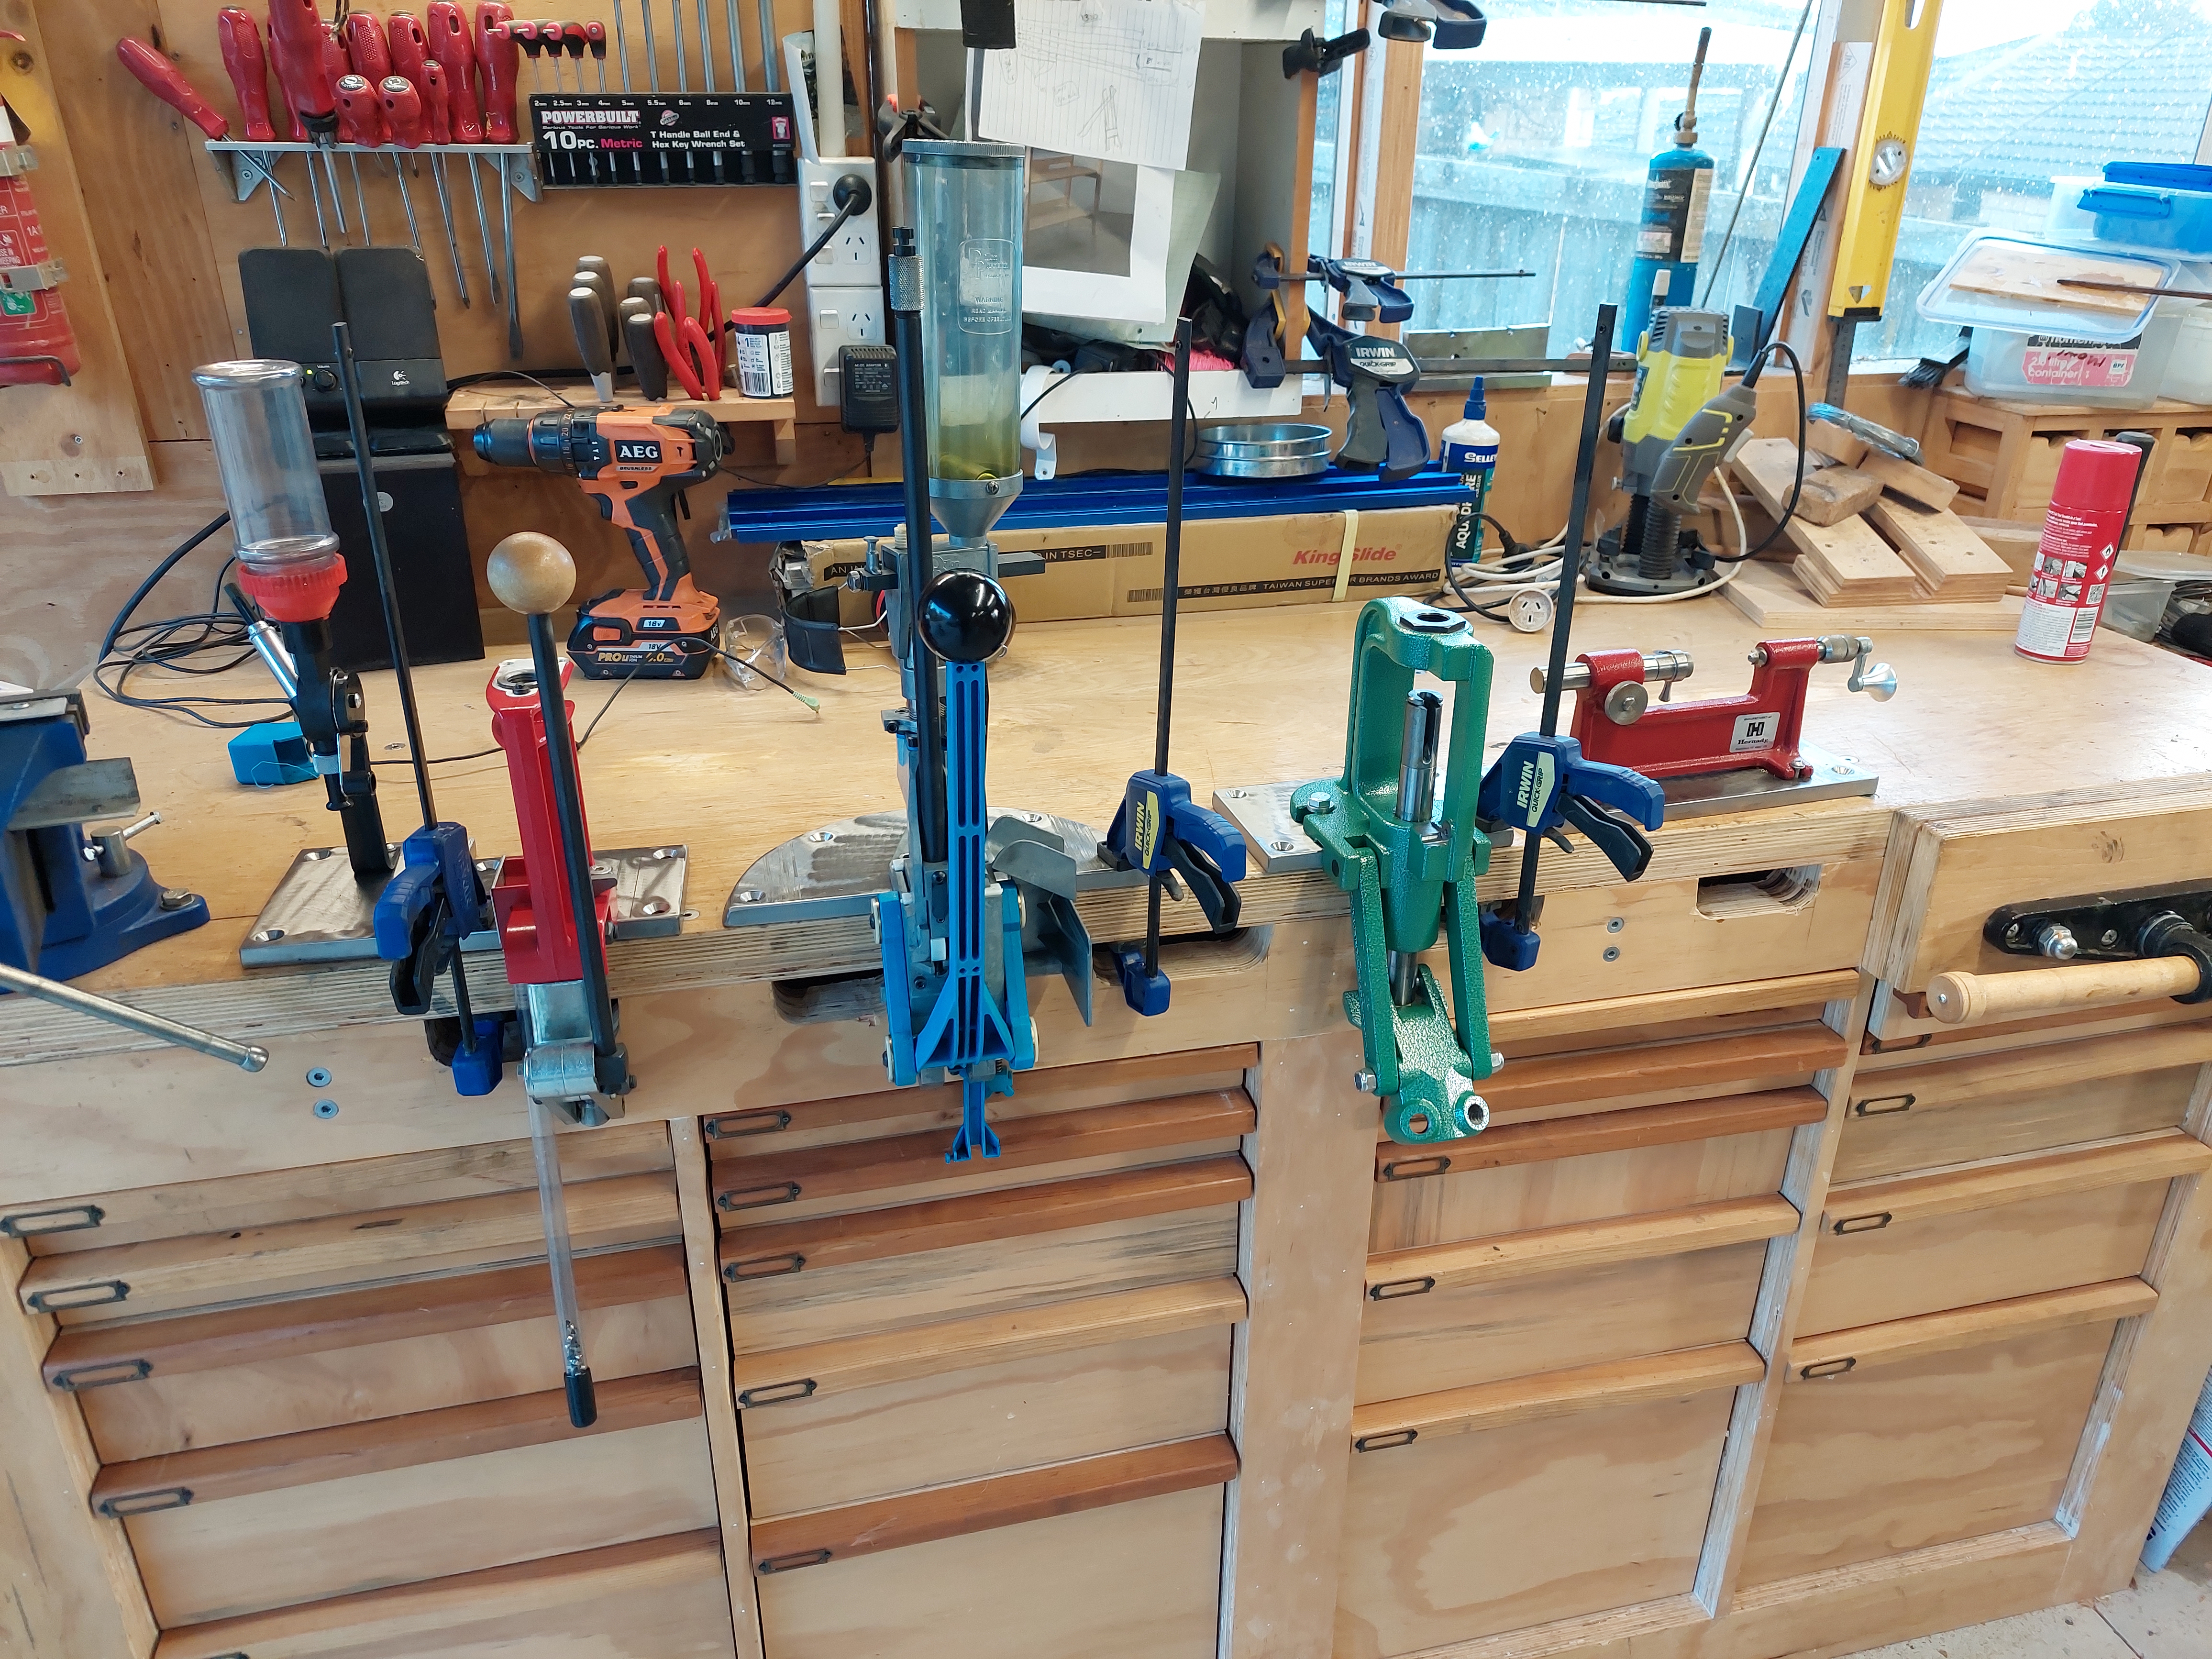
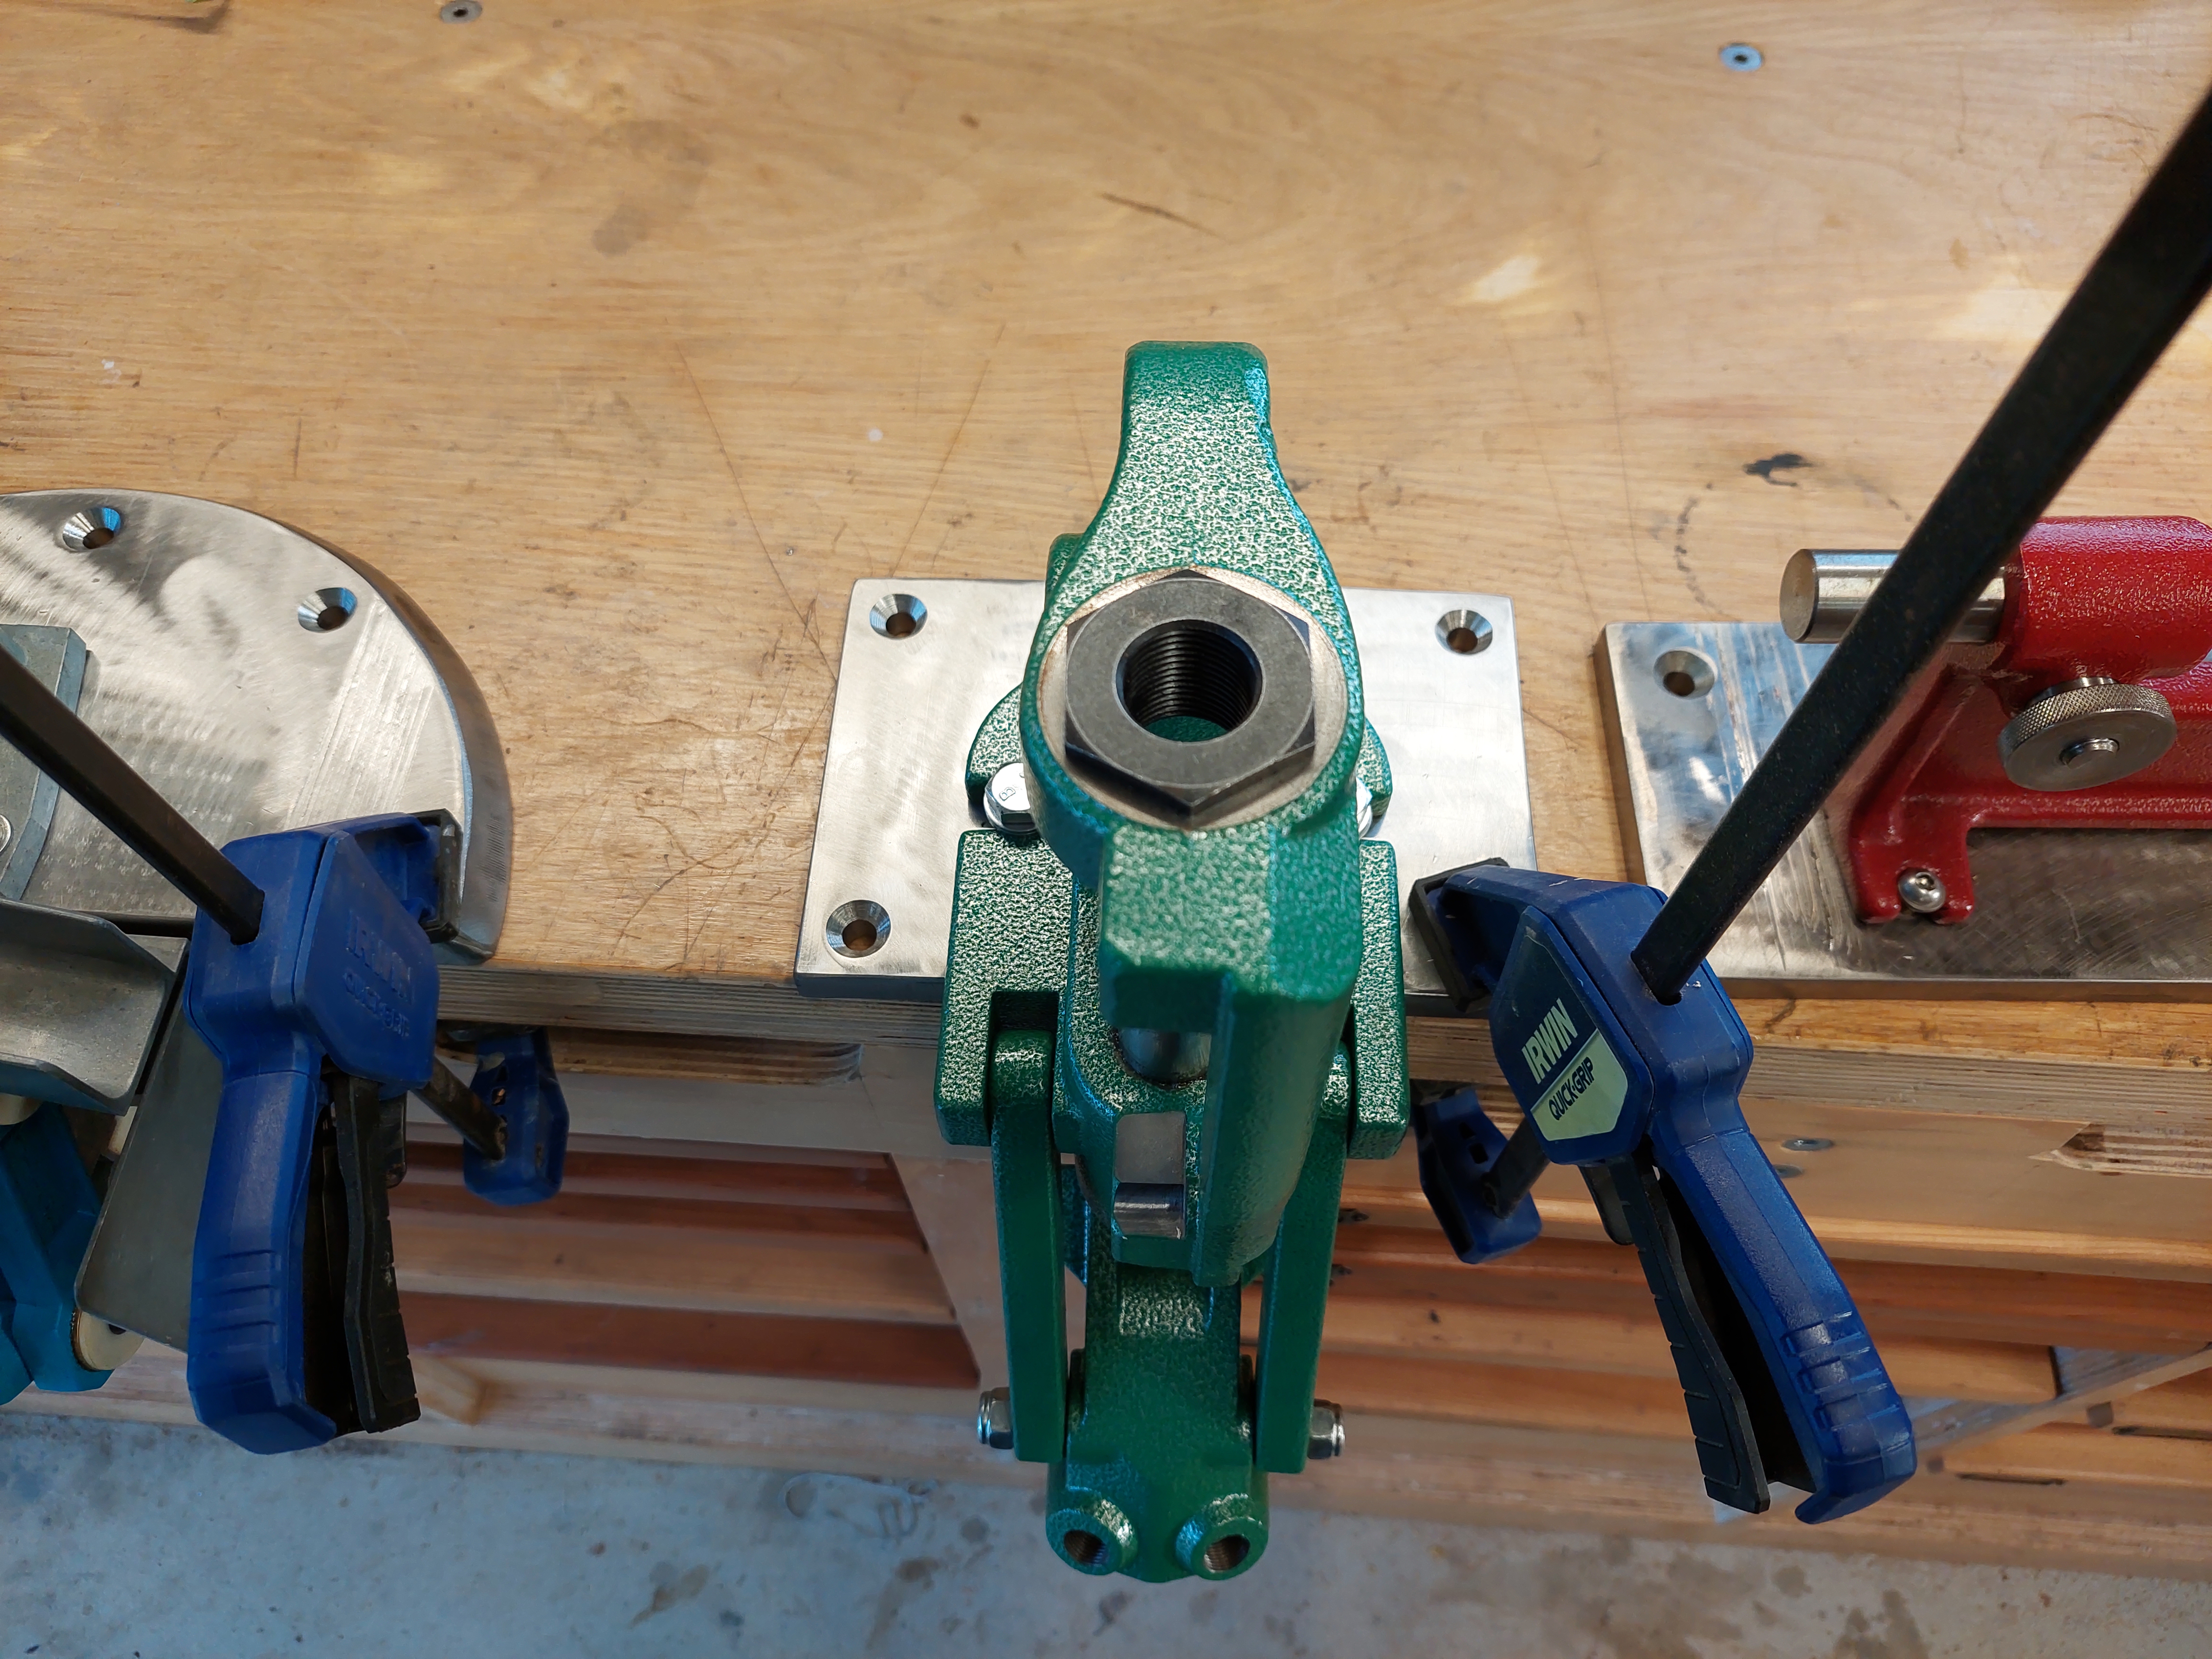
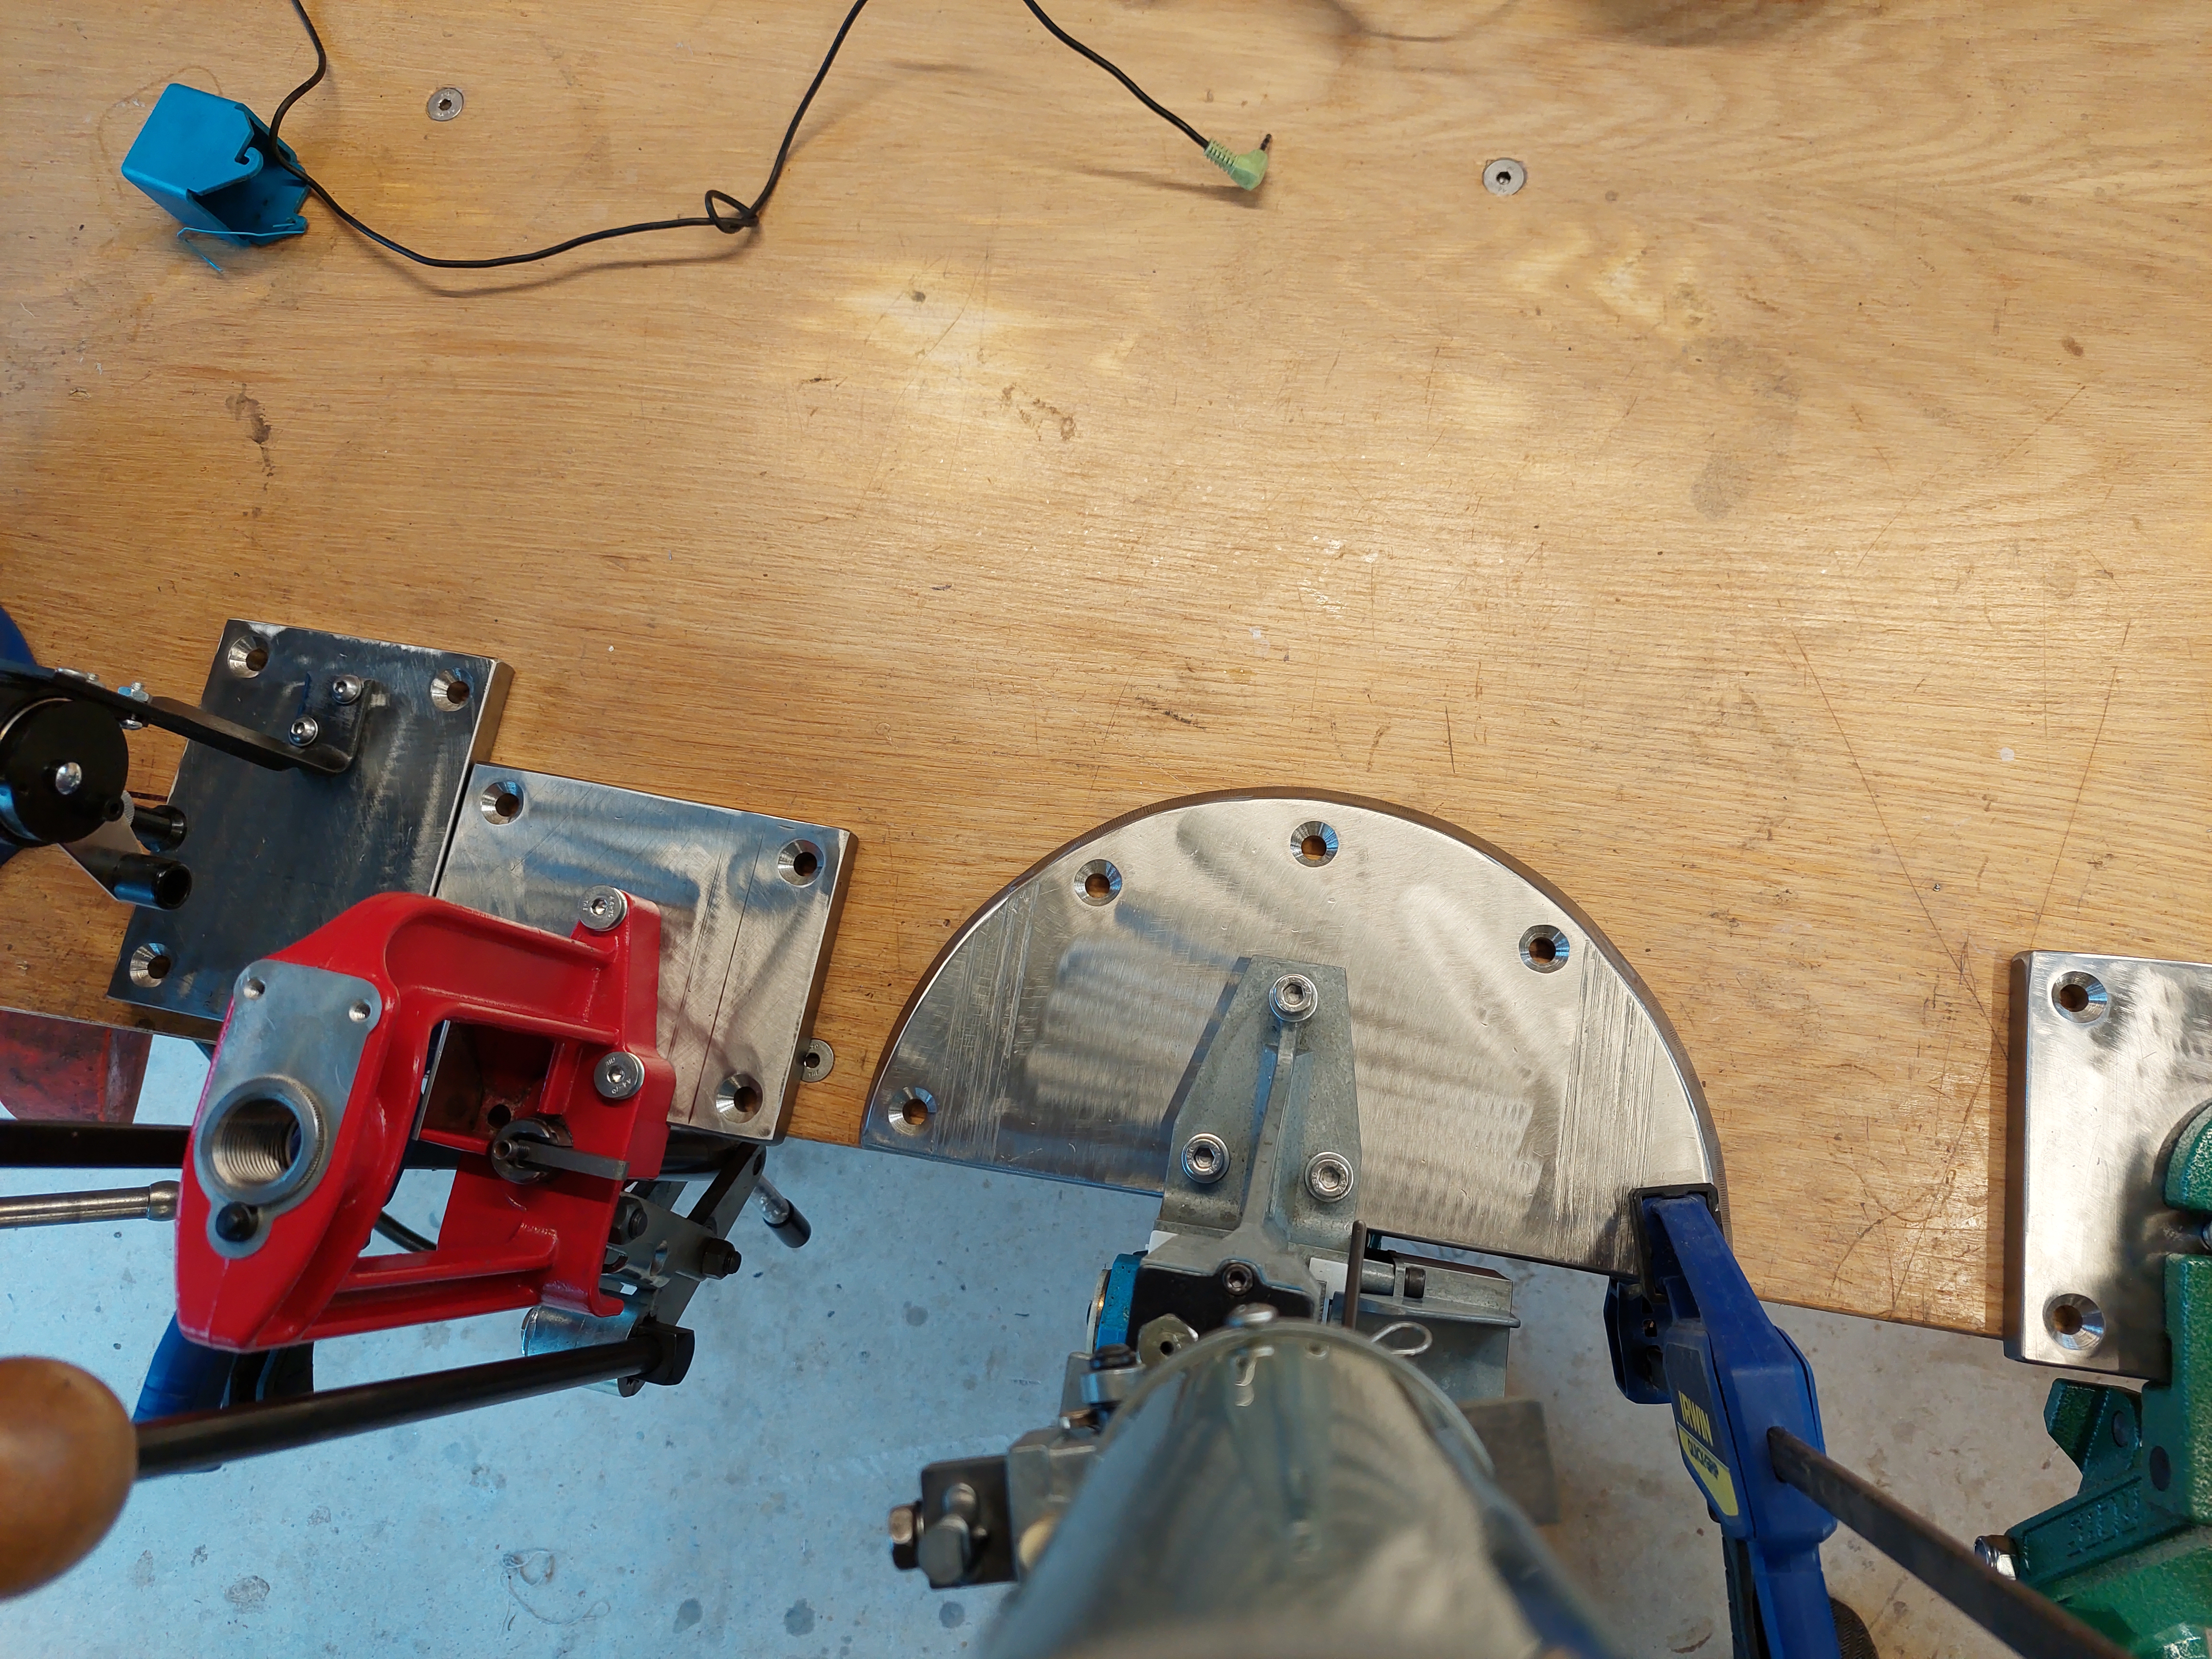
I'm beginning the process of setting up a reloading room and the first step, I decided, was to set up base plates for all the equipment to increase the foot print of the equipment and provide a rigid base for mounting.
I managed to source some scrap 304 stainless plate (about 15mm thick) from father in laws stash (with permission of course). A few niggles with the steel caused by work hardening in a few areas on the surface from galling and previous use (was a boiler valve plate). So burnt a couple drill bits hitting these spots, had to use a carbide burr to remove the surface work hardened areas in the hole locations.
Threaded holes to mount the plates to mount the plates and mounting holes with countersinks to provide for flush mounting later.
Should make for a solid foundation for the new bench and work stations once I've got that sorted.
Unfortunately they can't stay in the shed on my completely over built (but entirely rock solid) workbench as I do quite a bit of woodworking and metal working and the dust is terrible on everything.
I'll keep a bit of a progress report going as this (probably quite long-term) project progresses.
Welcome guest, is this your first visit? Create Account now to join.
Welcome to the NZ Hunting and Shooting Forums.
Search Forums
User Tag List
+ Reply to Thread
Results 1 to 15 of 33
-
09-07-2022, 05:56 PM #1Member

- Join Date
- Dec 2011
- Location
- Te Awamutu
- Posts
- 1,054
Reloading room and equipment upgrade - first step
Last edited by Makros; 09-07-2022 at 06:01 PM.
-
-
09-07-2022, 05:58 PM #2Member

- Join Date
- May 2016
- Location
- Blenheim
- Posts
- 1,202
Damn, that’s great. Beats my ply reinforced base on an old school desk.
-
09-07-2022, 06:26 PM #3
-
09-07-2022, 06:33 PM #4Member

- Join Date
- Dec 2019
- Location
- Okawa Hawkes Bay
- Posts
- 3,177
-
09-07-2022, 06:42 PM #5
Hell that's flash! Leave it there and put a dust cover over it unless you need the bench space
-
09-07-2022, 06:50 PM #6
-
09-07-2022, 06:57 PM #7Member

- Join Date
- Dec 2021
- Location
- Tauranga
- Posts
- 5,928
The old-skool guys using old-school, school desks...
That's certainly overkill on the bases though. 304SS is a prick for work hardening, it's not a metal to play nice with when drilling. Nice sharp drill, centre punched with a three-corner ground centre punch (not the usual coned center punch, the type with a triangular tip as it has less risk of work hardening the surface), slow RPM but heaps of downfeed or push to cut nice deep chips and get under the work hardening on each turn... Lots of lube too.
-
09-07-2022, 06:58 PM #8Member

- Join Date
- Dec 2011
- Location
- Te Awamutu
- Posts
- 1,054
-
09-07-2022, 07:04 PM #9Member

- Join Date
- Dec 2011
- Location
- Te Awamutu
- Posts
- 1,054
Not sure I believe in the concept of overkill...
Yup didn't find the normal centre punch caused any issues but slow speeds and lots of tool pressure and lube helped the process. I was impressed my countersink bit made it through relatively unharmed - a bit of chatter but not that bad. Made an absolute mess with the oil everywhere!
-
09-07-2022, 07:09 PM #10Member

- Join Date
- Jul 2012
- Location
- Tauranga
- Posts
- 2,633
Nice work
-
09-07-2022, 07:11 PM #11Member

- Join Date
- Feb 2014
- Location
- Cambridge
- Posts
- 686
Workbench wise, I ended up buying Rack it benches from bunnings.
The biggest advantage for me was I could assemble the bench in the room. I could not move a assembled bench into the room as access was too tight.
I built it the size I wanted, I brought a couple of standard 18mm sheets of particle board for the top and glued them together.
Sent from my iPhone using Tapatalk
-
09-07-2022, 07:12 PM #12Member

- Join Date
- Dec 2011
- Location
- Te Awamutu
- Posts
- 1,054
-
09-07-2022, 09:32 PM #13Member

- Join Date
- Jul 2012
- Location
- Hamilton
- Posts
- 755
Very cool!
Your workbench is epic also, did you build it?
-
09-07-2022, 10:26 PM #14Member

- Join Date
- Dec 2011
- Location
- Te Awamutu
- Posts
- 1,054
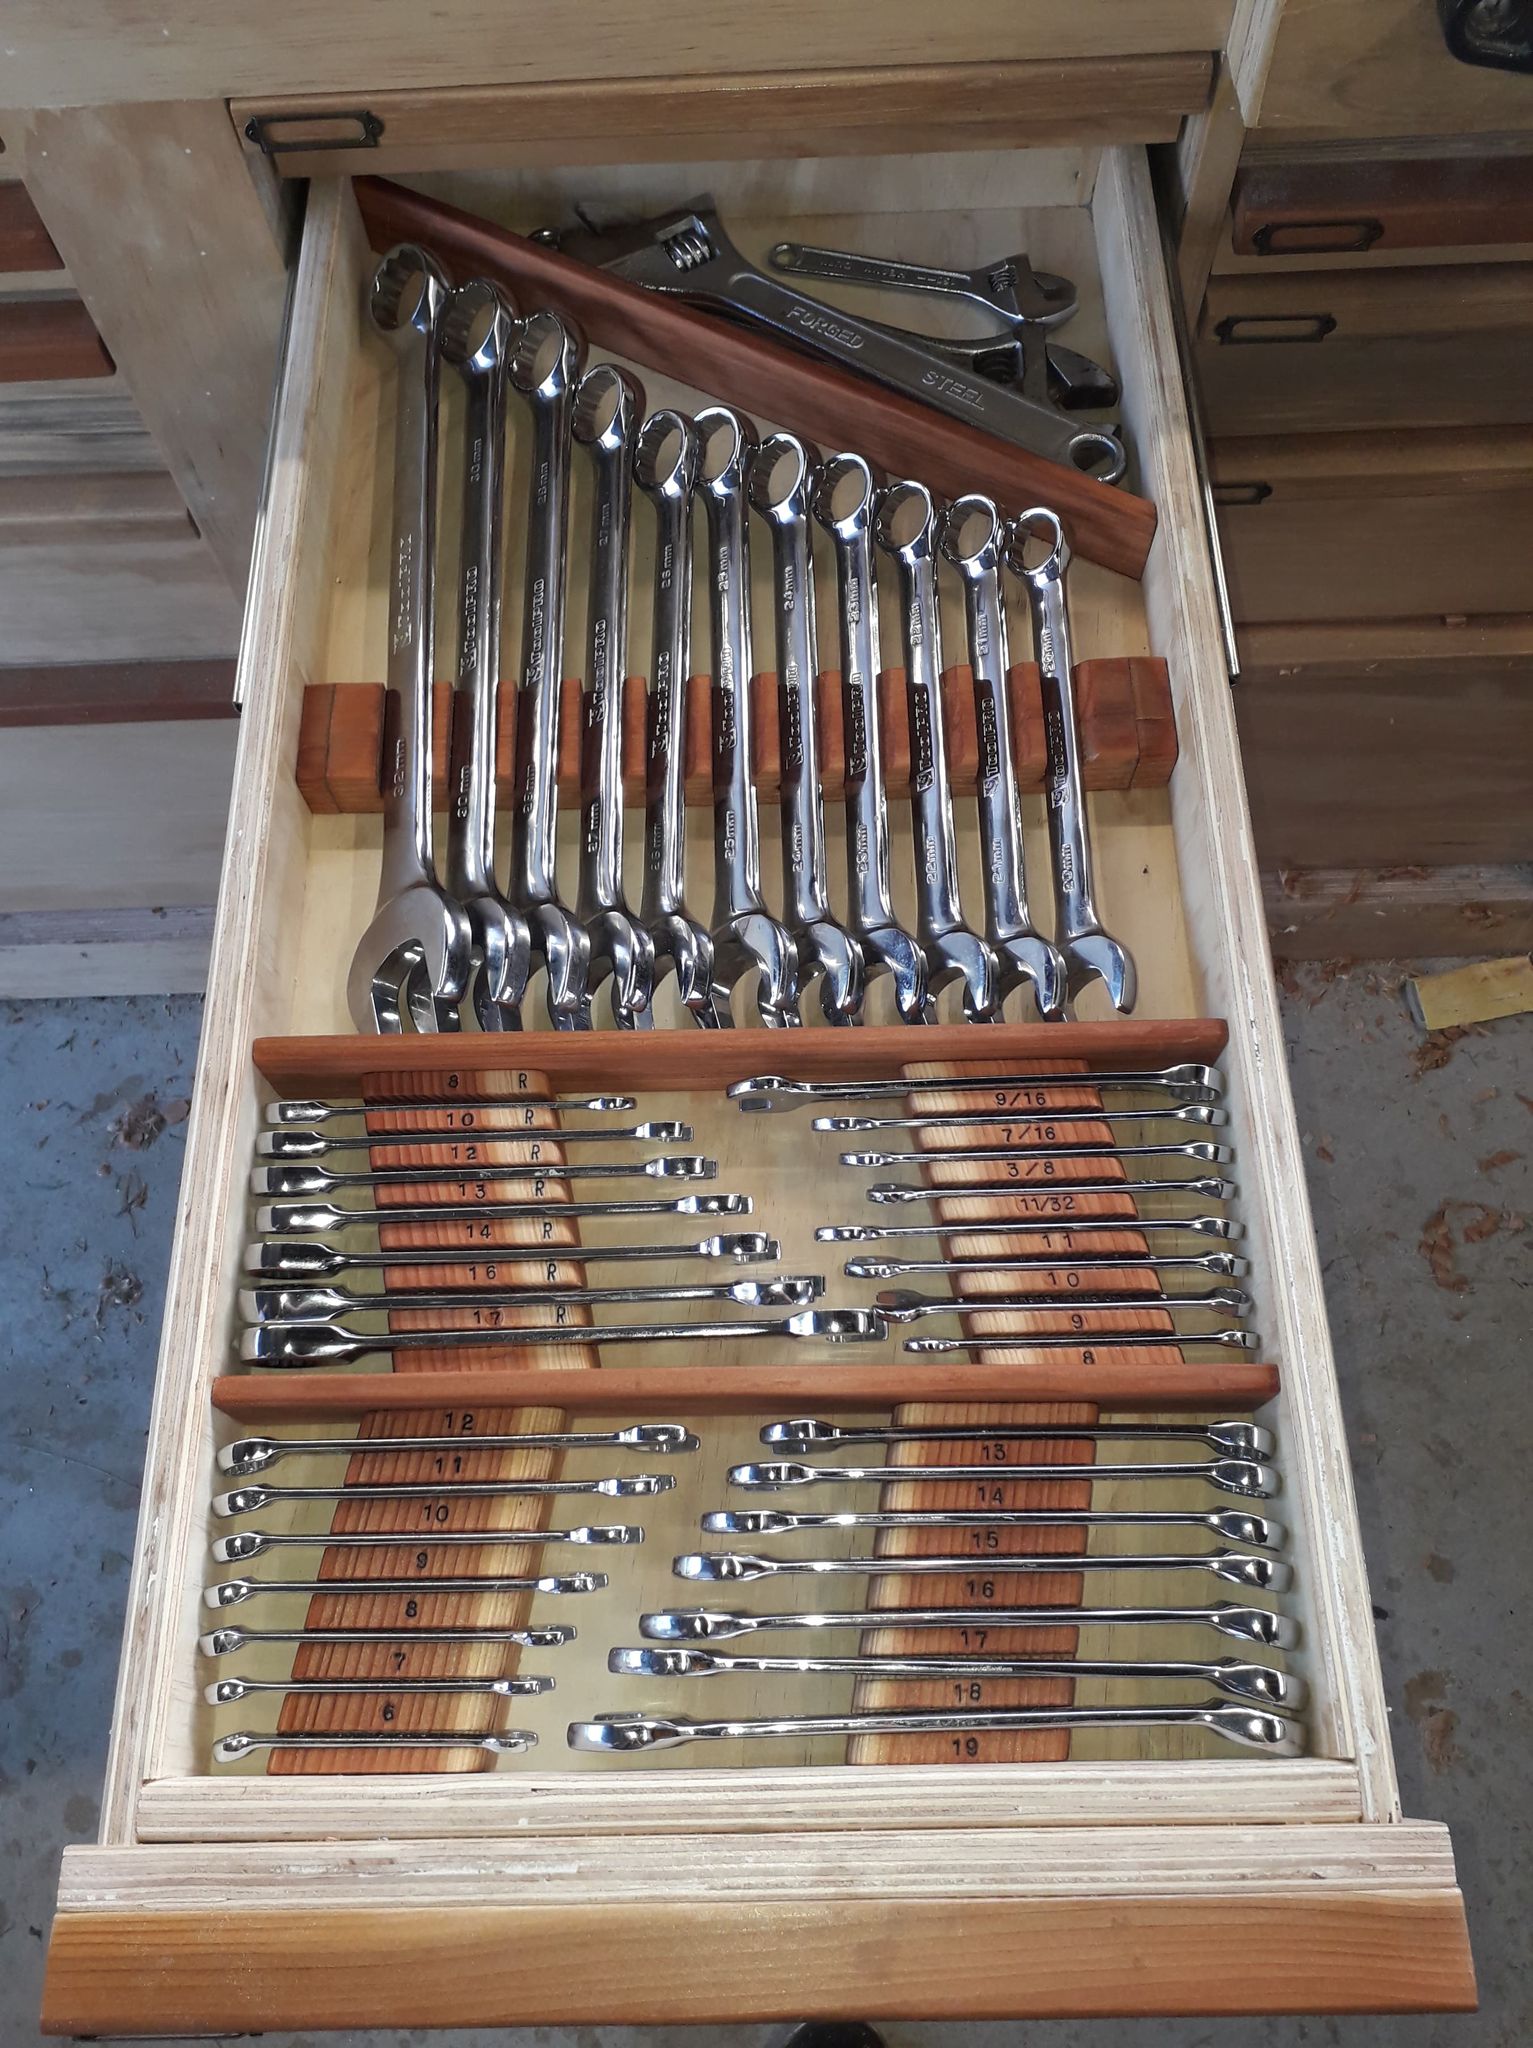
Yup, the boxes on top are the ball bearing drawers slides for another one too (another pending project which has been sitting there for a year or so).
Slowly sorting out the organisation of the drawers too. Slow progress on that idea though. Spanner drawer is cool though.
-
10-07-2022, 10:56 AM #15Member

- Join Date
- Feb 2014
- Location
- Hawkes Bay
- Posts
- 2,697
How did you "engrave" the sizes for each spanner?
The spanner slots are made from oregon?
Similar Threads
-
Reloading equipment
By JasonW in forum Reloading and BallisticsReplies: 20Last Post: 19-03-2017, 07:57 PM
Tags for this Thread
Welcome to NZ Hunting and Shooting Forums! We see you're new here, or arn't logged in. Create an account, and Login for full access including our FREE BUY and SELL section Register NOW!!


 42Likes
 LinkBack URL
 About LinkBacks


 Reply With Quote


Bookmarks