I've had the rifle for 5 years and every now and then the zero seems to wander a couple of centimeters at 100m, but recently it was 4 Right. Oh well, I adjusted the turret caps and went hunting. Next check, it was 4 left. I wound it across without rezeroing the scale and used it like that but you know how you feel when you walk around with the sights showing 0.4 mRad. Ratshit. And you're never quite sure if it was 0.4 L or 0.4 R.... Anyway, looking for an excuse to stay warm and dry at home and, having got the backup rifle nicely fixed up and sighted in, it was high time to do some routine maintenance.
First up is the barrel of course. I usually wipe out with just powder solvent (Hoppes in case you're wondering - just for the smell) and every 50 or 100 rounds use a bronze brush and decake extra black stuff, then do a bit of copper solvent (original Boretech). The bore had got pretty rough and patches were sticking badly in the throat a couple of yesars ago when I was advised to use a poly abrasive pad. That made the bore beautifully smooth and no more sticking. Now it was another 490 rounds down the track (total round count 2100 in the 7mm08) and time to do it again, I thought.
Carbon solvent on twist patches
Carbon solvent on bronze brush
Copper solvent on push through square patches
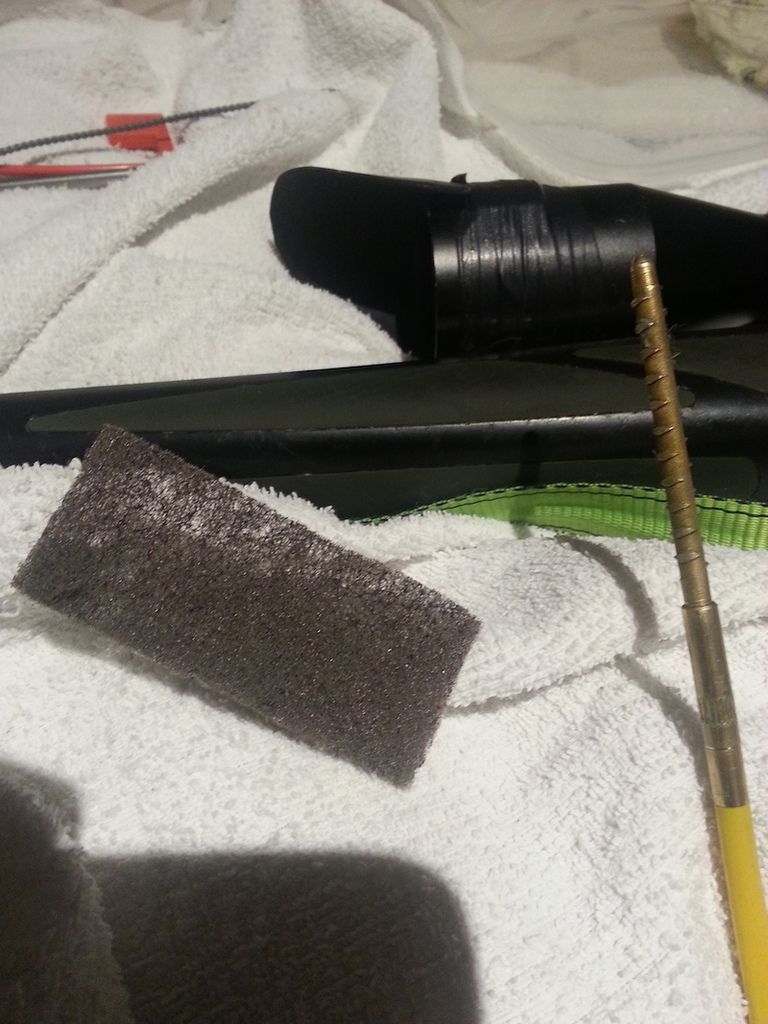
Polipad without lubrication (see photo)
More copper solvent (no blueness this time)
Polishing paste (JB)
Fine preserving oil (Mobil DTE light)
Dry patch out.
Clean and dry out the chamber with a big patch on a bottle brush.
clean the bolt lug recesses with a Sinclair lug felt tool.
The barrel is nice and smooth now.
Here's the brown polipad.
Cut to the size of a small twist on patch.
Carefully delaminate it splitting it down to half thickness.
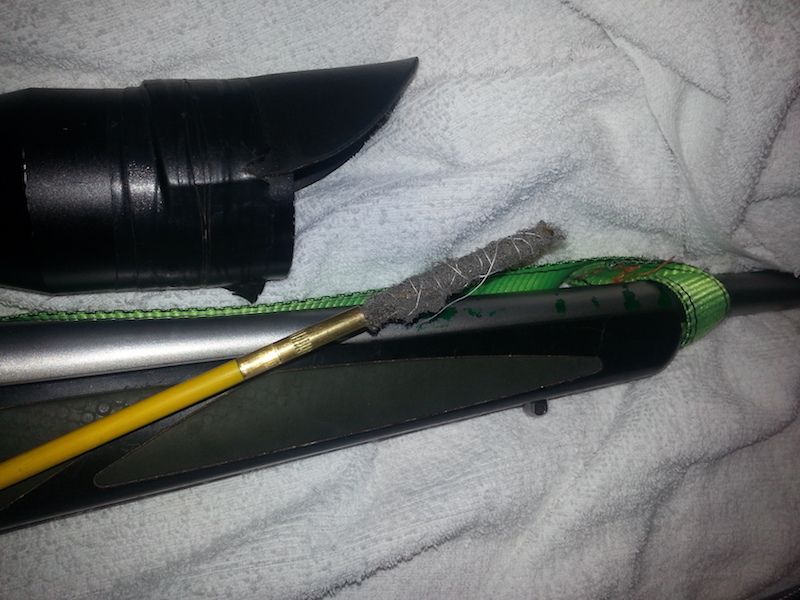
Then twist it onto the jag and hold it in place by twirling cotton round and round it. No need to tie knots to hold it on; the pad and cotton are pretty grippy.
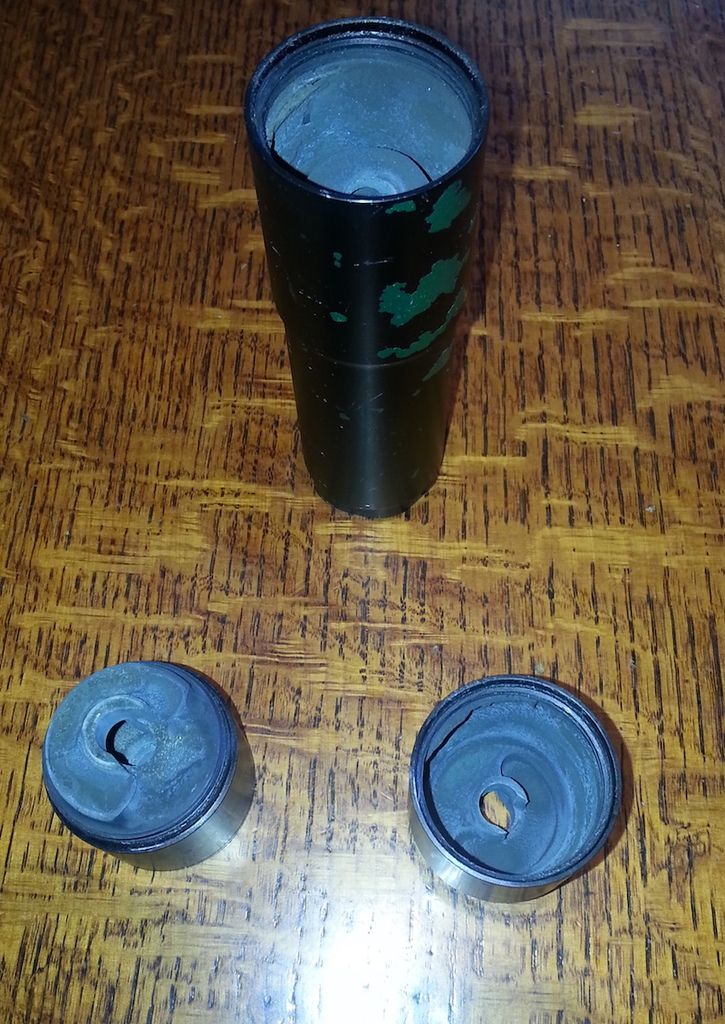
The suppressor was also getting a bit gritty to take apart and there was a bit of hard rock like build up inside it:
Powder solvent (KG1 this time) wouldn't soften the deposits and I couldn't flake them off with a screwdriver so I left them be. They must subtly affect the zero but hopefully don't change too quickly. The very end of the threads was a bit damaged, perhaps from grits of deposit on the tapering end. I cleaned the threads with powder solvent, wiped the rubber seal rings down and replaced with lithium grease. Also cleaned out the inside surface that fits to the muzzle with the felt.
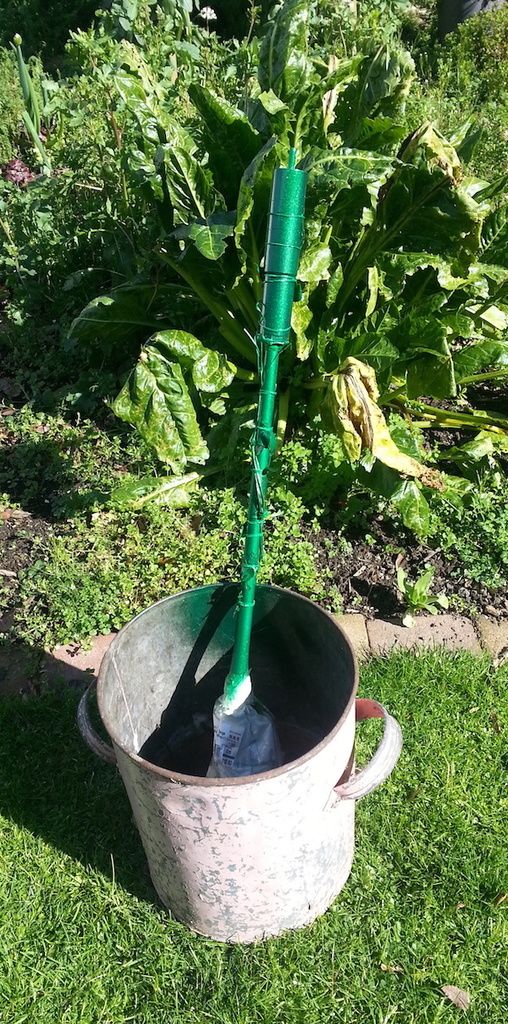
Then it was time to deal with the daft white colour of the barrel steel. Sure, there are white sticks in the bush but eyes are hard wired to detect lines and specially moving ones and I reckon a deer will look at it even if it can't see it.
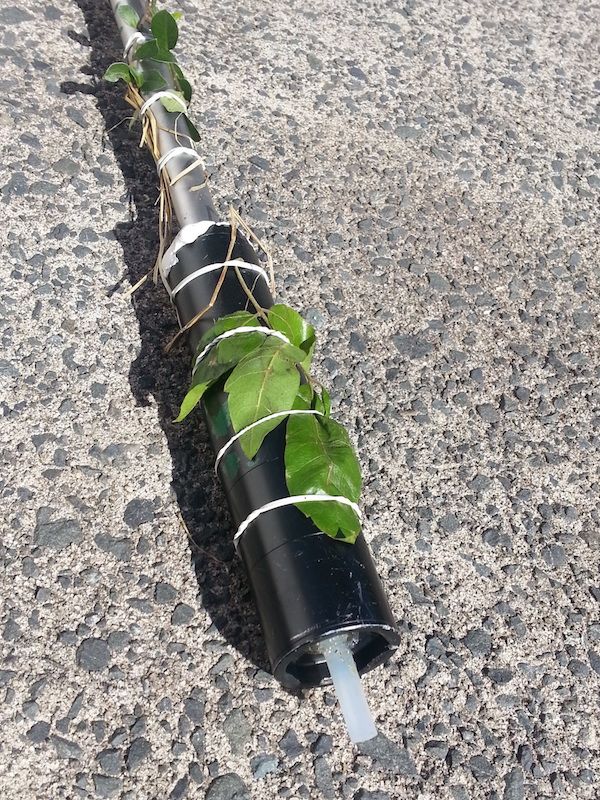
Put on suppressor.
Wipe all over with white spirits.
Plug the end with a rod of hot melt glue and seal it there.
Cover the back end of the suppressor with U Tack sticky stuff.
Cover the action with rag and plastic bag, masking taped on.
Wrap on a few native grasses and leaves with rubber bands;
Spray paint green, leaving some silver areas.
From experience, this is easiest with the barrel upright.
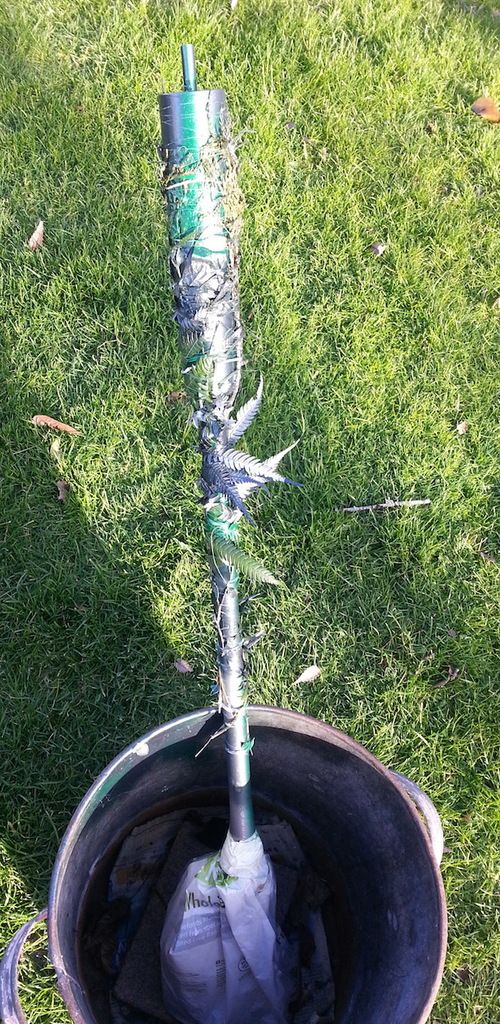
Wait a couple of days to dry then apply more ferns and stuff bound tightly down with cotton.
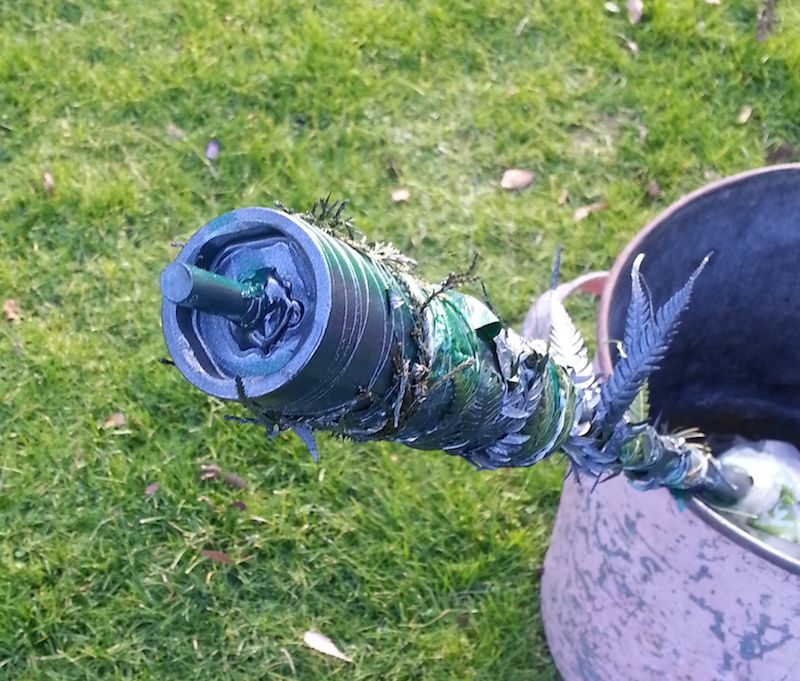
Spray paint with gunmetal grey (still a bit sparkly but the dullest I could find at the car parts shop).
I tried to get a couple of colours to break up the outline from deer's end view of it. There's not so much you can do about the scope lens but why show two eye like blacknesses ?
I expect the paint will chip off over the next year or two but it doesn't need to be a beautiful ceracote like finish.
Well that wraps up those two components. I'll show some pics of the whole gun in due course.
Welcome guest, is this your first visit? Create Account now to join.
Welcome to the NZ Hunting and Shooting Forums.
Search Forums
User Tag List
+ Reply to Thread
Results 1 to 10 of 10
-
21-08-2016, 11:20 PM #1Member

- Join Date
- Mar 2012
- Location
- Waikato
- Posts
- 2,186
Winter Rifle Maintenance: Barrel and Suppressor
-
-
21-08-2016, 11:46 PM #2Member

- Join Date
- Feb 2016
- Location
- Stewart island / canterbury
- Posts
- 9,193
Did a similar paint job on a 10/22 worked well for a while but scratched easy. Also did a third layer of brown
-
22-08-2016, 06:49 AM #3northdudeGuest
Maybe use etch primer first
-
22-08-2016, 08:44 AM #4
Replace metallic silver with metallic green.

-
22-08-2016, 08:16 PM #5Member

- Join Date
- Jul 2012
- Location
- Napier, Hawkes Bay
- Posts
- 4,460
Get yourself some 'Gunslick foaming bore cleaner' then you can do away with all that other stuff you're scrubbing up and down the bore.
It's awesome stuff.
-
22-08-2016, 09:27 PM #6
Elaborate.....

Where from @GWH - I like to use a minimalist approach to cleaning where possible.
-
22-08-2016, 09:48 PM #7Member

- Join Date
- Oct 2015
- Location
- The Stings
- Posts
- 176
-
30-08-2016, 09:32 PM #8Member

- Join Date
- Mar 2012
- Location
- Waikato
- Posts
- 2,186
@GWH are you truly happy with your relationship with your rifle ?
-
30-08-2016, 09:38 PM #9Member

- Join Date
- Jul 2012
- Location
- Napier, Hawkes Bay
- Posts
- 4,460
Ya what?
Sent from my SM-G900I using Tapatalk
-
30-08-2016, 10:14 PM #10Member

- Join Date
- Mar 2012
- Location
- Waikato
- Posts
- 2,186
Tell us about the foam....
Similar Threads
-
.243 Barrel length, over barrel or forward mount suppressor
By Strider B in forum Projects and Home BuildsReplies: 12Last Post: 14-04-2018, 01:52 PM -
Threading a barrel for Suppressor.
By LifeLust in forum Firearms, Optics and AccessoriesReplies: 7Last Post: 01-02-2014, 10:45 AM -
DPT Machinists - Duralium DPT 308/243 over barrel Rifle Suppressor
By KiwiinSeattle in forum Firearms, Optics and AccessoriesReplies: 9Last Post: 18-09-2012, 11:48 PM
Tags for this Thread
Welcome to NZ Hunting and Shooting Forums! We see you're new here, or arn't logged in. Create an account, and Login for full access including our FREE BUY and SELL section Register NOW!!


 1Likes
 LinkBack URL
 About LinkBacks



 Reply With Quote


Bookmarks