Well, what sort of maintenance does your scope need ? Itís a sealed unit isnít it ? What should you do to keep it working well ?
The key elements of effective scope set up are: reticle selection, mounting, zeroing and tracking.
The scope on my hunting rifle is a Schmidt and Bender PM II 3-12x50, which I reported on when I first got it. This scope is heavy, so potentially vulnerable to recoil but quite solid and ought to be durable. The optilock two piece mounts are part stainless and part phosphatised so some rust could be possible.
First up, of course, is cleaning the lenses. I try to do this as seldom as possible, so they are usually a bit dirty and can benefit from a touch up. Use a lens brush for specks, leaf and grit. Then a brisk blow by mouth usually leaves good condensation dampness all over. Then do some gentle circular wiping with microfiber cloth till all smears are gone, making it nice and clear again. If you use antifog stuff you might put some more on now. I personally thought it slightly hazed the view and it stuffed my lenspen when I forgot the instructions and used it Ė smeared clean lenses for a while afterwards. The anti fog didnít seem to really make much difference for the sort of thick condensation I get over the lenses, sweating through the bush in cold rain.
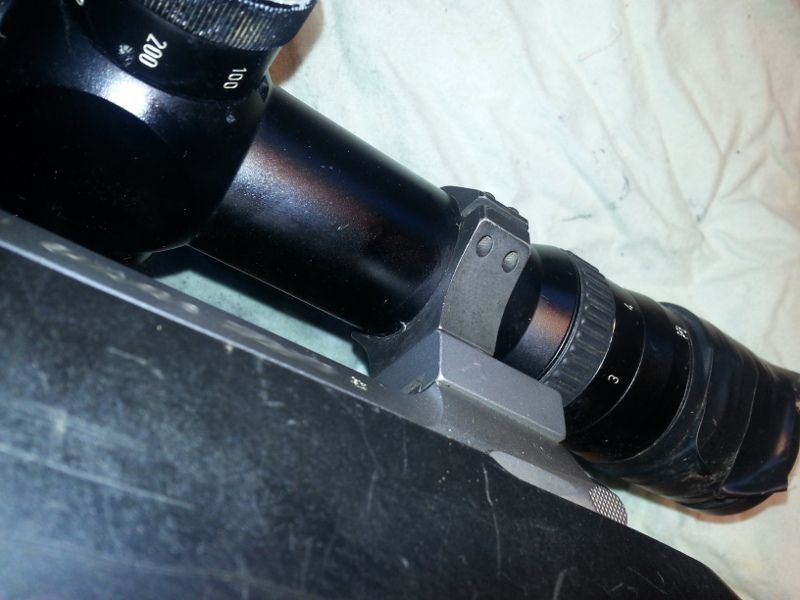
Next, I took the scope off the rifle, which I hadnít done since I got it 3 years ago. People always tell me my scopes are tilted even after Iíve carefully aligned them. This one was put on by a gunsmith and Iíd had good success at range so it was probably pretty square and I didnít want to fiddle. Before removing it, I used a darning needle to scratch small registration marks on the scope and rings so I could put it back on more or less the same.
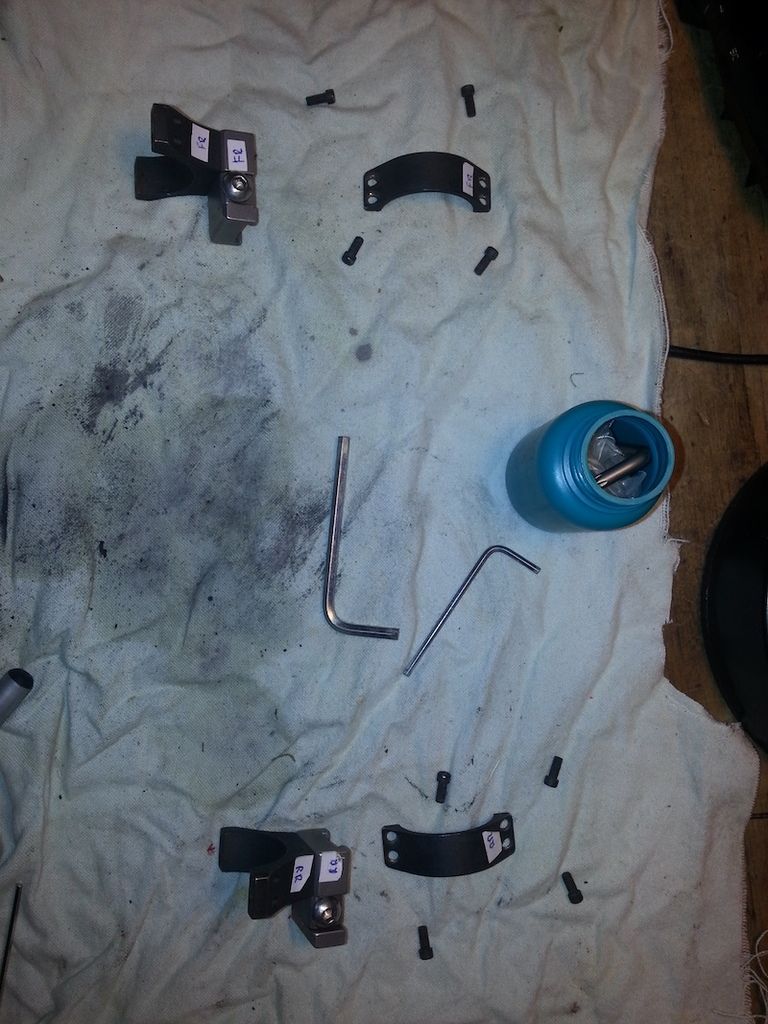
Removing screws and rings, I kept them neat and tidy so each screw and top half would go back where it came from. Over the years Iíve checked the screw tightness many times with little tweaks and possibly built up the tension randomly, so this was a chance to start again from scratch. I donít have a torque wrench. All rings and screws showed no corrosion and I put a tiniest drop of oil on each before reassembly to prevent rust and try to get torque smooth so it will equate to tension without sticking or binding.
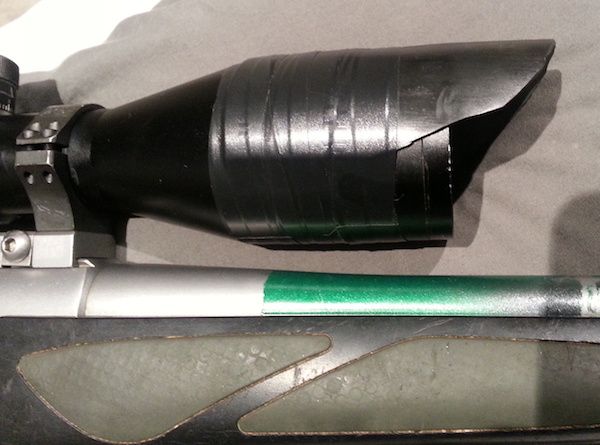
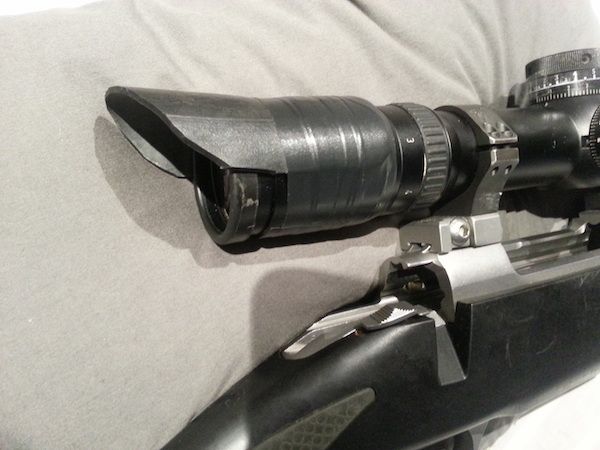
New inner tube rubber scope shades were fixed on with electrical tape and replaced worn out ones. These shades keep a lot of rain off the lenses and protect them from some contact with branches and my hand. The rubber and tape protect from minor knocks and taps on rocks. I also printed out a new turret drop tape, marked in 100's of metres, onto sticky vinyl paper.
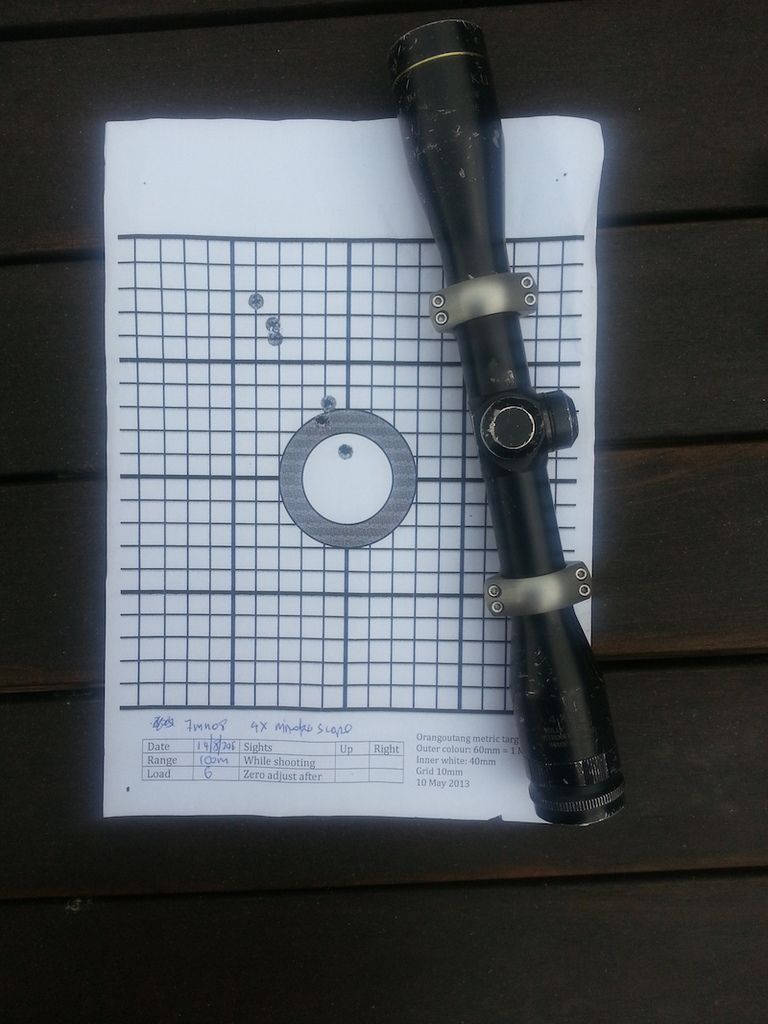
Next, I pulled out a trusty 30 yr old 4x32 Miroku scope, recently used on the .22 and .303, and set this up in my spare 1Ē optilocks. Iíd wanted to recycle this long stored gear into a useable spare and, with the main scope off, this was the opportunity. The comb is high for the big scope so I had to push down hard with my cheek and even then had a big half crescent looking through the top of the exit pupil. I didnít need to do a lot of group testing and already know the dialing only moves half what itís supposed to. So, it was just 3 shot groups and they came in quickly to 25mm high at 100m and I left it at that. Not bad performance from what was a modest ďjap crapĒ scope in the 1970ís; now itís stood the test of time and can be a reliable expedition backup.
Then I returned the big scope to the gun, registering the rear mount against itís recoil pin slot and tapping the front one forward lightly onto the sako dovetail. Itís well recognized how important vertical scope mounting is. However, some scopes have the reticle canted relative to easily accessible reference surfaces like the turret caps. The important thing is that the image moves up and down straight toward the center of the bore and that this axis is vertical, parallel to gravity, for every shot. The only true test is checking at a variety of ranges where drop is significant, ie more than at least 600m, and then wind drift comes into play. So, it is not simple matter to check oneís scope is vertical and I donít stress about it now, for a rifle intended to shoot under 500m. On the spot, I set up the eye relief and vertical as best I could without tools. Only the next week, I remembered the registration scratches and was amazed to find they were aligned pretty well right, within the thickness of the scratch marks (0.5 mm) anyway. Your eye can be pretty accurate on cant.
I shot from the prone position, using an entry level front sandbag rest and rabbit ears rear sandbag and left hand on the rear bag. I already know this gives a zero very close to what I get shooting without rest or holding the fore end with left hand and also the same as with bipod (if I have to use it ever). My groups are better with the sandbag rests, so I use that for serious sighting in.
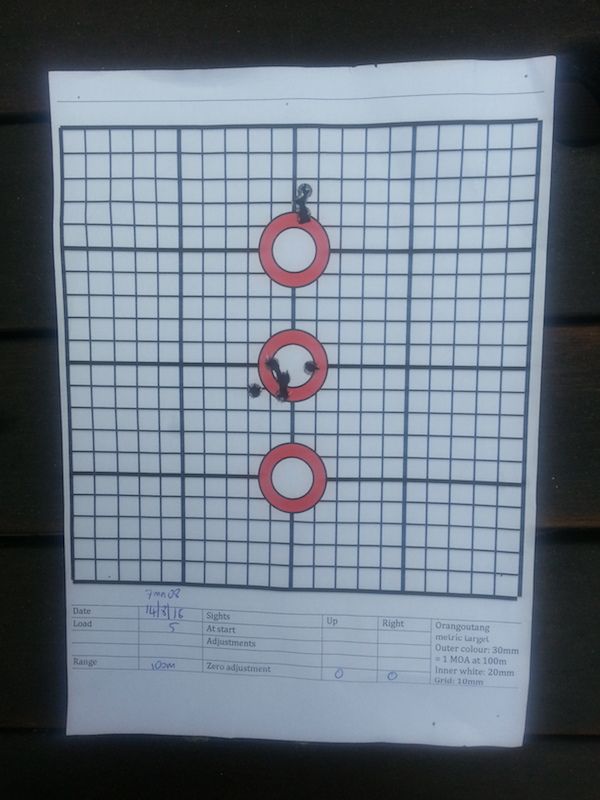
With a few shots, again not really trying for groups, I brought the mpi to zero at 100m, then gently snugged up all the scope and bedding screws and adjusted the turret settings to zero elevation and zero windage. This is easier said than done with the fine allen key push up pull down system on the S&B, so I needed to test a 5 shot group to be happy it was close enough. In retrospect, as you will see, the group probably was centerd a good centimetre low and left so I will check and refine that zero next time I'm on the range.
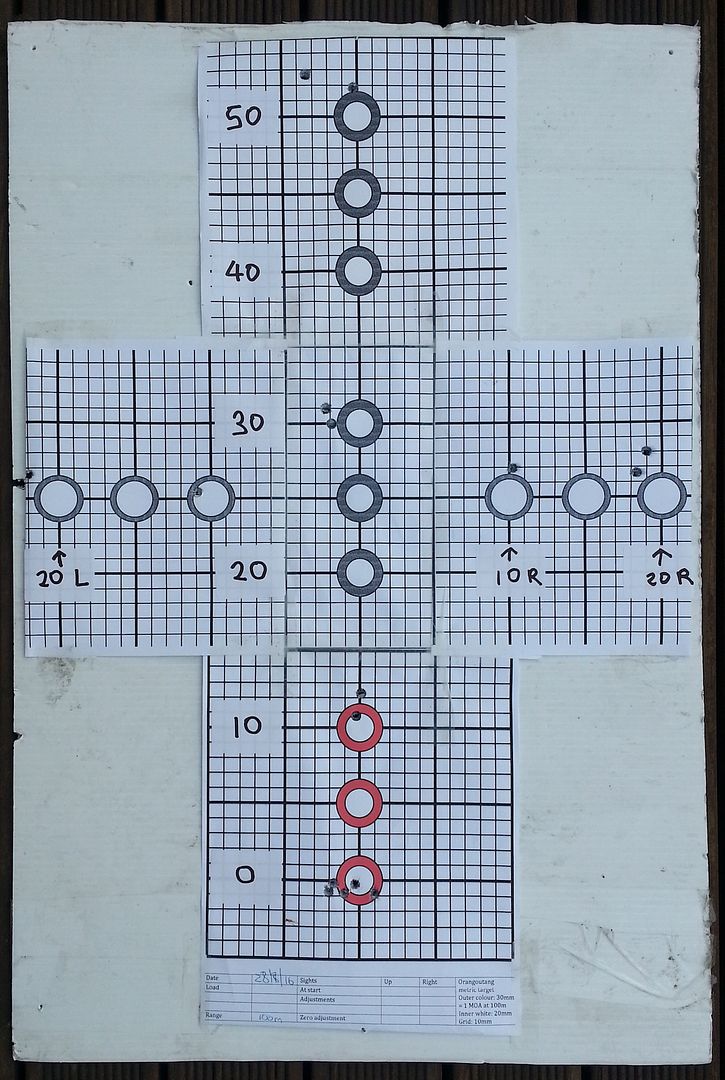
Finally, I repeated the tracking test Iíd last done when I got the scope 3 years ago. Iíd read that tracking can deteriorate over time. Iíve put through 1300 rounds under the scope now, and done a reasonable amount of dialing up and down at different ranges. This is a 1 cm grid target shot at 100m. So, each 10cm is 1 mRad.
I aimed at the lowest red circle for all shots and adjusted the sights around to try and hit the other grey circles, never firing more than one shot between adjustments. I started (3 left hand bullet holes) and finished (2 right hand holes) on the bottom red target (zero wind and zero elevation). So, the scope does return well to zero. It is a small worry that the zero seems to have shifted 2cm left since a fortnight ago but time will tell if this is now stable. Looking critically at the shots further up the target, there is a hint that they could be running a couple of cm high at 5 mRad (104% adjustment). The range finder said it was 100.7m from the scope to the target, so that could account for part of the error (0.7%). In fact, the test I did 3 years ago shows the same thing. Iíll retest this again in due course and see if it is consistent or not. 5 mRad is close to the adjustment I need for 600m, which is the envelope of my performance requirements for this rifle. All my hunting shots are well within 400m (2.4 mRad) so there is not too much problem there for hunting purposes. But a minor tracking error, if present, could contribute to the difficulty I have in tagging plates at 600m.
So, there it is, a lot of points checked and equipment now in known good order. Next, it will be time for a brush up on my shooting skills and some spring and summer hunting trips.
Welcome guest, is this your first visit? Create Account now to join.
Welcome to the NZ Hunting and Shooting Forums.
Search Forums
User Tag List
+ Reply to Thread
Results 1 to 3 of 3
Thread: Winter Rifle Maintenance: scope
-
08-09-2016, 09:32 PM #1Member

- Join Date
- Mar 2012
- Location
- Waikato
- Posts
- 2,188
Winter Rifle Maintenance: scope
-
-
09-09-2016, 03:50 PM #2
Great write up @Bagheera picked up some great pointers there, what is that 'green- looks like spray paint' on the barrel, below you scope? is it to stop 'sun glare'?...
Last edited by Scouser; 09-09-2016 at 04:14 PM.
While I might not be as good as I once was, Im as good once as I ever was!
Rule 4: Identify your target beyond all doubt
-
10-09-2016, 05:59 PM #3Member

- Join Date
- Mar 2012
- Location
- Waikato
- Posts
- 2,188
Yes it's just green car spray paint. It's a very rough and ready DIY camo job. The silver and black colour scheme might have fit some Finnish environments but I think it would stand out in NZ bush and scrub so decided to have a go. More description here: http://www.nzhuntingandshooting.co.n...pressor-29481/
Similar Threads
-
Winter Rifle Maintenance: stock and bedding
By Bagheera in forum Firearms, Optics and AccessoriesReplies: 2Last Post: 01-09-2016, 11:34 PM -
Winter Rifle Maintenance: Barrel and Suppressor
By Bagheera in forum Firearms, Optics and AccessoriesReplies: 9Last Post: 30-08-2016, 10:14 PM -
Winter Rifle Maintenance. The Action: bolt, trigger, magazine
By Bagheera in forum Firearms, Optics and AccessoriesReplies: 7Last Post: 30-08-2016, 04:07 PM
Tags for this Thread
Welcome to NZ Hunting and Shooting Forums! We see you're new here, or arn't logged in. Create an account, and Login for full access including our FREE BUY and SELL section Register NOW!!


 4Likes
 LinkBack URL
 About LinkBacks


 Reply With Quote


Bookmarks