Following @RV1's request for info on making a tarp, thought I'd post it here.
My UK Army basha is slowly making its way back from UK, so thought I'd have a crack at making one.
Went to Spotlight, and bought:
- 3.5m of ripstop nylon (1.5m wide roll)
- 5m of 20mm nylon webbing
- Strongest synthetic thread they had
Sewing shop
- 3.5m nylon ribbon (lighter than webbing)
From a sailing/marine shop:
- 15m of 2.0mm cord (the sheathed 'paracord' is a bugger for twisting, so if you can find just the braided nylon, that's better)
- 5m of 2.5 or 3mm cord
Then from Bunno's:
- type of 100% silicon (clear)
- 4L unscented turps
Then back to Spotlight to buy:
- the other half of 3.5m of ripstop nylon (1.5m wide roll)... oops
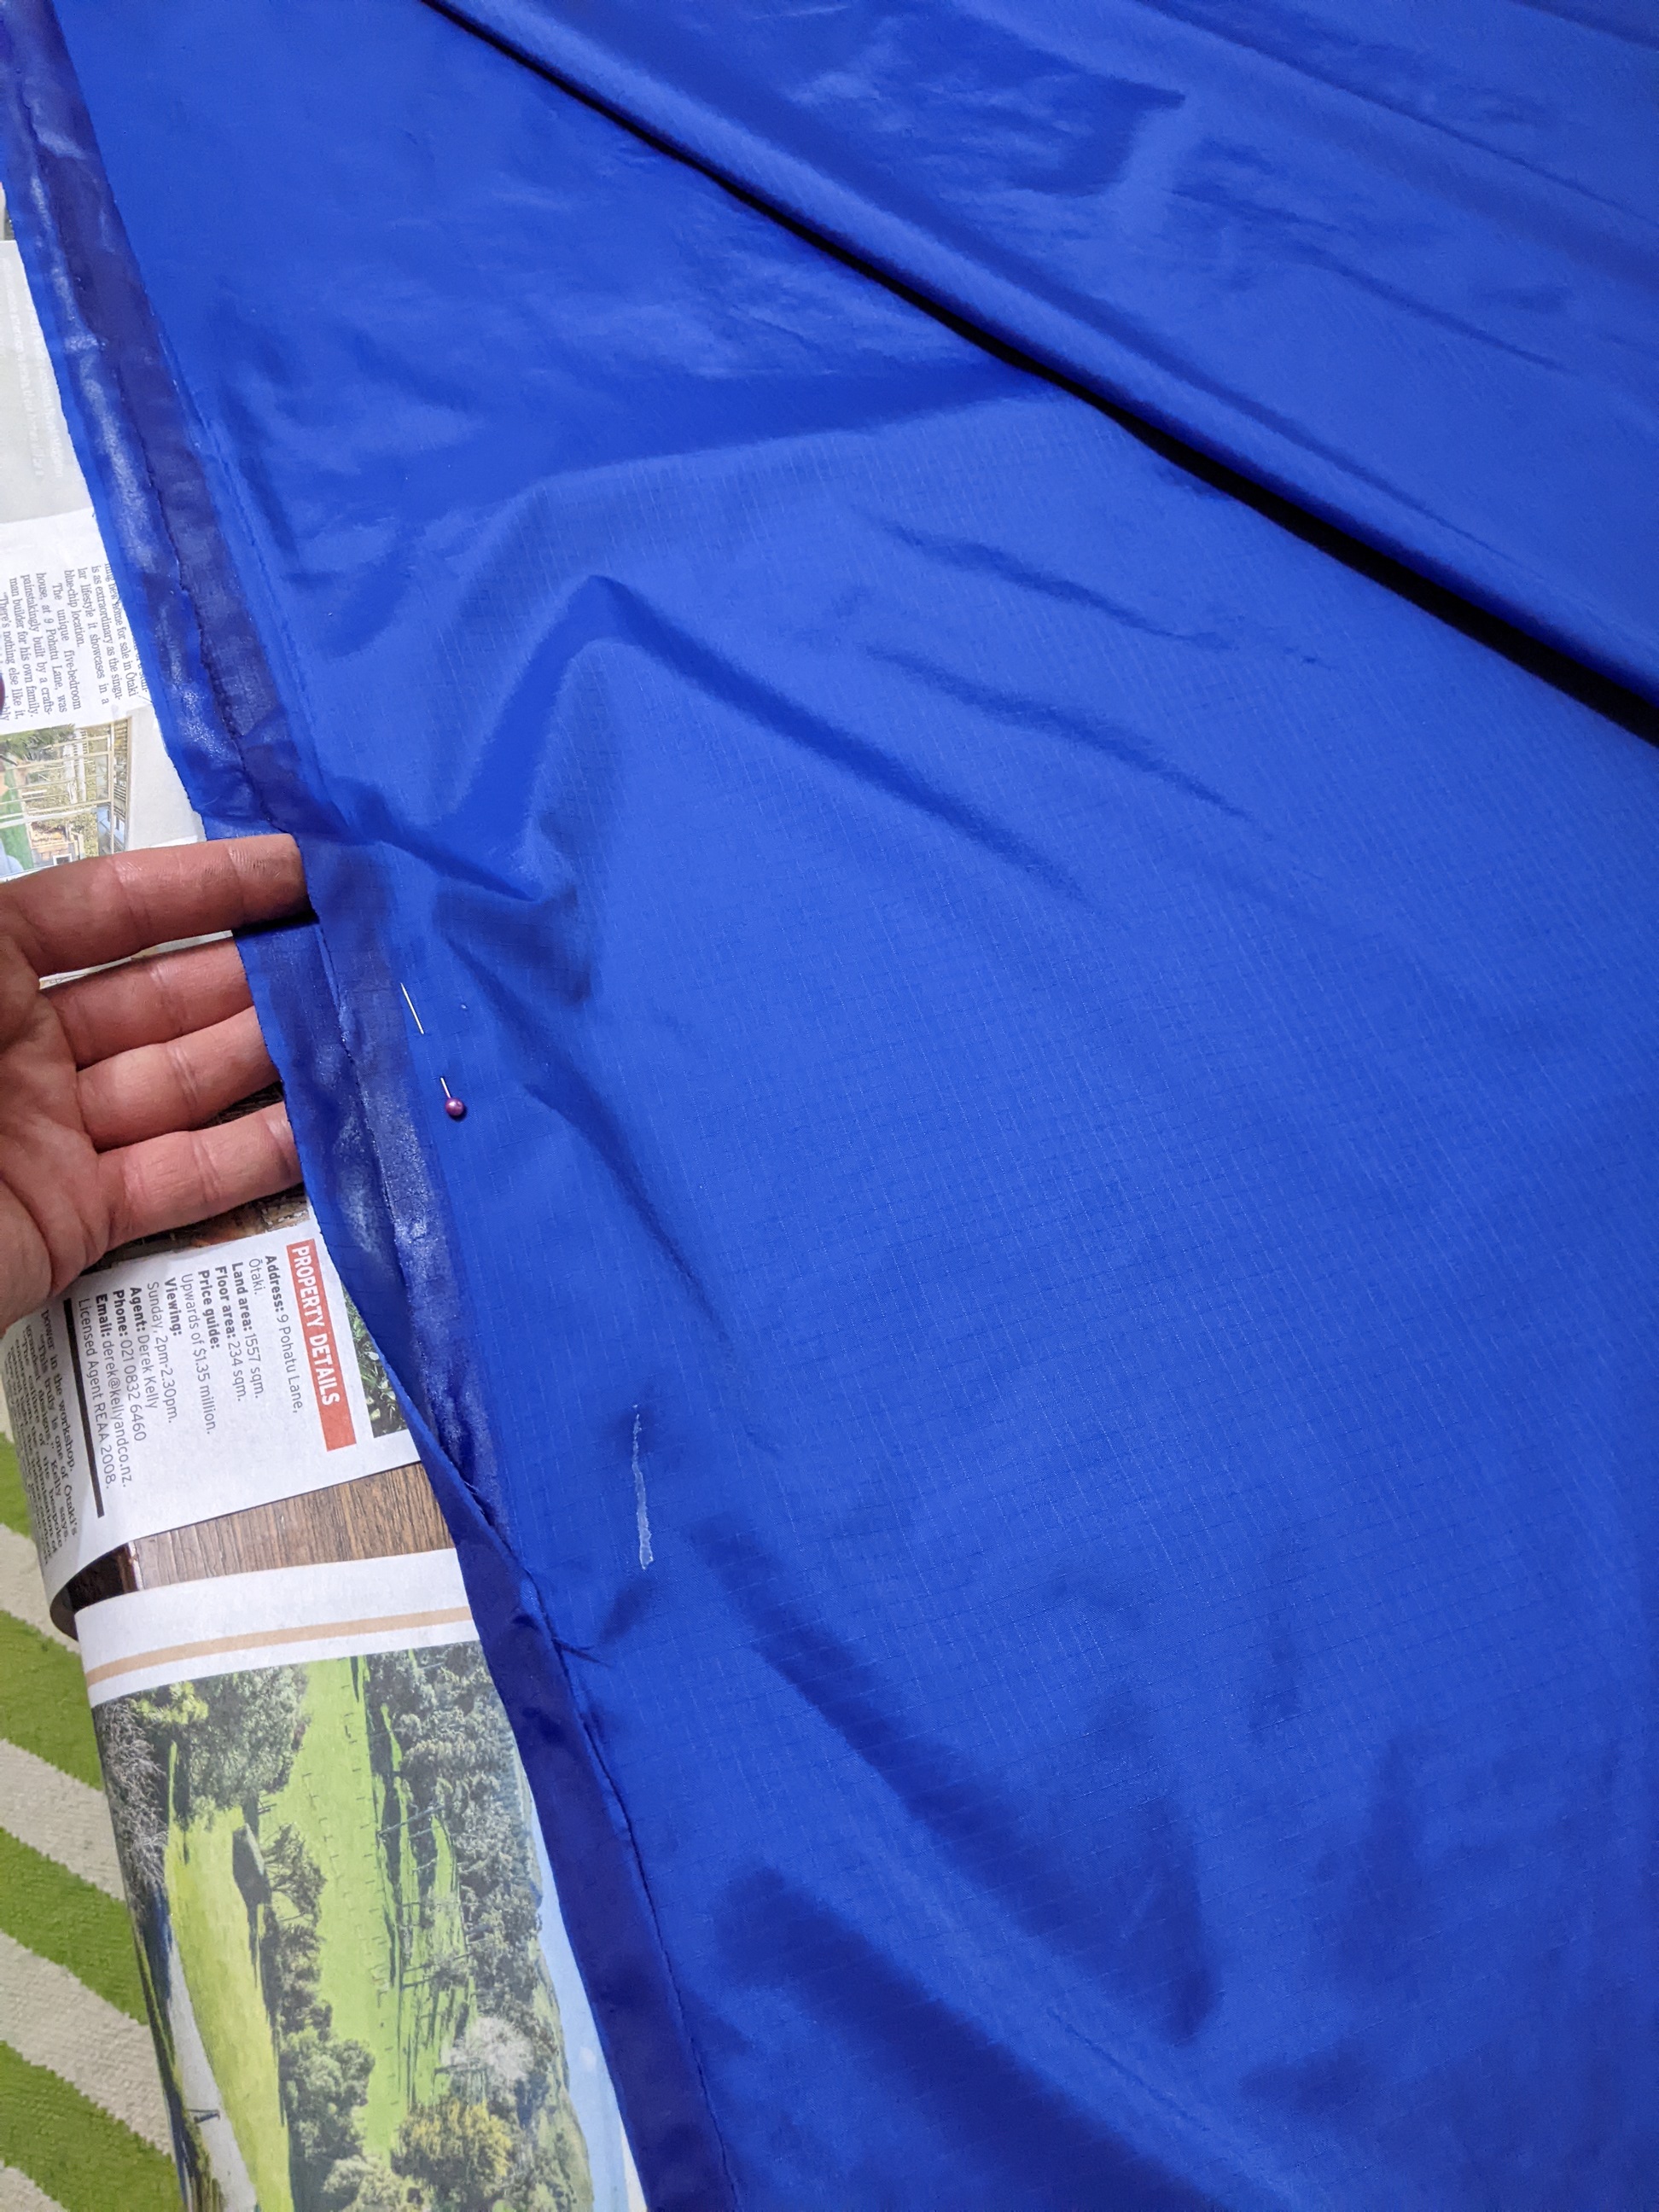
The ripstop nylon is slippery shit, so was quite hard to keep together. I ended up gluing it along the main ridge seam to keep it together when sewing, but this wasn't entirely successful.
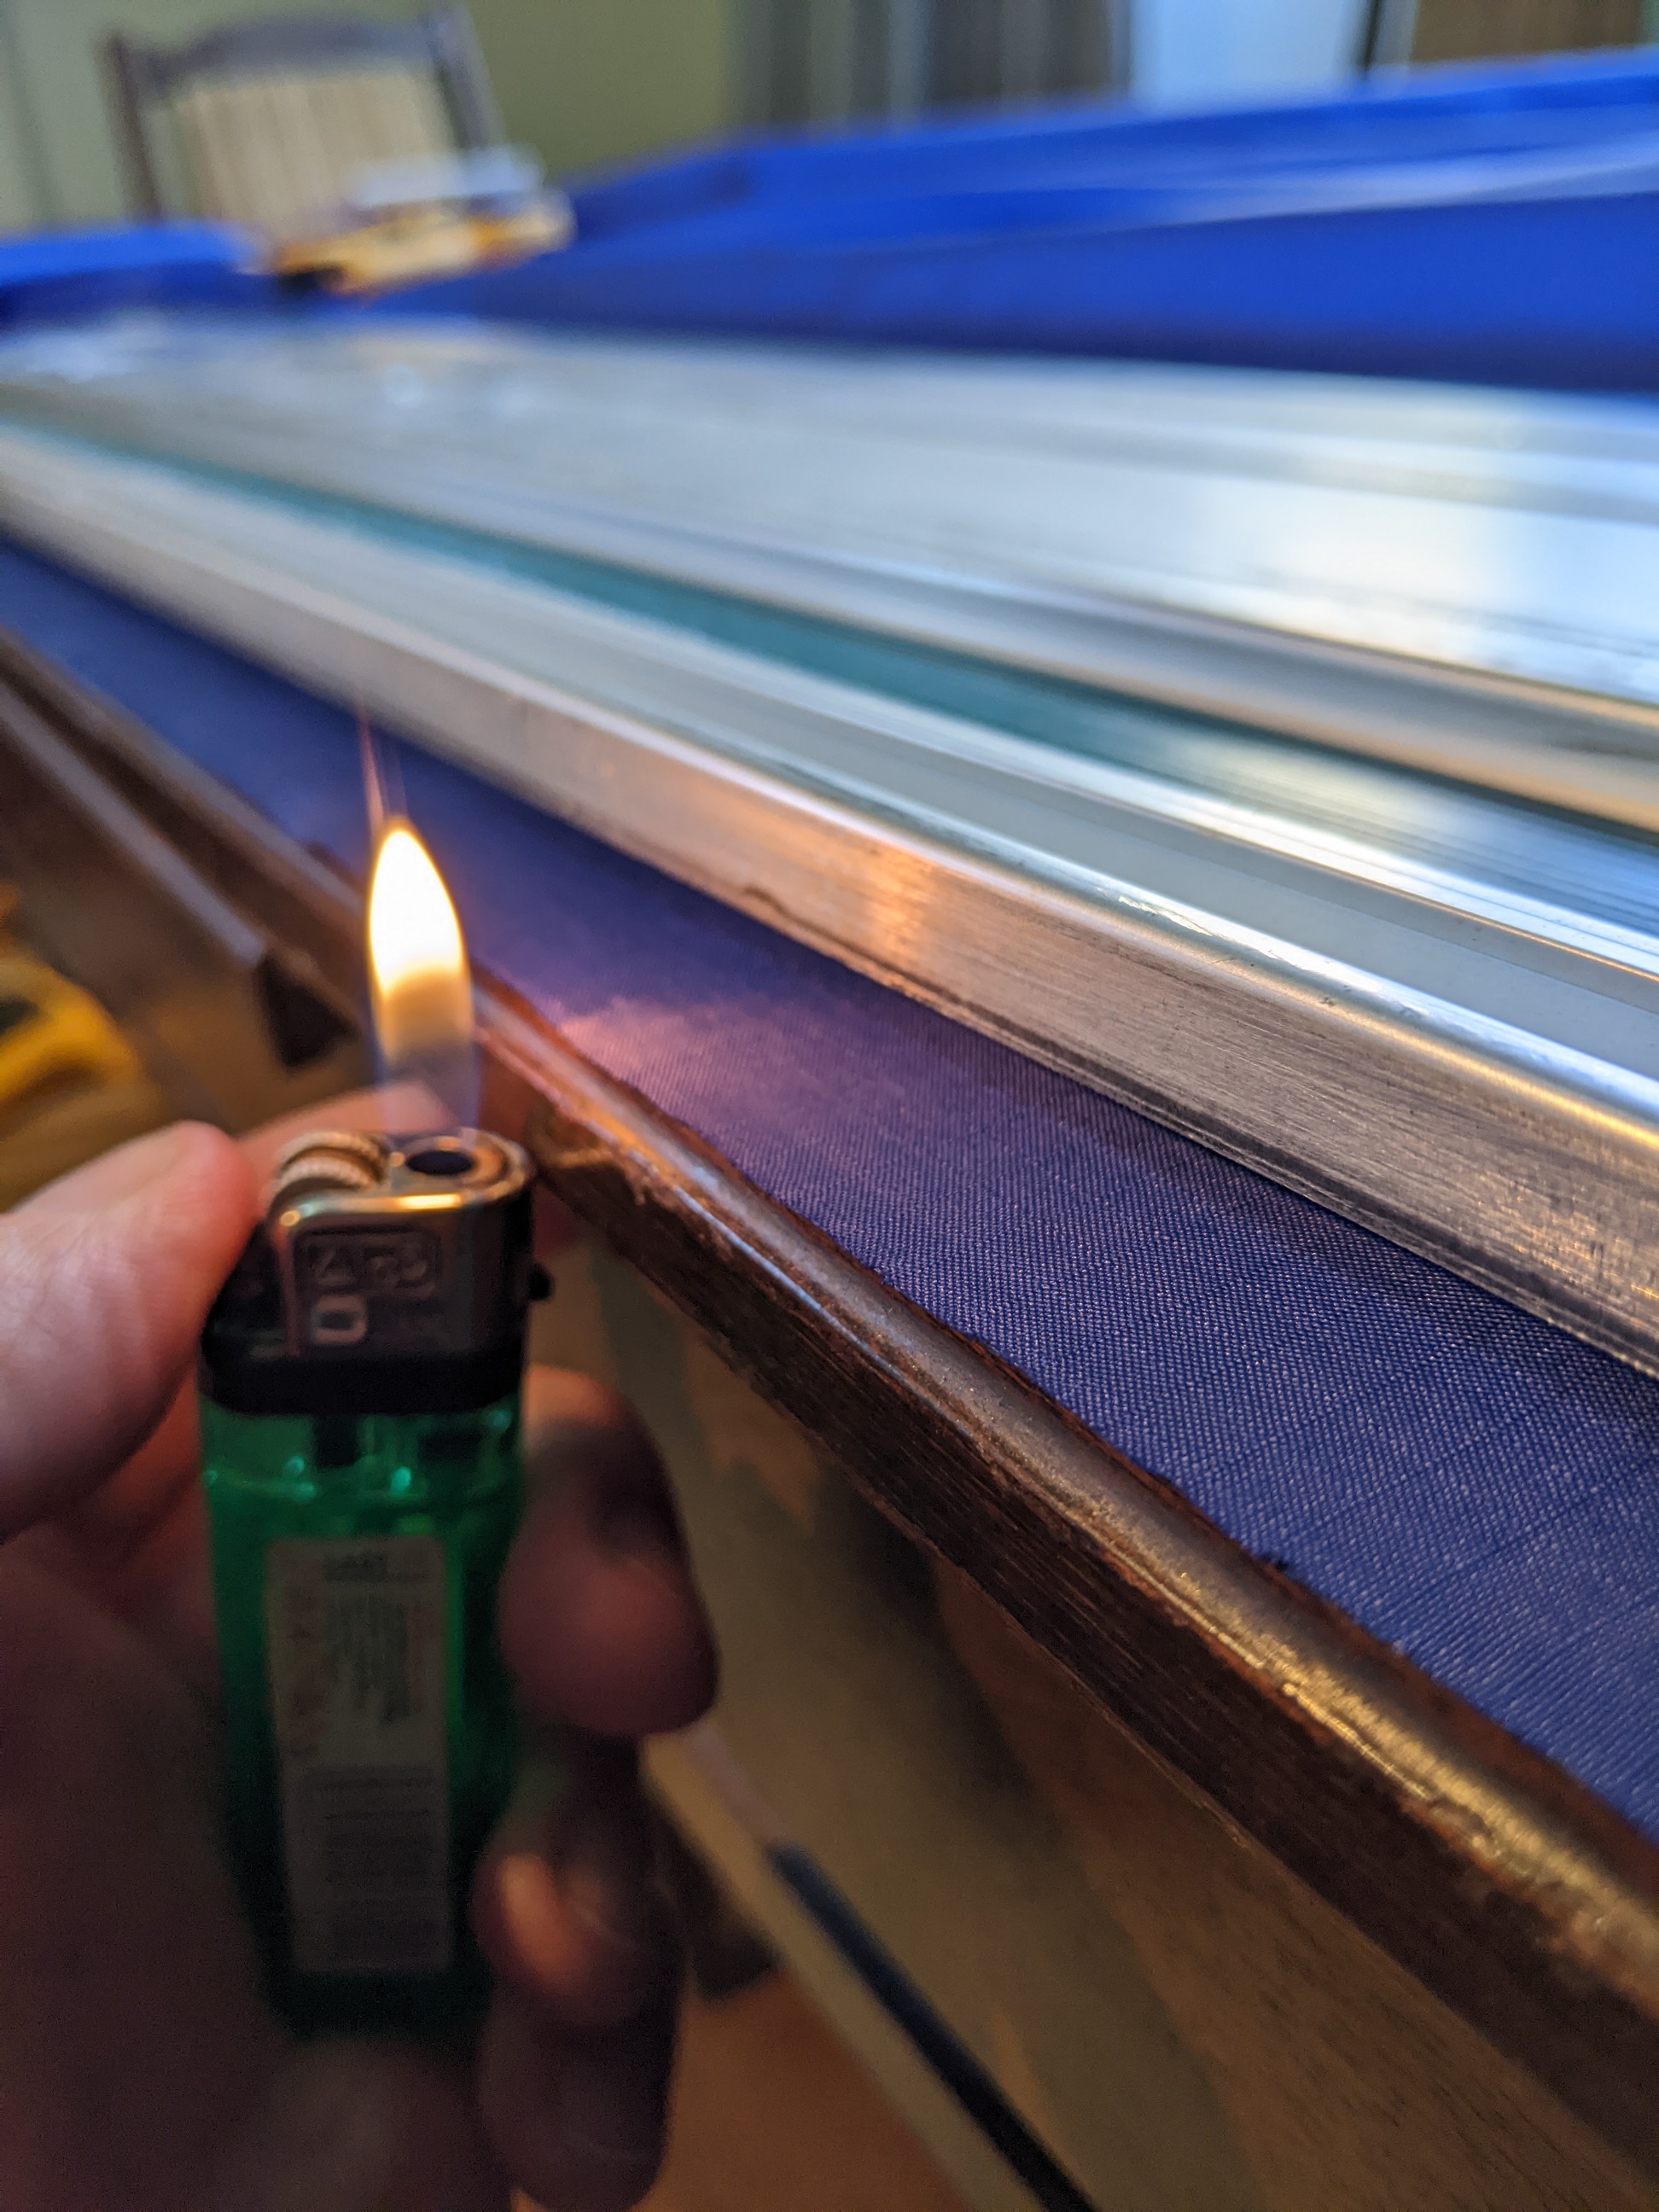
First got a straight-edge, and cut... straight edges. Then got a lighter and melted all the edges so they wouldn't fray.
With a hot iron (surprised it didn't melt it, but it didn't), folded over a 8-10mm edge along the long side of one piece of the fabric.
Then glued (used that spray-mount stuff... not overly successful, could maybe try Ados F2? It's just to hold it in place while sewing) the flap over the other long edge of the other piece. Once this had set, I ran a line of stitching along the whole thing to hold them together.
(Using glue to try hold the folded edges together...)
Then folded and ironed the second piece the opposite way to the first fold, to create sort of a 'Z'.
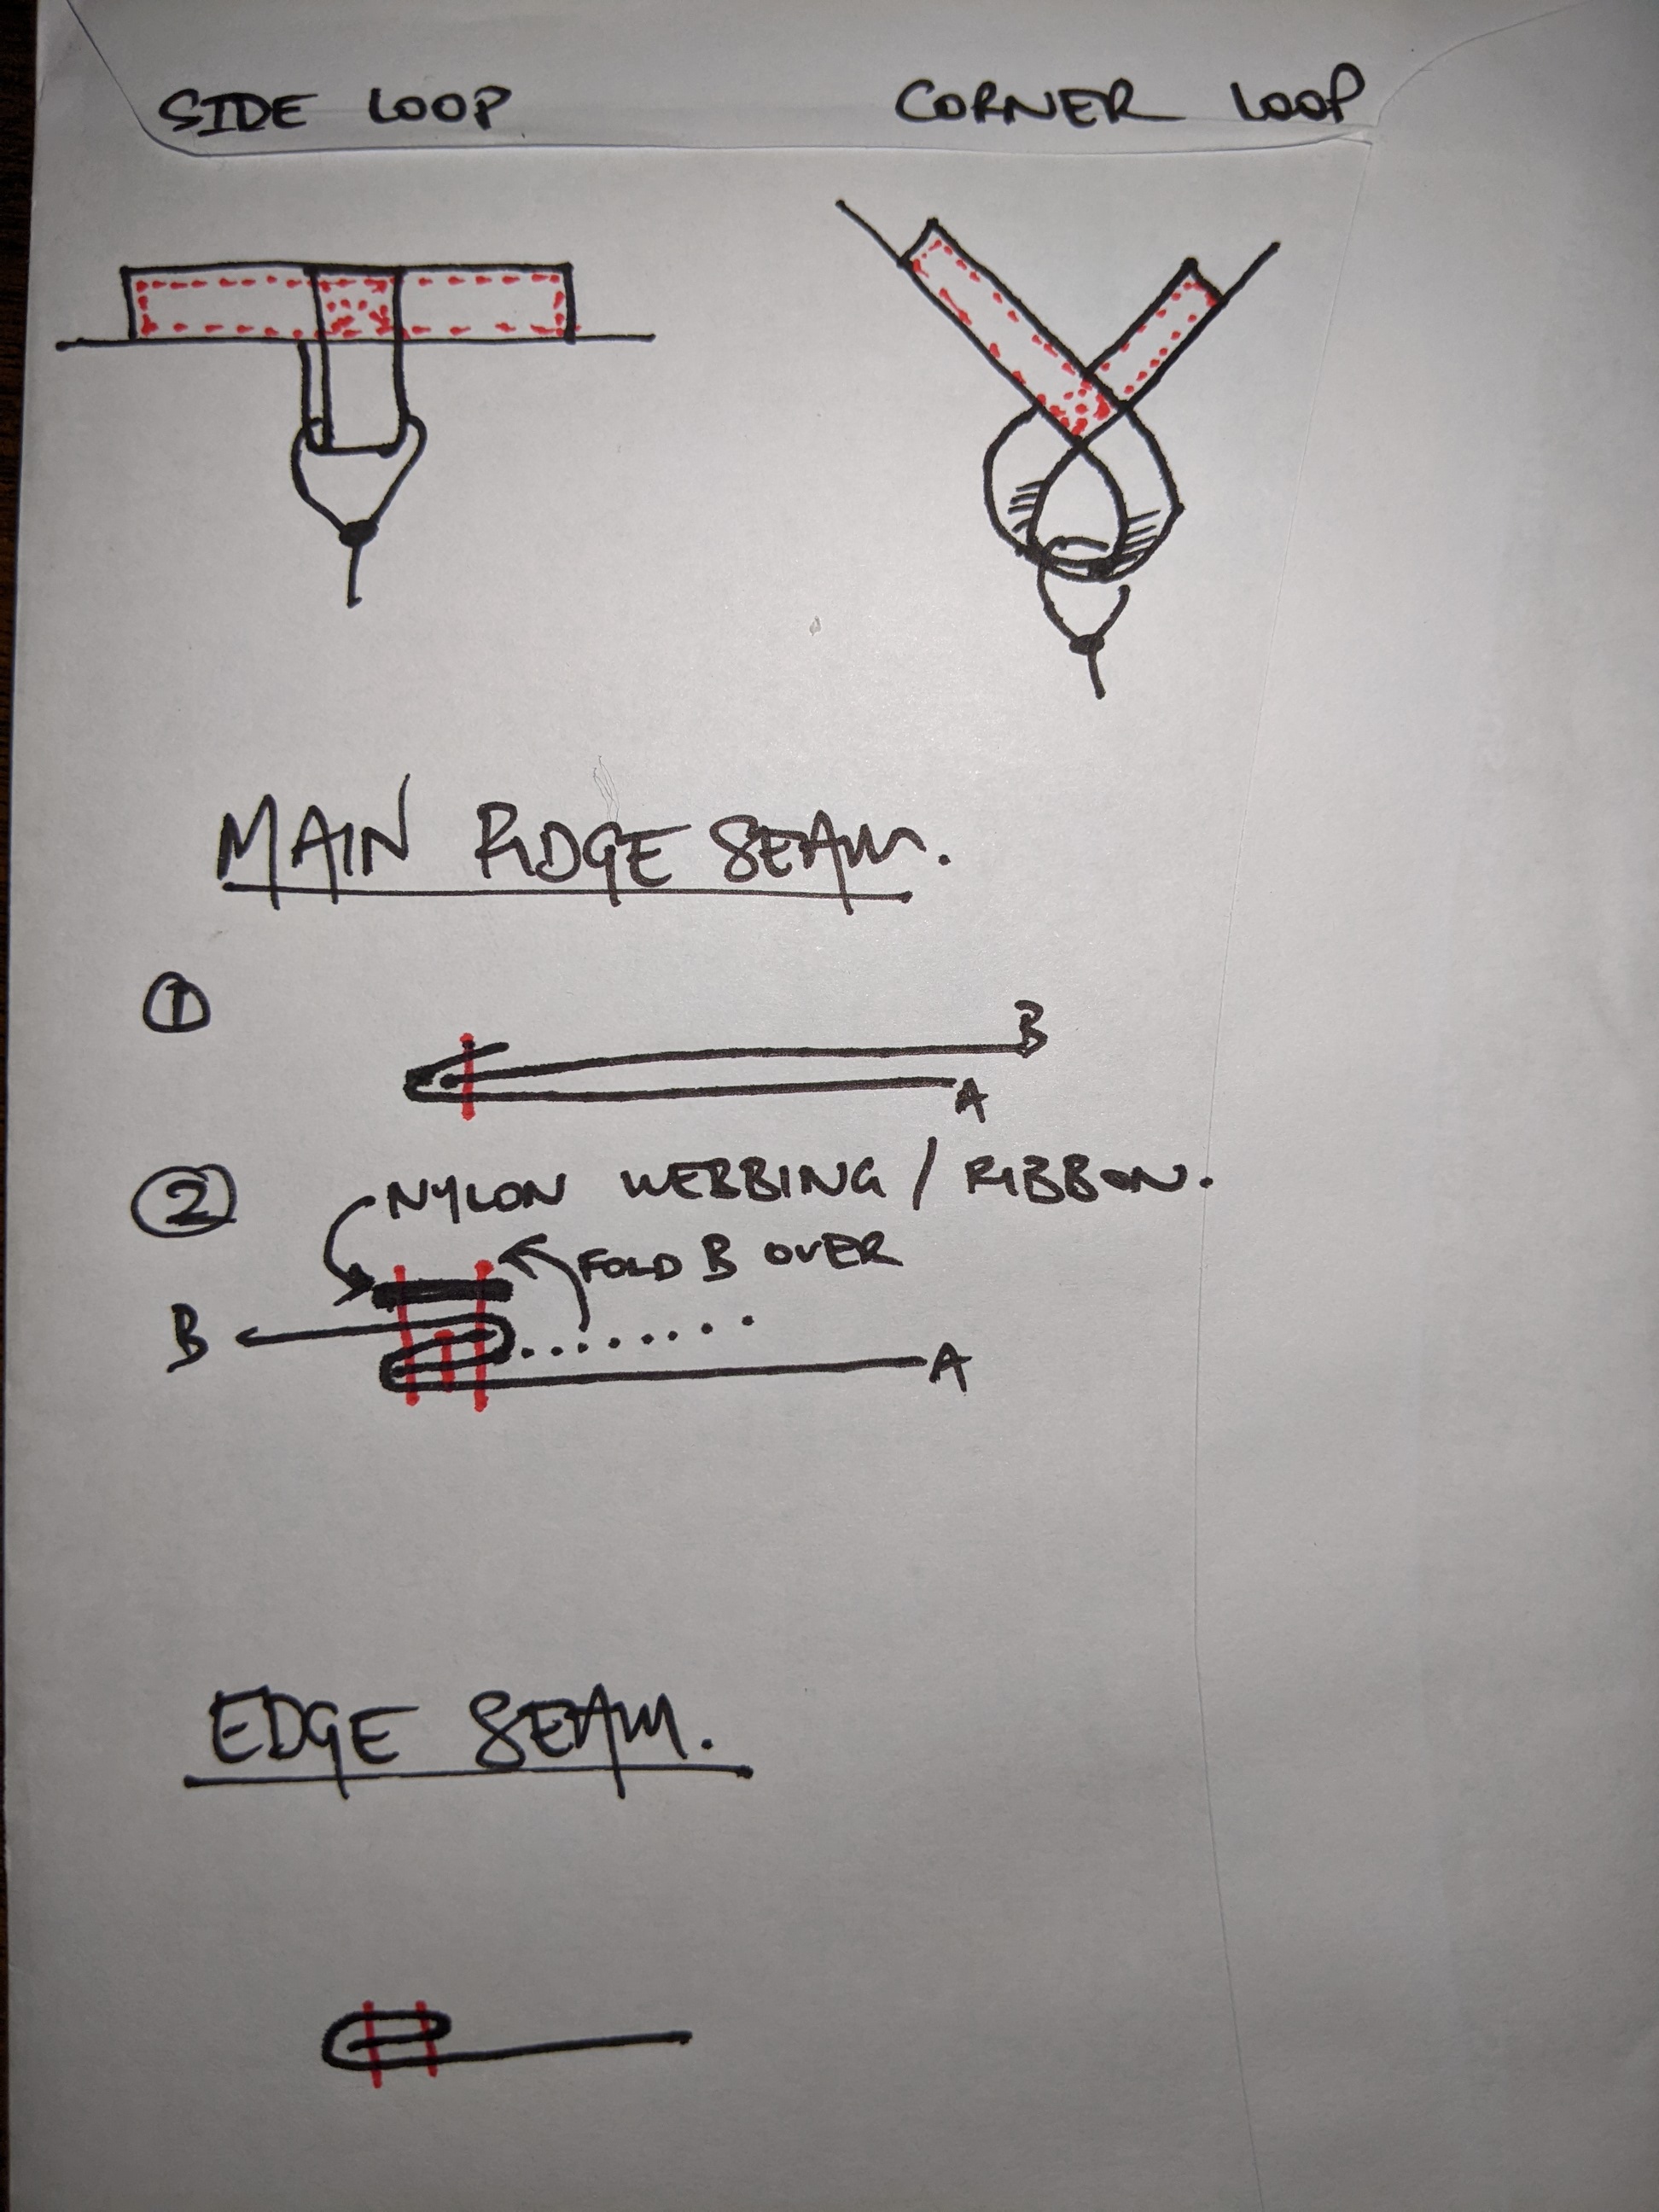
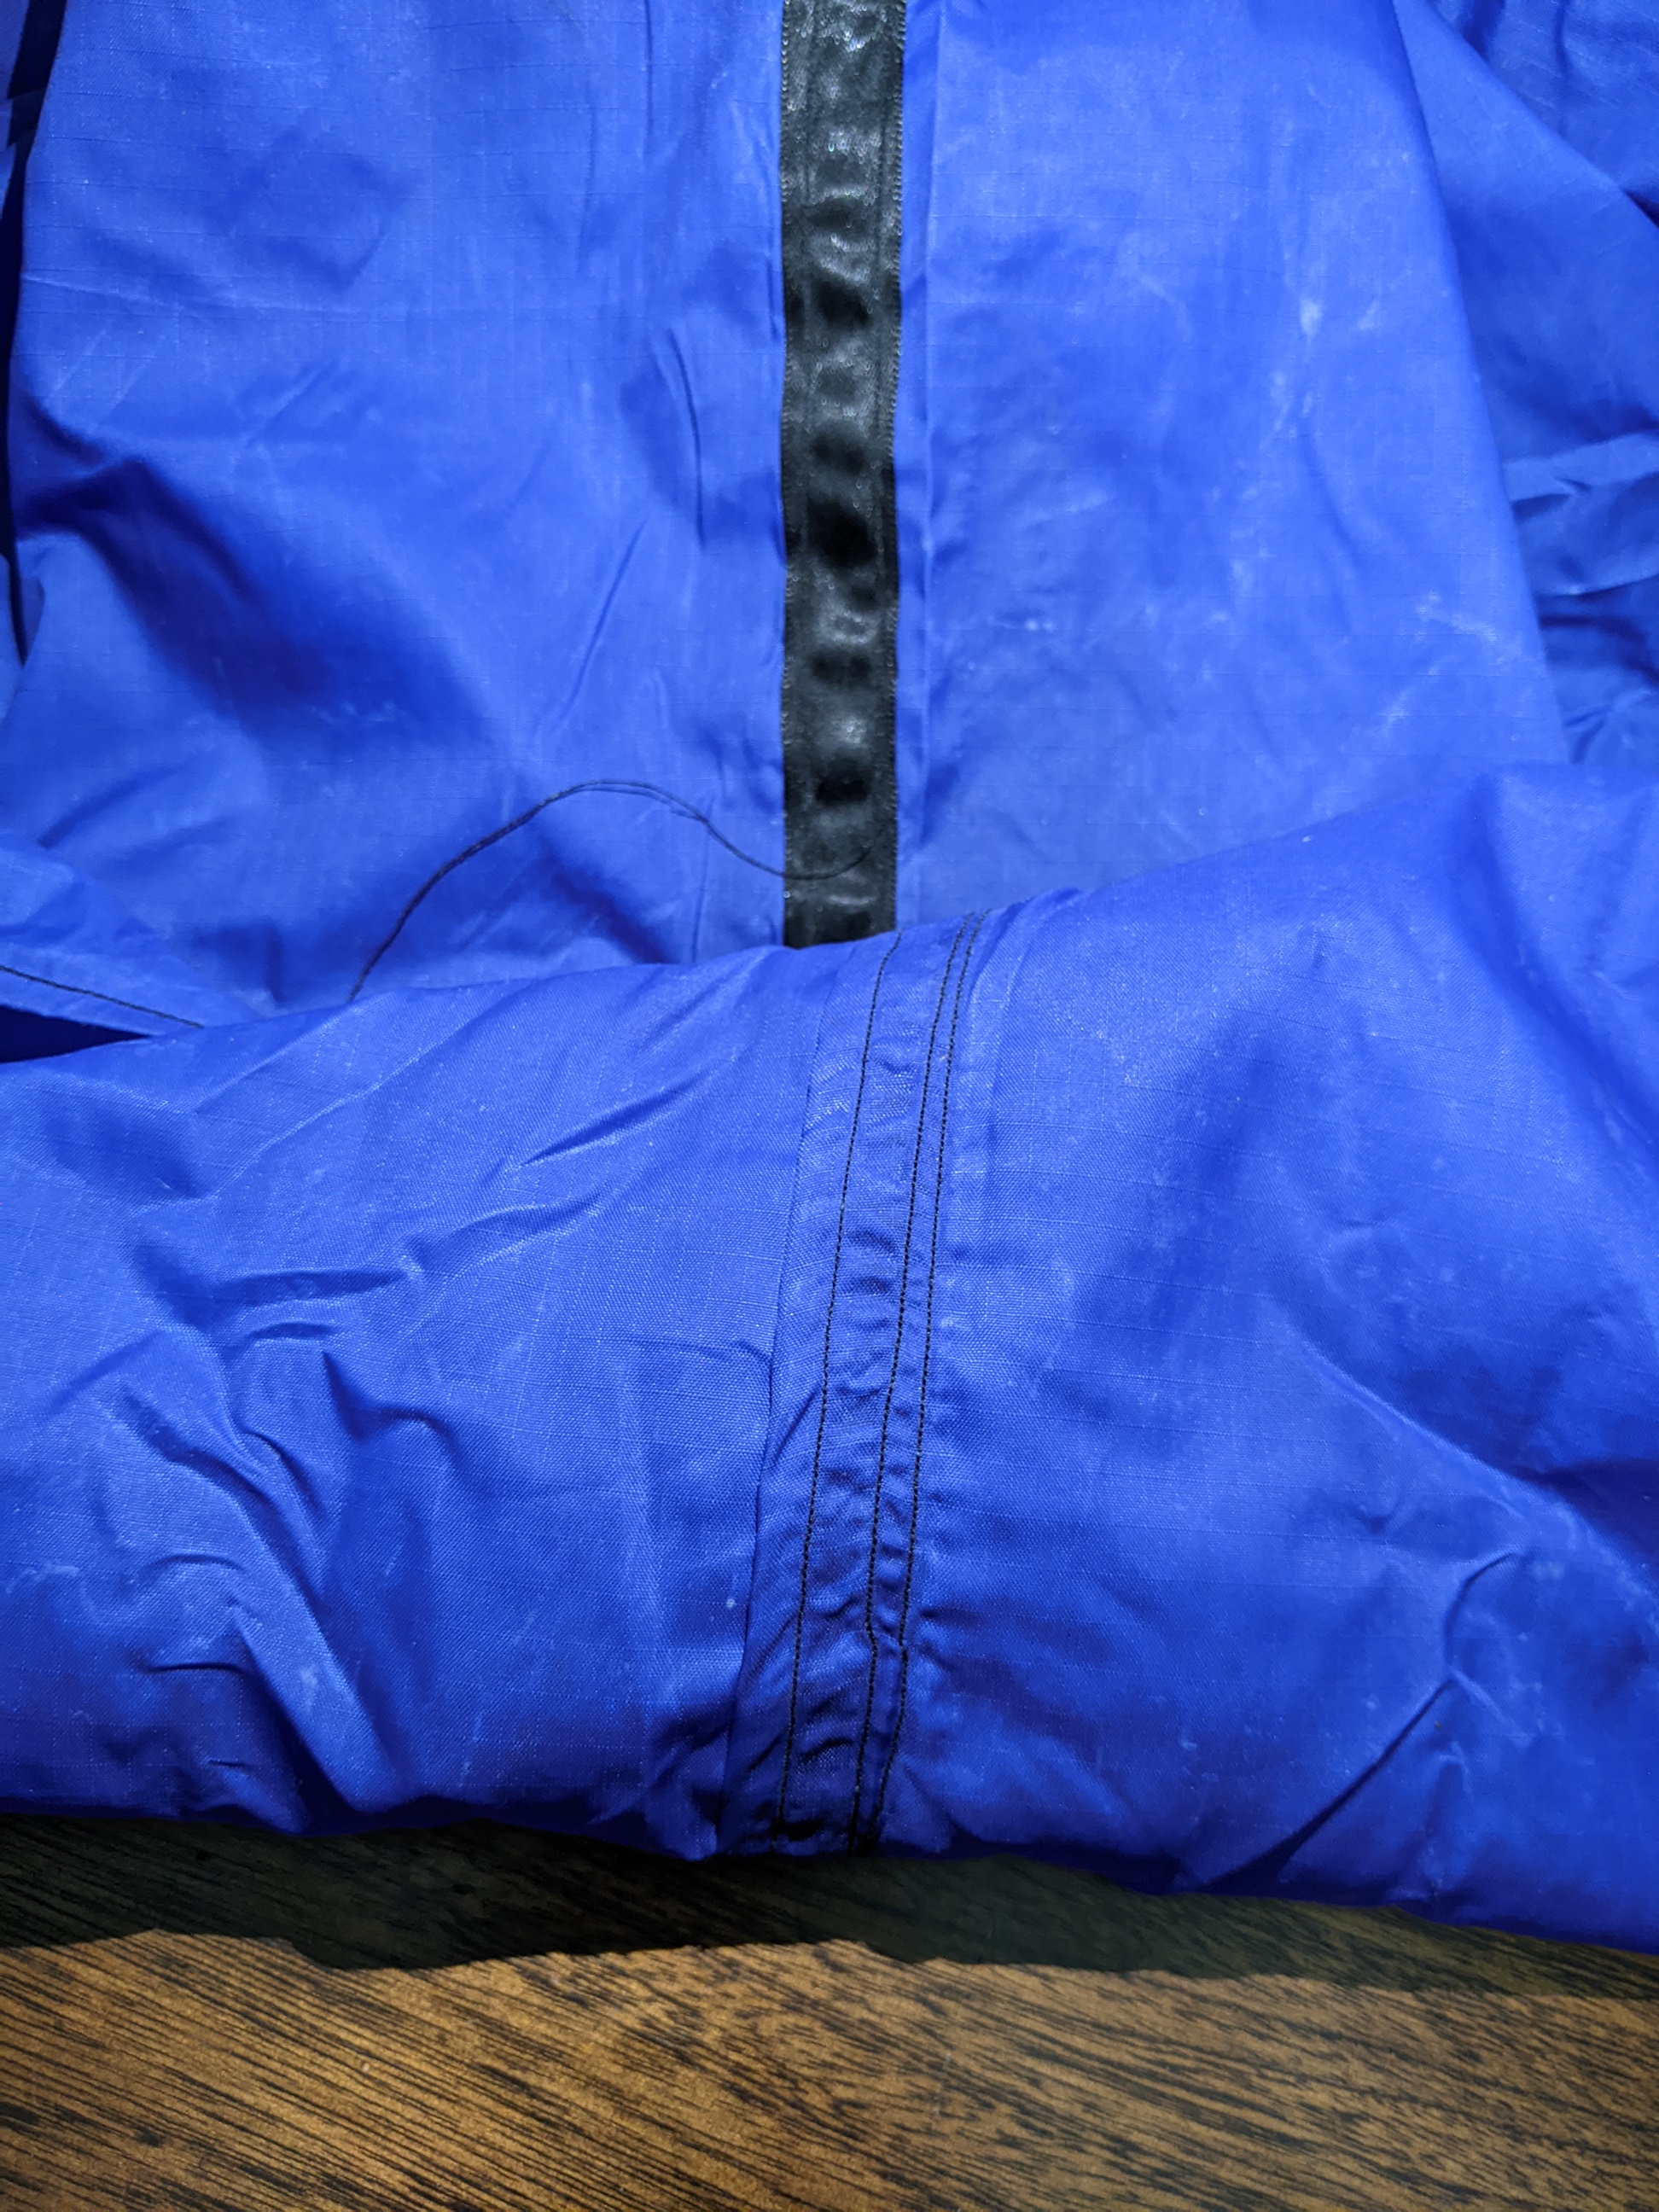
Along the top of the 'Z', laid the nylon ribbon, then stitched all the way along on both sides, far enough in from the edge to pick up all layers of fabric below. Tried to draw it - hope it makes sense.
At each end, I had planned to make a loop from the ribbon along the ridge, but forgot, so stitched on a loop of the webbing, which was probably harder wearing anyway.
(Loops at end of ridge line)
(Top and bottom of main ridge)
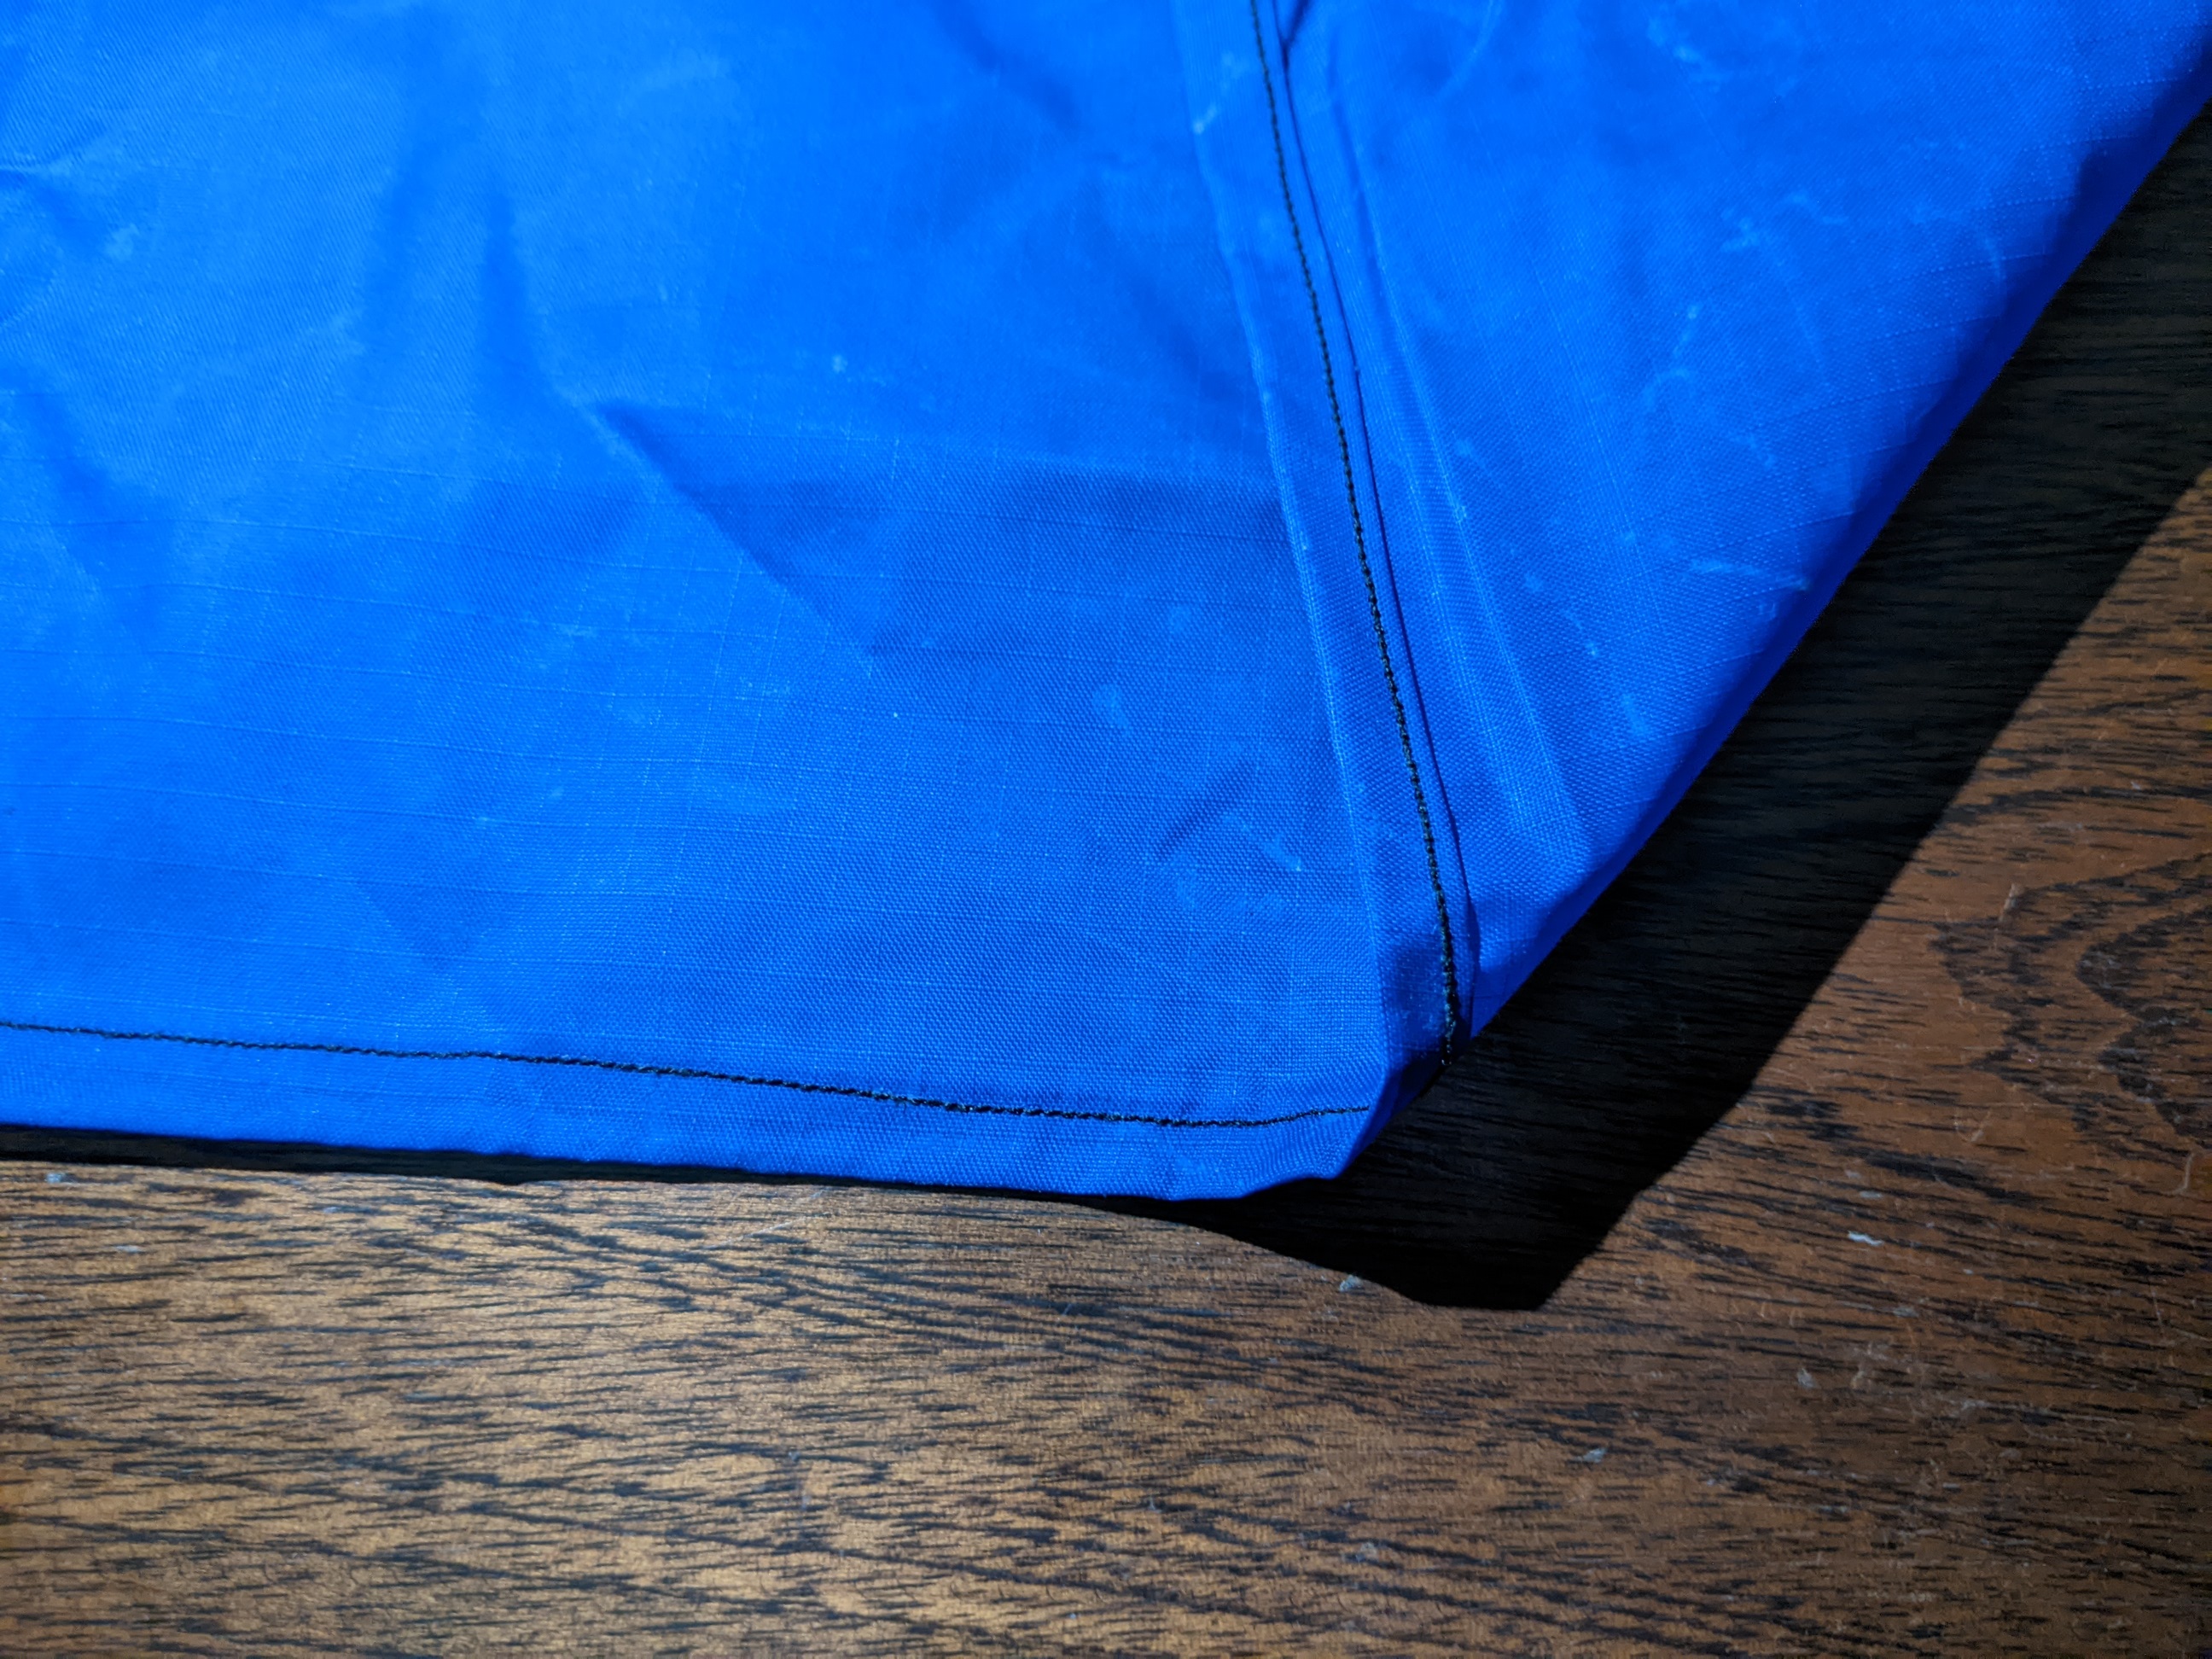
For the outer edges, I ironed a crease, then folded that and ironed it again, so the edge was inside the second fold. Then stitched around this, picking up both folds - apparently supposed tondontwo lines of stitching, but CBF. I had ordered some fancy sewing foot that did this automatically, but it didn't turn up in time.
(Top and bottom of edge seam)
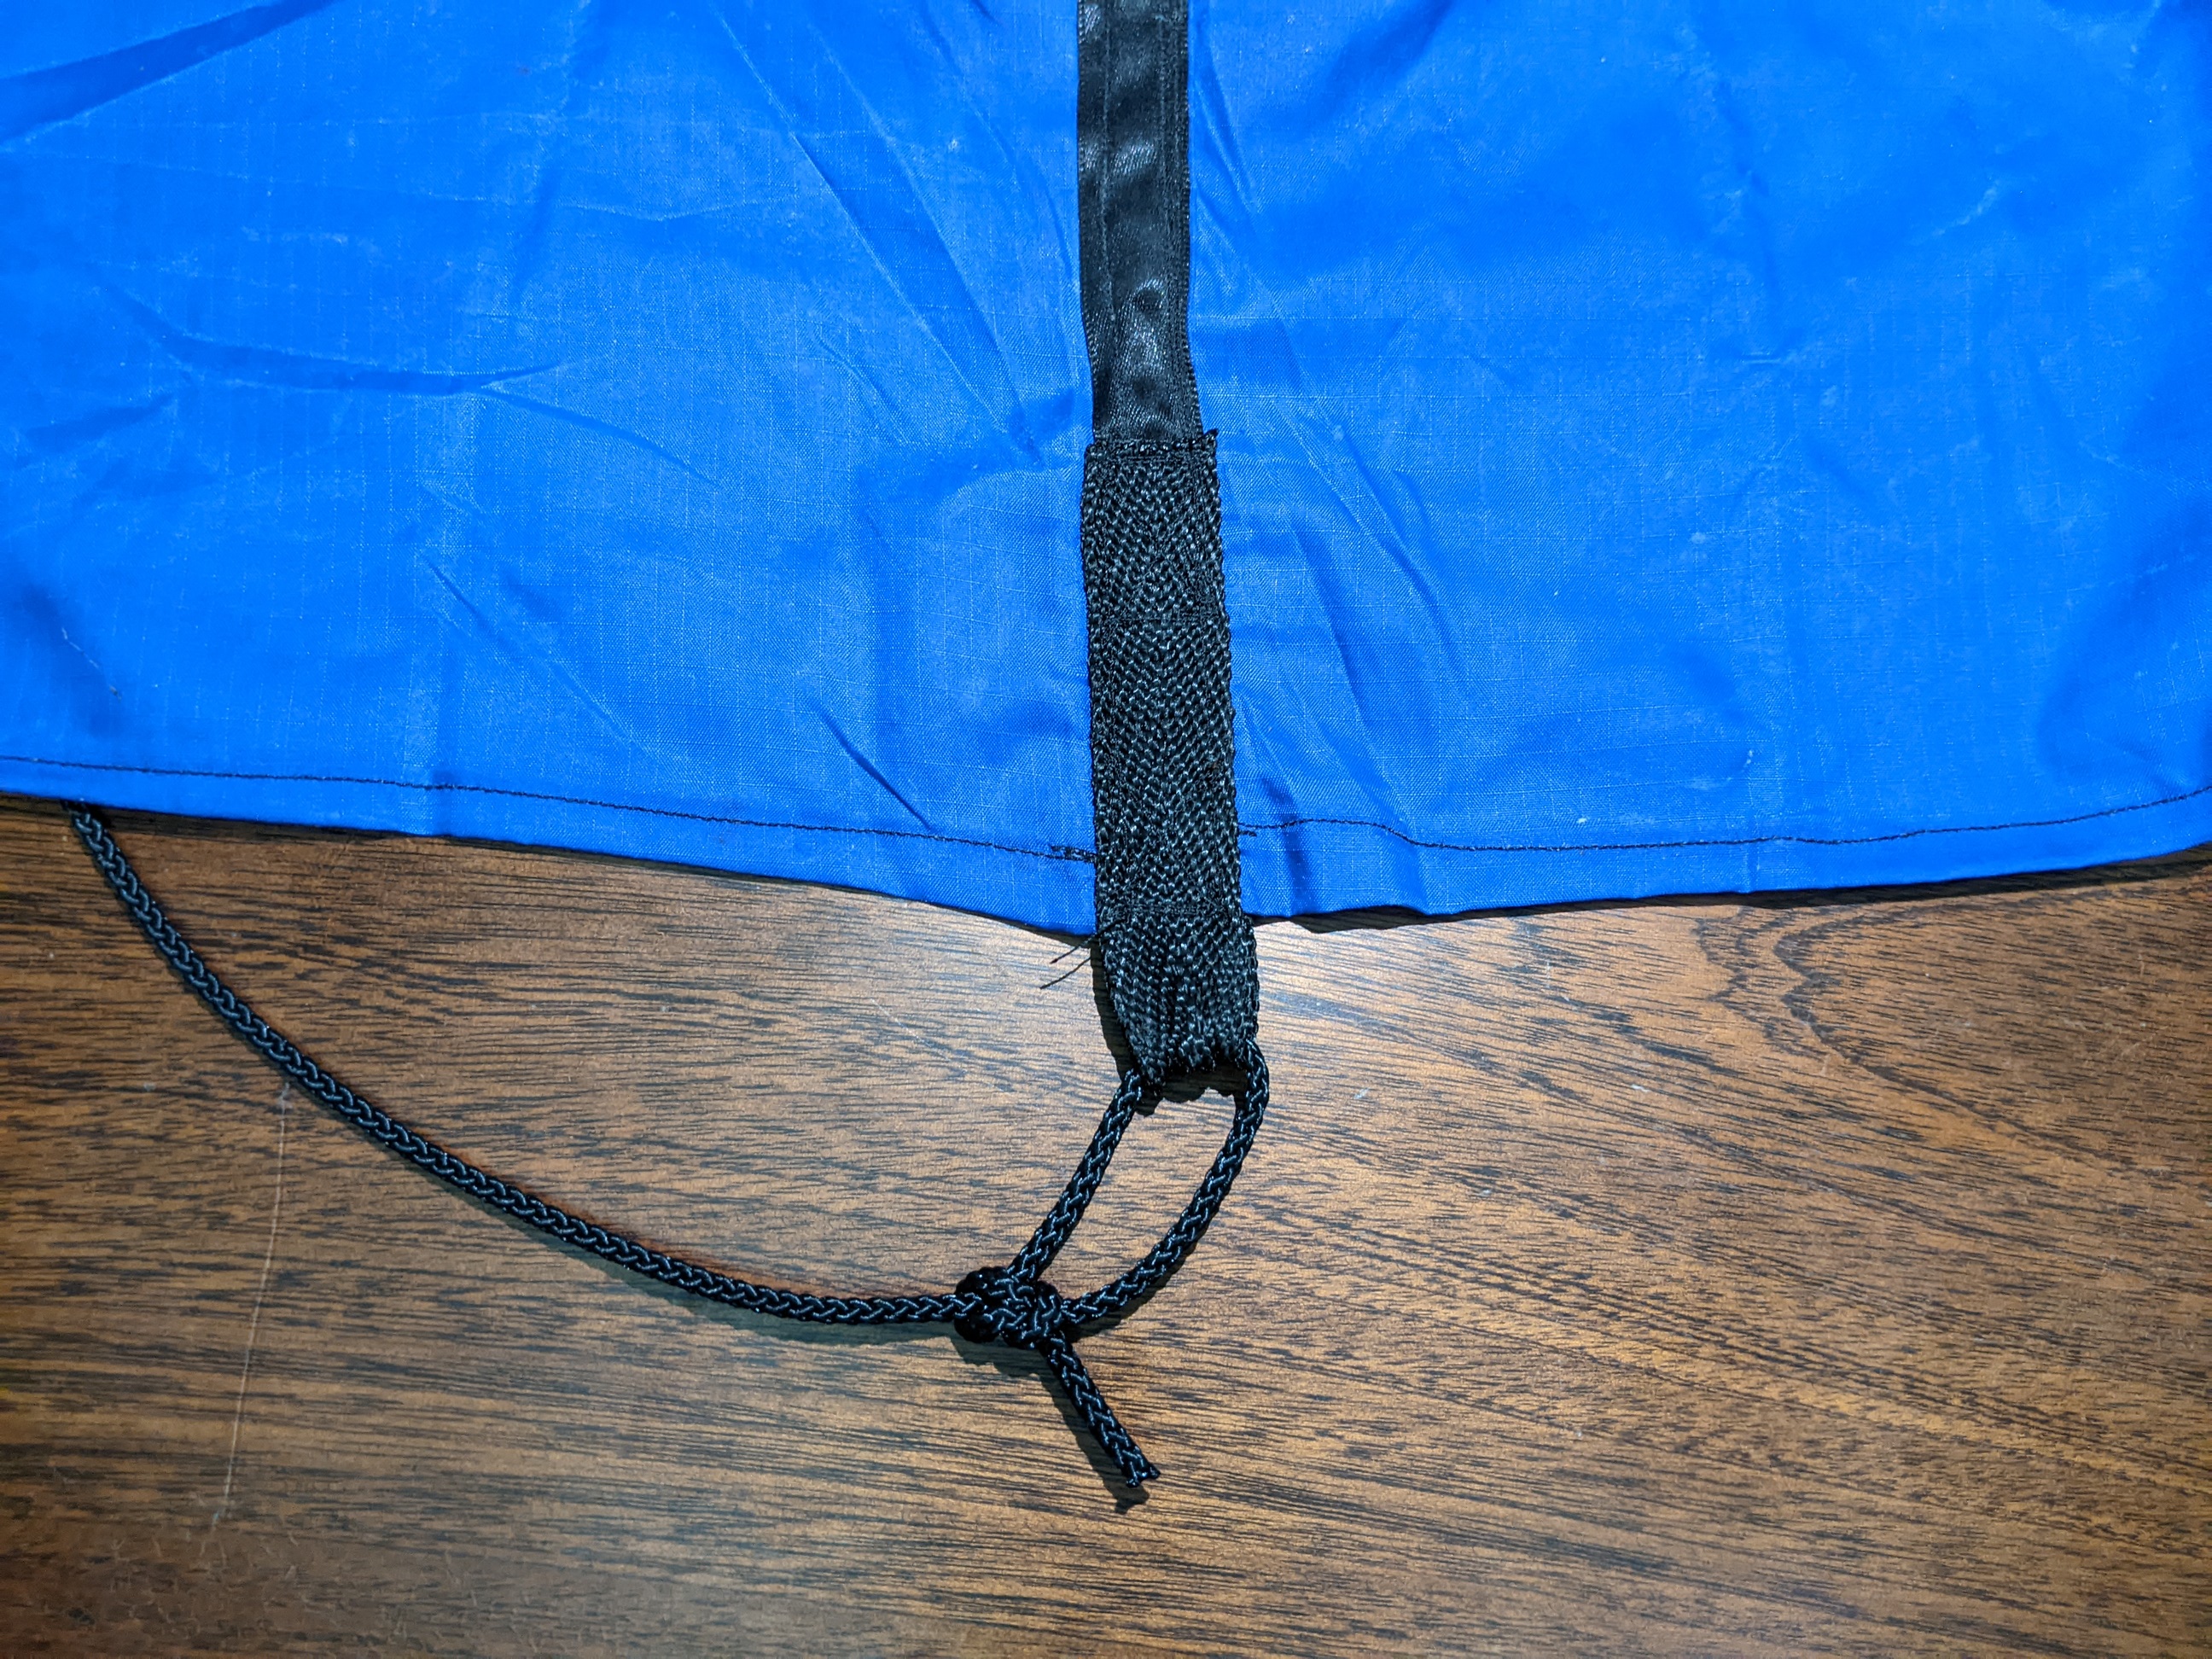
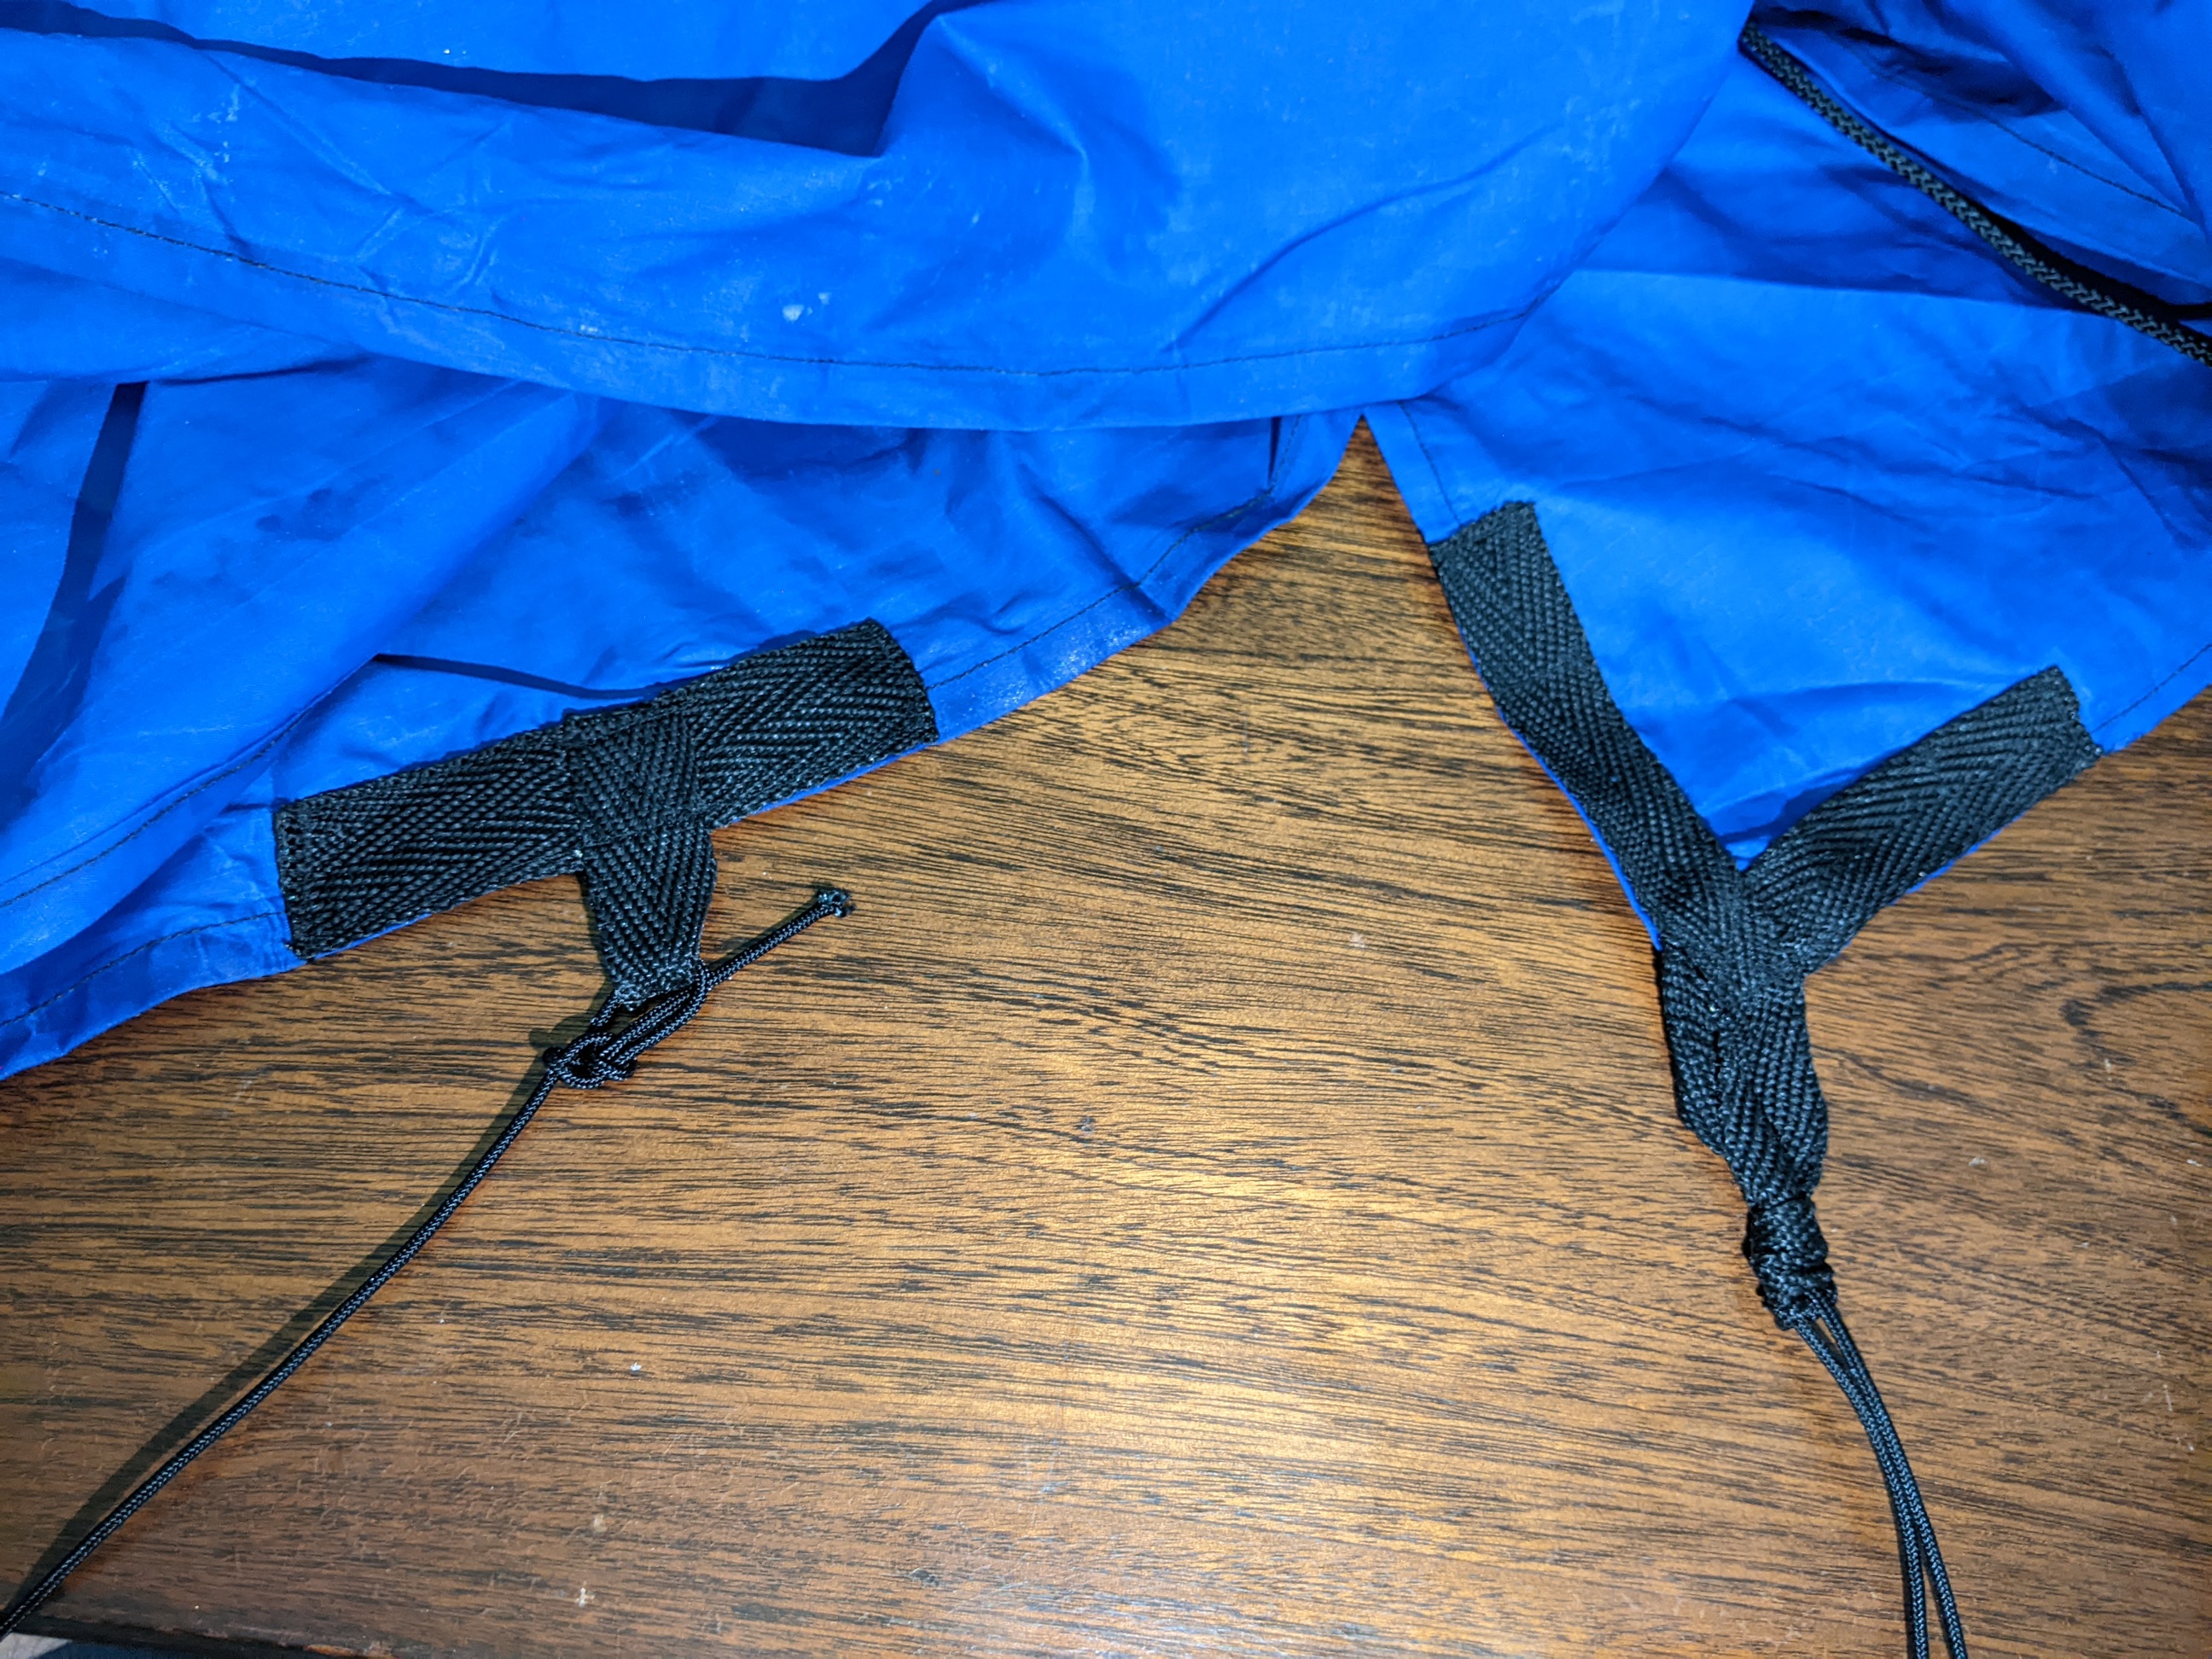
On all four corners, stitched a loop as photographed below, and then stitched loops at the centre of each side, and one in the middle of the ridge line - this is handy to tie the centre up to a branch to give the ridge a bit more strength when it's windy.
(Corner and side loops)
Then to each end of the main ridge, tied a 2-3m length of the 2.5 or 3.0mm cord, and to each of the three loops along each side, tied 2-3m of the 2.0mm cord.
Lastly, to waterproof it, mixed half a tube of silicon to 2L of turps in a bucket till there was no lumps of silicon left in the mixture. Then just dunked it in and mixed it about till it all had a good coating. Hung it up to dry, and left it for a couple of days in the sun. The turps all evaporated off, and just leaves the coating of silicon on the nylon... and my fecking concrete. Plenty of super-serious pullhards on YouTube showing how to do it - this guy was the only one that didn't make me want to stab my eyeballs out while watching it: https://m.youtube.com/watch?v=-UTZPllgqSc
Lessons:
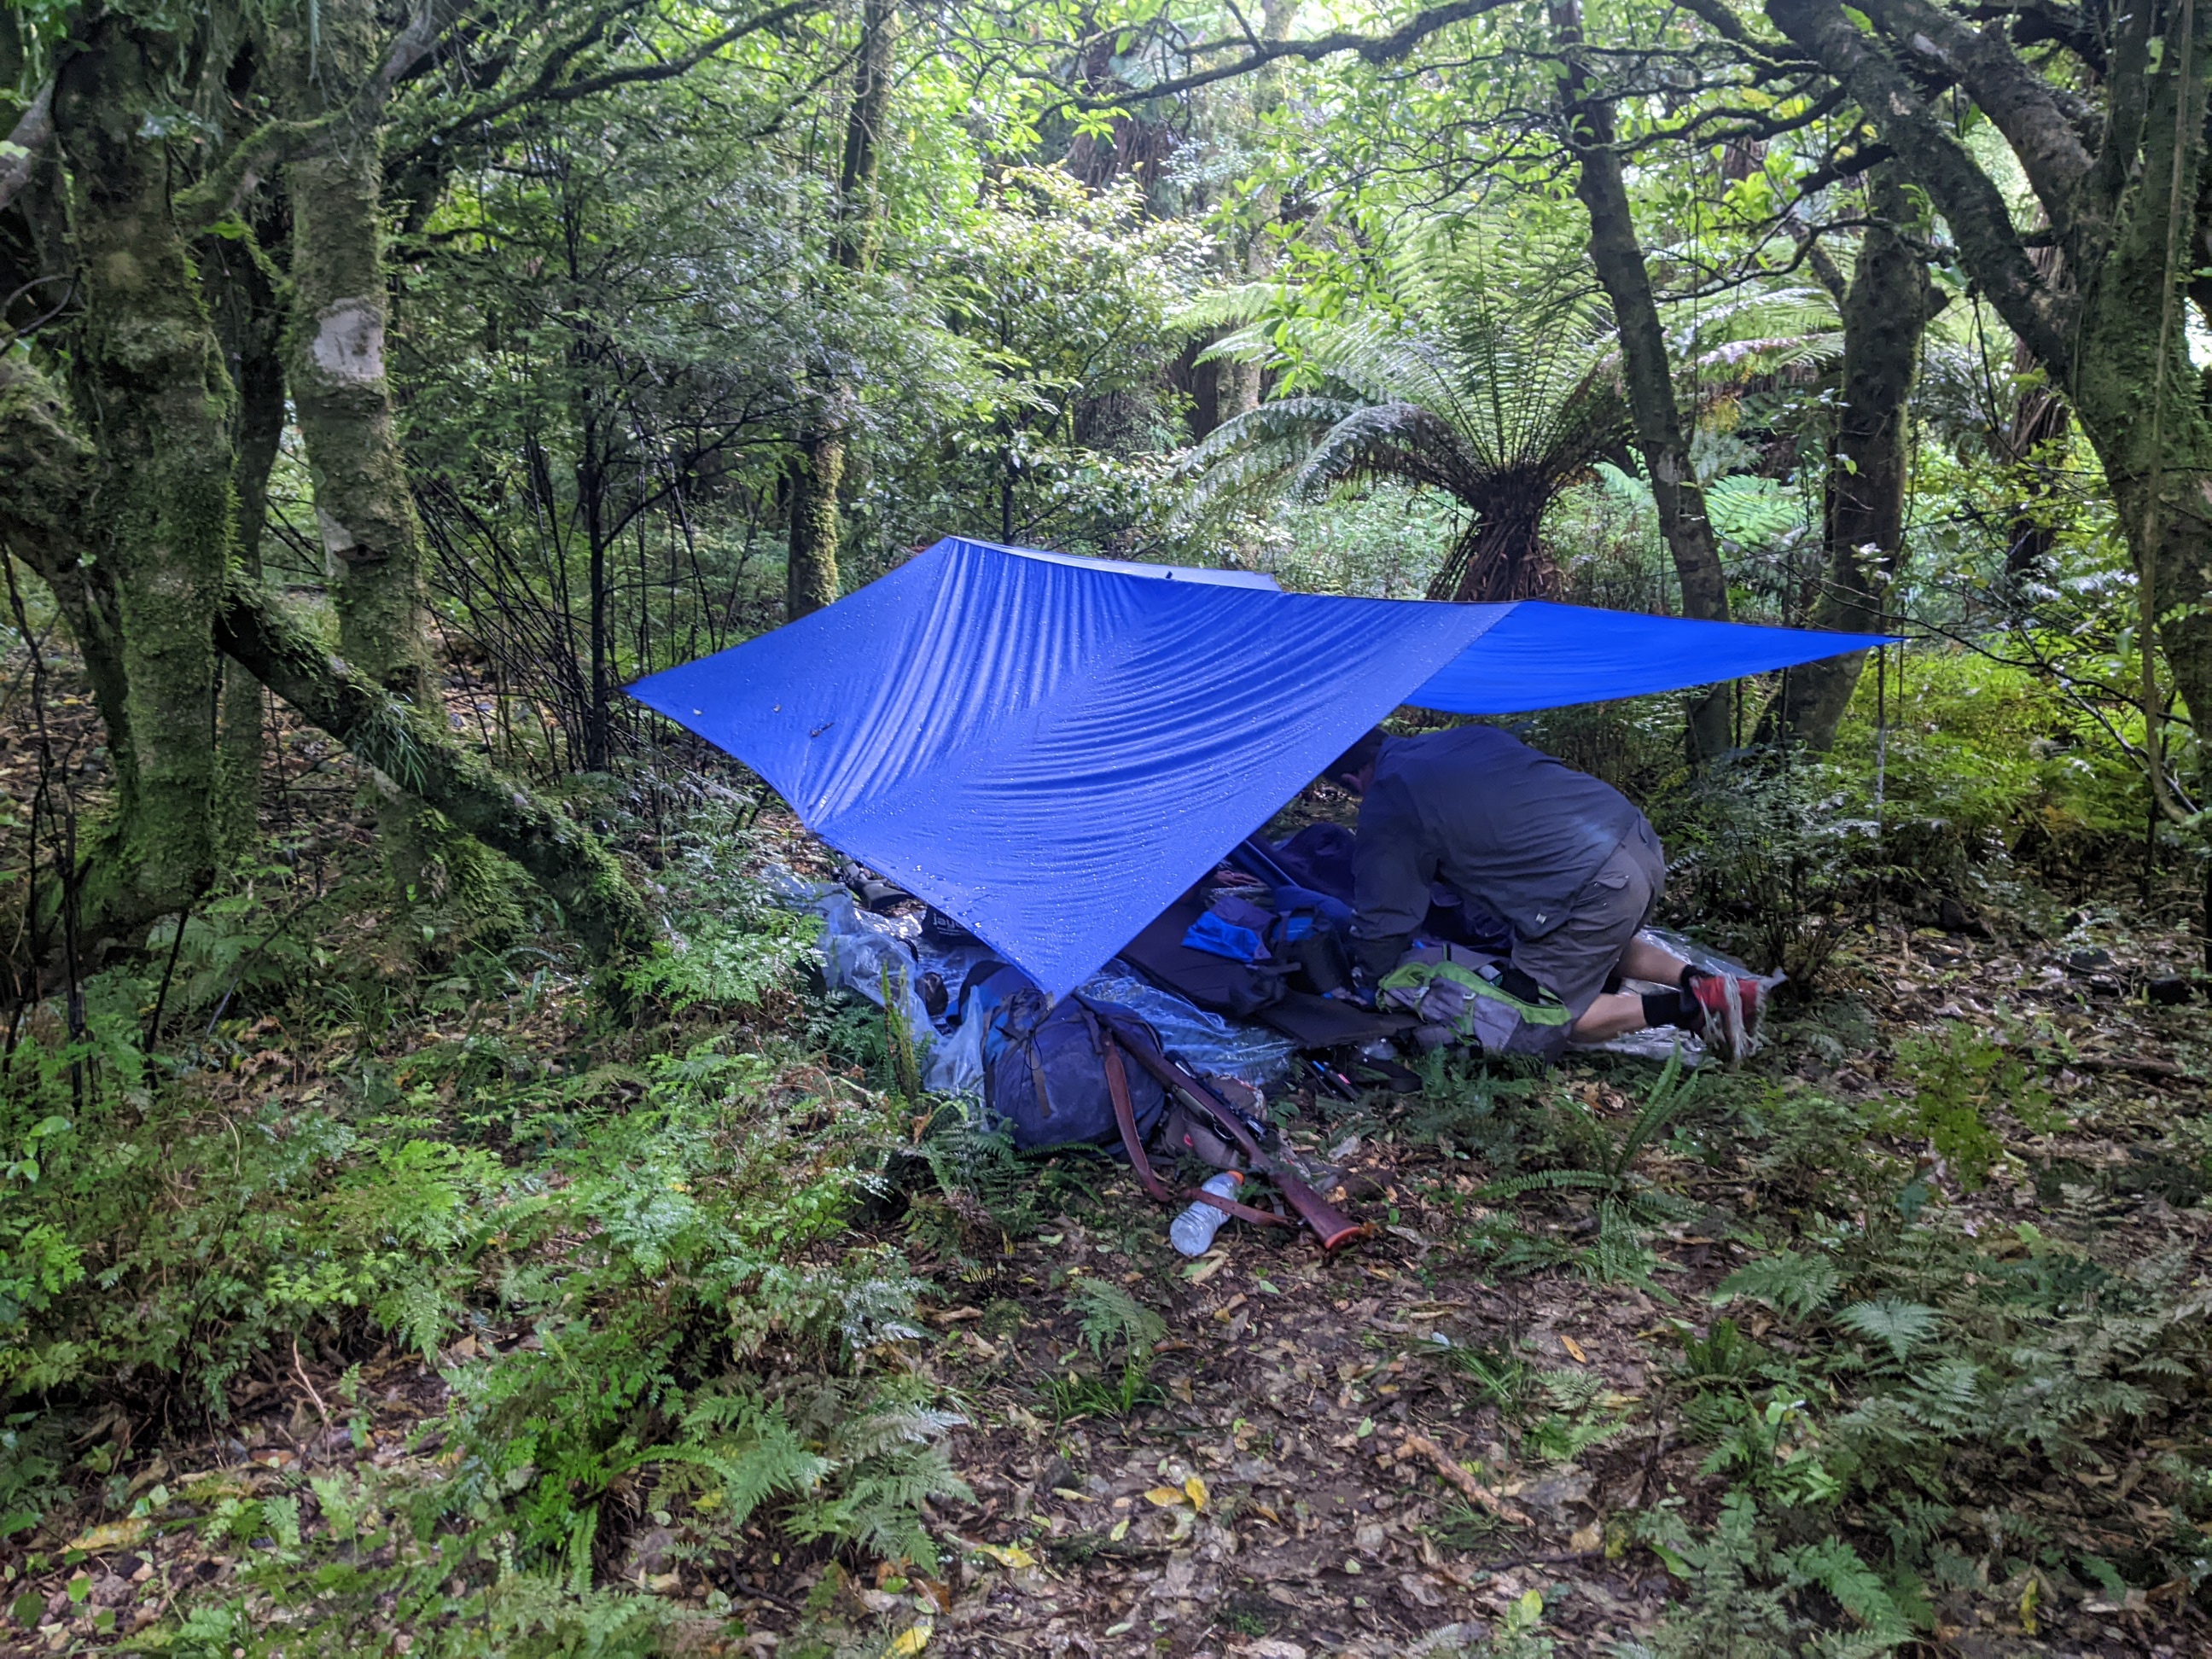
- ripstop nylon is slippery as a greased eel swimming in baby oil, and in sewing the main ridge seam, I didn't quite get it straight, so there's a saggy bit on one side of the ridgline (pic below). Next time, was going to sew the ridgline with a slight concave shape to prevent this. Apparently you can also do concave cuts on the side edges to help with tension. I could prob still do this, but can't be arsed redoing the side loops.
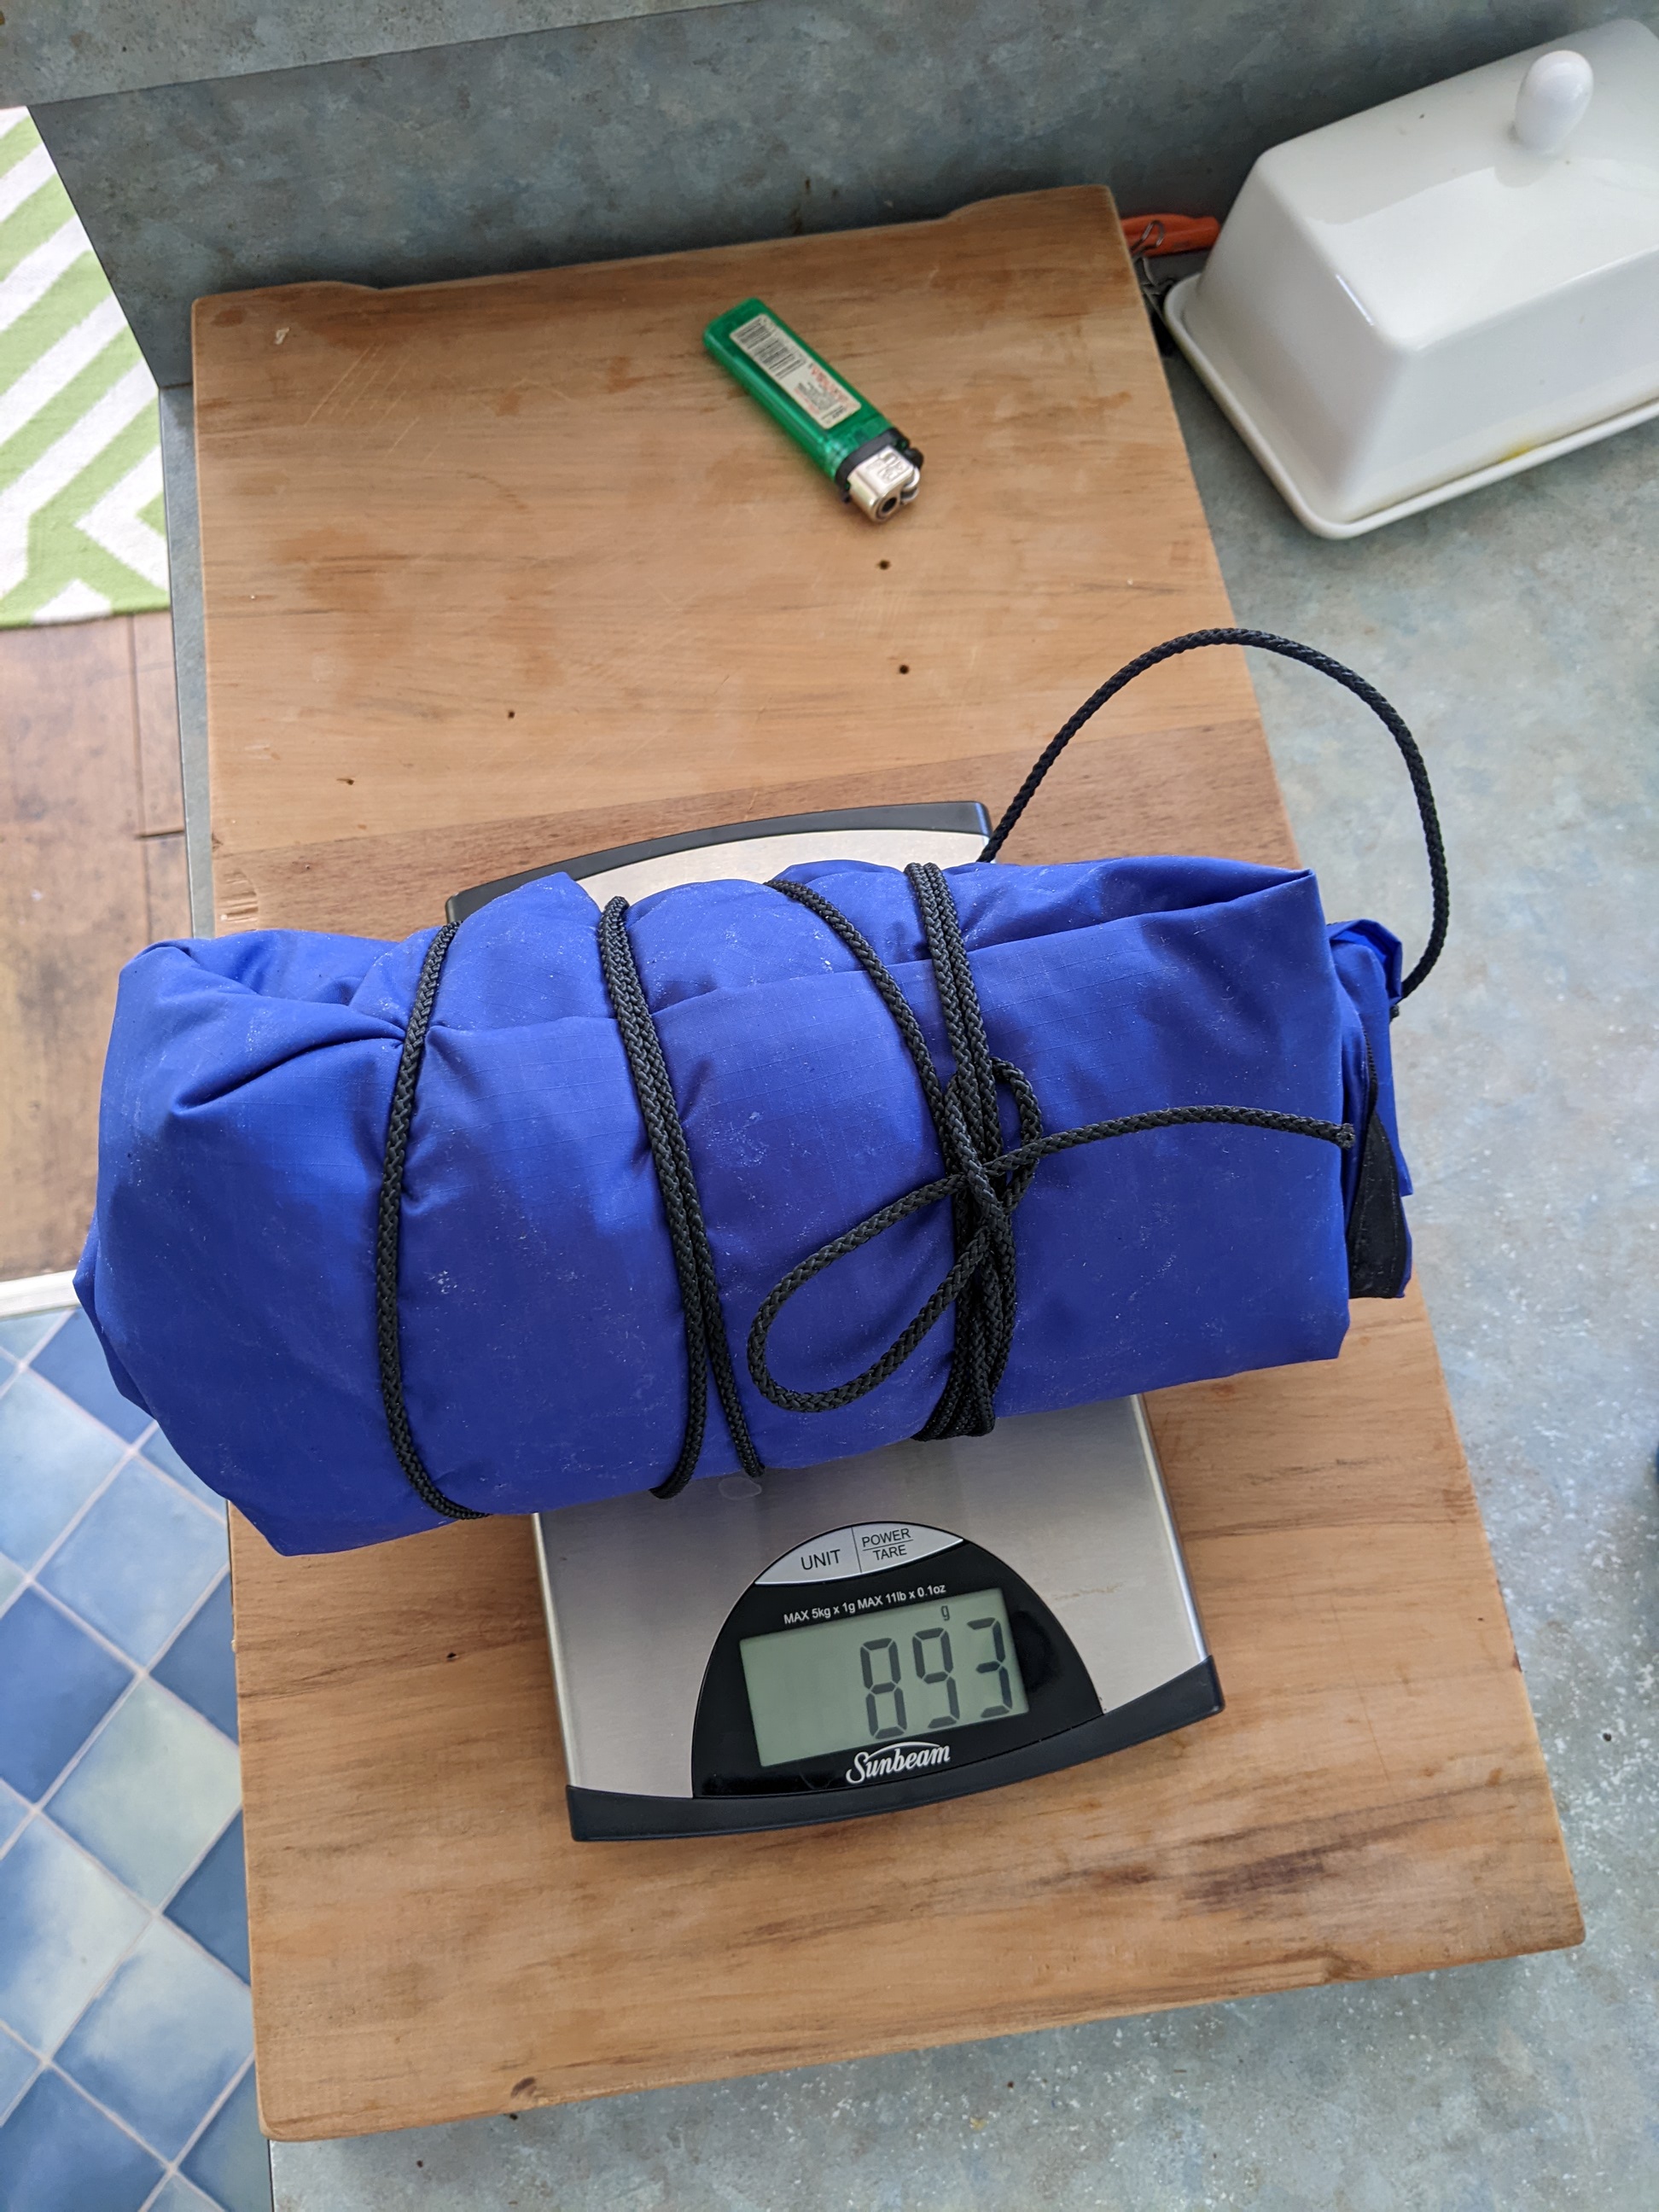
(See it's tight along the bottom, but still some sag along the centre. Also see the beautiful Model 70 Featherweight. 270 rearing to go! This slept 3ppl across with room for packs above our heads)
- the silicon thing worked pretty well. Slight whiff of turps, but not too bad. It rained pretty heavily the first night it got used, and with heavy drops of branches/leaves above, you would get a very, very fine mist come through, so ideally needed another coat, will do that with a paintbrush to ensure a good coating.
- if I calculated my time, not sure I save that much money, but wanted something big enough for 2-3 people plus gear at the end. Also handy as a second layer over tents and bigger vestibule for longer trips.
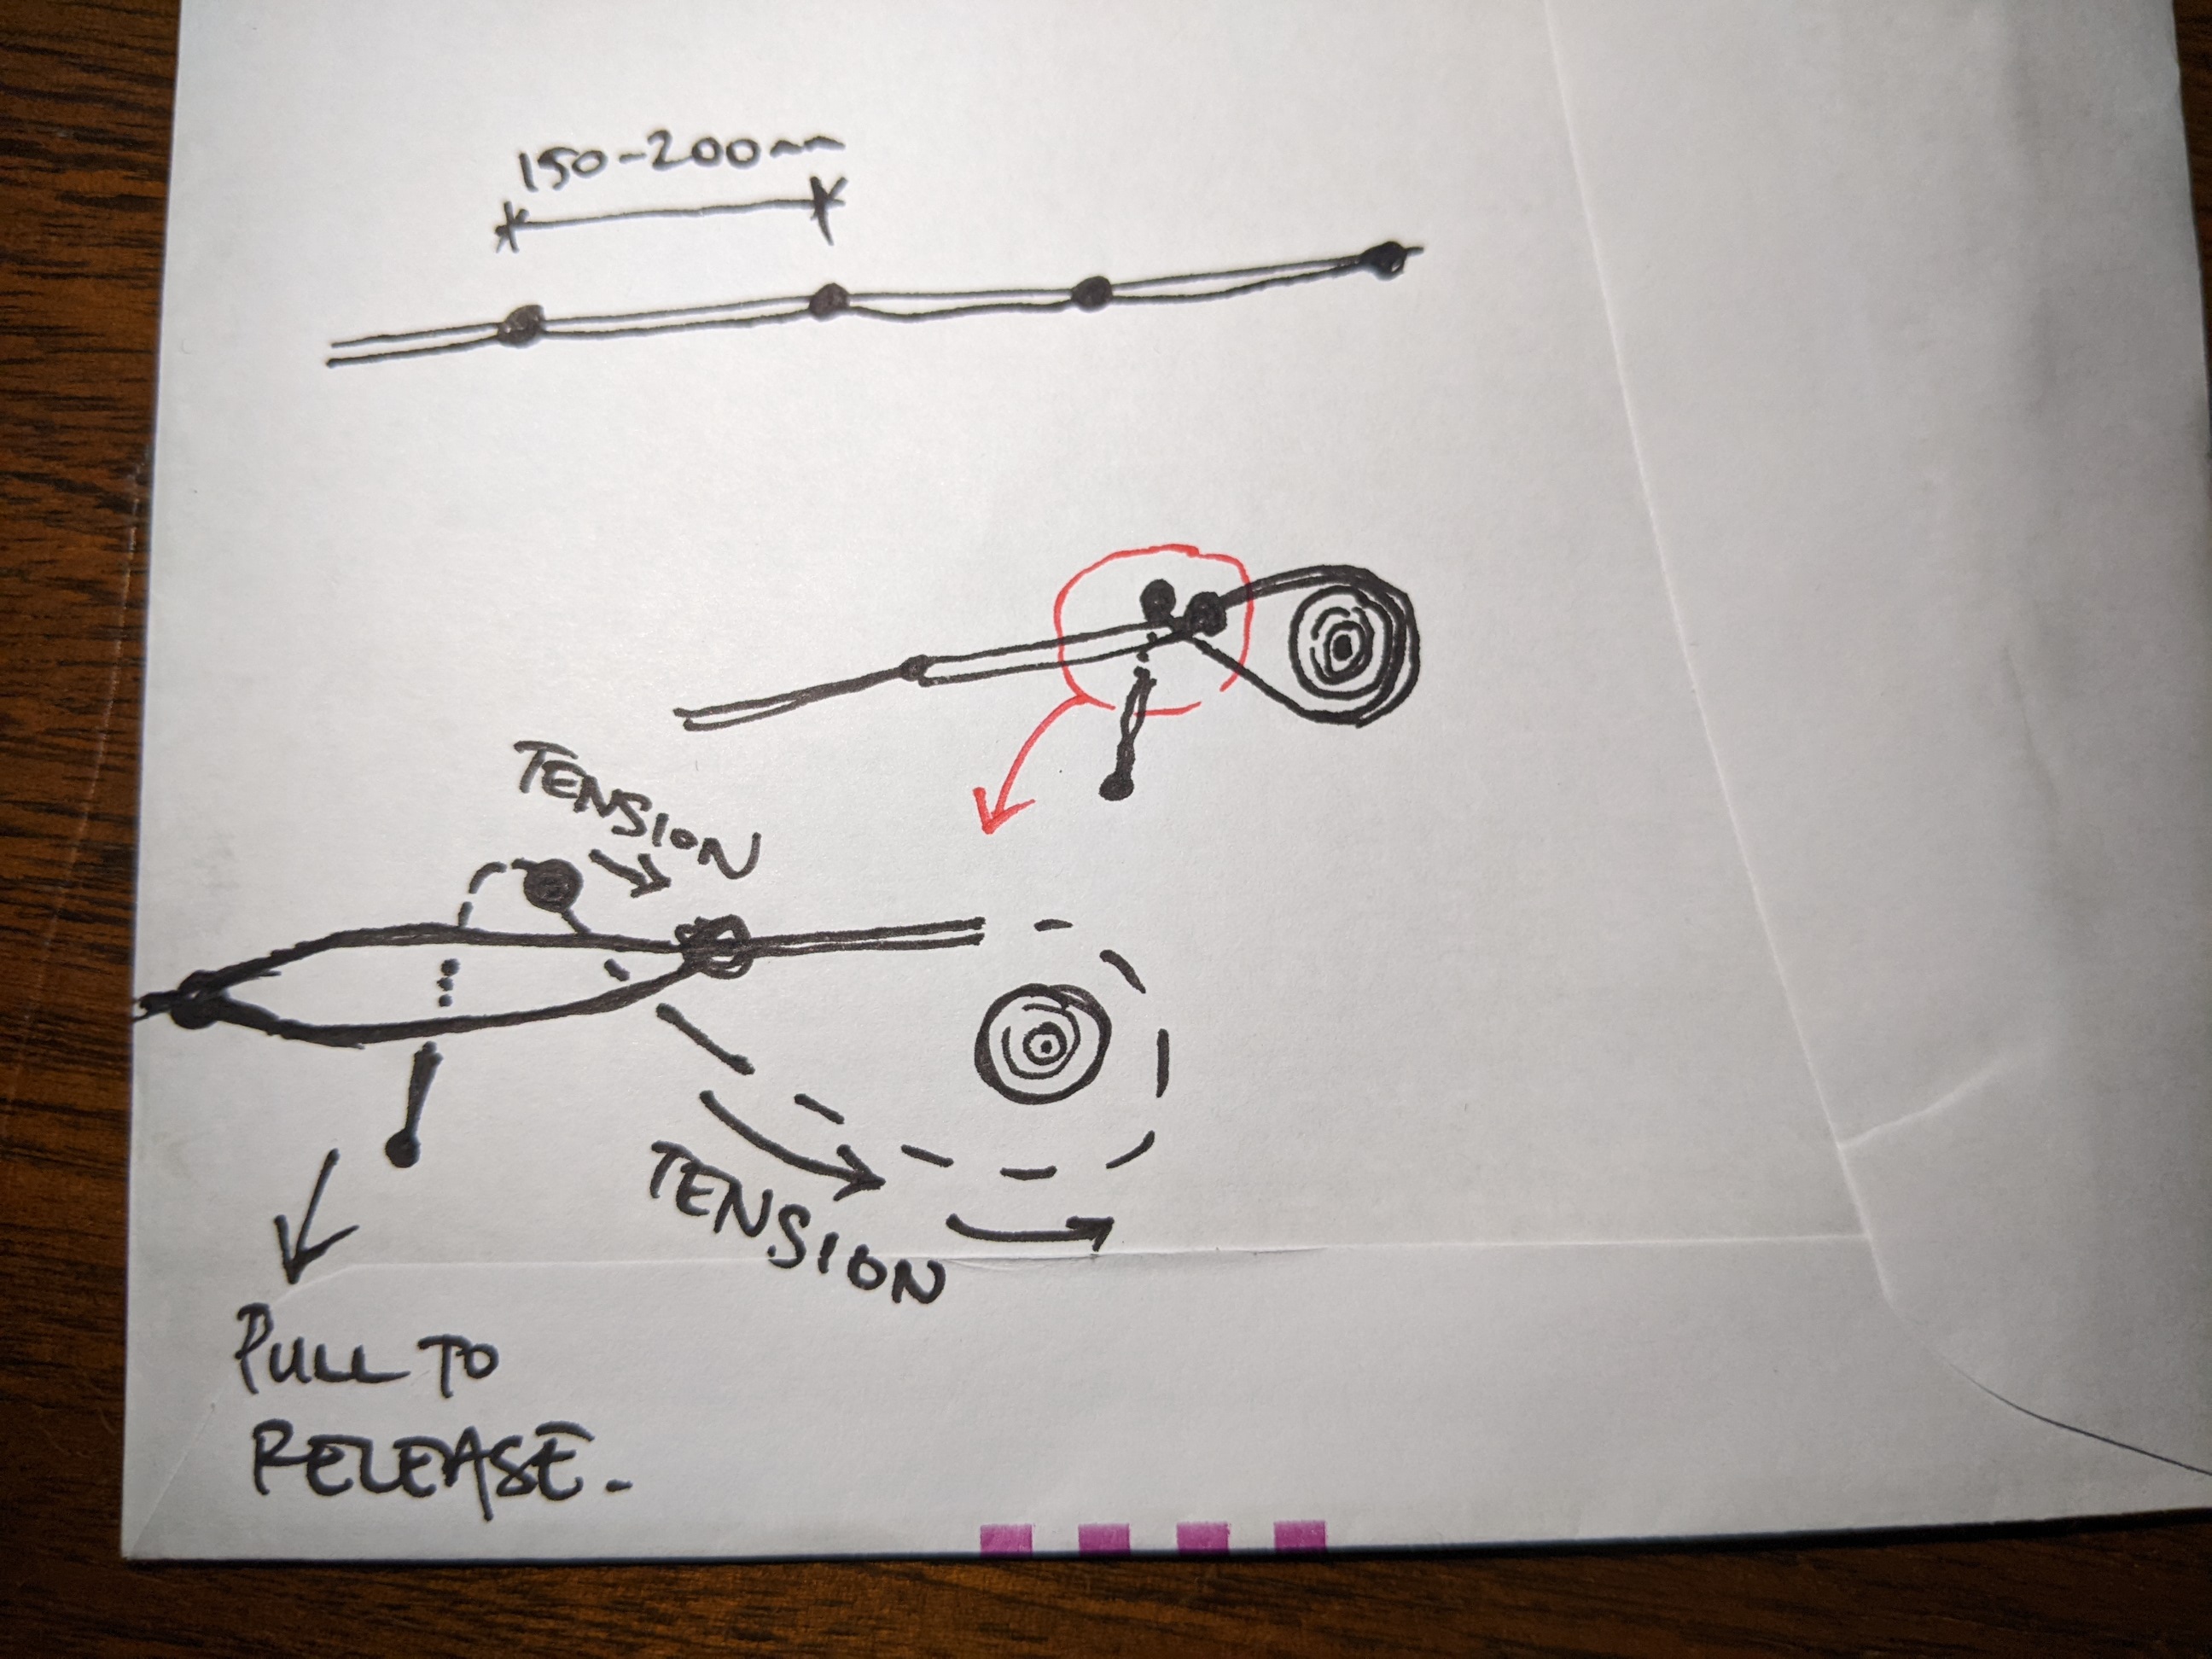
- to tie it up, my Brit basha has doubled up cord with knots every 150-200mm. Used to put the doubled up cord around a tree/branch, put the nearest knot between the nearest two bits of cord, then the tension would slide the knot back to wedge up against the next knot, and be held in place by the tension. To remove it, you just gave a tug on the end, it pulled the knot out, and off you trot. That was an awful explanation, diagram below.
And the least annoying YouTube clip I could find: https://m.youtube.com/watch?v=2pAe1C1YMWo (save yourself some time and either set playback speed to 2x, or just watch from 6'30" to 6'40", and you will see all you need to see) I didn't have enough cord to do that on this one, so just used an Italian Hitch/Munter Hitch, locked off with a looped half hitch.
Most info off internet - it's all be done before! Sing out if anyone is stupi... ummmm... determined enough to try it, and wants any info on what not to do. Worth also noting the last time used a sewing machine was in Form 1 at Manual in Ashvegas, so it was all pretty rough.
Tune in to tomorrow's episode, where we'll feature a home made fleece pikau!
Welcome guest, is this your first visit? Create Account now to join.
Welcome to the NZ Hunting and Shooting Forums.
Search Forums
User Tag List
+ Reply to Thread
Results 1 to 11 of 11
 24Likes
Thread: Home made gear
-
03-04-2023, 01:03 AM #1Member

- Join Date
- Oct 2021
- Location
- Wellington
- Posts
- 554
Home made gear
bunji likes this.
-
-
03-04-2023, 08:12 AM #2Member

- Join Date
- Nov 2014
- Location
- Tasman
- Posts
- 847
Great project very informative and interesting knots! Well done.
-
03-04-2023, 08:41 AM #3Member

- Join Date
- Jul 2020
- Location
- Central North Island
- Posts
- 5,339
Good stuff.
Just a word from experience... it can be very easy to slow down the feed of material under the foot too much, and have the stitches get too close to each other. That in turn weakens the stitch line and under pressure the material can rip along that line. In ripstop the stitches should be 2-3mm apart.
Its very rewarding being able to make all your own stuff. There are a couple of places that sell end of line fleece, nylon etc etc that can be useful for making your own gear from. Backstreet bargains was one (in Hamilton). Somethin or other Emporium in Whangarei was another
-
03-04-2023, 09:44 AM #4Member

- Join Date
- Feb 2021
- Location
- Christchurch
- Posts
- 304
Wow, very cool. Thanks for sharing! I saw a vid of someone using jungle knots last year, very nifty idea.
-
03-04-2023, 01:31 PM #5Member

- Join Date
- Oct 2021
- Location
- Wellington
- Posts
- 554
Thanks XR500, it is rewarding when it works!
I did wonder about stitch length... Made a 50-50 guess, and evidently I went the wrong way with short stitch length ha ha! Great to know if there is a next time though, thank you!
Yeah I found a place in Petone like that, but a little too late. Fabric Clearance Shed I think it was. Got some fleece material for the pikau though.bunji likes this.
-
03-04-2023, 01:41 PM #6Member

- Join Date
- Oct 2021
- Location
- Wellington
- Posts
- 554
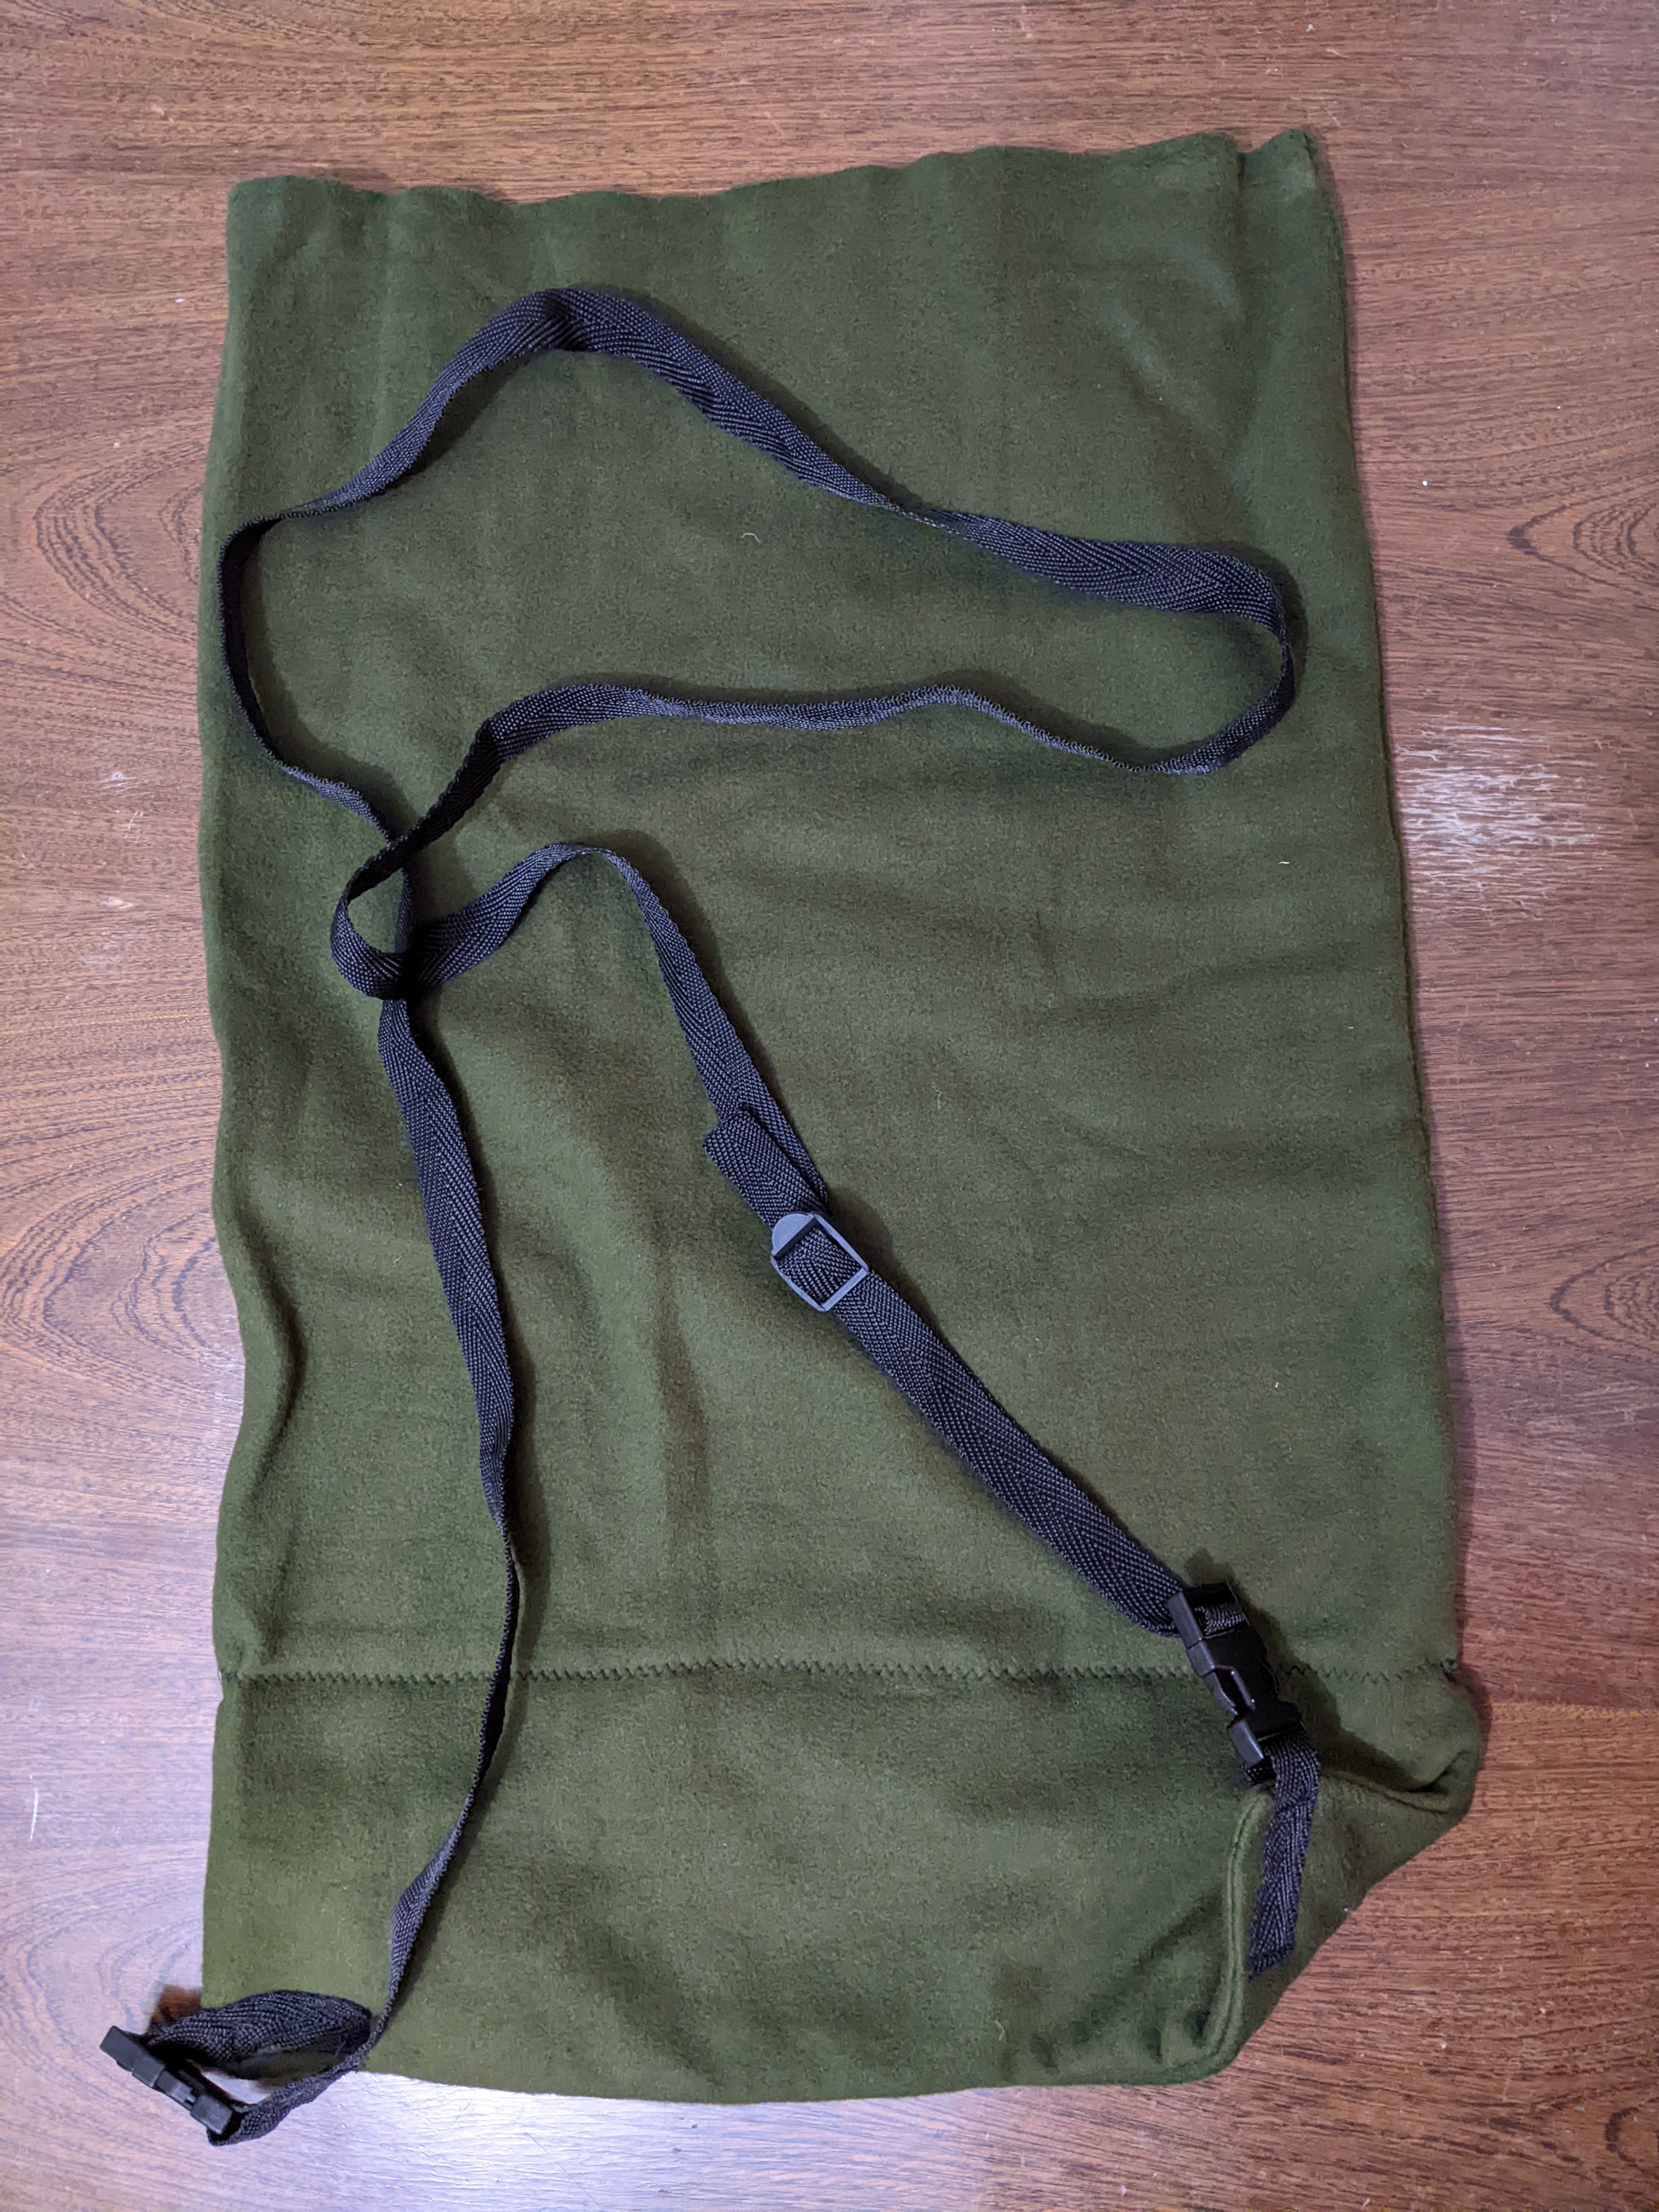
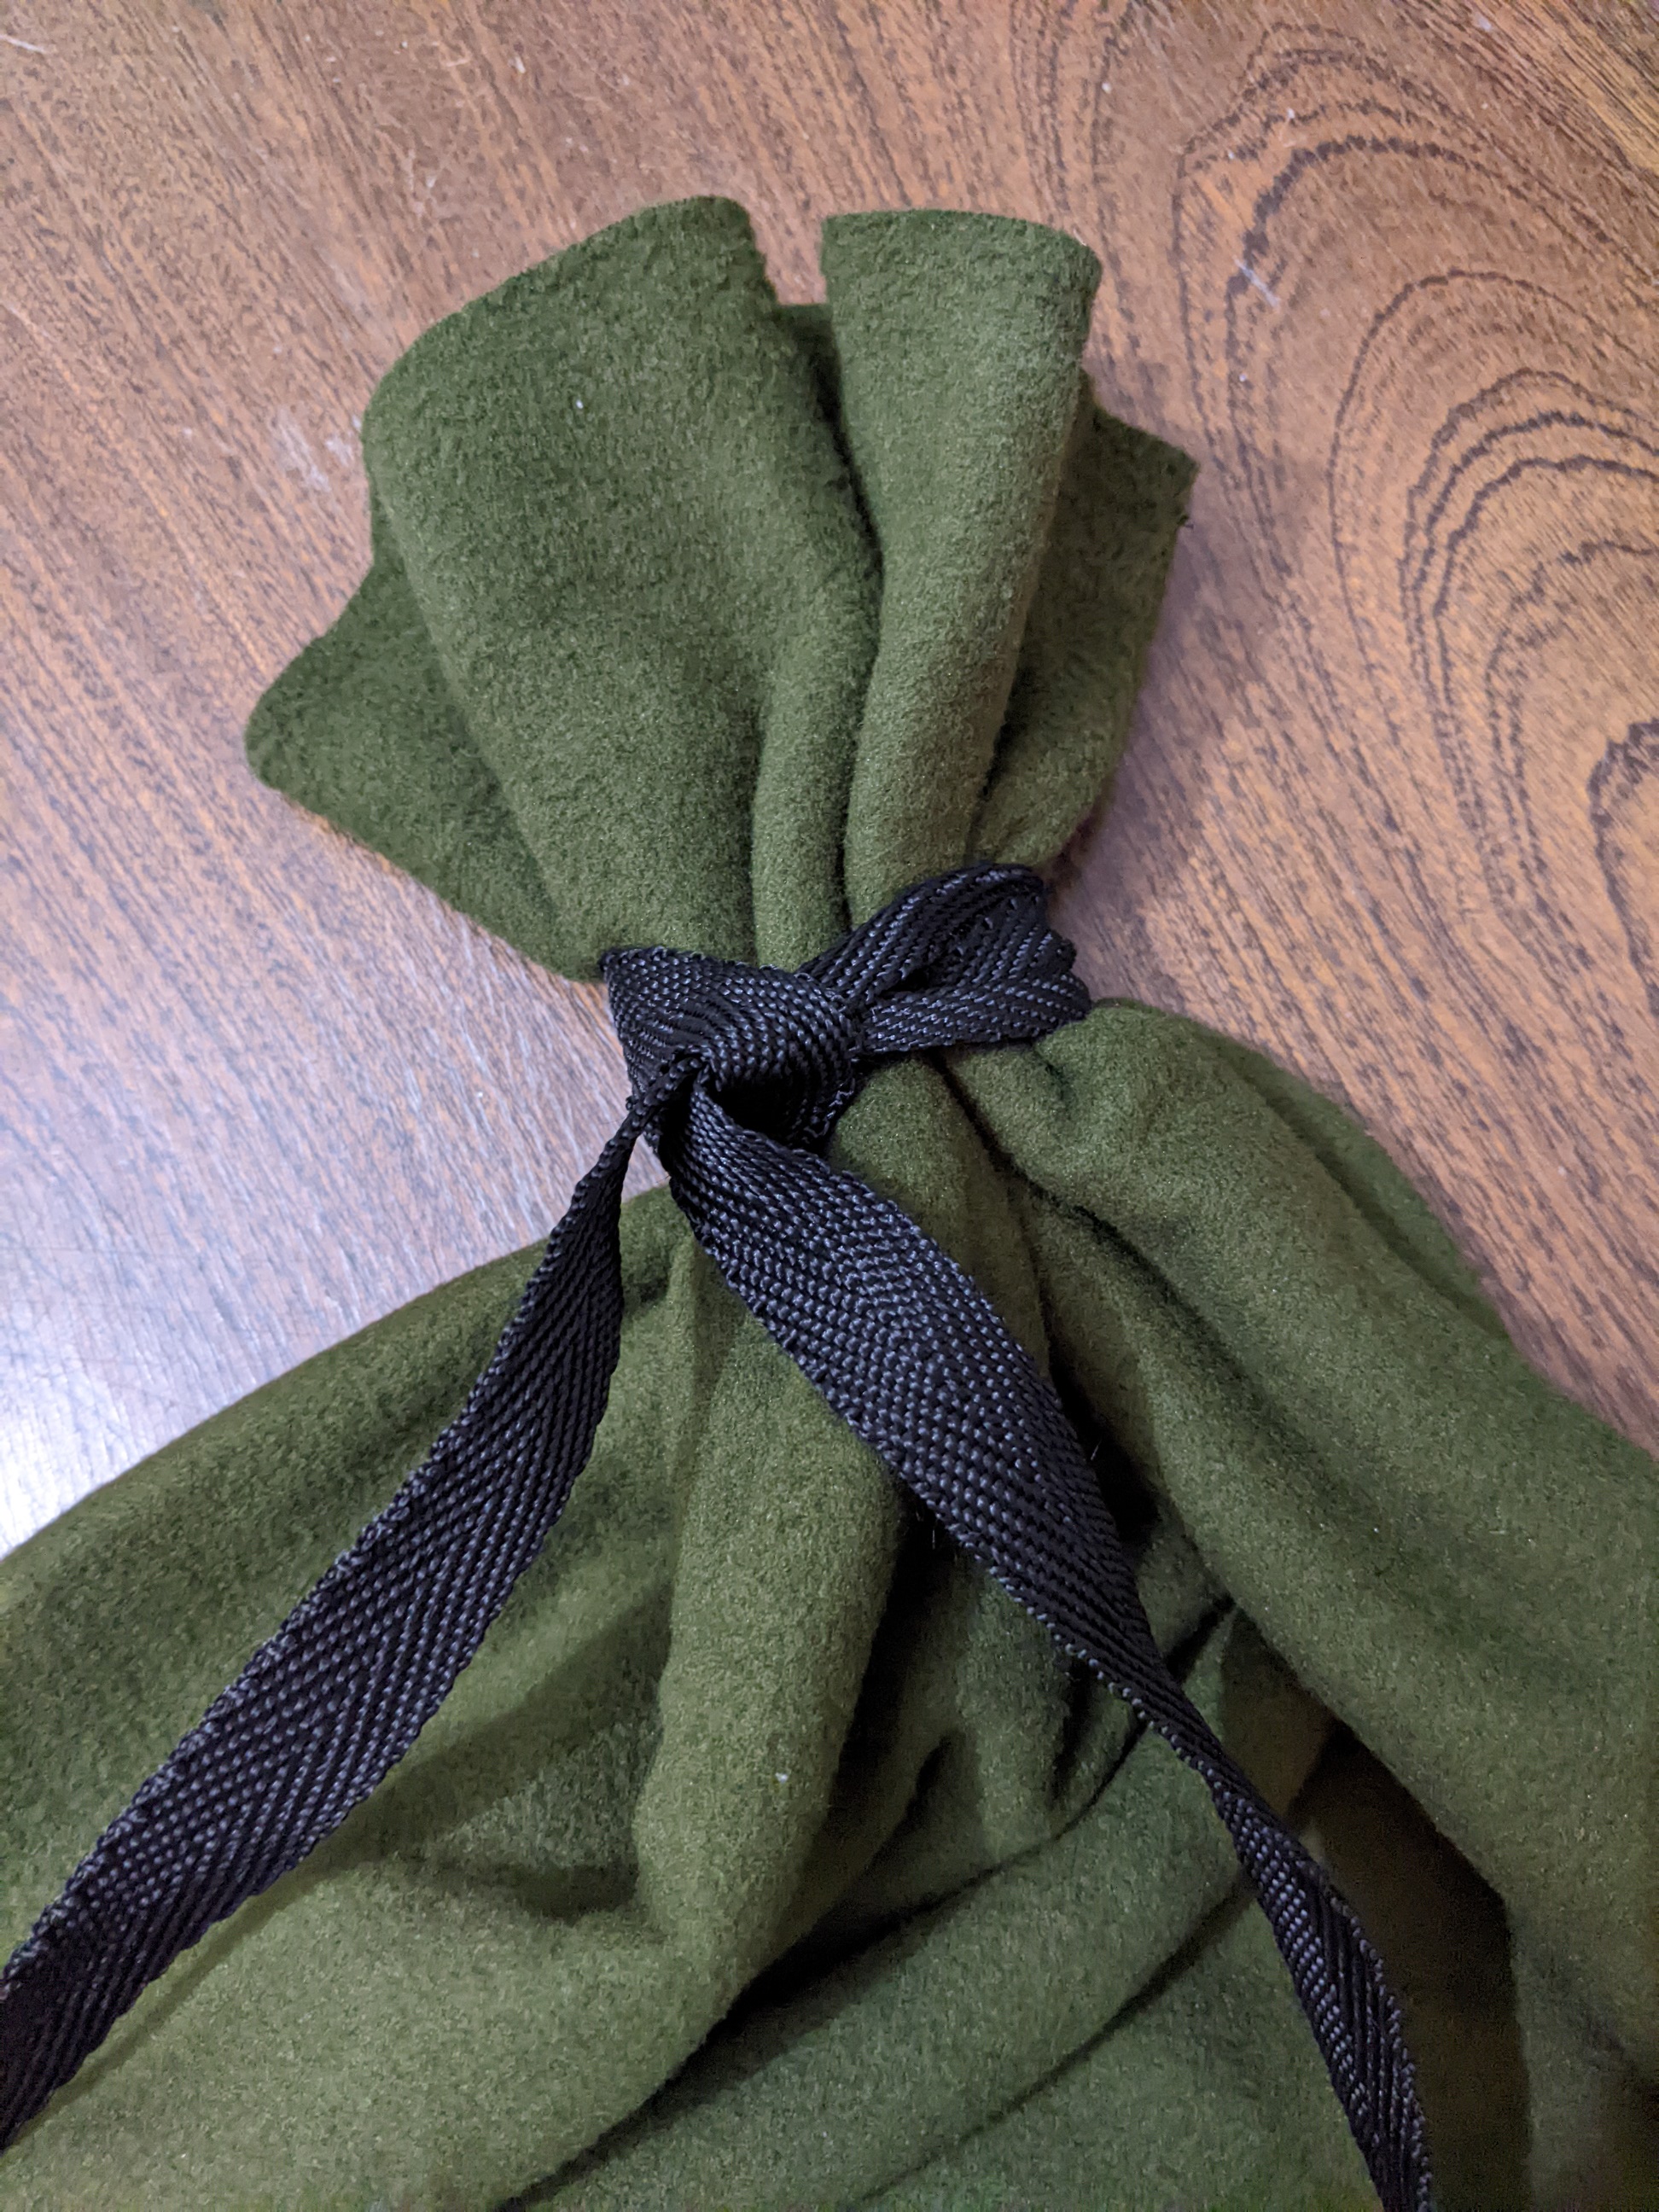
Today's episode, as promised features a fleece pikau for an upcoming trip. Rolls up and fits into a belt pouch.
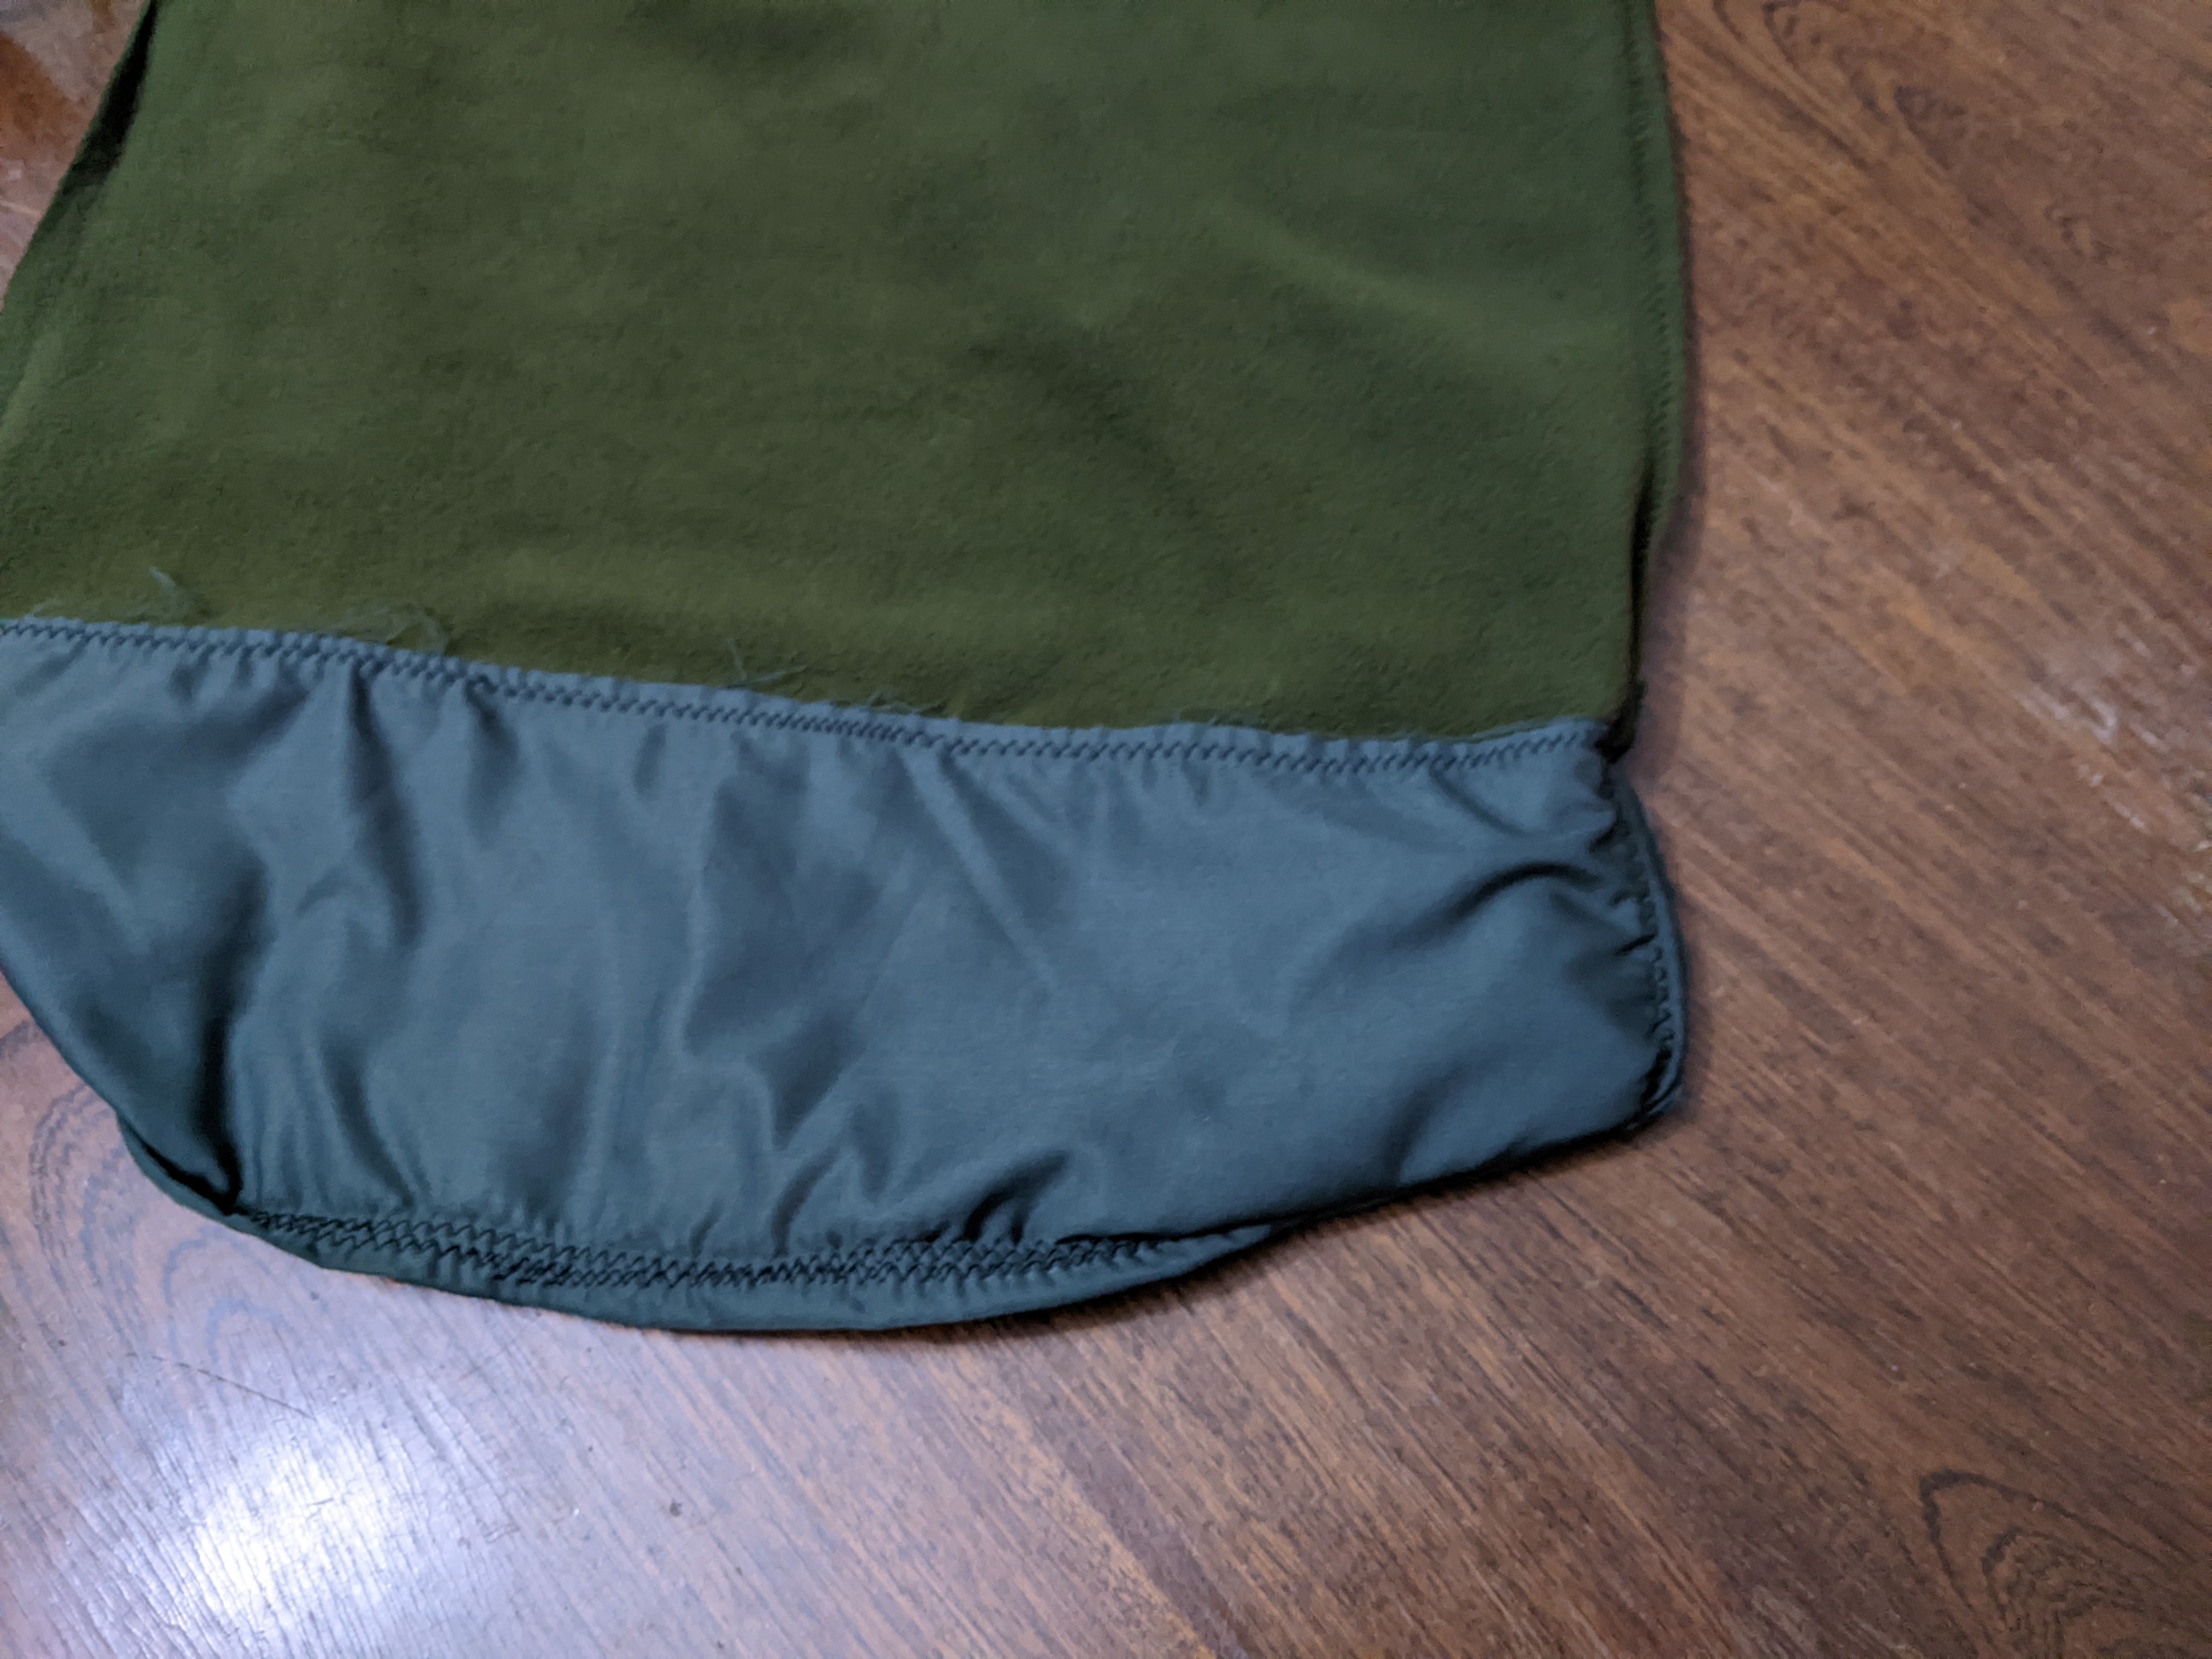
Very basic. Folded fleece over, to about the right size. Had some nylon left over from another project, so used that to reinforce the base. Sewed around the two sides (fold made the third), then along the top of the reinforcing.
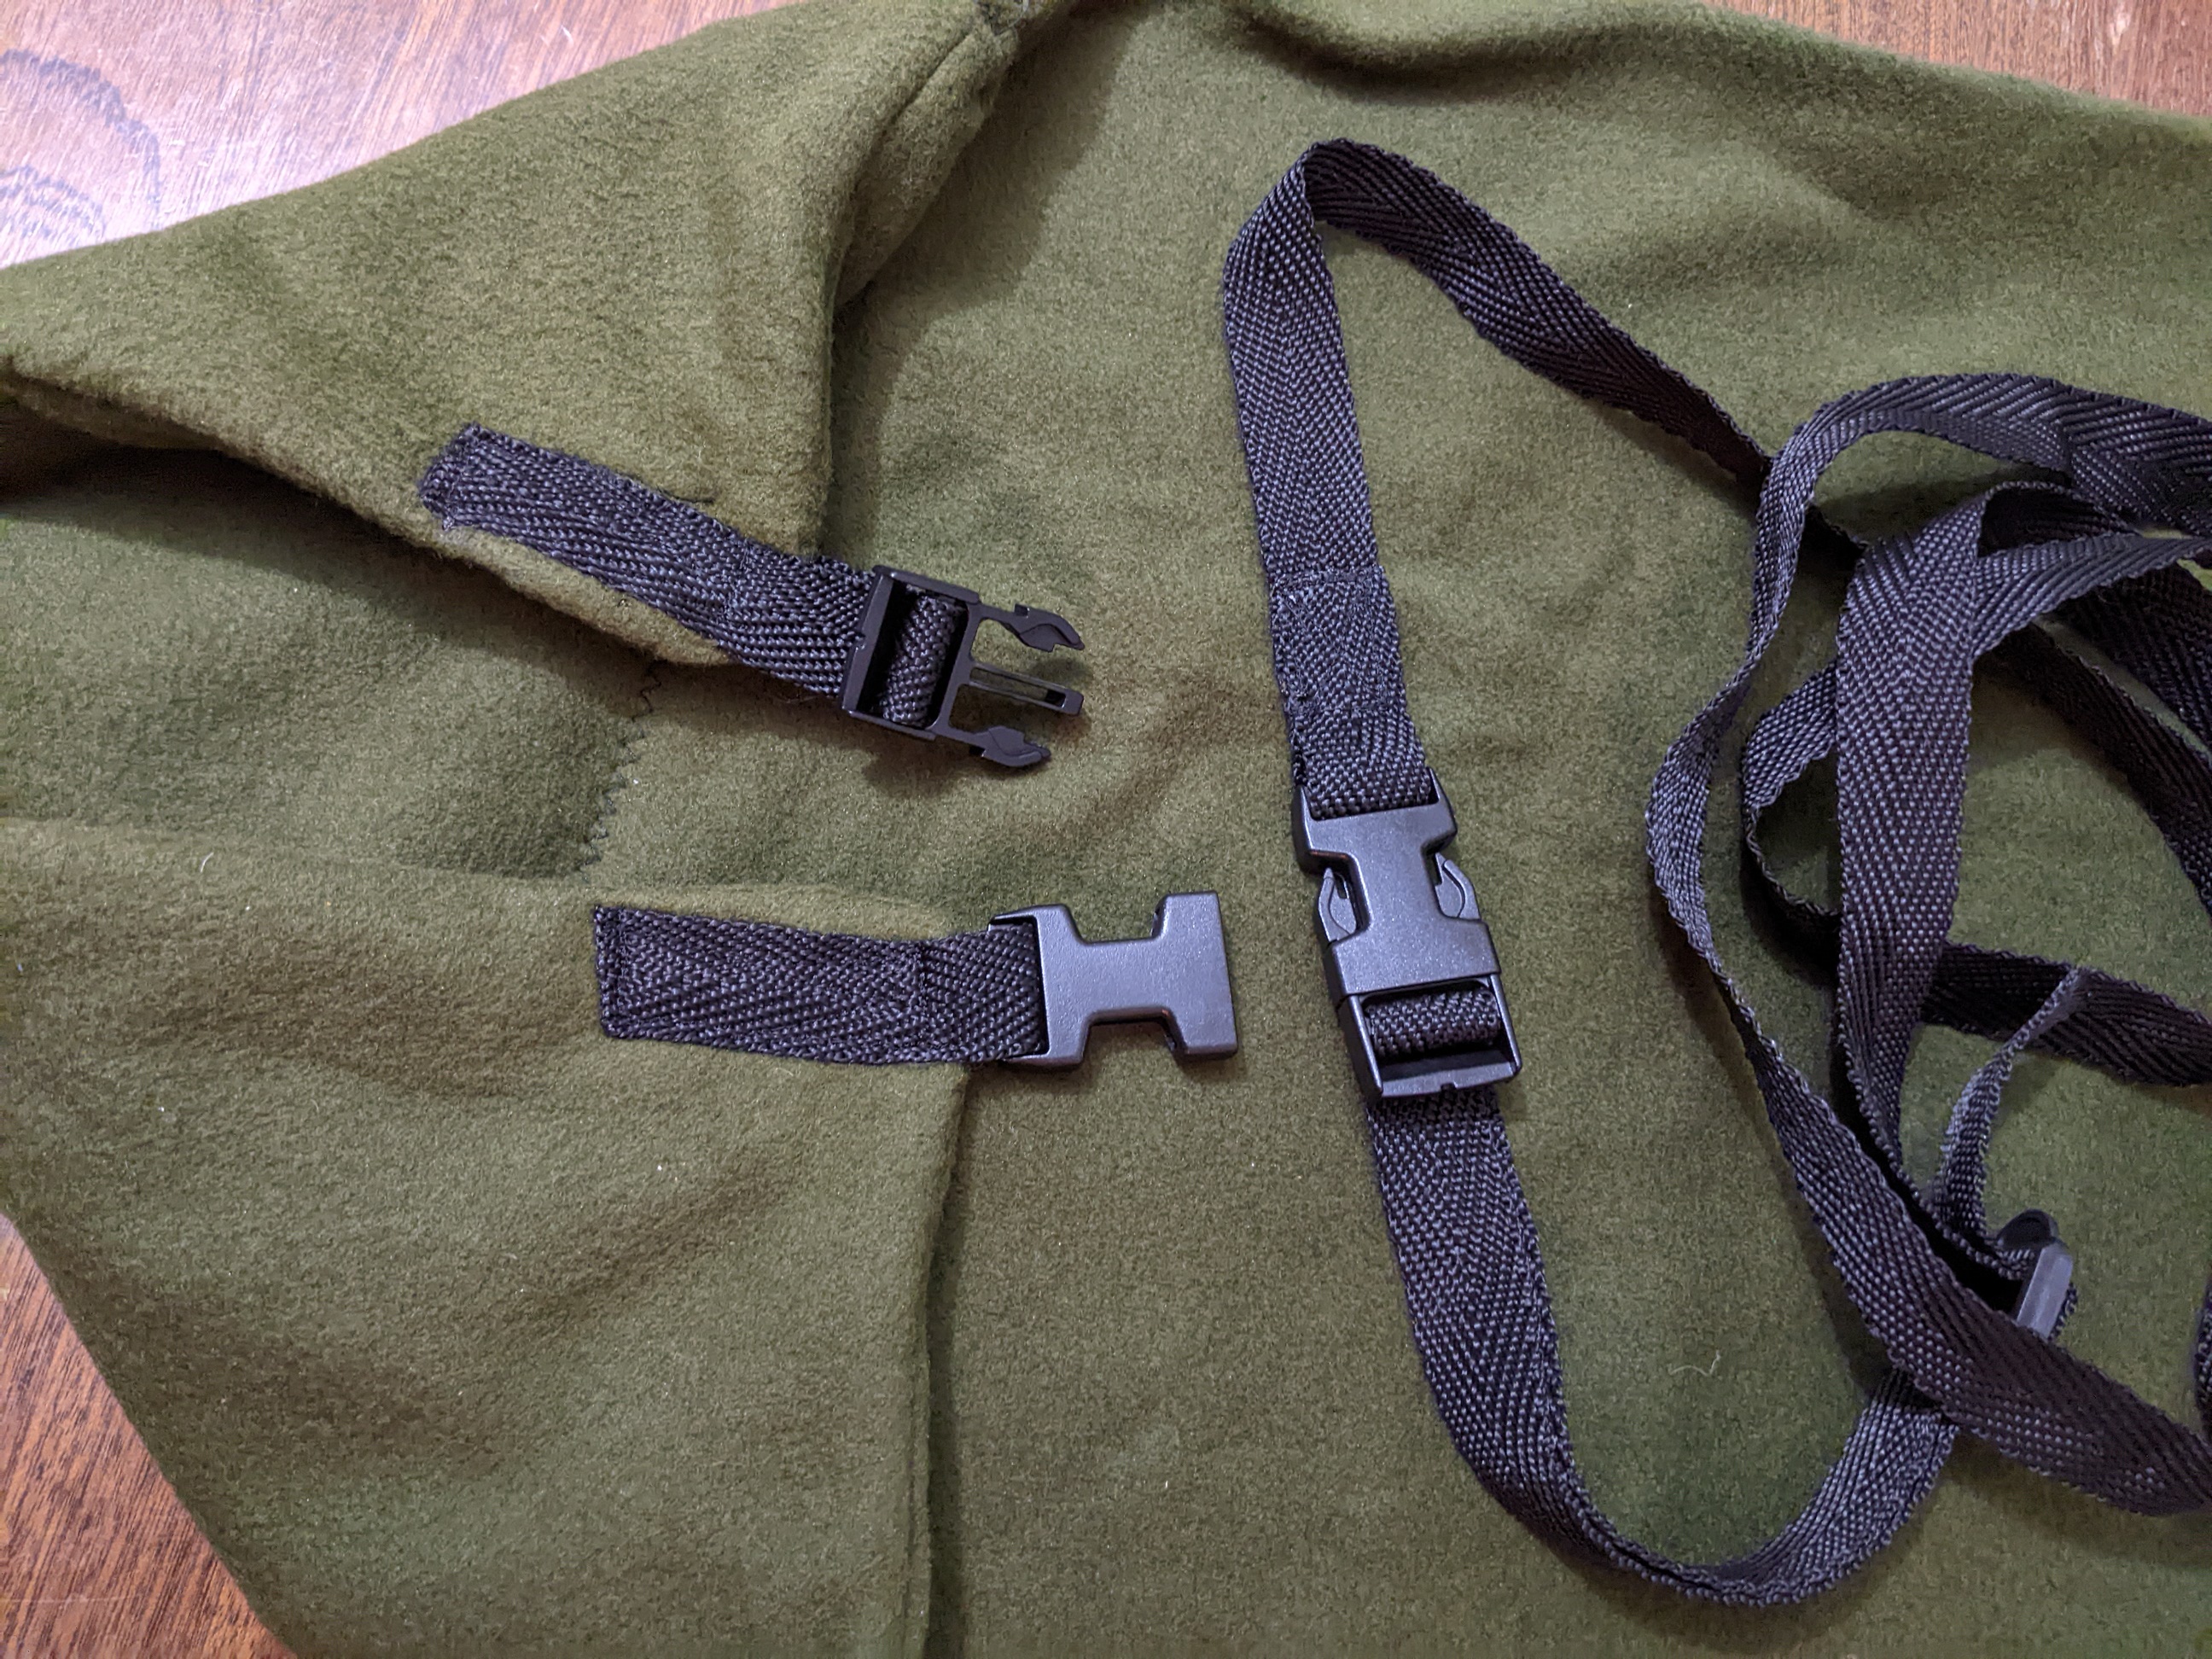
20mm webbing for the straps (shoulders may moan about that later), with buckle/clip things reversed on each side so the main strap can be removed separately and used for whatever. A little uncertain if that will prove to be as smart as it seemed once it's loaded up - hopefully they both don't let go at once.
Will be put to the test next week!
 bunji likes this.
-
03-04-2023, 04:23 PM #7Member

- Join Date
- Jul 2020
- Location
- Central North Island
- Posts
- 5,339
I 'improved' my old swazi fleece pikau by sewing a piece of 4mm braided nylon rope into the top rim of the bag. That way when you have 15kgs of venison attempting to escape from your pikau, the rim cannot slip through your knotted on straps, as its fatter than the rest of the fleece

And yes, your straps need to be at least 50mm where they transfer the load to your shoulders. Closed cell foam wrapped in fleece and sewn on is your friend.
-
22-06-2023, 02:46 PM #8Member

- Join Date
- Jun 2014
- Location
- CNI
- Posts
- 5,985
 Summer grass
Of stalwart warriors splendid dreams
the aftermath.
Matsuo Basho.
-
22-06-2023, 03:42 PM #9
wonderful stuff..keep it coming please.
my fleece pikau is mayby twice the size of pillow case both ways...the straps are a single piece of seatbelt strap about 8foot long.... and two tennis balls sit in corners of bag with a larks head knot to hold then there...the larks head knot is also used to hold top of bag closed with belly of straps.... beauty of then not being attached is I can use the strap to carry deer/pig/goats using Alex Gale carry strap method and drop the fleece bag into gut cavity of animal....
been looking at other tarps online,most seem to be 2.9x2.9 but I believe something slightly bigger will work better..there is one design of tarp bivy that really appeals to me and I can never refind it on net...... it has floor and door and its basically a big triangle sort of like icecream cone ,only needs one pole of tie up point....75/15/10 black powder matters
-
22-06-2023, 05:10 PM #10
-
22-06-2023, 05:23 PM #11
thats the one ,thanks.
75/15/10 black powder matters
Similar Threads
-
Home made annealing
By charliehorse in forum Reloading and BallisticsReplies: 14Last Post: 22-11-2020, 08:00 AM -
Home Made Safe
By Tailfeathers in forum Firearm SafetyReplies: 32Last Post: 08-10-2019, 09:22 AM -
Home made rifle stock, made from good old native Rimu. check this vid out
By kingstoncowboy in forum Projects and Home BuildsReplies: 24Last Post: 10-02-2014, 12:21 PM
Tags for this Thread
Welcome to NZ Hunting and Shooting Forums! We see you're new here, or arn't logged in. Create an account, and Login for full access including our FREE BUY and SELL section Register NOW!!


 LinkBack URL
 About LinkBacks


 Reply With Quote


Bookmarks