Yes it is.It's a bit different to work with,will be interesting to see how durable it is.Certainly doesn't wetmold or burnish very well.Quote:
Originally Posted by Ftx325
Sent from my SM-G390Y using Tapatalk
Printable View
Yes it is.It's a bit different to work with,will be interesting to see how durable it is.Certainly doesn't wetmold or burnish very well.Quote:
Originally Posted by Ftx325
Sent from my SM-G390Y using Tapatalk
I would say it's going to be durable all right . Even cutting it took me a lot more effort than the russet .
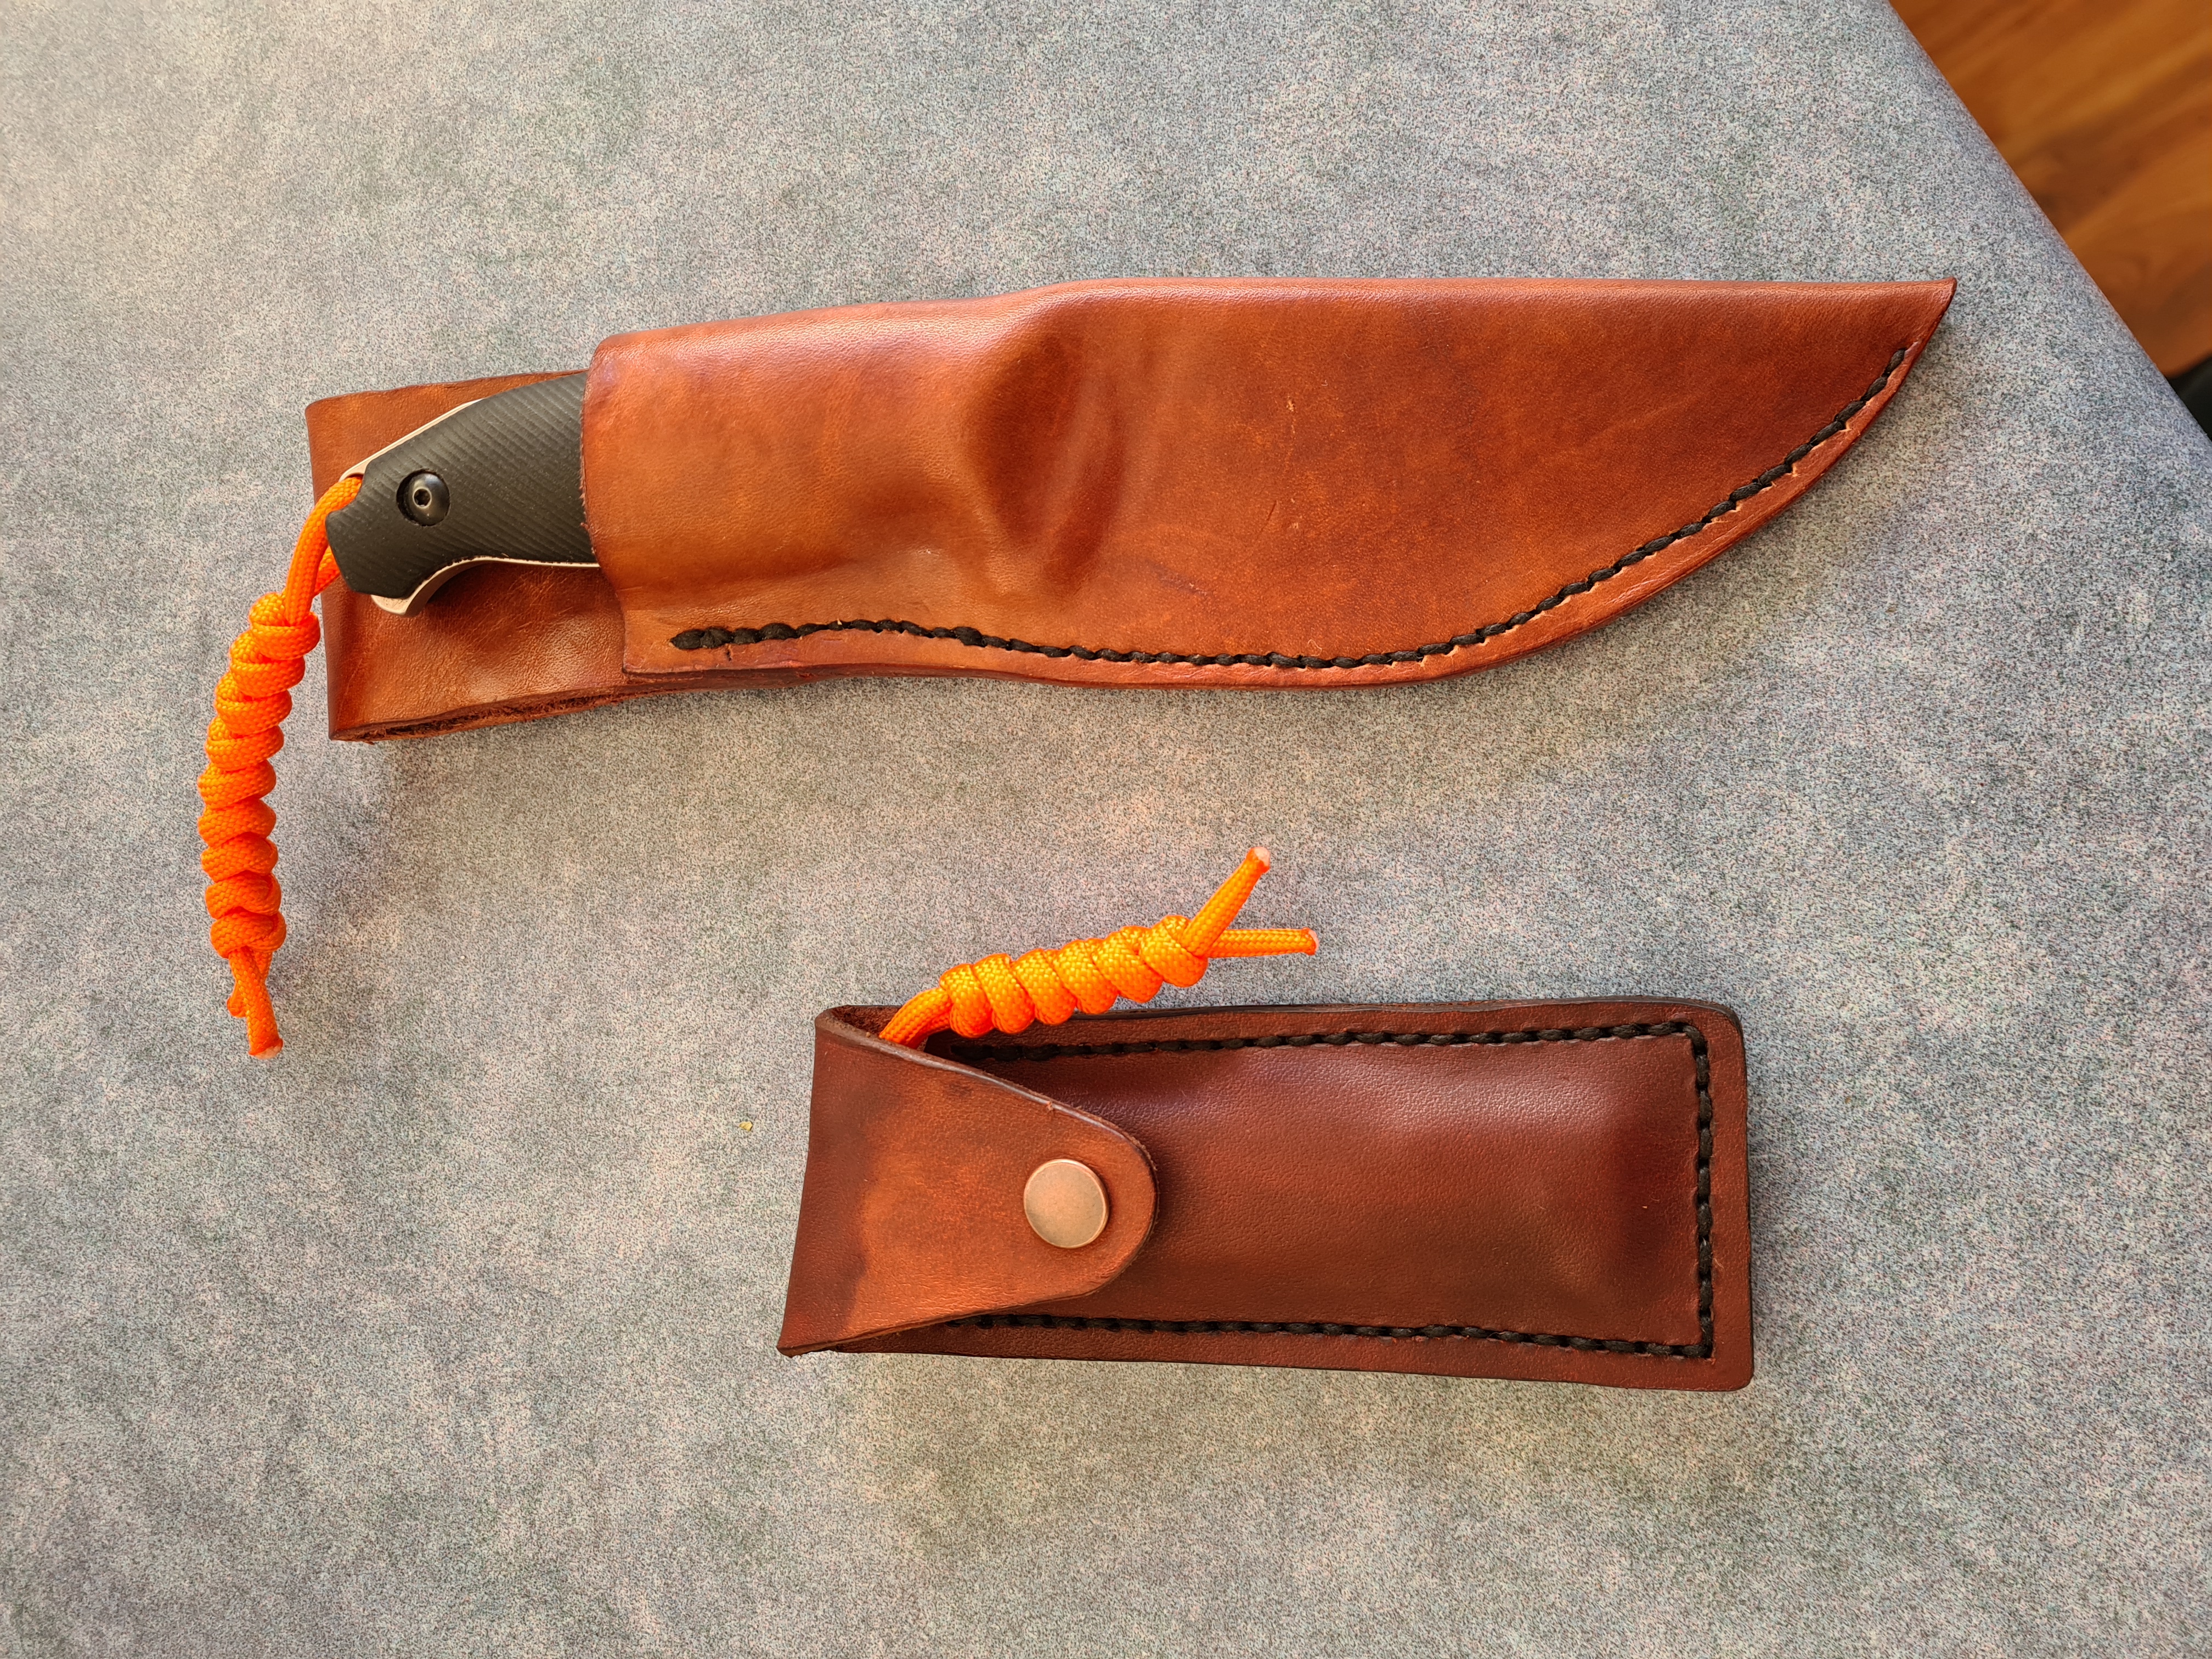
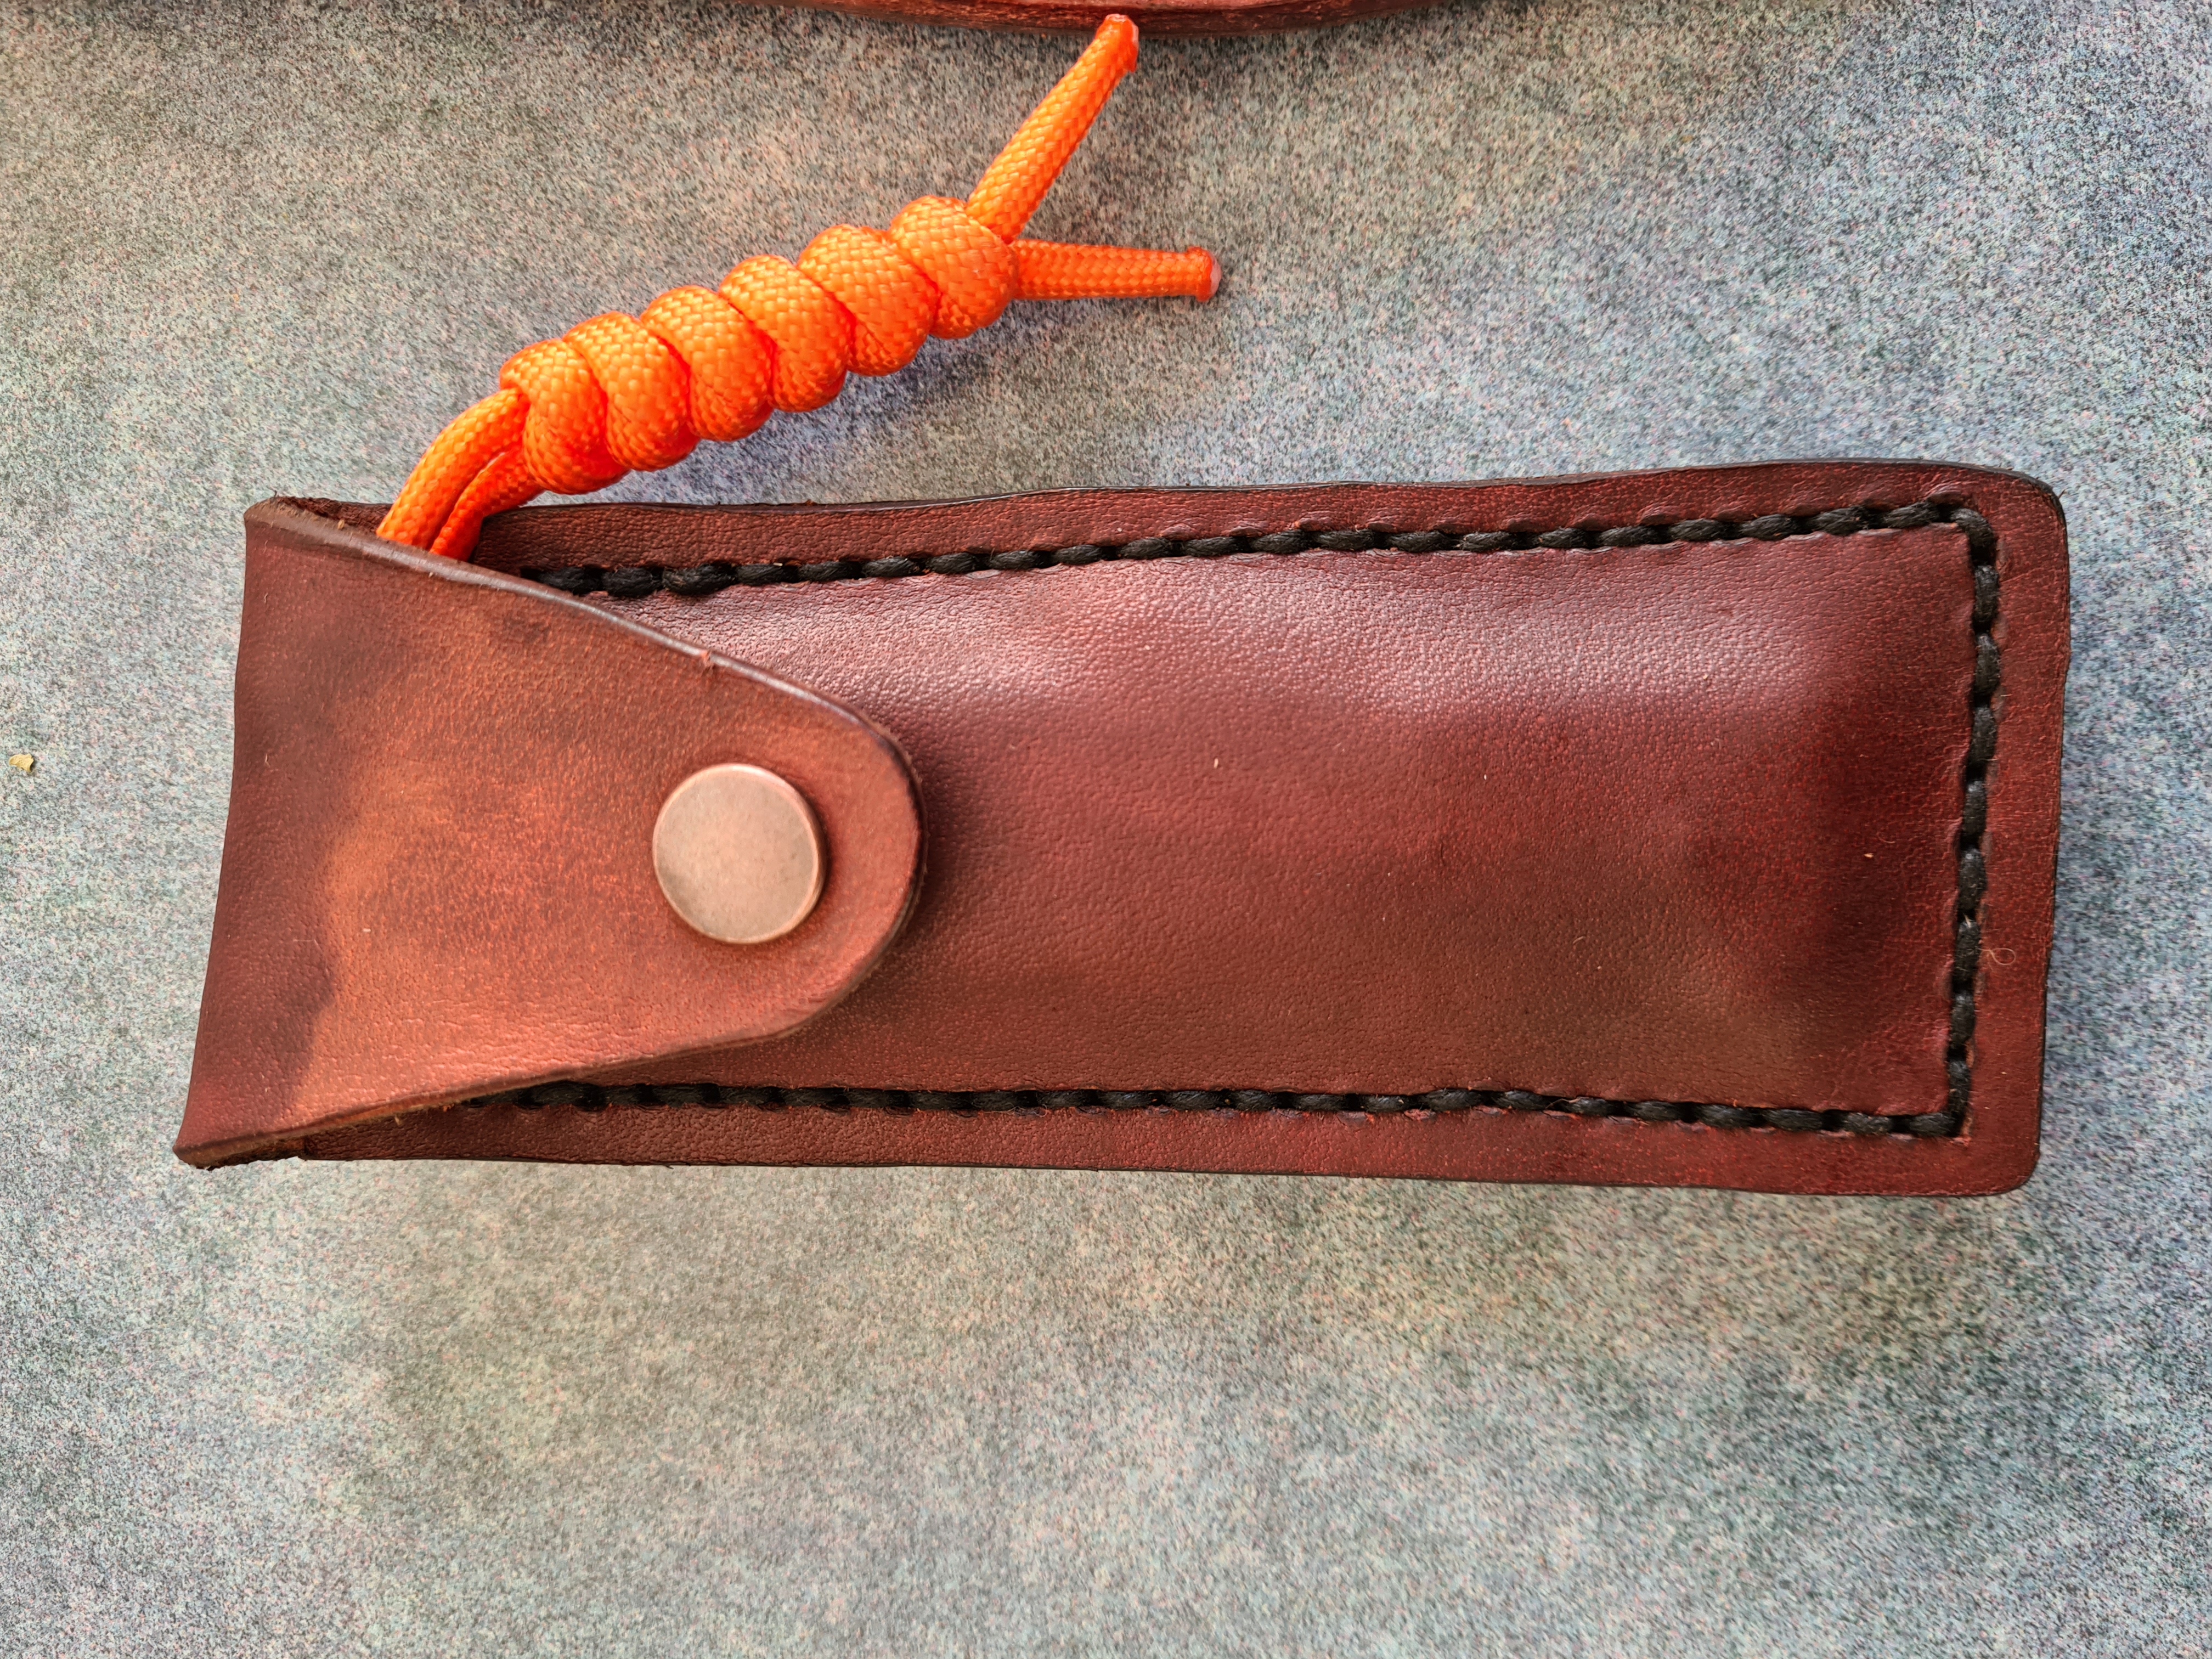
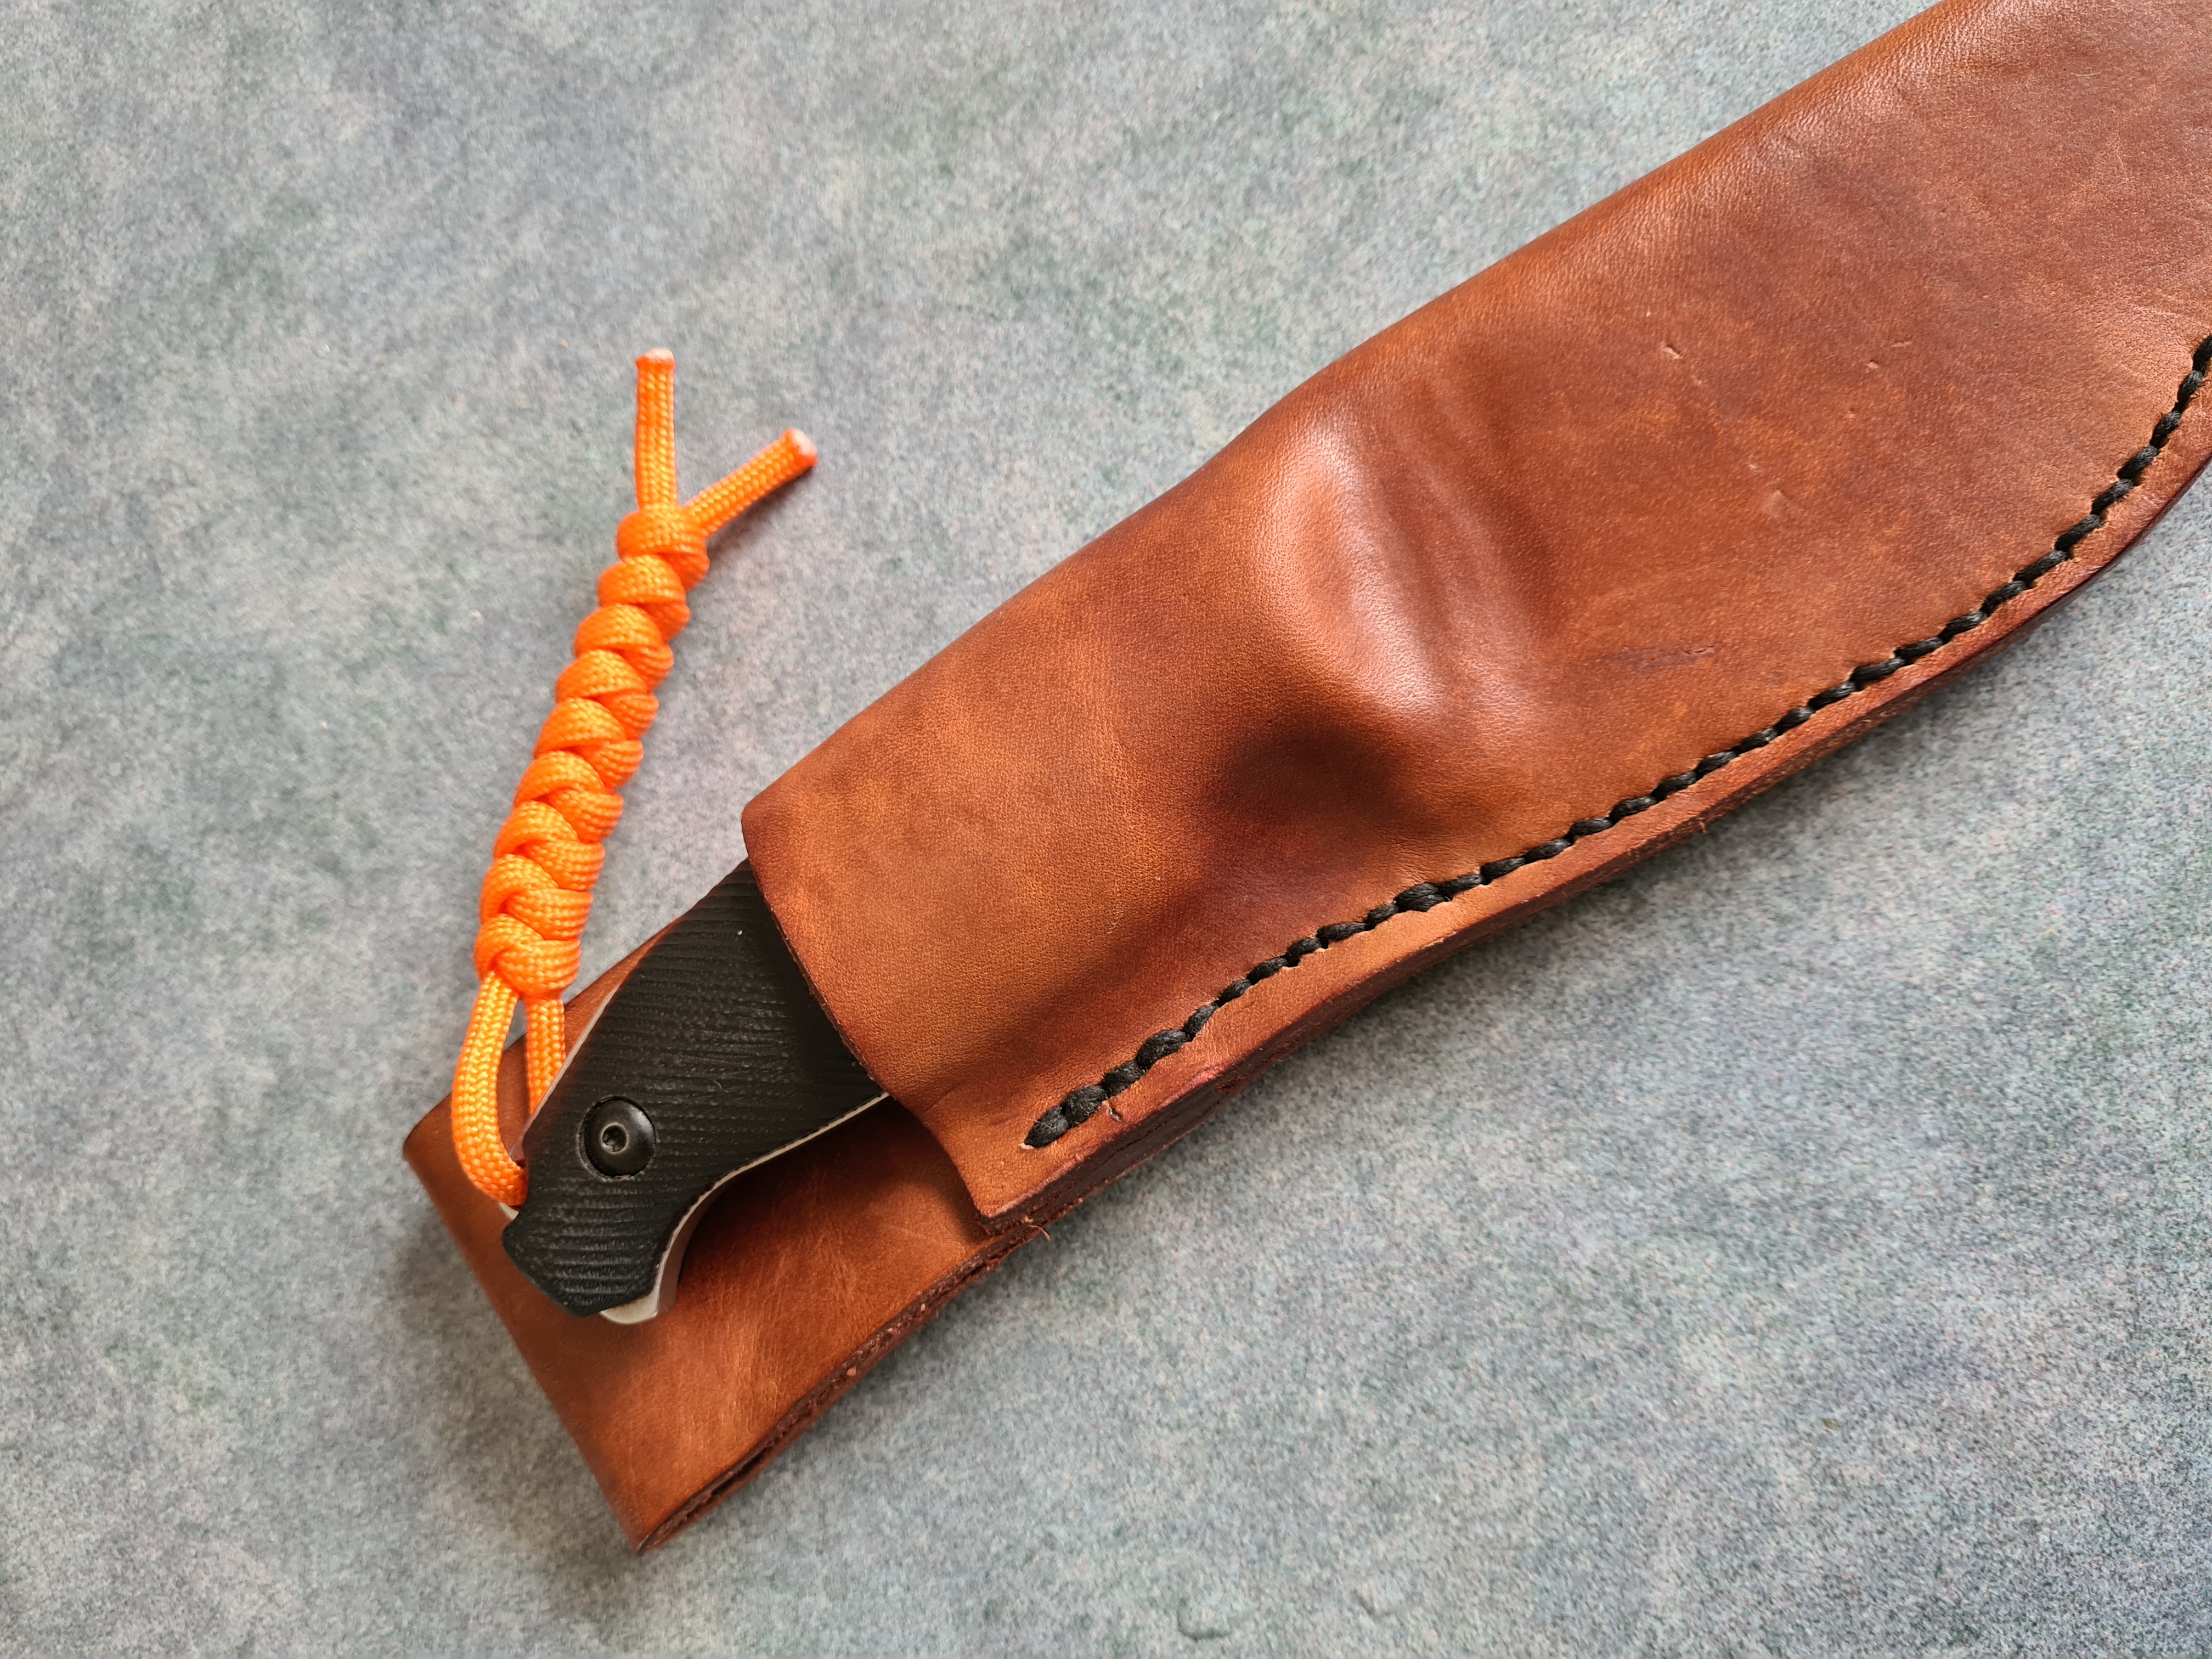
Had to get a new phone recently, after looking at various protective cases I decided to make my own.It was a good excuse to try a couple things I've been wanting to do for a while now.
Also finished up a sheath I was asked to make for a mates sonhttps://uploads.tapatalk-cdn.com/202...1cf6f1246b.jpghttps://uploads.tapatalk-cdn.com/202...358832159c.jpg
Sent from my SM-G525F using Tapatalk
Awesome mate, love your work
Looks bloody good Alistair!
Sent from my SM-A025F using Tapatalk
Has anyone made a decent sheath for a bahco knife yet?
Yup, back in the day I made heaps of themQuote:
Originally Posted by The bomb
Sent from my SM-G996B using Tapatalk
Depends on your definition of decent.Would probably cost ya more than the knife[emoji848]Quote:
Originally Posted by The bomb
Sent from my SM-G525F using Tapatalk
I used to charge anywhere from $85 to $95 for an open top sheath. That was 5 years ago nowQuote:
Originally Posted by hunter Al.7mm08
Sent from my SM-G996B using Tapatalk
Yeah I'm about the same,bit cheaper for mate's etc.When you work it out there's nearly $30 worth of leather in a decent sized sheath.Quote:
Originally Posted by HNTMAD
Sent from my SM-G525F using Tapatalk
Jeez mate , your getting good at the design carving . Looks real good :thumbsup:Quote:
Originally Posted by hunter Al.7mm08
I have been looking at the carving tools on Ali and seriously considering investing in some . Just don't know if I will be doing enough leather work to justify the money .
But that phone case looks awesome 😎
Cheers Andy.I hope yours is still in pristine condition? [emoji6]Quote:
Originally Posted by andyanimal31
Sent from my SM-G525F using Tapatalk
Thanks @Ftx325 have been looking for an excuse to try some for a while.Tryed 2 different color antique's and a sealer as well. Quite pleased with the result[emoji16]
Sent from my SM-G525F using Tapatalk
Hey mate, not sure if this has been mentioned but sheath for a mercator would be awesome!? Already have one from Hamish. Could do with another
Managed to score a a box of tools, and a both of leather for proper cheap, so been doing some lockdown projects in between chasing a toddler. Keep in mind these are my first two projects. Be gentle...
Attachment 177141
Attachment 177142
Attachment 177143
The Mercator pouch was still a bit wet from moulding
@Rocco looks bloody good,nice even straight stitching.good tight fit around the handle bit of burnishing will tidy up the edges nicely.Job well done[emoji106].Bit hard to tell from the photos,did you put a third layer of leather along the edge to stop the blade cutting the stitching? https://uploads.tapatalk-cdn.com/202...55b5214ca5.jpg
Sent from my SM-G525F using Tapatalk
Thanks mate. Spent a lot more time on the hole for the stitching on the Mercator pouch, and it showed. Rushed the knife and made a few errors, like snapping the thread a ton of times, and not sorting an extra strip to protect the thread. Expecting to have another crack at it soon and V2 should go a lot better.
What do y'all use for burnishing? I've tried a few things but haven't been happy.
Check this out....was a clip i put together a few haircuts ago...used cotton cloth for burnishing.Quote:
Originally Posted by Rocco
https://youtube.com/watch?v=B4HPIFl6ivU&feature=share
Hamish
Sent from my SM-G996B using Tapatalk
What do y'all use for burnishing? I've tried a few things but haven't been happy.
We all learn as we go mate.Did you get an edge Beveller in you tools?.I use it to take the sharp edges off then wet the edge slightly. There are various products you can apply at this stage,or water alone works.I just use saddle soap.Then just rubber vigorously with something hard like the wooden handle of a awl.I find a piece of scrap leather works well too.Products like 'edge cote'can be used if you want to get carried away.https://uploads.tapatalk-cdn.com/202...3414a197a4.jpghttps://uploads.tapatalk-cdn.com/202...56c3bd2391.jpg
Sent from my SM-G525F using Tapatalk
Awesome video! Good few things to take on board in there, thanks Hamish.Quote:
Originally Posted by HNTMAD
Yeah unfortunately not, that is in the very much need category. So have free handed with an old razor blade and used water and an old Bic lighter. Hasn't gone great, but it's not the worst either.Quote:
Originally Posted by hunter Al.7mm08
On the subject of first attempts @Rocco this was mine.Used the heaviest leather I could find[emoji123],no idea how to wet mold.Hand poked all the holes with an awl[emoji625],measured the spacing by eye[emoji102].Didn't know about putting a groove for the stitching to lay in[emoji423],hence why it's so StRAigHt!and sitting on top of the leather. No idea how to burnish it.But,10yrs on it still hasn't fallen apart and I'm still rather proud of it[emoji16]https://uploads.tapatalk-cdn.com/202...6aa3c0f267.jpg
Sent from my SM-G525F using Tapatalk
Not too shabby
Sent from my SM-G996B using Tapatalk
Hi @Rocco
That's not a bad first effort mate . When I made my first sheath I spent a week self training by watching youtube videos to get a better understanding of how they are done and then came up with a few workarounds to allow for tools I didn't have . But an edger as mentioned by hunter al is well worth having . Makes all the difference when it comes to having a nice finish on the leather edges .
If it's any help I did a thread a while back where I made a sheath for a forum member and showed how I made it along with the 'tools' I used to make up for the proper tools I didn't have - kitchen cutlery mainly ...lol . I am a certified teaspoon ninja ....:thumbsup:
So here is the thread link , and also lots of input by guys like hunter and huntmad to give other or proper ways of doing things . That said I still make all my sheaths the same way as in this thread including the double sheaths on the earlier page so it seems to work ok...
https://www.nzhuntingandshooting.co....ke-mine-64486/
hope it helps ....
oh and as for the burnishing , I personally find it works better if you start on the edge and work towards the middle or the leather bulges and deforms outwards . BY working from the outside in gives a better result . I just dampen - dampen not drench - the edge with water on my finger then once I wax the finished product quickly go over it again with wax and whatever you use for burnishing . I found a biro can work really well , especially in the tight inside curve .
I had almost forgotten the teaspoon @Ftx325 [emoji16].Having the right tools makes things easier but, as you say it's surprising what you can achieve with what you have on hand[emoji375]
Sent from my SM-G525F using Tapatalk
Getting well used look actually!Quote:
Originally Posted by hunter Al.7mm08
Sent from my SM-A025F using Tapatalk
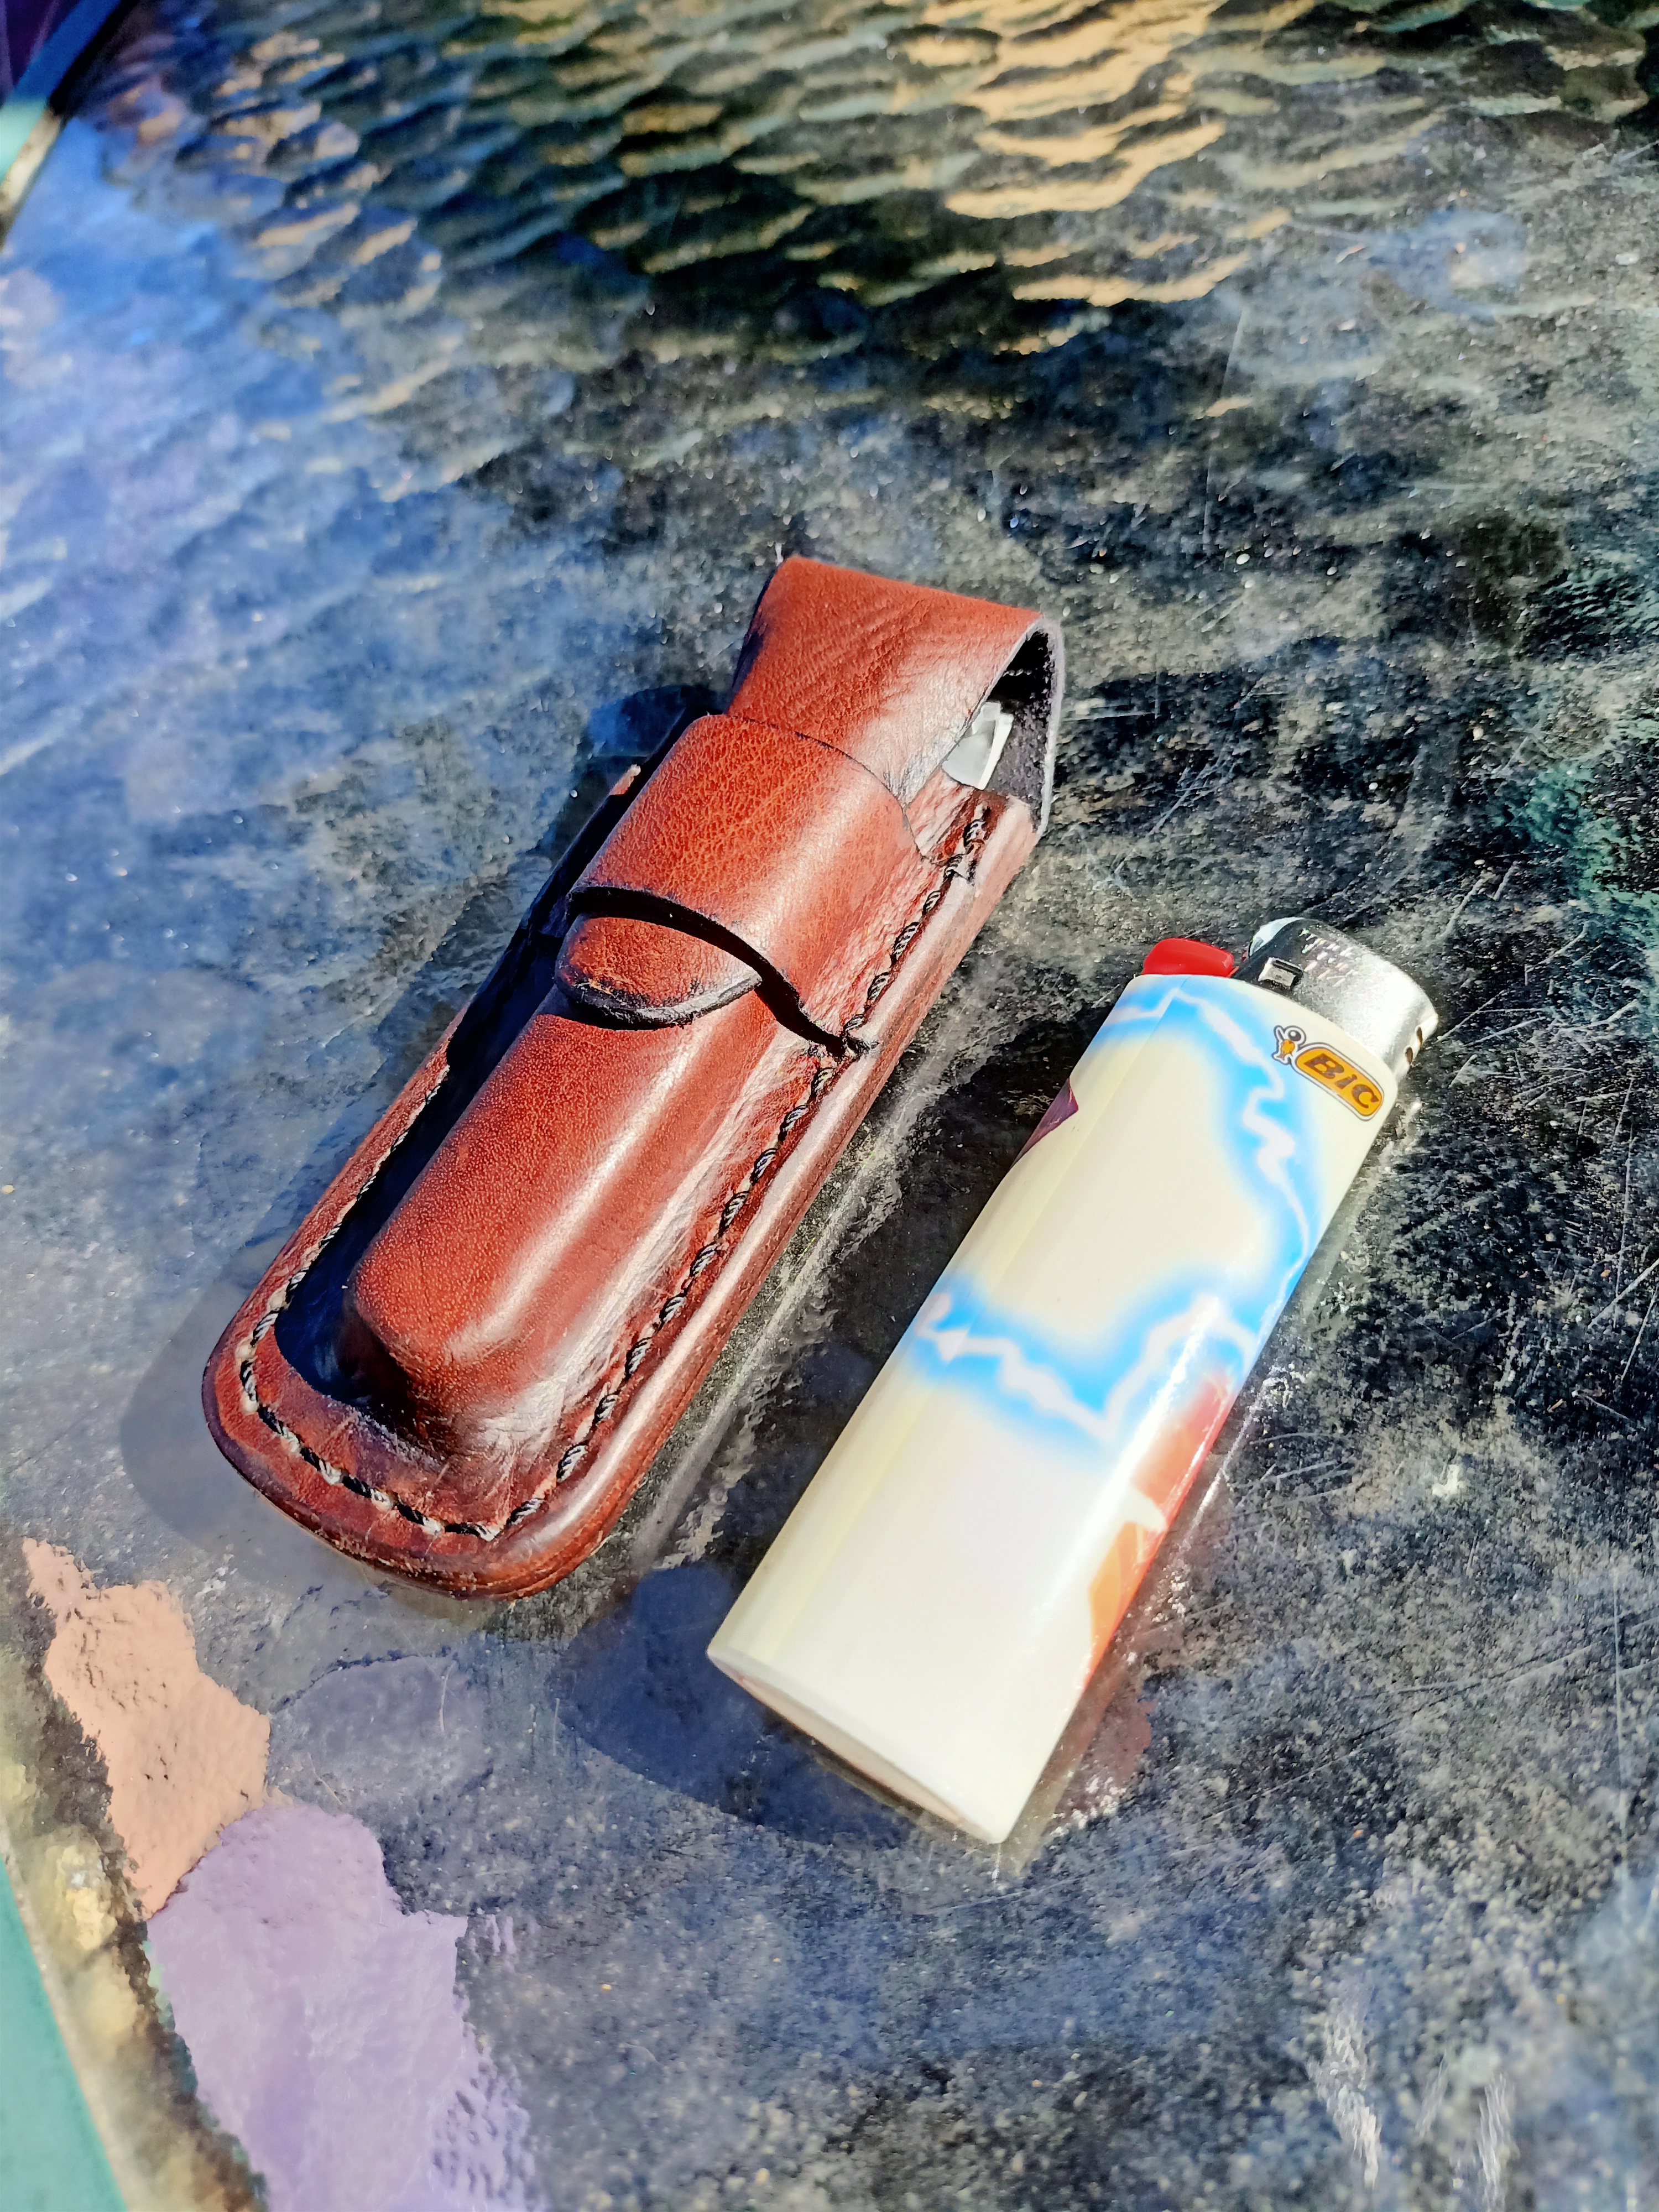
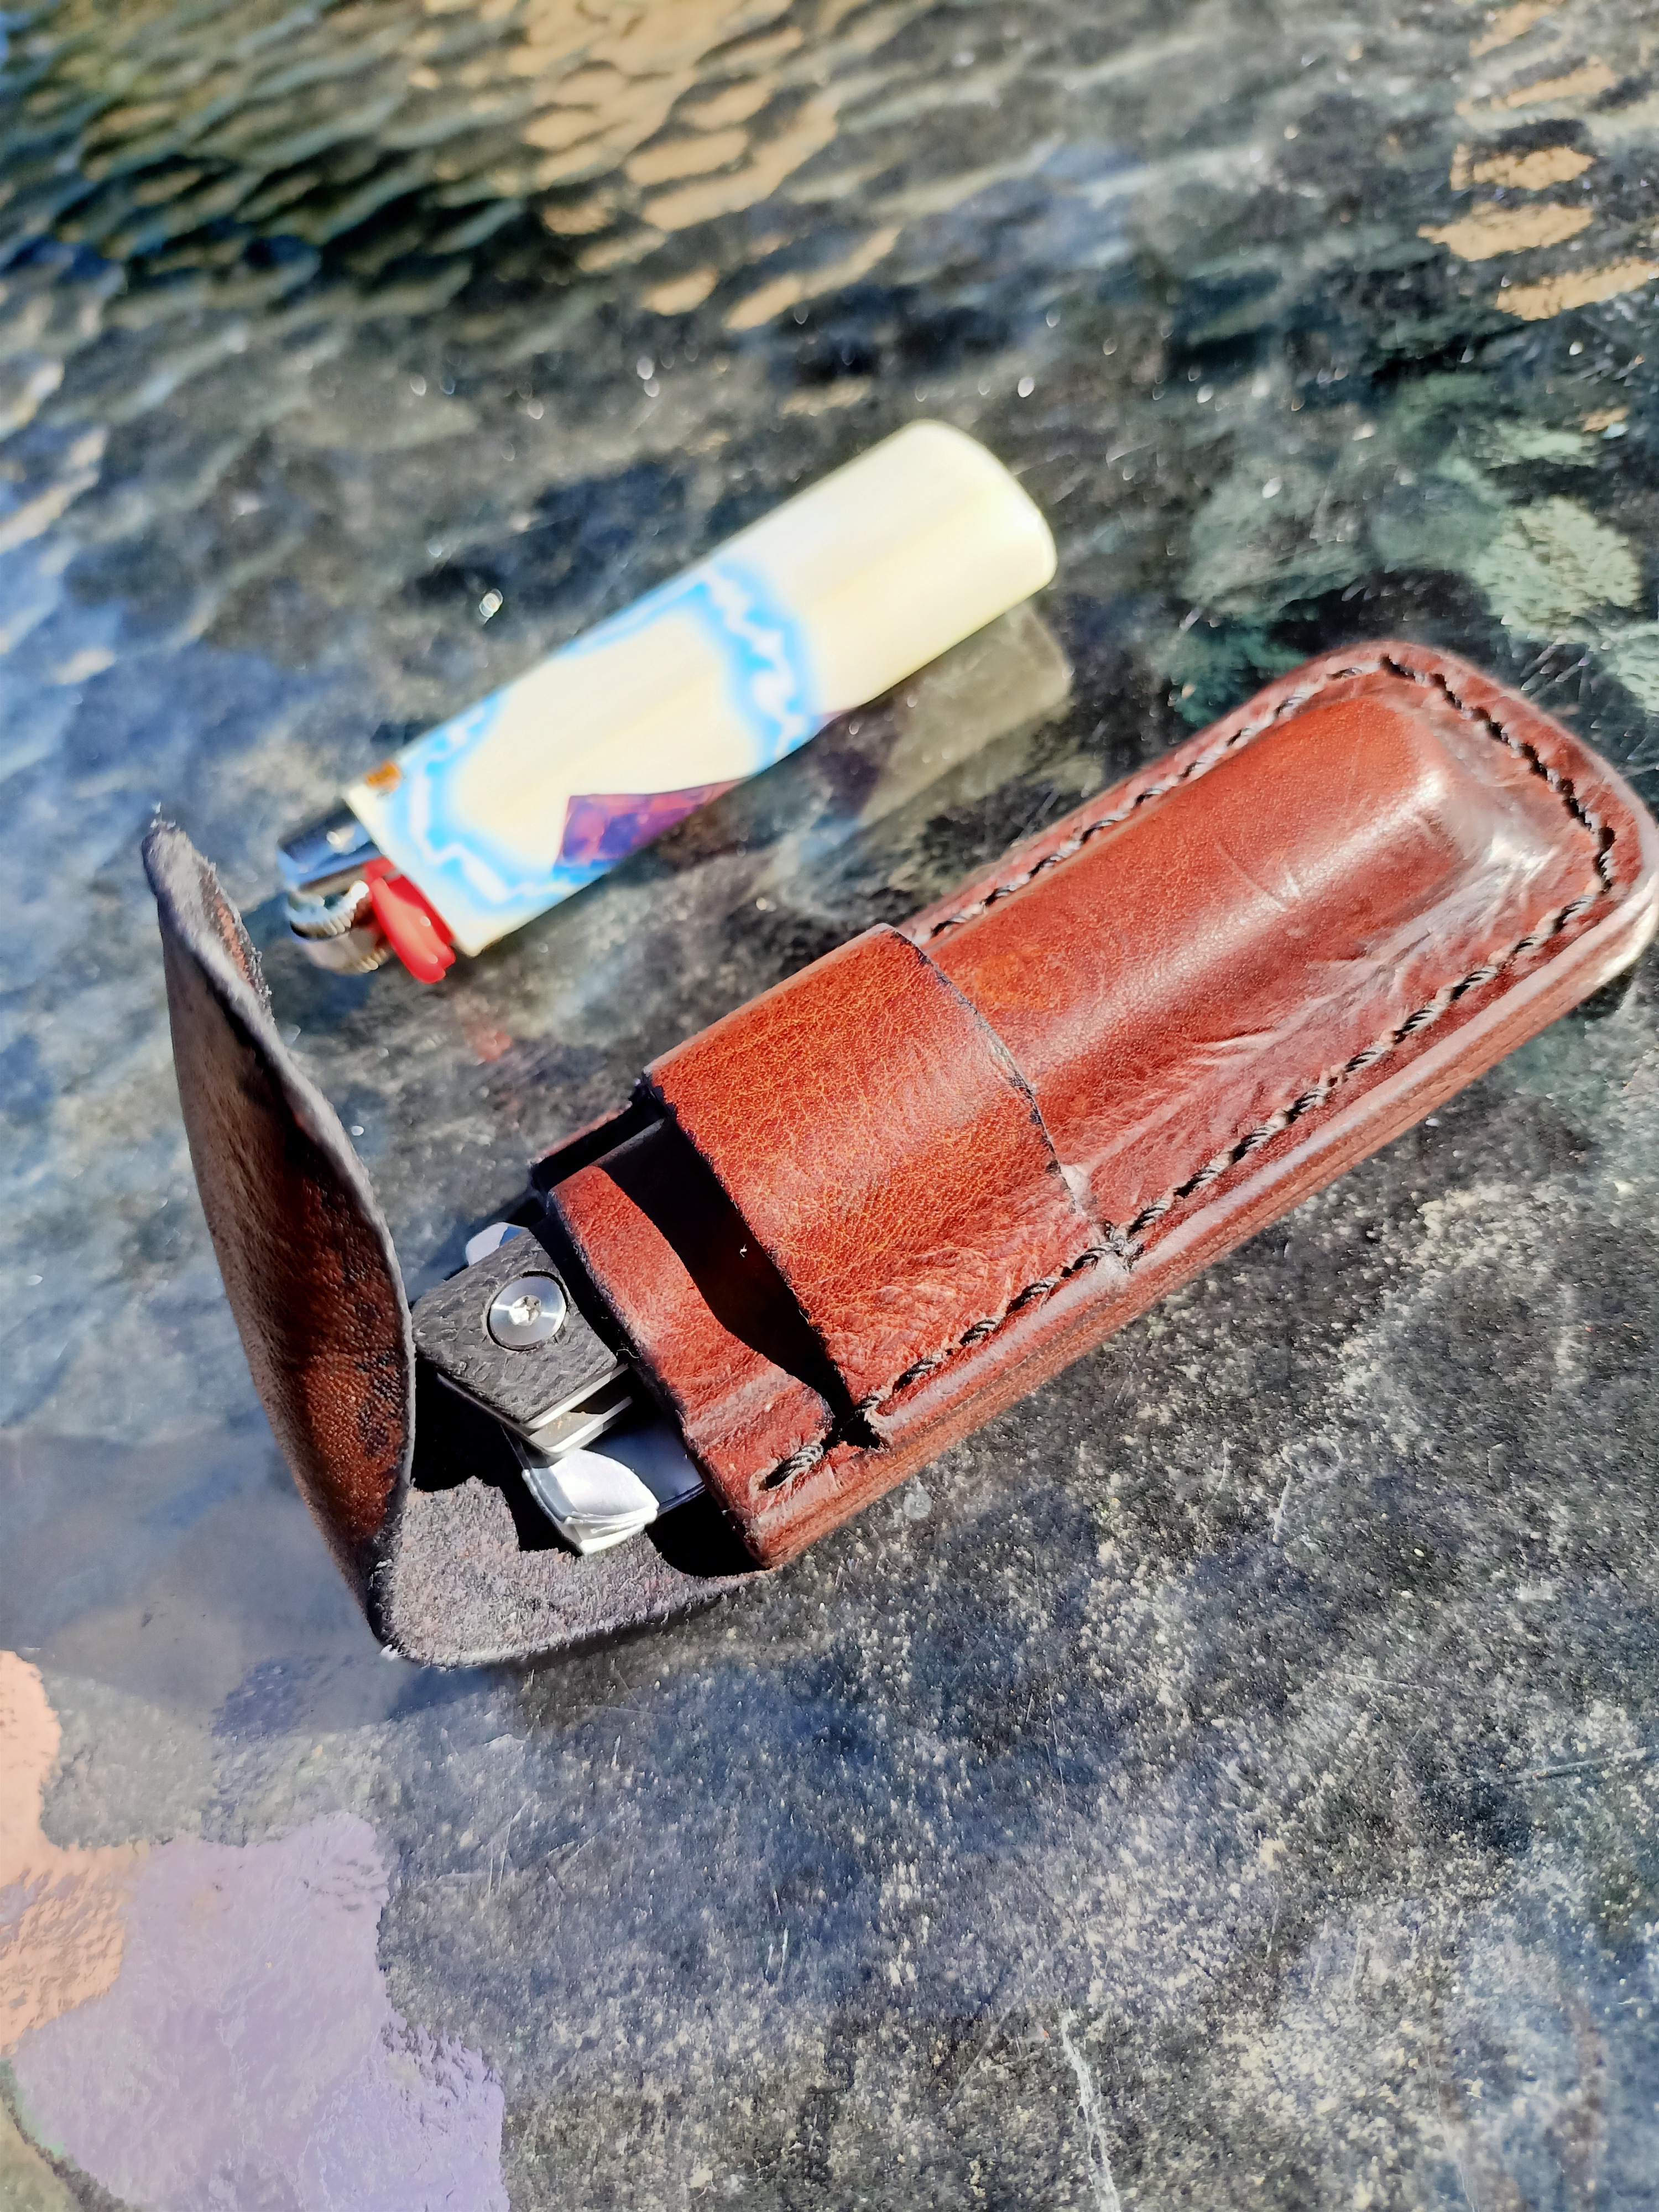
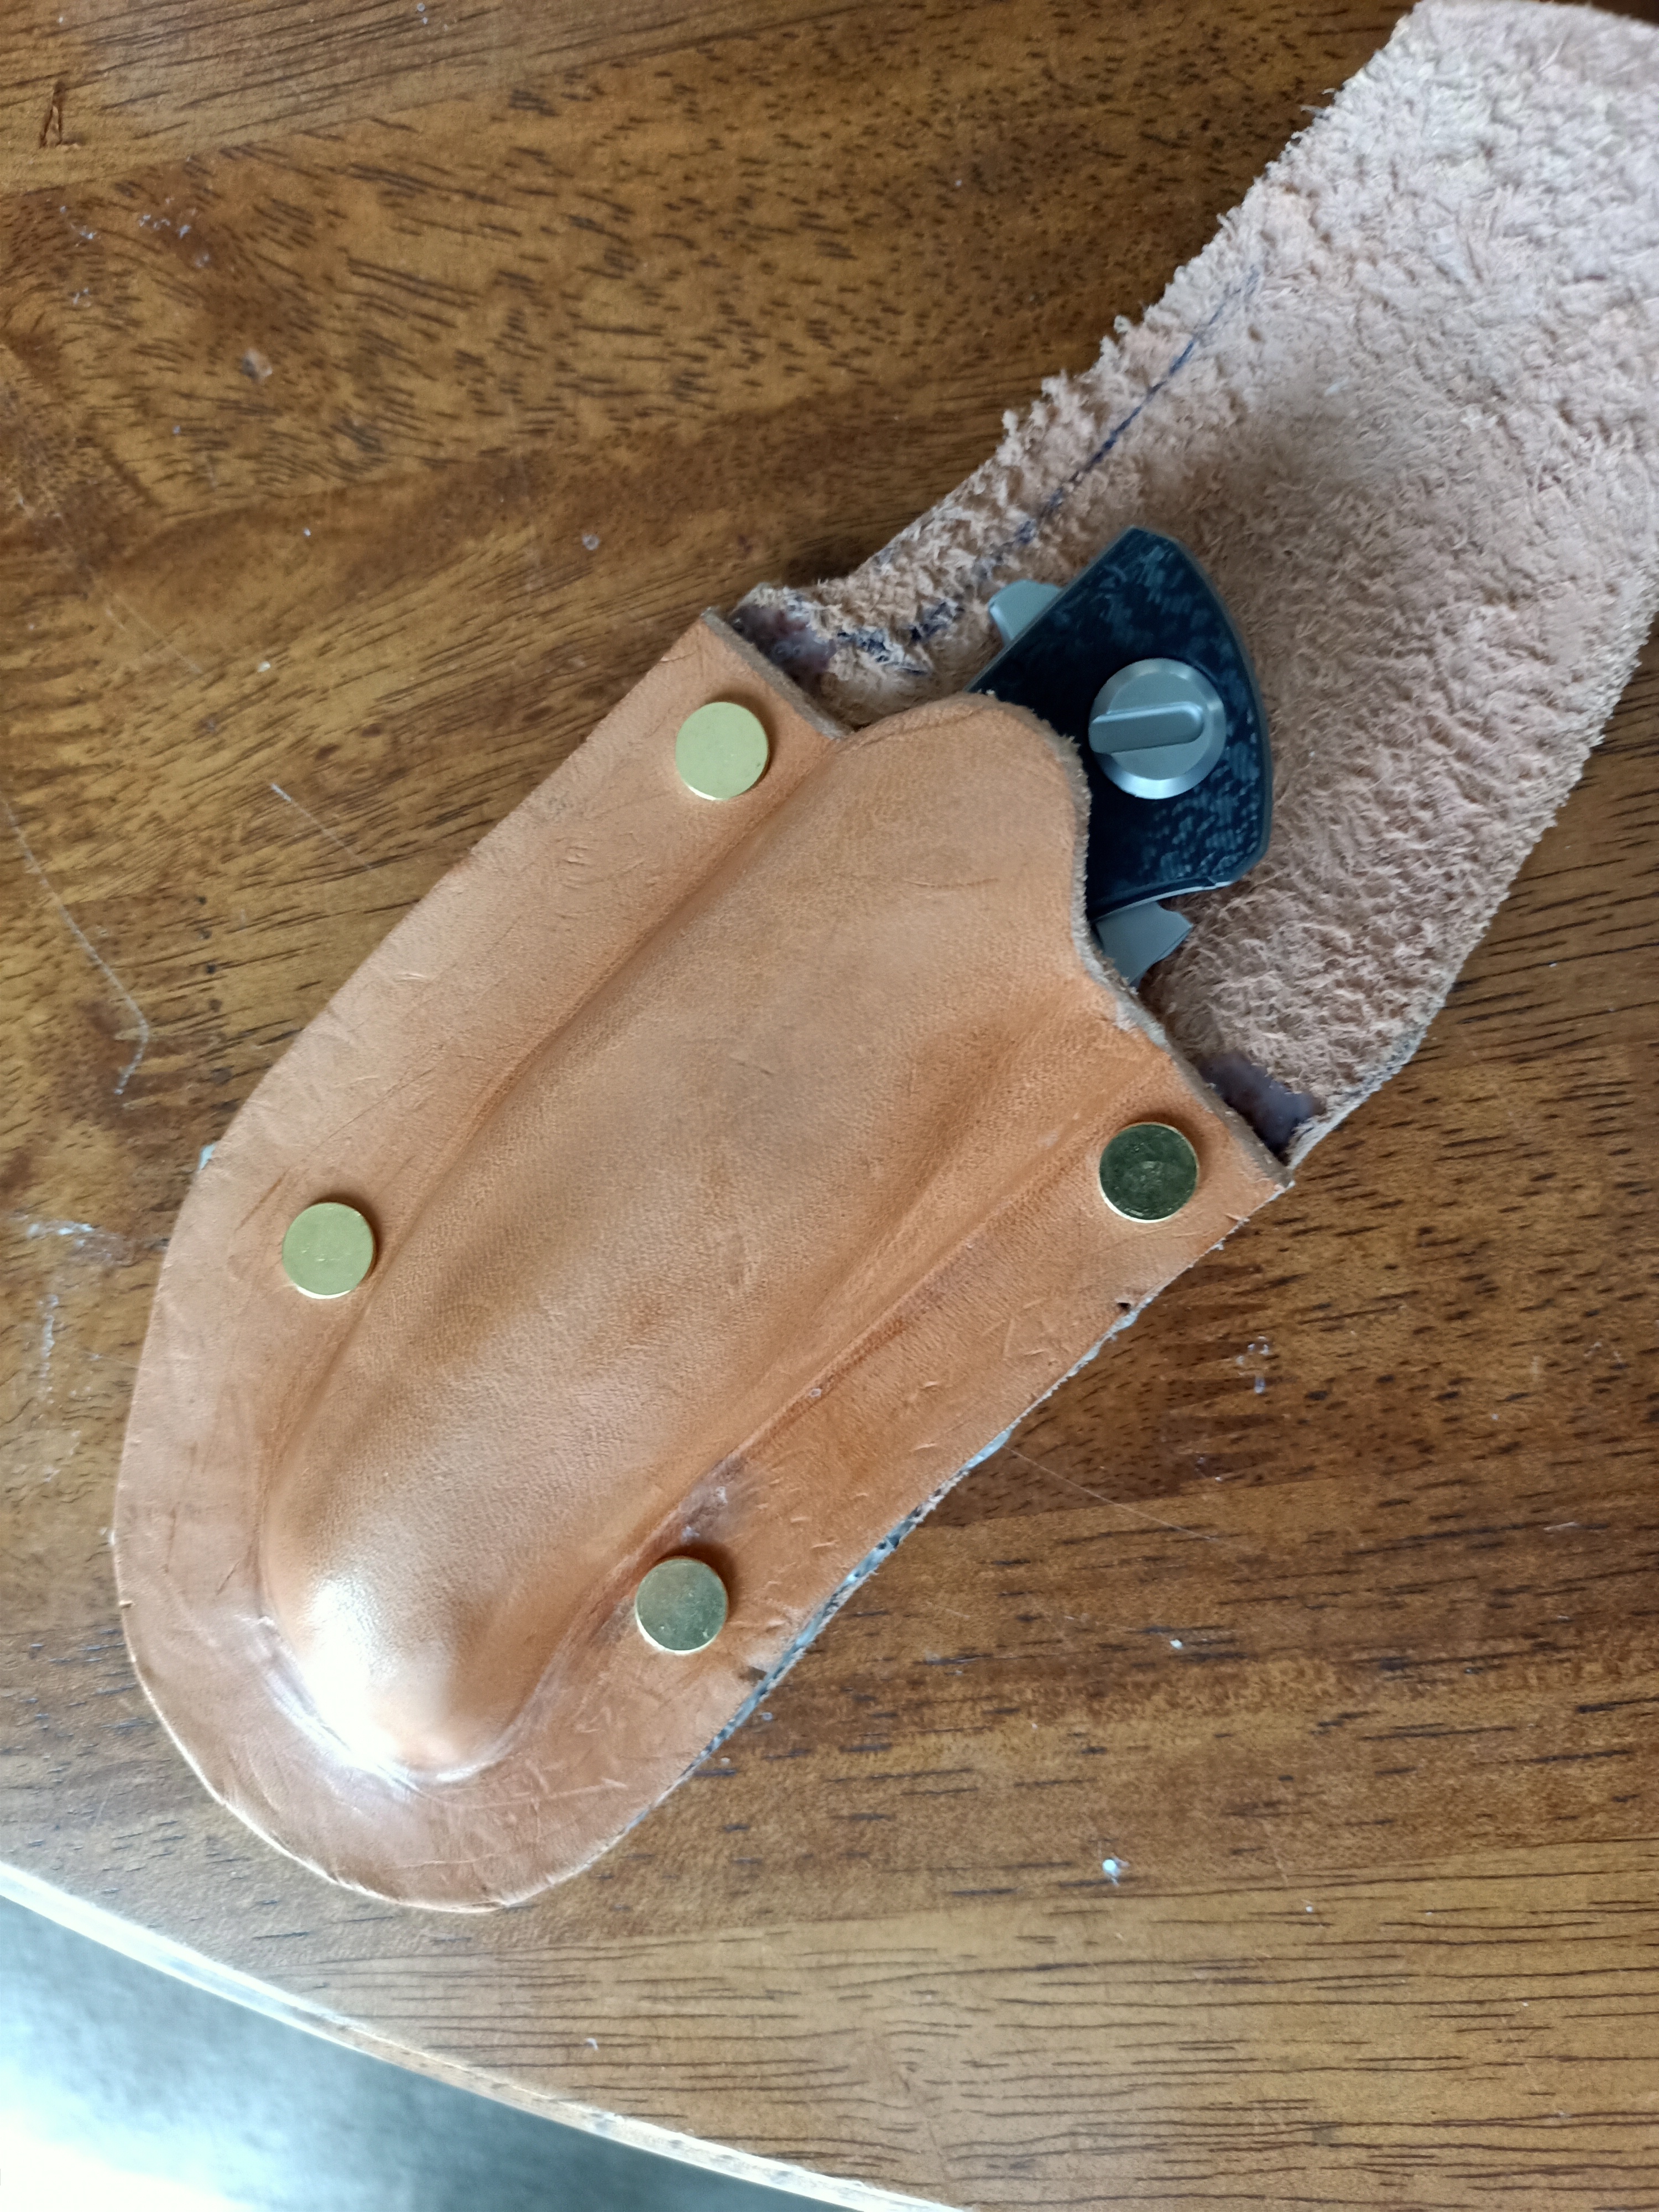
Spent the last few nights making a wee double decker pouch/sheath for my new folding scalpel (scalpel for hunting thread) to keep the knife and some spare blades together I can just throw in my bumbag/belt pouch and not rattle around .
Made it using some thin 1.5 ish mm leather scraps kindly donated by @ebf .
Water molded to the knife with a separate slot in back for blade storage . Also molded the lid flap in closed shape to make that the natural shape of the leather which keeps the flap almost locked closed when slid under the retaining cross strap .
Gotta say was a right pain trying to make something so small with such flexible leather but quite pleased with end result . And with the finished article being 4 layers thick is actually quite stiff once completed .
No teaspoons were harmed in the making of this sheath .....
Attachment 188531
Attachment 188532
Attachment 188533
well done indeed. pleased you put lighter there for size as no idea otherwise. if you find it opens you could put hole in end of flap and simply thread string through it so it would be too fat to return through hole unless string removed.
Thanks MD . I was a little dubious about the flap closure but turned out surprisingly secure .
Was going to use the standard popper setup for closing but decided I wanted to try something different and think also popper would have made it to bulky . Seriously considered making it button up and making a button out of antler but decided a bit over the top for something that is going to live in my bag and never be seen by anyone so just did the nice simple retaining strap instead ....
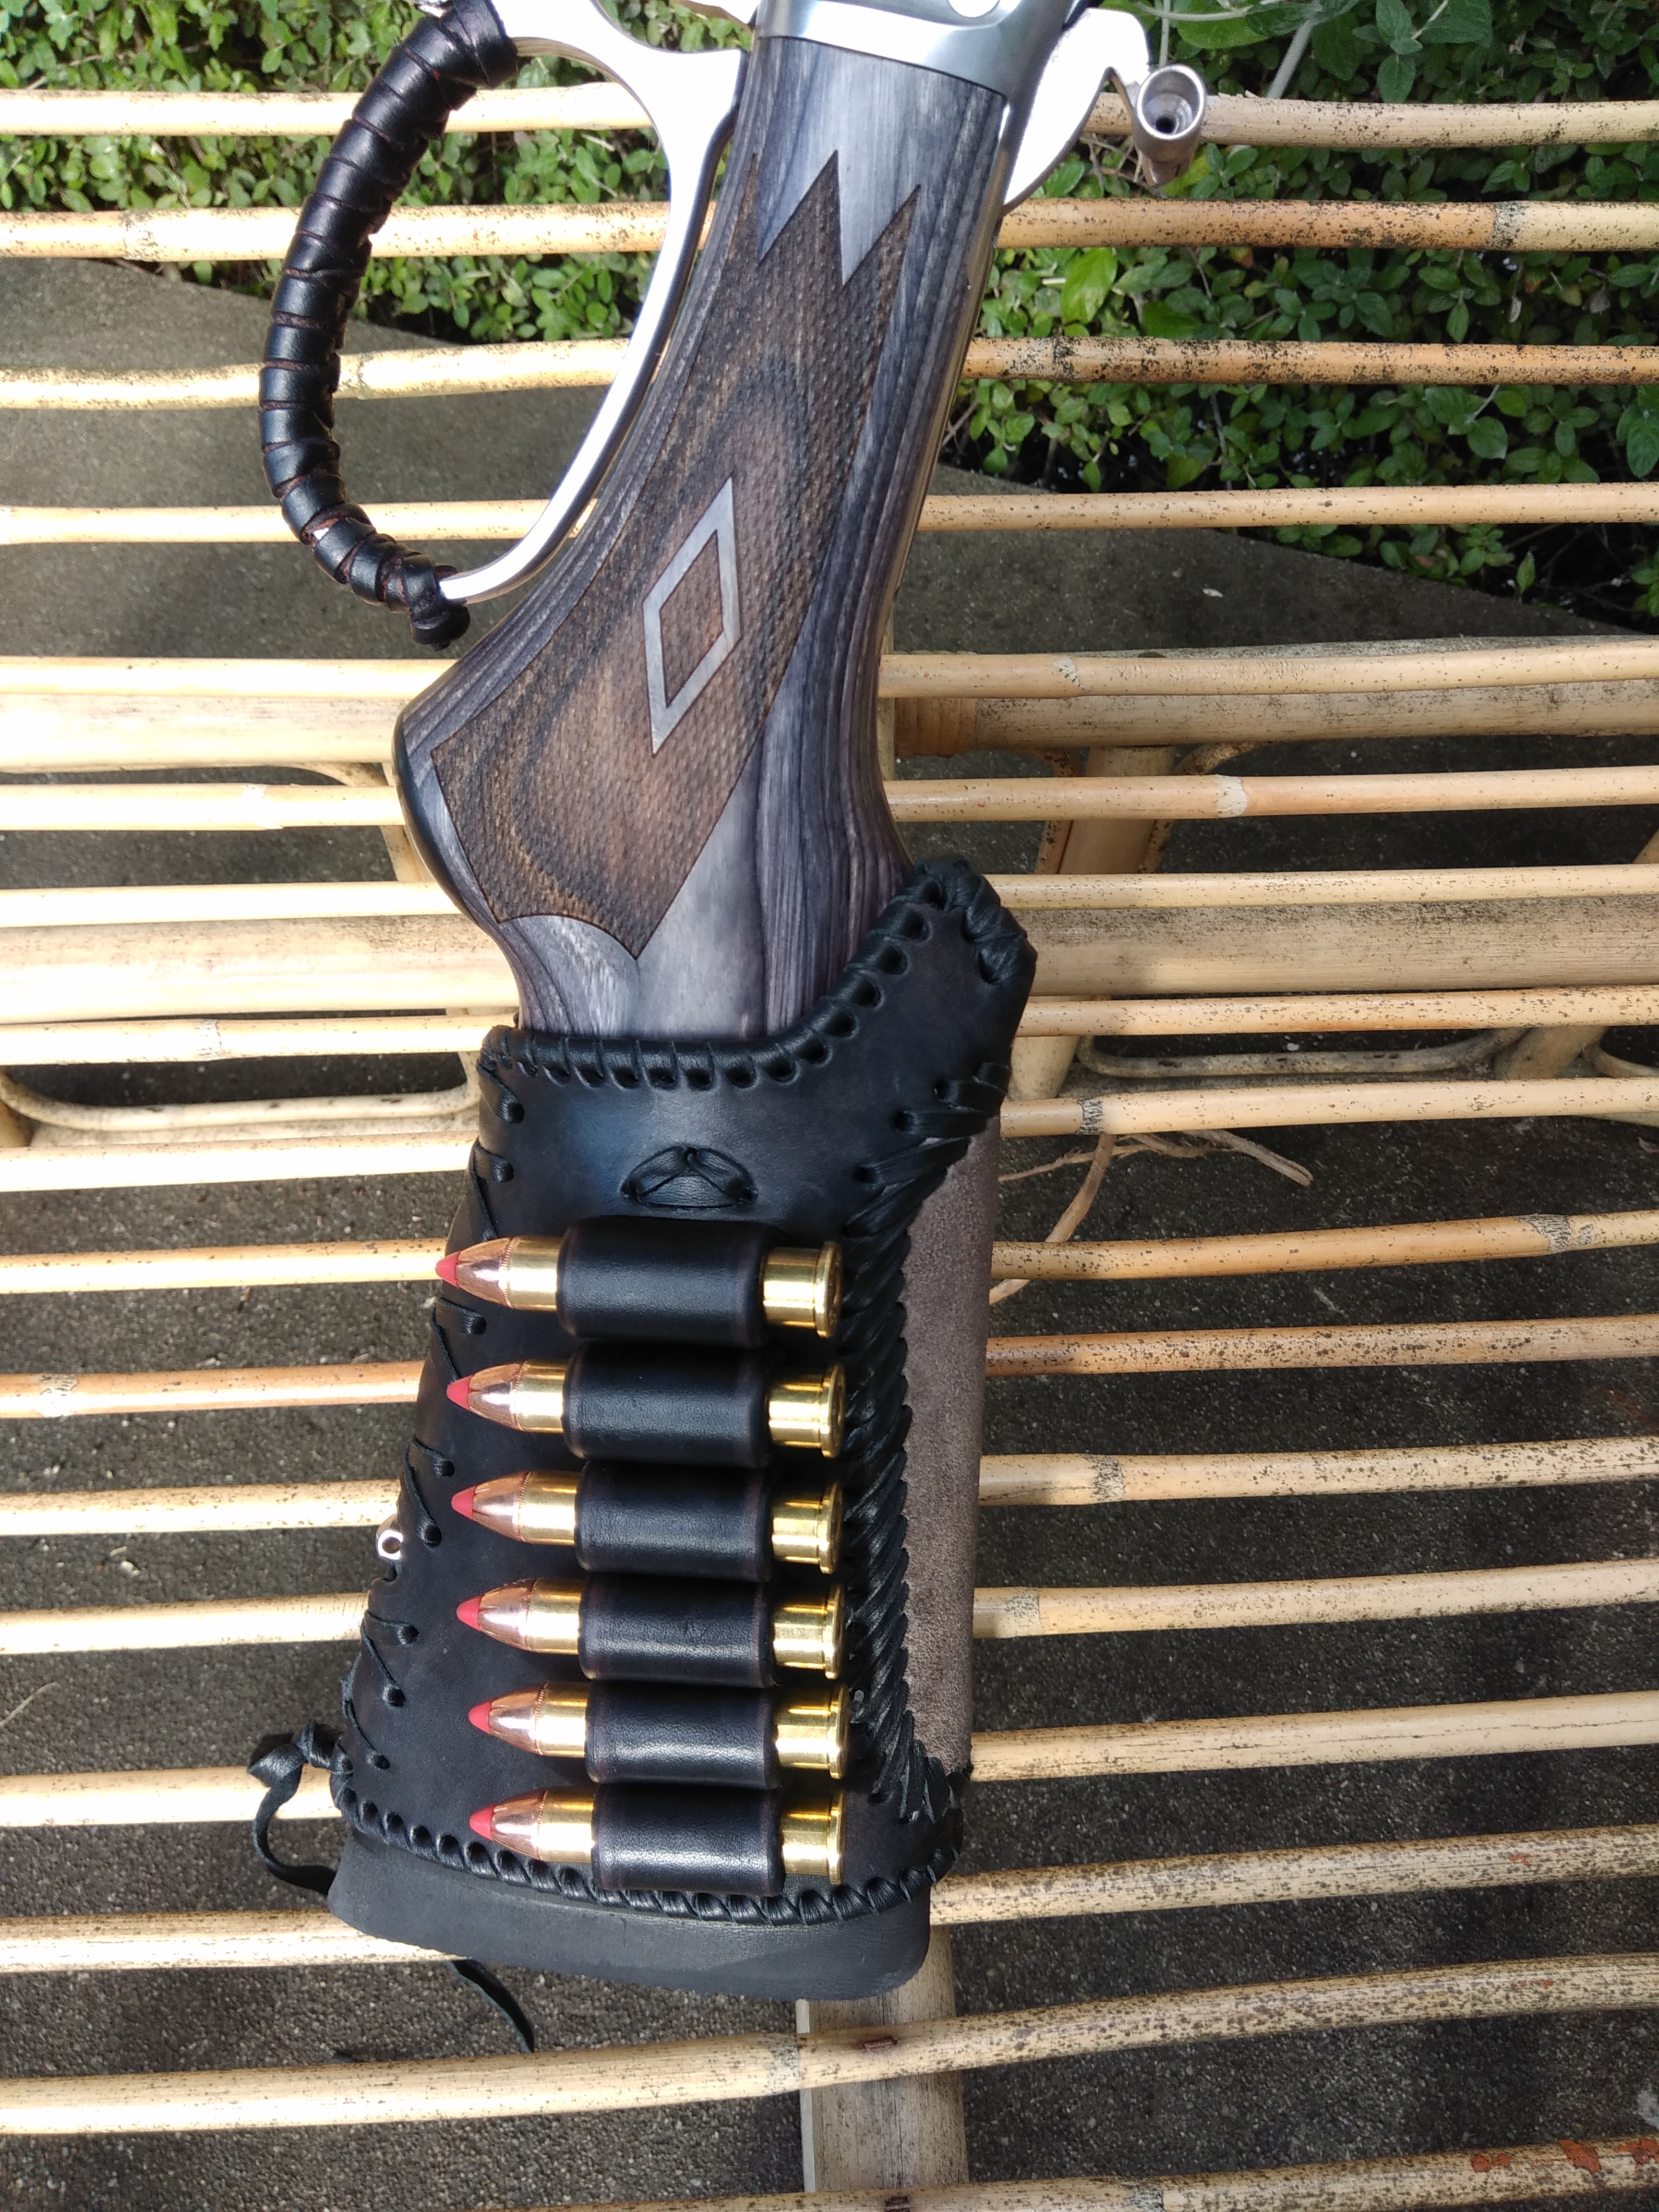
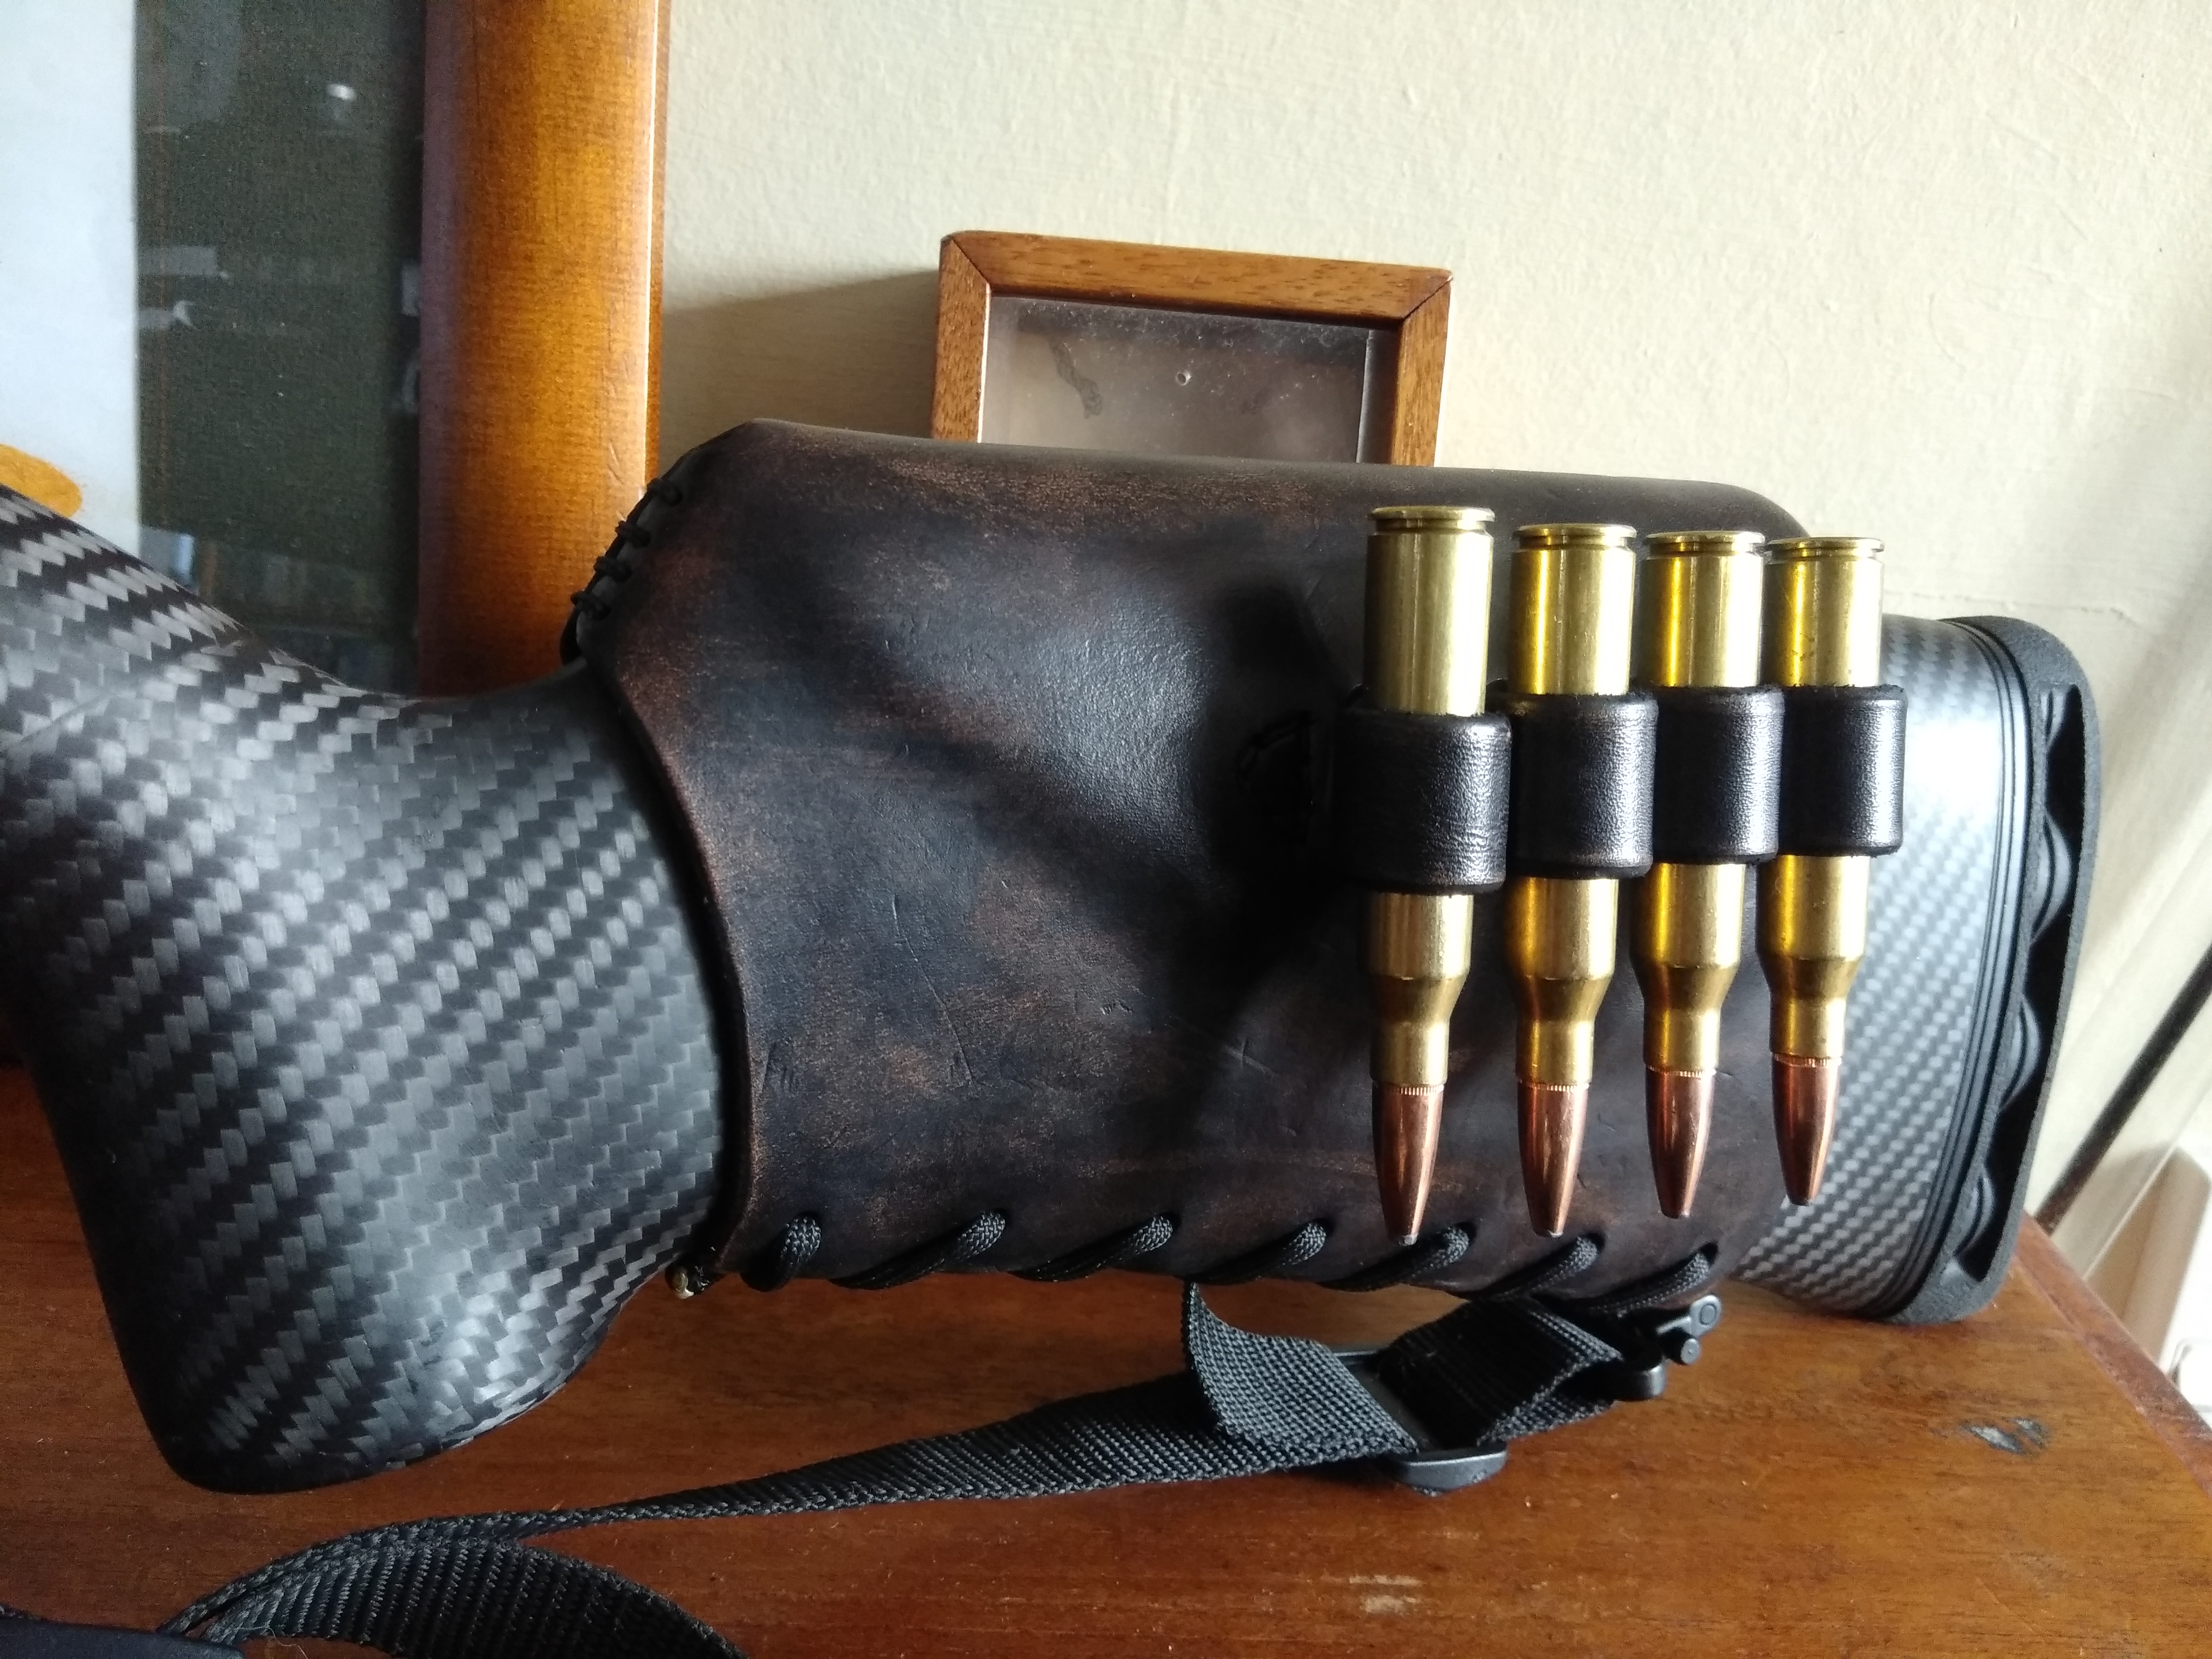
Thats amazing work for a lefty, most would need the shell holder on the right side though.Quote:
Originally Posted by Ftx325
Thanks ...Quote:
Originally Posted by CBH Australia
And you are correct , there are a lot of weirdos out there who would want it on the 'wrong' side .... bloody cock-eyed right handers .... ;)
That's some tidy work @Ftx325. What make is that knife?. Have often wondered how they would go.
I had a little play with a similar pouch design a while ago, but with a horizontal carry belt loop. The flap seems to be holding up OK but I also have doubts about them[emoji848]https://uploads.tapatalk-cdn.com/202...57f6136a91.jpghttps://uploads.tapatalk-cdn.com/202...914294fcf3.jpg
Sent from my SM-G525F using Tapatalk
Hi Hunter . Thanks ...
I wouldn't have done the flap closure like that if I was belt mounting it but ok just in bag and the knife and blades are still a light friction fit in sheath so won't fall out anyway .
I left the flap leather normal to start but wasn't happy so soaked the flap up until about 3/4 of inch before the the mouth of sheath , slid it under strap and molded around sheath so it wraps around it then cooked it with a hairdryer . When dry the flap is stiff but the point above mouth is still flexible to allow it to bend to get open or closed and because leather is stiff you actually have to make an effort to open it as it doesn't want to bend to allow you to pull it out ... Make sense ?
You can see in the 2nd pic where the flap is stuck up stiff and shaped to wrap from the tip to just after the bend where flexible leather starts .
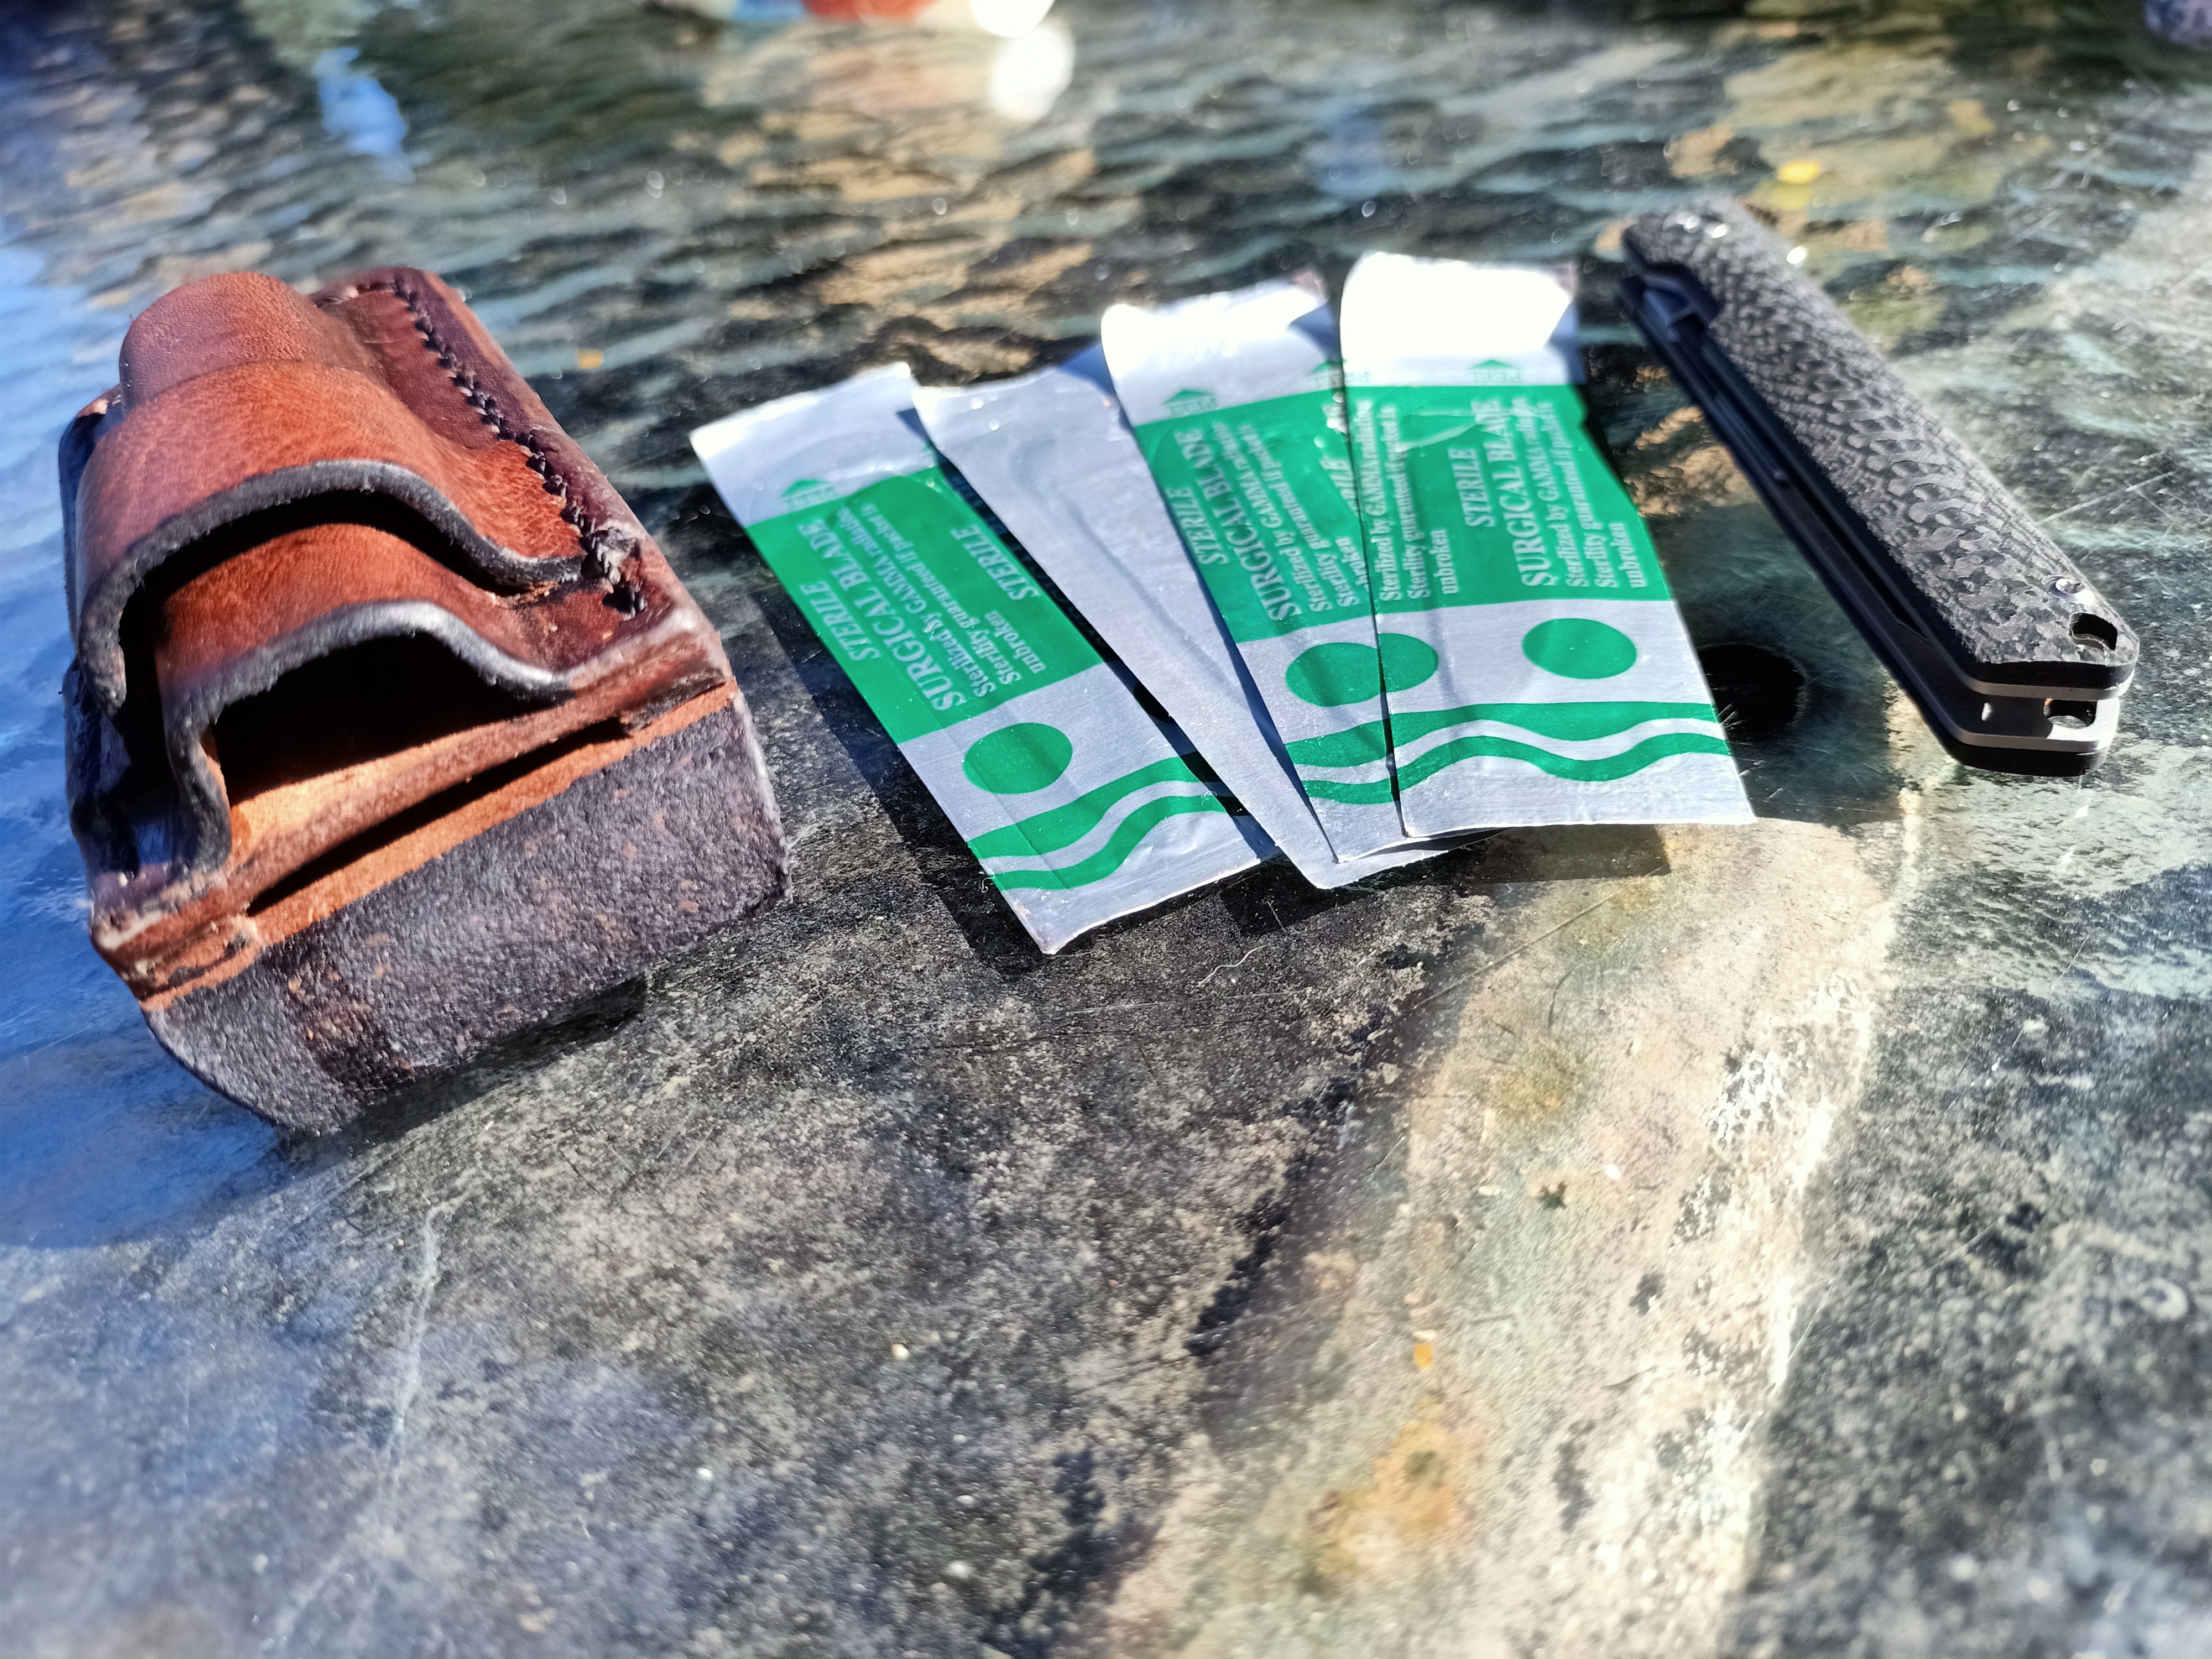
The scalpel was from Ali express . The seller was tczuo edc . Have since ordered 4 more for the guys at work which arrived the other day .
I am considering ordering in a bunch more as 2 others now want one after seeing mine as well as my boy ....
Thanks @Ftx325 will have a look at them.
I always find when you make stuff for yourself it is a good excuse to try different designs/techniques. If they work out it's good, if they fail then no one is pissed but yourself [emoji1745]
Sent from my SM-G525F using Tapatalk
@Ftx325, looks mint ! very clever work on the flap. Should be nice and quiet. :thumbsup:
Little rainy day E.D.C project. Victorinox Adventurer and a Wurkkos wk01. Little torch but puts out 120+ lumens, I'm quite impressed with it.https://uploads.tapatalk-cdn.com/202...0a60e02d11.jpg
Sent from my SM-G525F using Tapatalk
Nice.... Funny I just started much the same thing for my pocket knife .
Wet molded again and the flap will be removed .
Attachment 189597
Obviously a work in progress .... Just started it yesterday with some more little scraps so the design is a compromise due lack of leather . Was going to add torch also but not big enough leather pieces for that unfortunately .
Great minds huh!.Mine was reclaimed from the scrap box too.
Sent from my SM-G525F using Tapatalk