How do you effectively sight in on public land, while out hunting ? "Back in the day", we all did this, but standards of marksmanship were less than is expected now. Deer cullers got 3 rounds per tail returned and that was considered a fair average success rate.
So, why might you have to do it now ?Sh**t happens.
- "mates scope broken, has to borrow your spare"
- "range closed and weíre on the way to the bush"
- "emergency swap out scope in the middle of a trip"
There are a few prerequisites that I'll mention as we go. Its not ideal of course, but it can be done.
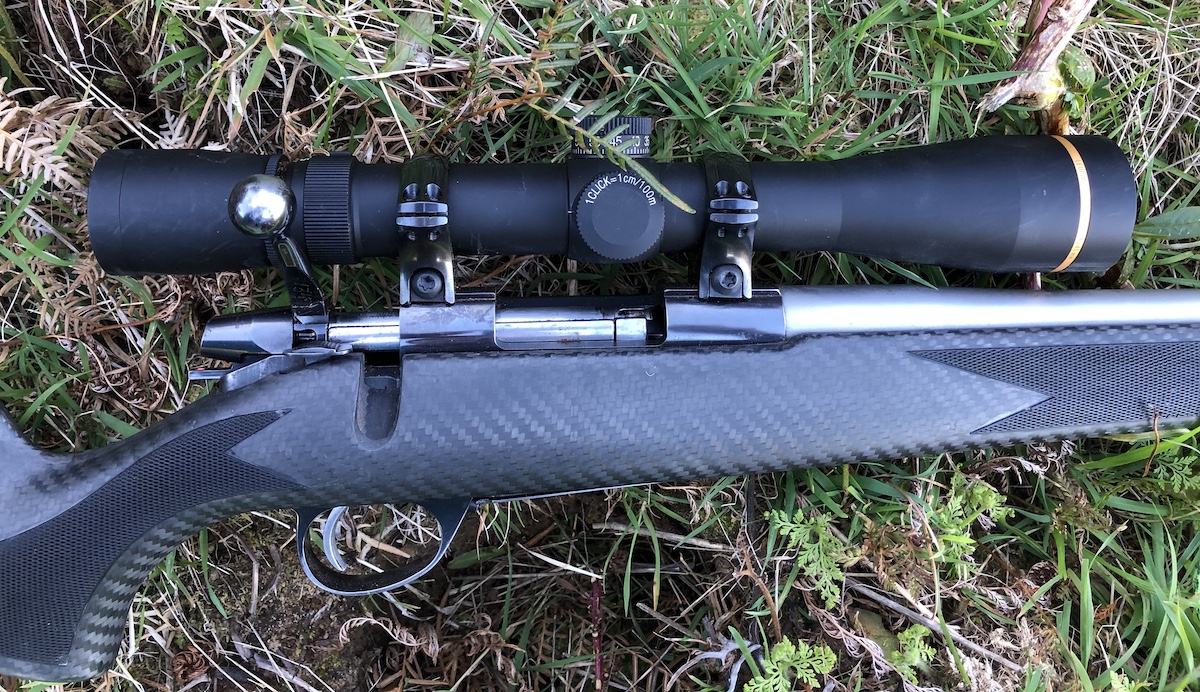
This weekend, I had a new scope and not enough days to get to the range and also do a bit of a goat hunt.
First, I'm in an area I know well, where few trampers or other hunters go. If I see an animal on the first part, it will be a goat and I could restrain myself frtom letting strip before I've put a shot or two on paper. I donít mind disturbing the little valley Iíll be shooting in, but Iíll fire as few shots as I can.
At a sight in session on a formal range you are usually assessing several things about your rifle-scope-ammo system:Naturally, if you are trying to use the minimum number of shots, from improvised shooting positions, at whatever distance is available, you have to know that all of these are satisfactory and limit yourself to just establishing that the mean point of impact is indeed where you want it.
- Grouping capability Ė the most basic level of rifle performance
- Zero stability Ė assurance of this needs several good range sessions with plenty of use in between.
- Sight adjustment reliability Ė tedious to formally confirm but essential
- Accuracy of zero Ė mean point of impact at the desired location
- Trajectory ĖThis needs to be checked if the shooting in distance is not the same as your required zero distance.
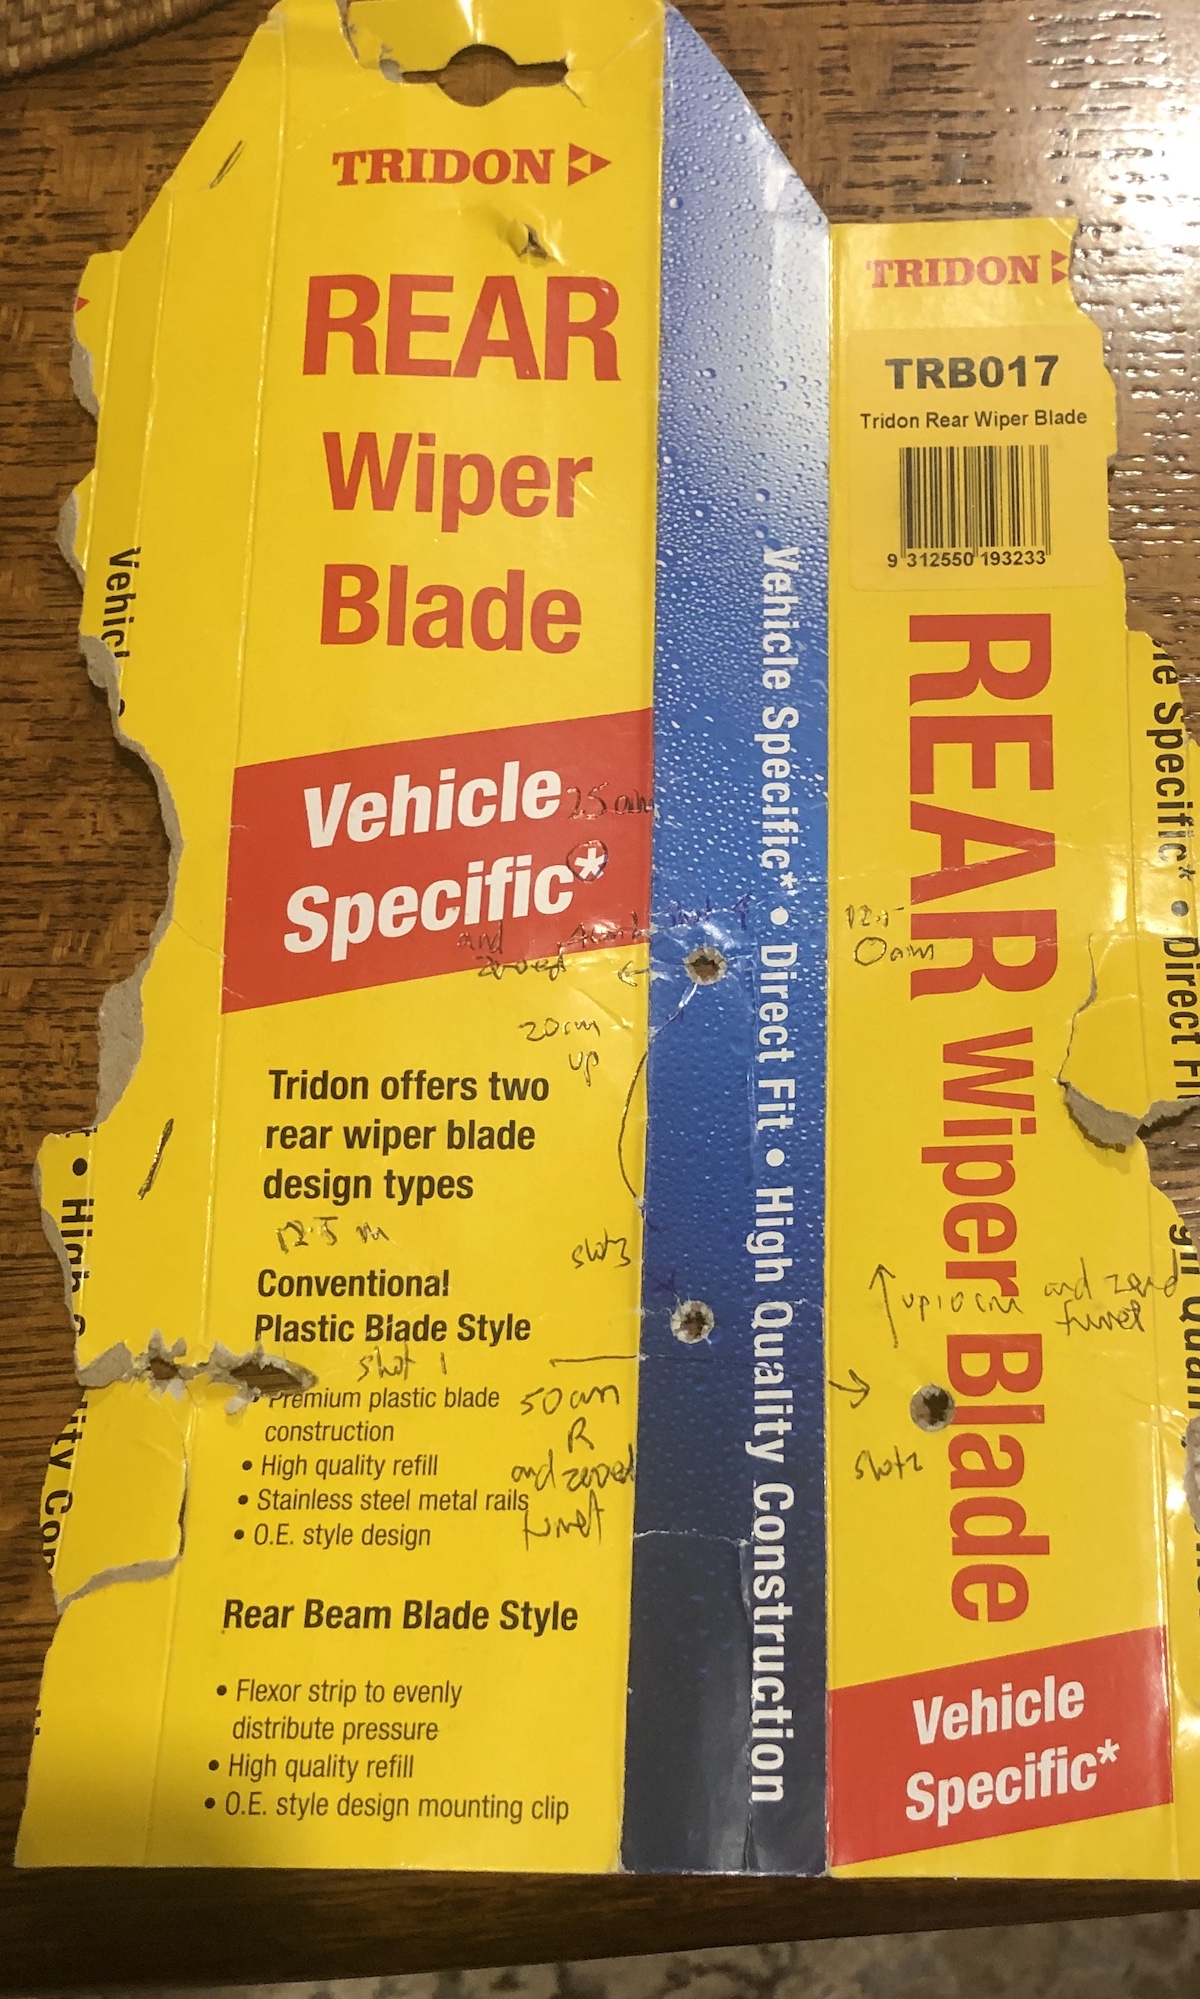
So, I start at 12m to be sure I can see that first shot. That's 1/8 of 100m. I'm sitting with a rest on a ponga, which is a pretty stable shooting position. Yes, it just clips the edge of the card. This is the key shot of the session. If you canít see where your shot has gone, there will be much uncertainty and some ammo wasted for sure.
It's about 5 cm low and 8cm left. At 12m, the bullet needs to fly most of the scope height low - about 3cm.
This scope is easy to use. It adjusts in cm/100m.
If you have doubt about what the clicks or graduations are or which way to turn it (very common unfortunately and weíve all got it wrong sometimes) then you are up against it and some frustration and wasted shots are likely.
Adjust 50cm/100m right and zero turret. I write all adjustments on the target as I do them.
Second shot, at 12m, just 8cm low.
Adjust 10cm/100m up and zero turret; record it on the target.
At this range, I can adjust on single shots. I know the rifle, ammo and I reliably shoot 30mm groups at 100m. Say, 6cm sitting with a rest. The two new components are the scope and mounts, which are both good brands and carefully mounted. 60mm at 100m is about 8mm spread of centres at 12m. I donít sweat the small stuff and Iím adjusting in big, round numbers for a start.
Then, I continue on, round as few corners, till I can find a safe spot with a clear 25m range and another good ponga rest.
Third shot, at 25m, 8cm low and 1cm right.
Adjust 20cm/100m up and zero turret.
I find I can do this sort of calculation if Iím quiet and on my own, but not with a knowledgeable mate chattering in my ear or listening to my own clever commentary.
Fourth shot, at 25m, 2cm low and 2cm right.
Now weíre getting close.
Adjust 4cm/100m left and zero turret.
OK, the shots seemed to adjust pretty closely where I expected. I have a sample of three, saying the scope does move as it claims.
Here is the short range target. Itís just a bit of cardboard I had lying around in the back of the car. The shots look a bit messy on it, as they do if you shoot through several adjustments on one piece of paper.
I now expect the mean point of impact will be within 6cm of where I aim at 100m, so Iíd be happy to take a broadside chest shot on a largeish got if one were to present itself. But I need to check with a bigger number of shots at 50m or 100m, as there is better ďleverageĒ to detect whether a small adjustment is needed.
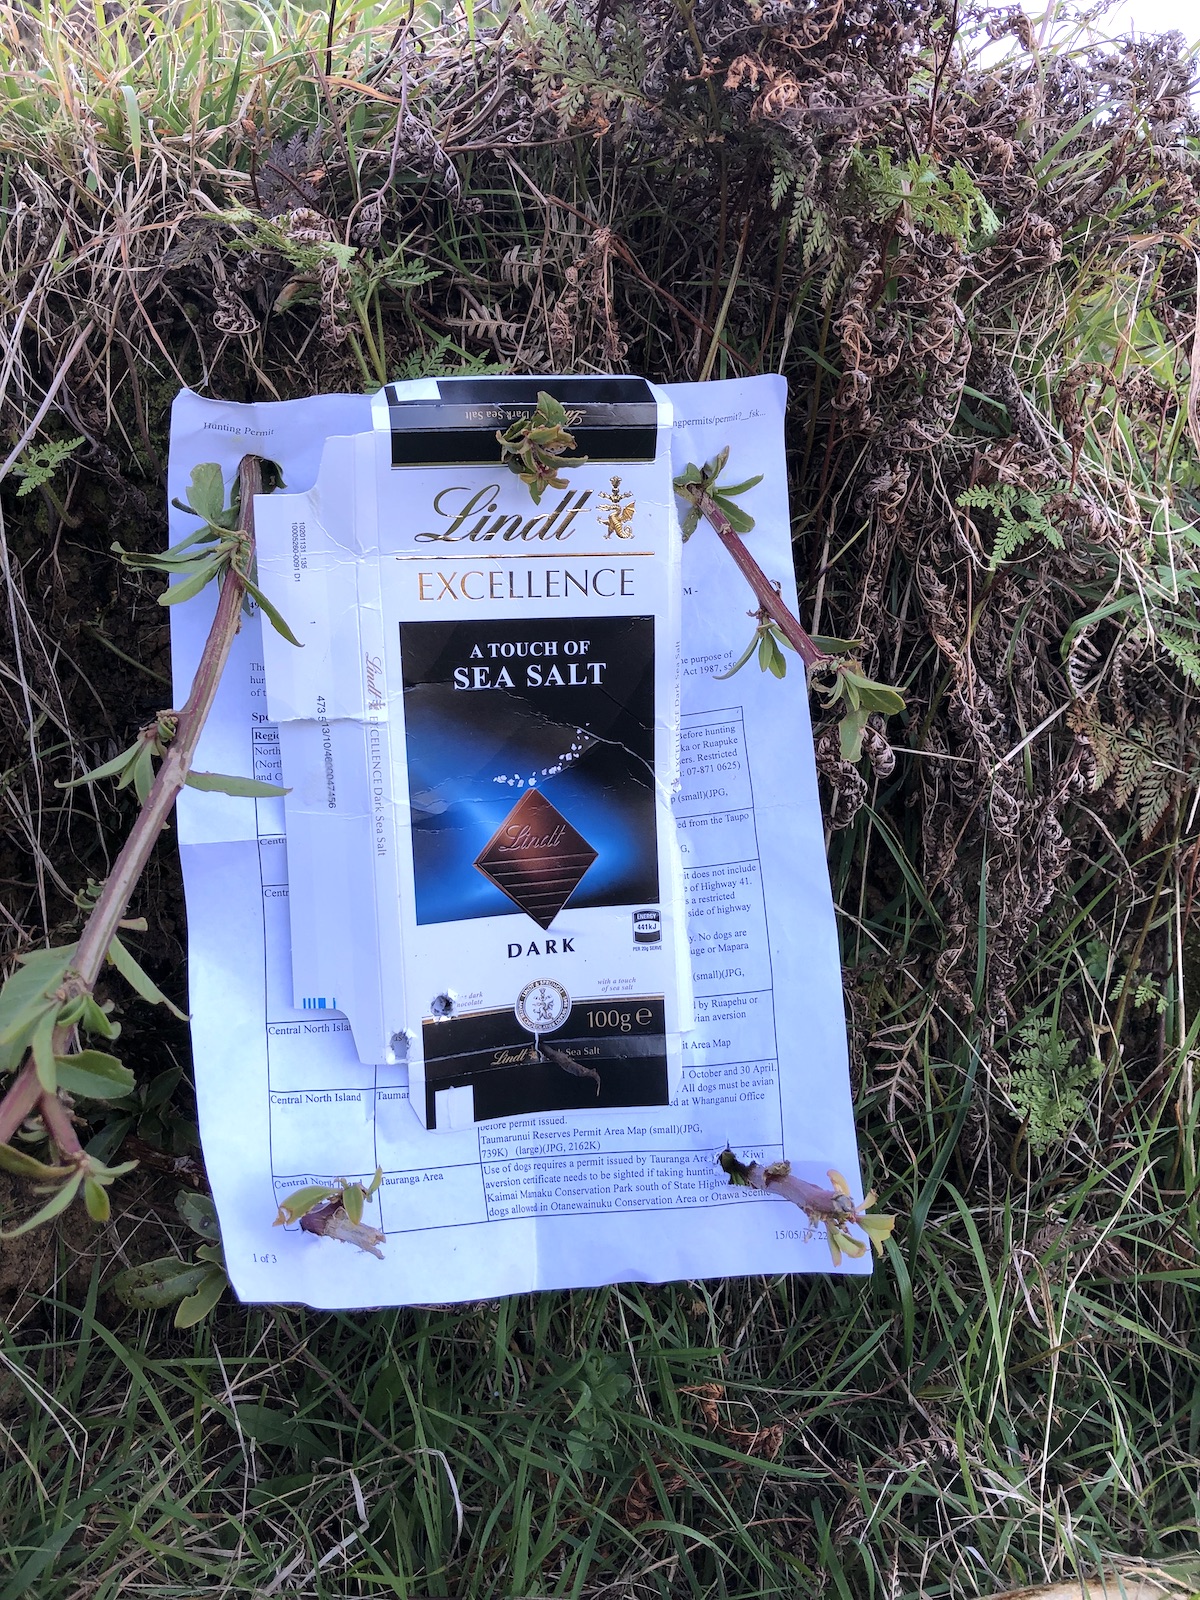
Once Iím out in the open, I select another target from my daypack. Its my hunting permit and a now-empty chocolate packet. I use the rangefinder on a flat pot on the next ridge and find a nearby spot of vertical ground to pin the target to, as close to 100m as I conveniently can. Itís 108m. Itís important to fix the target as best you can because there is nothing more annoying than having it swing loose and needing to make a 200m round trip between shots ort else shoot at a crooked target. I use 6 twigs to hold it in place. I aim at the bottom of the black square and fire two. I donít like to fire three in a row in case someone thinks itís a distress signal. I shoot prone over my backpack, holding the foreend as I do when hunting.
As you can see, if you look carefully, the two shots are about 2.5cm apart and 2cm low and left of the aiming point. Again, I am thankful they were both on paper, so I can have good confidence where the zero will be. I adjust 2cm up and 2cm right, zero the turret and write it on the target. On a proper range, Iíd fire a careful 5 shot group to confirm everything is just right. But, for today, Iím good to go out to 200m. The previously verified drop chart taped on the butt tells me I would need to dial up 10cm/100m at 200m and has dope out to 300m for if something goes wrong.

Welcome guest, is this your first visit? Create Account now to join.
Welcome to the NZ Hunting and Shooting Forums.
Search Forums
User Tag List
+ Reply to Thread
Results 1 to 7 of 7
 5Likes
Thread: Field Sight In
-
23-09-2019, 10:12 PM #1Member

- Join Date
- Mar 2012
- Location
- Waikato
- Posts
- 2,185
Field Sight In
-
-
23-09-2019, 10:50 PM #2
very good......you COULD have saved some time and ammo with a colimetre/bore sight device.....or looked through bore at an object and same through scope...much easier done if you have some way to hold it firmly....smack on at 26ish yards will/should see you couple of inches hugh at hundy.
Ive tried the lazer bore sight things but buggered if I can get it to give me a single red dot to put scope onto...must have bought a dud.
-
23-09-2019, 10:56 PM #3Member

- Join Date
- Jul 2013
- Location
- Waikato
- Posts
- 2,576
After boresighting ,I fire one shot at25m then hold rifle real steady and move crosshairs to bullet hole ,good enough for a bush hunt then shoot at 100m later at range to fine tune.
-
23-09-2019, 11:15 PM #4sneakywaza I got

- Join Date
- May 2013
- Location
- Fairlie
- Posts
- 3,626
With practice, you can boresight with Mk1 eyeball at 30yds (ish) and start shooting at 100yds, your third shot should be the first in a group centered on your chosen point of impact for the ballistics you need. Have lost count of the number of rifles I have boresighted, and assuming the rifle/load/scope are up to it, always on or close to the money off the bat. Stationary supply places have 2" stick on fleuro squares that are perfect, I carry one in my gear, just in case.
-
24-09-2019, 12:26 PM #5Banned

- Join Date
- Mar 2016
- Location
- auckland
- Posts
- 2,453
In Te Urewera, the road signs seem convenient for this purpose.
-
24-09-2019, 12:35 PM #6
Shit I just bore sight it at 30m, fire one shot at 100, adjust, one shot to confirm. Done. 2 shot sight in, so easy. Used to not even boresight back in the day before I knew better and use like 20 rounds to sight in Haha
Flappy Disc Customs Bespoke Hunting Rifles
-
24-09-2019, 01:35 PM #7Member

- Join Date
- Sep 2013
- Location
- Taupo
- Posts
- 1,600
Something handy to know is the distance your round goes through the sightline.
For my rifles this is usually between 20 and 27 yards, depending on the rifle/load. At that distance the hole should exactly take the centre out of a bullseye, and if you are careful with the shot it is obvious what is going on. A little maths re the adjustments and you can get it pretty well perfect. A vertical line drawn on the target makes it clear what is happening.
At 25 yards a 1/4 moa adjustment will move the bullet point of impact about 1.5mm.
Similar Threads
-
Laser sight or red dot sight for .22 rifle.
By Grey Kiwi in forum Firearms, Optics and AccessoriesReplies: 3Last Post: 16-04-2019, 09:20 PM -
Field gun
By Survy in forum ShotgunningReplies: 43Last Post: 22-04-2015, 04:47 PM
Tags for this Thread
Welcome to NZ Hunting and Shooting Forums! We see you're new here, or arn't logged in. Create an account, and Login for full access including our FREE BUY and SELL section Register NOW!!


 LinkBack URL
 About LinkBacks


 Reply With Quote


Bookmarks