Kia ora tātou,
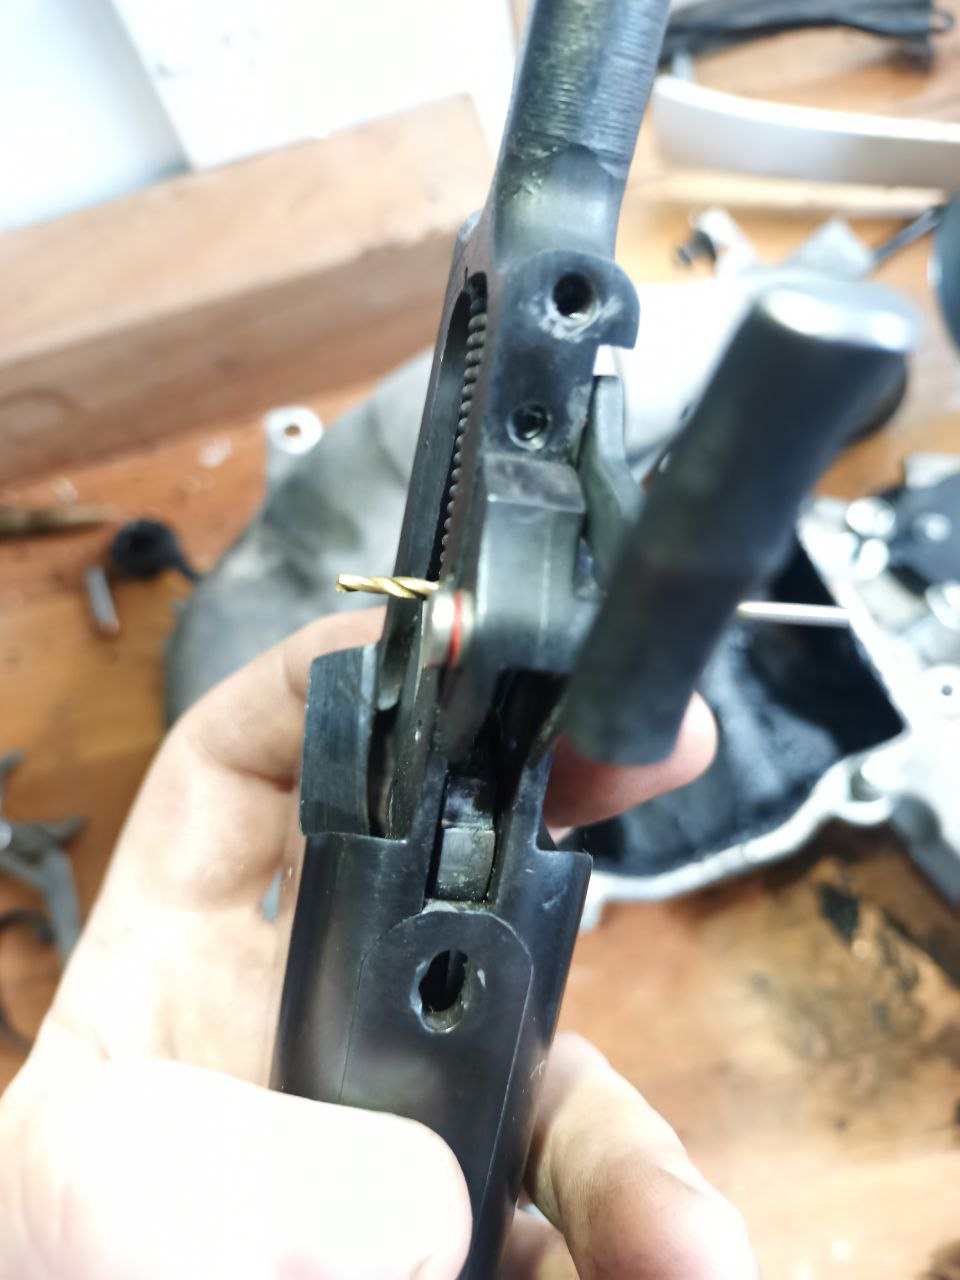
Thought I'd share a bit of my work over the weekend. Having a young family means time doing anything gun related is pretty limited at the moment, but had been chafing to get in to see if I could get my .243 baikal working a bit nicer, mostly around the trigger. Turns out it was pretty straightforward, pulling the buttstock off to pull the action out of the stock, then only needed to tap out the one main trigger pin. Process is made significantly easier by shoving a pin above the trigger spring (some cheap shirty drill bits lying around were easiest for me) to minimise the force through the trigger pin.
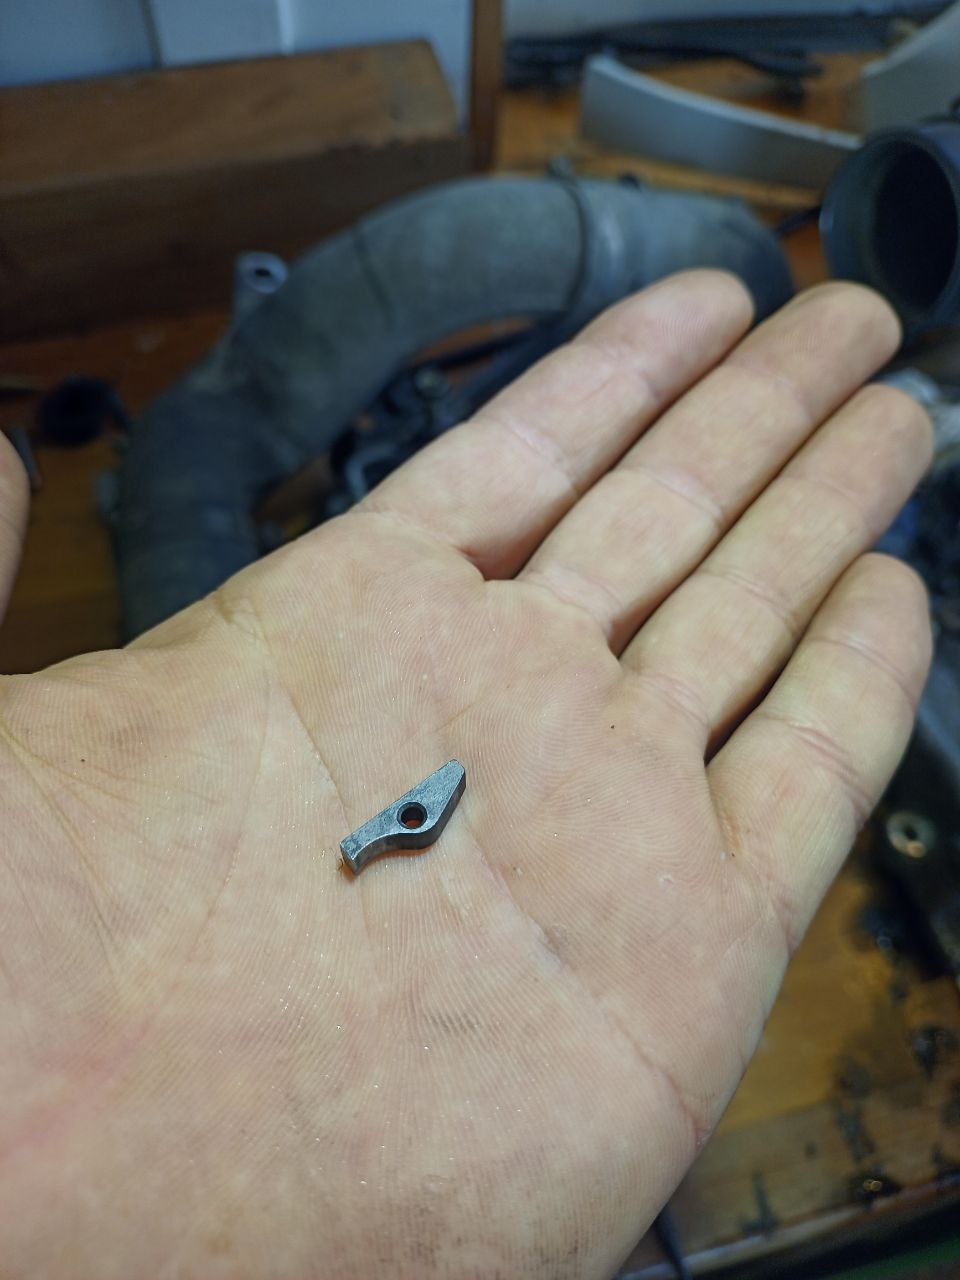
Pics showing my rudimentary pin holding my trigger spring up, and also the surface of the hammer which I cleaned out.
Cleared up all the crud and took the sears to a very fine stone to remove some of the burrs. Moved a cloth around on the sear of the hammer also which cleaned it up nicely.
Straight-forward to reassemble, you could probably do it a lot faster than me if you don't drop the little part from inside the trigger assembly on the ground and spend a frustrating soul-revealing 40 minutes looking for it.
Gar!
Most people comment on the jankiness of these triggers, I so wanted to see how much I could improve mine with some TLC. Fully assembled it runs a heck of a lot smoother, first of all getting rid of all of the crud from its pre-me-life made it a lot smoother throughout the full pull, and more critically removing the burrs means it doesn't feel like a two-stage trigger now, where the effective different lengths of lever arms from those burrs means you don't get the feedback about when it's going to release.
Managed to get 3 shots in around 35mm at 100m after getting it all back together, so pretty happy for a pack gun from a tractor factory!
I'm looking at customising this puppy a bit more, so I'll keep you all posted. I know a lot less exciting that most of the awesome work you guys are doing here, but it's something!
Welcome guest, is this your first visit? Create Account now to join.
Welcome to the NZ Hunting and Shooting Forums.
Search Forums
User Tag List
+ Reply to Thread
Results 1 to 6 of 6
Thread: Baikal centrefire trigger work
Hybrid View
-
24-10-2023, 11:05 AM #1Member

- Join Date
- Aug 2021
- Location
- Christchurch
- Posts
- 44
Baikal centrefire trigger work
-
24-10-2023, 02:56 PM #2
the yare vastely under rated rifles.....have you worked out to carry it uncocked yet??? much safer but quick to make go bang..just make plurry sure when you do recock it that action is up tight still,they can be not quite shut and stil lfire resulting in miss by a mile.....
75/15/10 black powder matters
-
26-10-2023, 11:47 AM #3
I had one in 270 and the trigger was definitely tough to get used to, but boy could it shoot. 3shots into a thumbnail at 100. Chamber was super rough and the cases would come out with a double step in the neck... they know how to rifle a barrel though.
"That is ever the way of the Highlander. He alters like a clear pool to every mood of the sky, so that the shallow observer knows not how deep the waters are."
-
26-10-2023, 04:12 PM #4Member

- Join Date
- Nov 2014
- Location
- Christchuch New Zealand
- Posts
- 6,247
Intelligence has its limits, but it appears that Stupidity knows no bounds......
-
28-10-2023, 08:56 PM #5Member

- Join Date
- Aug 2021
- Location
- Christchurch
- Posts
- 44
Yeah that's a good point - was mostly using 1000 grit stones, and pretty much only touched the burrs, so should be minimising risk.
-
27-10-2023, 02:54 PM #6
I love the single shot baikals, wish i could find the number of the guy i sold my 222 to. Still have a 12ga thats great for kids cos its near imposible for someone under the qge of 15 to cock it.

Sent from my SM-N981B using Tapatalk
Similar Threads
-
BSA centrefire variants
By Mathias in forum Firearms, Optics and AccessoriesReplies: 73Last Post: 11-02-2024, 12:18 PM -
New work truck ready for work
By Harryg in forum Outdoor TransportReplies: 20Last Post: 09-07-2018, 02:22 PM -
X-Bolt Trigger work
By Reonnz in forum Firearms, Optics and AccessoriesReplies: 2Last Post: 21-09-2014, 09:52 PM -
Getting a centrefire rifle
By Dundee in forum Firearms, Optics and AccessoriesReplies: 64Last Post: 29-10-2013, 10:24 PM
Tags for this Thread
Welcome to NZ Hunting and Shooting Forums! We see you're new here, or arn't logged in. Create an account, and Login for full access including our FREE BUY and SELL section Register NOW!!


 19Likes
 LinkBack URL
 About LinkBacks


 Reply With Quote


Bookmarks