Step One
Prep the stock
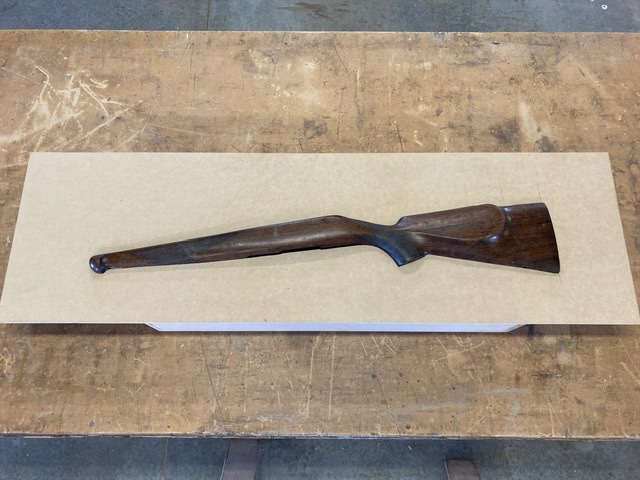
Make sure you are happy with the stock finish, as any defects will be represented in the fibreglass copy. I spent some time steaming out dents, and giving the stock a refinish (London oil style) I filled the pores of the wood as much as possible, and got it down to a 0000 steel wool finish.
Step two
Build parting board
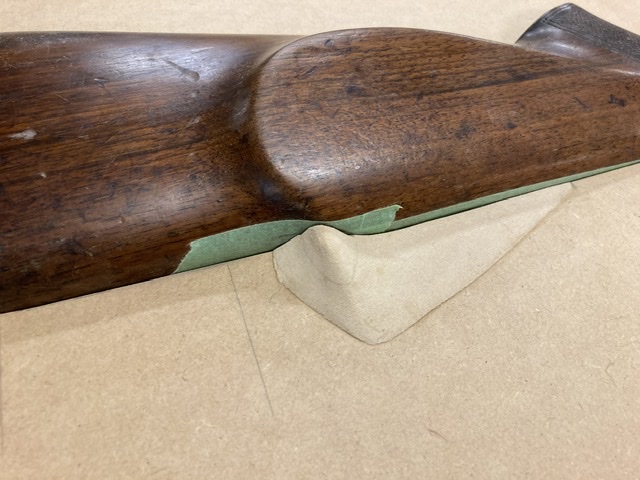
The mould was going to be vertically split, so a parting board needed to be made. I used 4mm MDF for this, and spent a good deal of time cutting and shaping it with a minimal gap around the periphery of the stock.
I built a box for the parting board to sit on, that also cradled the stock, so that the parting board and stock were held together in the correct position. The top of the parting board needs to run down the stock centreline. This is a good time to take some time and really have a think about how the mould halves will fit together, and whether your stock will be ‘trapped’ in the mould. Cheek pieces are a classic place for this.... in the next photo, you’ll see what I had to do to make sure the mould break line was in the centre of curvature of the top line of the stock.
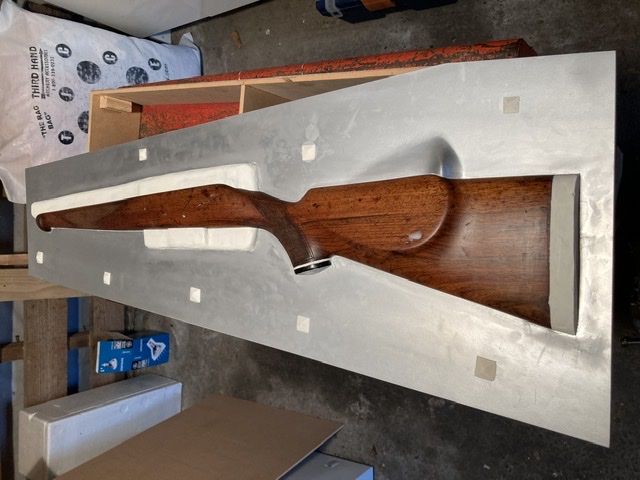
Next, paint the parting board (top only) and get it to smooth a surface as possible. I used what I had left in the garage (metallic silver) and wouldn’t recommend it. It seemed to bleed out colour after it was polished with 1000 grit wet and dry, but worked ok in the end.
Step three
Fill inletting with plasticine
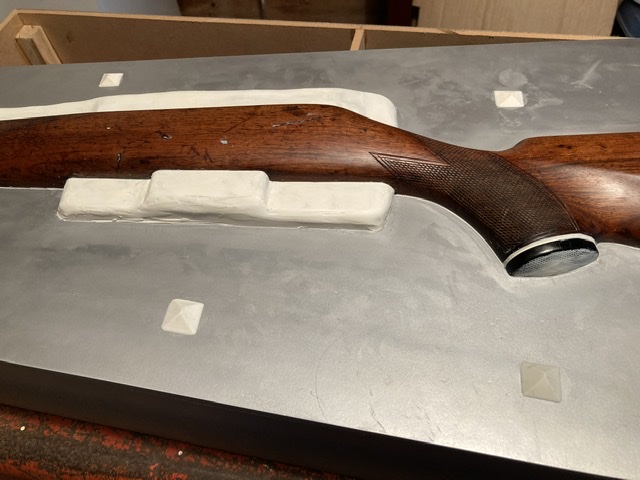
Once the parting board looks good, fill the gap between the stock and the board with plasticine. You want to make sure the transition is perfect, as that makes sure the split line of the mould is neat and square. Also fill the inletting with plasticine. It takes quite a bit, and a bit of time smoothing it out to look good.
Then make sure you create plasticine mould alignment pyramids every 3-4” around the stock. They are used to ensure alignment between the two mould halves.
Welcome guest, is this your first visit? Create Account now to join.
Welcome to the NZ Hunting and Shooting Forums.
Search Forums
User Tag List
Results 1 to 15 of 38
Threaded View
-
29-05-2021, 10:24 PM #2Member

- Join Date
- Aug 2019
- Location
- Manawatu
- Posts
- 1,057
Last edited by Hunter_Nick; 29-05-2021 at 10:35 PM.
Similar Threads
-
Shotgun Stock CNC Build
By Skirch in forum Projects and Home BuildsReplies: 23Last Post: 30-04-2021, 07:36 AM -
Wooden stock build
By Remmodel7 in forum Projects and Home BuildsReplies: 3Last Post: 03-03-2020, 09:57 PM
Tags for this Thread
Welcome to NZ Hunting and Shooting Forums! We see you're new here, or arn't logged in. Create an account, and Login for full access including our FREE BUY and SELL section Register NOW!!


 99Likes
 LinkBack URL
 About LinkBacks


 Reply With Quote


Bookmarks