Step 10
The big reveal!
There is just something special about breaking a composite part out of a mould. I know I’m addicted to it, it never stops being exciting for me!
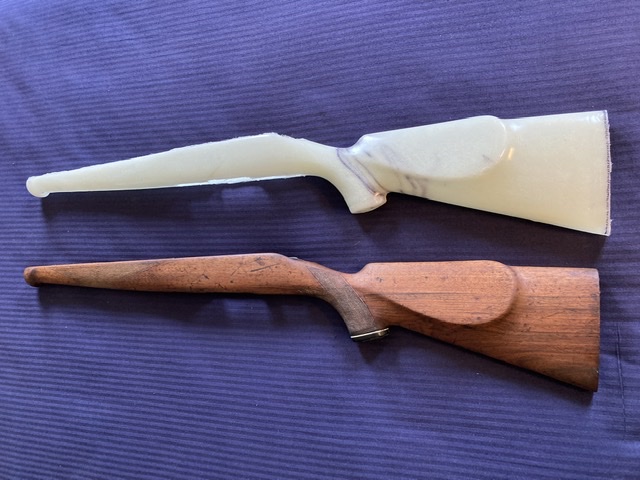
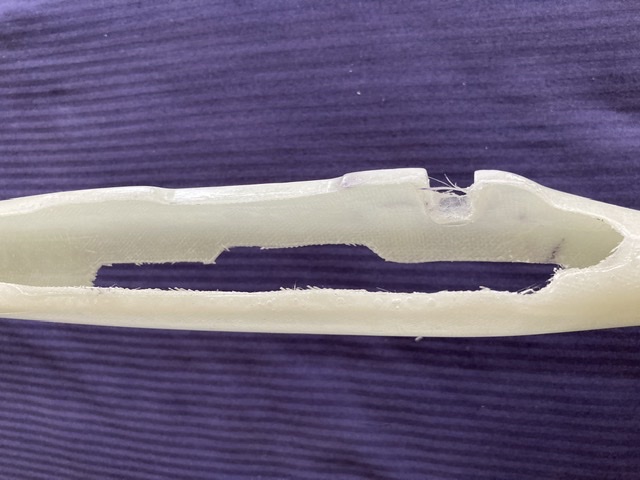
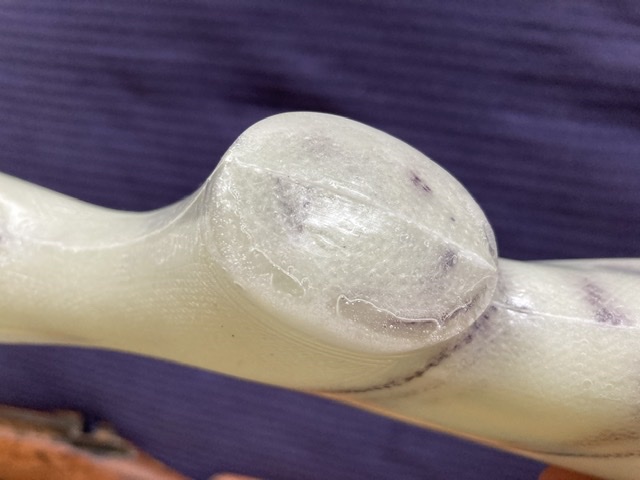
After at least 12-18 hours, you can undo the bolts on the mould and gently break the halves apart. This should happen pretty easily, but if not, a wee bit of warm water will help as PVA release is water soluble. With any luck you now have a hollow shell that is a perfect replica of your original.
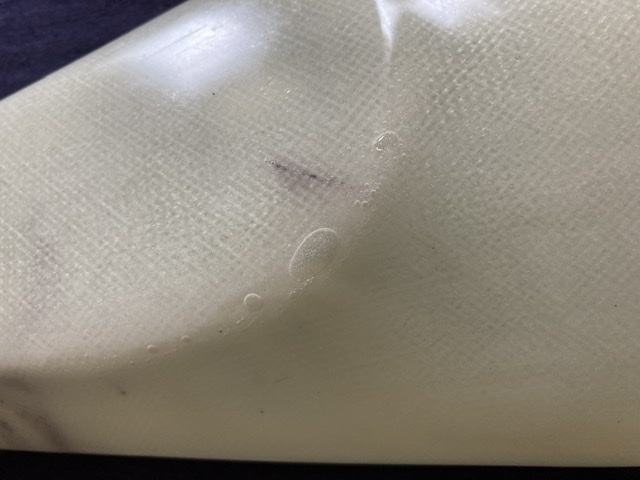
I had a few defects with my first one because I didn’t use a thickened coat of resin first. It was all able to be fixed, but just added a bit of time to the project. The following pictures will illustrate the usual places that you’ll get caught out....
Welcome guest, is this your first visit? Create Account now to join.
Welcome to the NZ Hunting and Shooting Forums.
Search Forums
User Tag List
+ Reply to Thread
Results 16 to 30 of 38
-
01-06-2021, 08:08 PM #16Member

- Join Date
- Aug 2019
- Location
- Manawatu
- Posts
- 1,057
-
-
01-06-2021, 08:33 PM #17Member

- Join Date
- Feb 2014
- Location
- Hawkes Bay
- Posts
- 2,711
So what did Mk.1 weigh roughly Nick?
-
01-06-2021, 08:57 PM #18Member

- Join Date
- Aug 2019
- Location
- Manawatu
- Posts
- 1,057
@6x47 the first one came out at 735g finished with recoil pad. Pretty good really, but itís a fairly slim stock so the dimensions helped there.
Original in walnut was right on 1000g
-
01-06-2021, 08:58 PM #19
You could try using one of the vacuum storage bags you can buy off Trademe. You’ll need to put some peel ply on the fibreglass then some old sheet or similar on top of that. It will squeeze some of the excess resin out.
-
02-06-2021, 09:46 PM #20Member

- Join Date
- Aug 2019
- Location
- Manawatu
- Posts
- 1,057
Thanks for that @stug great input for those looking to try this. I had access to a full vacuum bag setup, but decided to see what I could achieve with the bare basics, for no other reason than just because. I tend to like the K.I.S.S principle!
-
02-06-2021, 10:09 PM #21Member

- Join Date
- Aug 2019
- Location
- Manawatu
- Posts
- 1,057
Step eleven
Making the inlet moulds
Now this bit was theoretically easy, but in practice just about broke me! I’ll get to why that was shortly.
Anyway, the idea with this step is to cast a two piece silicon rubber male mould of the inletting. This is made of an upper and lower part that will eventually be clamped into the hollow stock, and then thickened resin poured in to create the inlet.
What you do is create a plasticine dam around the edges of the inlet and dam up one half in the mag well/trigger well as in the picture. Note the locating indentations in the bottom.
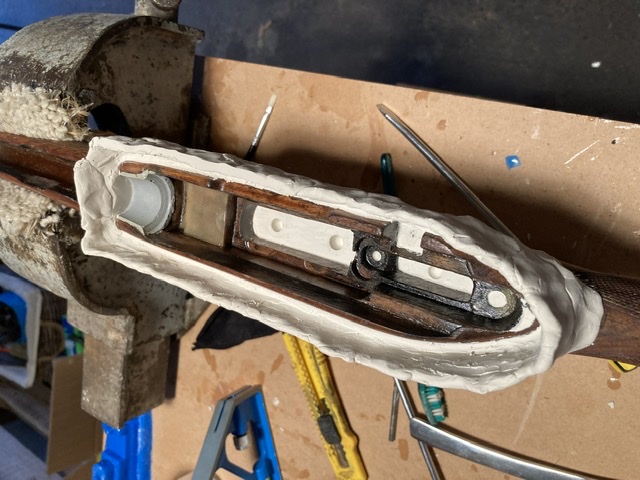
Once that is done mix up your silicone and pour in as directed by the manufacturer. I used Mold Star pourable silicone.
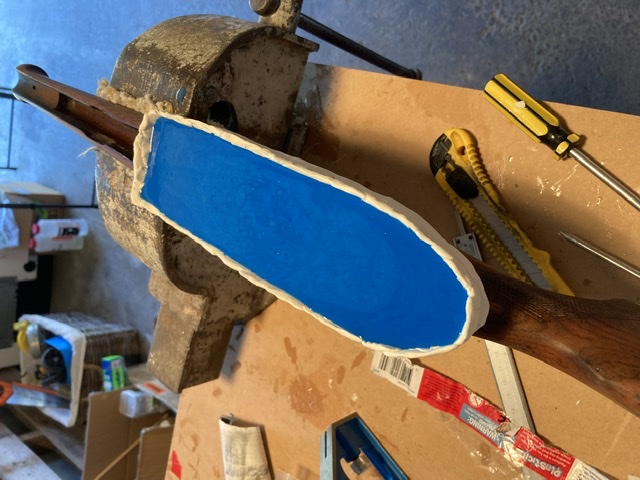
Once cured, build plasticine dams for the bottom half, remove the plasticine dams in the mag well etc, and pour the bottom. Make sure you use a release agent designed for silicone to ensure the two halves do not stick together.
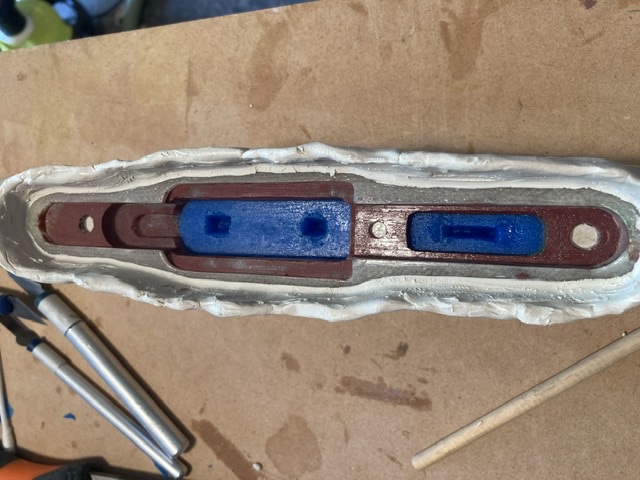
Once it’s cured, you can remove both halves out of the stock and you should have a perfect imprint of the inletting. Not like this however!!!!
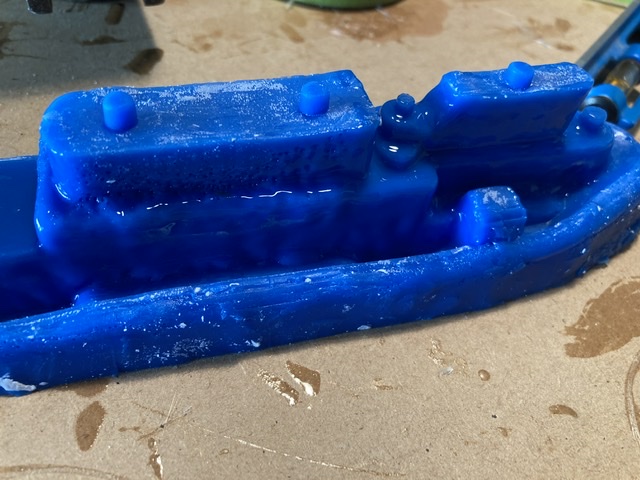
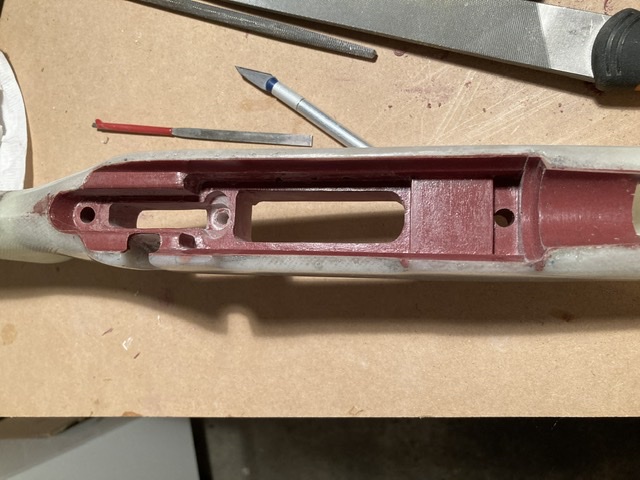
For some reason the silicon cure was inhibited. Sulphur is the main culprit, but I didn’t expect that to happen on a walnut stock. I spent hours cleaning off the gooey residue, and cleaned the inlet thoroughly with Acetone. I then painted on a thin coat of clear acrylic lacquer, and tried the whole thing again. Much to my dismay it failed to cure a second time! Albeit better than the first attempt. It was at this point I almost gave up...... but instead used the castings I had to ‘roughly’ cast the inlet on MK1 and then carefully hand filled and sanded the inlet to the right dimensions after it cured. I also bedded the action into the MK1 composite to get a good basis to silicone mould from. It was laborious work, but got there in the end.
-
03-06-2021, 07:39 AM #22
I use to make the action inlet mold the same way, but after a few uses the silicon ripped apart. I then swapped to useing silicon sealant you get in the tubes. It is a bit of a bugger to work with but is heaps cheaper and a bit more flexible and easier to get out once you have cast the action area.
I did a two part cast like you have, smear the silicon thickly around the edges making sure to push it down into the corners, then leave that to set then fill in the rest. It does take a couple of days for the silicon to set right through.
I put petroleum jelly on the action first to act as a release agent.
-
03-06-2021, 12:17 PM #23Member

- Join Date
- Mar 2012
- Location
- Naracoorte South Australia/From South Canterbury
- Posts
- 417
-
03-06-2021, 01:31 PM #24Member

- Join Date
- Aug 2019
- Location
- Manawatu
- Posts
- 1,057
@Tuidog thereís a chance that something might be able to be arranged.....
Just moved house, so lifeís a bit hectic but maybe in a wee while
-
03-06-2021, 04:54 PM #25
@Tuidog I used maguires release wax, I think it is a car wax.
-
03-06-2021, 04:58 PM #26Member

- Join Date
- Mar 2012
- Location
- Naracoorte South Australia/From South Canterbury
- Posts
- 417
-
03-06-2021, 09:27 PM #27Member

- Join Date
- Aug 2019
- Location
- Manawatu
- Posts
- 1,057
Step twelve
Creating the inlet
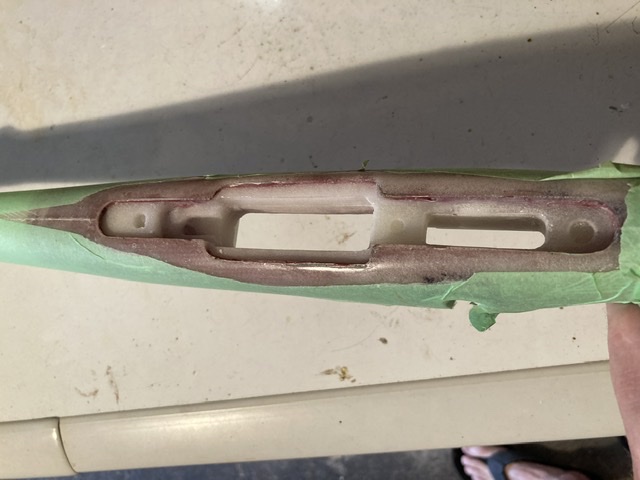
Now that you have a hollow shell and inlet moulds, it’s time to get ready to make the inlet for real. There are a couple of prep steps before hand however.
1. Block off the rear of the action area at the start of the pistol grip. This is so when the epoxy is poured in, it doesn’t flow all the way into the buttstock area. I used a piece of fibreglass sheet that I laminated up earlier from 6 layers of 200gsm cloth.
2. Grind/sand the edges of the inlet area, so the moulds will fit in without distorting. I used the action and floor plate to check that, and made sure they fitted in nicely but without too many gaps.
Once that’s all done, rough up the inside of the shell slightly with some 80-100grit, and secure the mould halves into the shell.
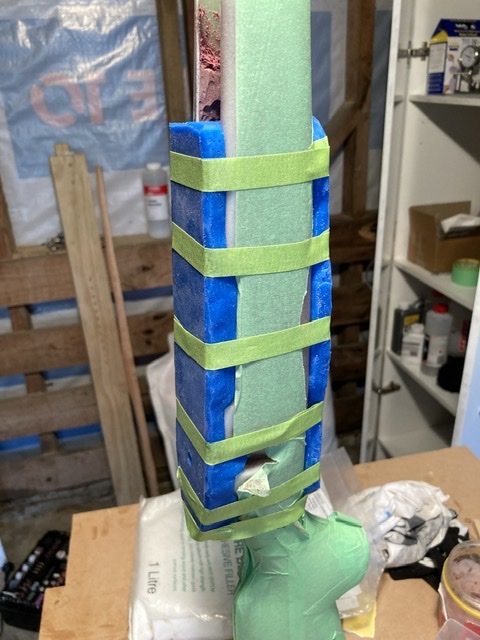
With the stock secured vertically you can make a batch of thickened resin to pour in. Now this part is VERY important!...
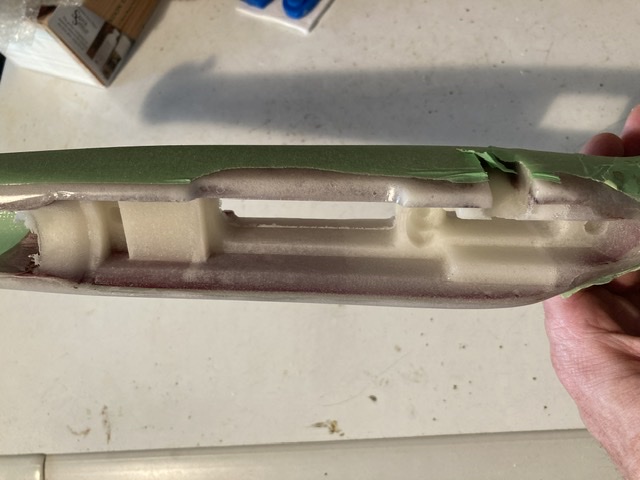
****** Thicken the resin as much as possible to reduce its density (weight) but still ensure it is runny enough to flow. Also, only pour in small batches! If you fill the whole cavity, the resin will exotherm and probably go up in flames! West resin isn’t designed for thick pours, so just do a little at a time, and wait for it to cure enough that pouring the next lot on won’t create a cumulative heat issue. *********
Once it’s all cured, pull the moulds out and voila!
-
03-06-2021, 09:51 PM #28Member

- Join Date
- Aug 2019
- Location
- Manawatu
- Posts
- 1,057
Step thirteen
Mould the barrel channel
We’re almost there! Now it’s time to take a mould of the barrel channel, so we can create a liner for the forend. For my stock it was a bit of a pain, as the BSA factory hollows out the forend to relieve weight. I had to first fill that with plasticine before coating in release wax and then PVA. It also has that little bugle for the rear sight which made things a little niggly too.... I made the mould from 6 layers of cloth, and once set, trimmed and fixed to a scrap of wood so it was easy to secure.
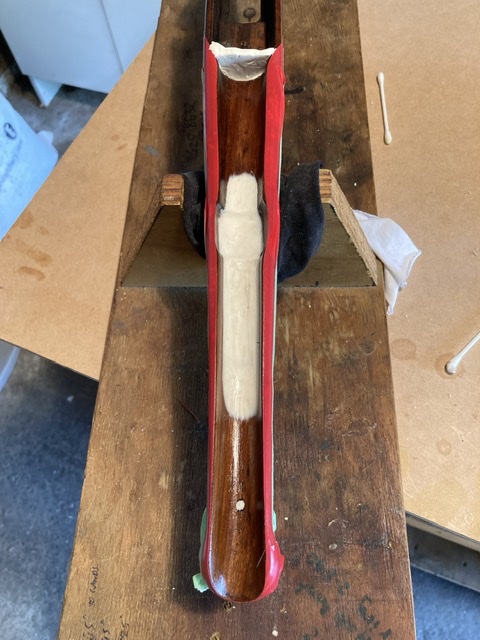
One the mould is done, do the standard mould prep and laminate the liner from 4 layers of 200gsm cloth.
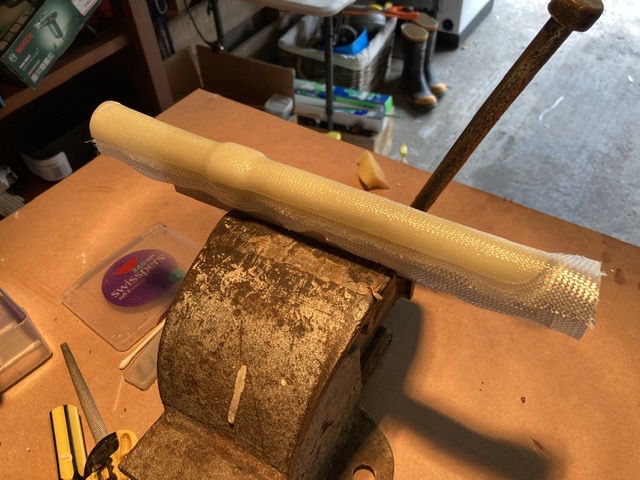
Again, once cured trim and release from the mould.
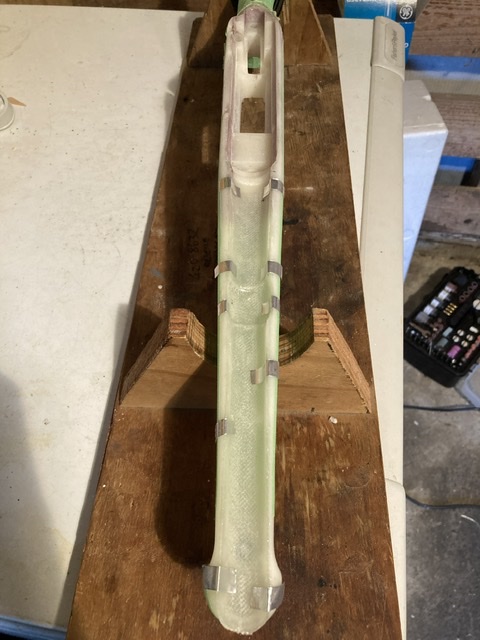
Now it’s time to trim the inside edges of the stock shell in order to get the forend liner to fit. This can take a while, as you want to make sure that it is straight and providing an even free float along its length. I did plenty of test fitting with the barrelled action in place. It likely some dremel work will be required on the inlet epoxy, so that the barrel liner will sit on it at the correct depth.
Don’t forget to put a sling swivel stud in if you want one! I added about 4-6 extra layers of glass in that area to ensure it was good and strong.
Once your happy, glue the liner in!
-
03-06-2021, 10:10 PM #29Member

- Join Date
- Aug 2019
- Location
- Manawatu
- Posts
- 1,057
Step fourteen
Recoil pad
Remember how I mentioned a piece of flat fibreglass plate earlier? Well some more of that is required for fitting the recoil pad.
I cut and trimmed a piece so it would fit snugly inside the end of the buttstock, about 3-4 mm inside the finished edge where the recoil pad would mount. I glued this in with a generous scallop of resin ‘glue’ mix and let cure. I then filled that recess with a resin and micro balloons mix, and when cured sanded flush and square for the recoil pad to mount to. This seemed to me to be the best compromise between strength and weight.
Chose the recoil pad you want and mark the holes on the stock for the mounting screws. Drill the holes oversize (around 10mm) as we’re going to use then to pour in expanding foam.
I bought a 2 pack polyurethane expanding foam kit, and used that to fill the buttstock area. You don’t need a lot, only about 4-5 tablespoons is enough to fill the area once it goes it’s thing. Once cured, use the same drill that you drilled the recoil pad holes with, and deepen the holes into the foam to about 15mm deep and fill with thickened resin. This will provide a good stable and strong place for the recoil pad screws to hold on to.
Them just mount and grind your recoil pad as per usual. Be careful though, fibreglass doesn’t handle a belt sander as well as walnut if you get a bit loose grinding the pad!
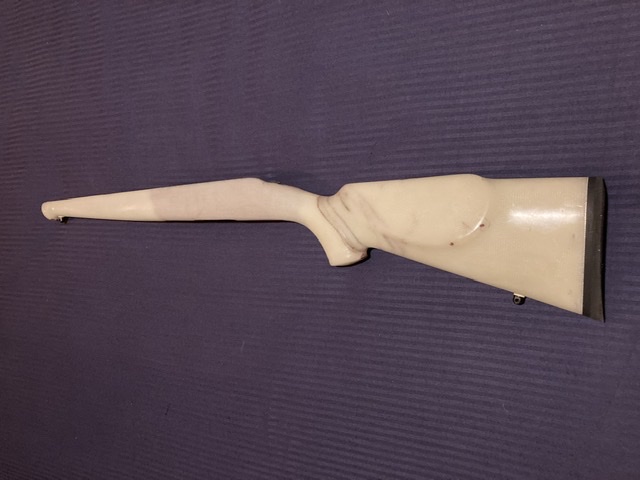
Oh yeah, and don’t forget to add something inside the stock in order to screw the rear sling stud into! That needs to be done before you close the end of the stock in.
Some people also fill the forend with foam, but given the small dimensions of the BSA stock I chose not to.
-
03-06-2021, 10:16 PM #30Member

- Join Date
- Aug 2019
- Location
- Manawatu
- Posts
- 1,057
Step fifteen
Pimp it out!
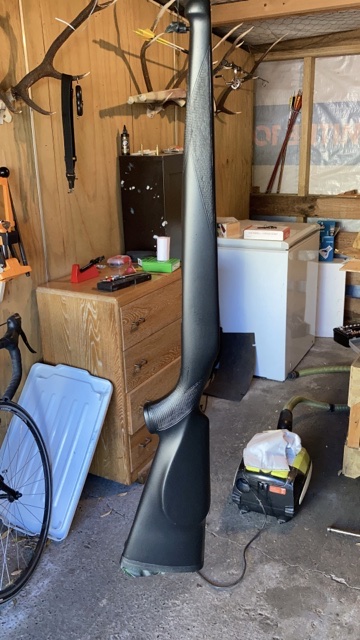
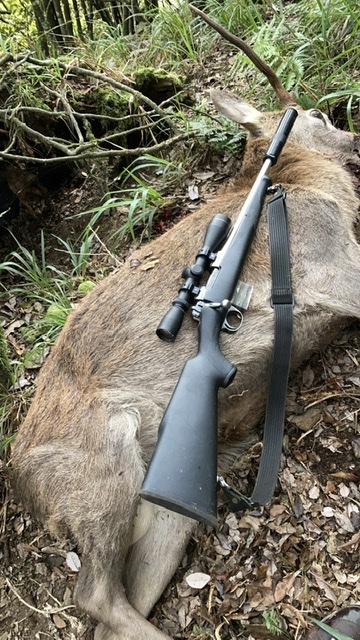
So now you have your stock basically done. Only thing to do now is give it some colour! I got lazy and rattle canned mine with some Matt Black Wattyl Kill Rust epoxy topcoat. I just keyed the stock surface and sprayed it on. It has stood up to the punishment pretty well so far, so I’m happy enough.
Similar Threads
-
Shotgun Stock CNC Build
By Skirch in forum Projects and Home BuildsReplies: 23Last Post: 30-04-2021, 07:36 AM -
Wooden stock build
By Remmodel7 in forum Projects and Home BuildsReplies: 3Last Post: 03-03-2020, 09:57 PM
Tags for this Thread
Welcome to NZ Hunting and Shooting Forums! We see you're new here, or arn't logged in. Create an account, and Login for full access including our FREE BUY and SELL section Register NOW!!


 99Likes
 LinkBack URL
 About LinkBacks


 Reply With Quote


Bookmarks