

 133Likes
 LinkBack URL
 About LinkBacks
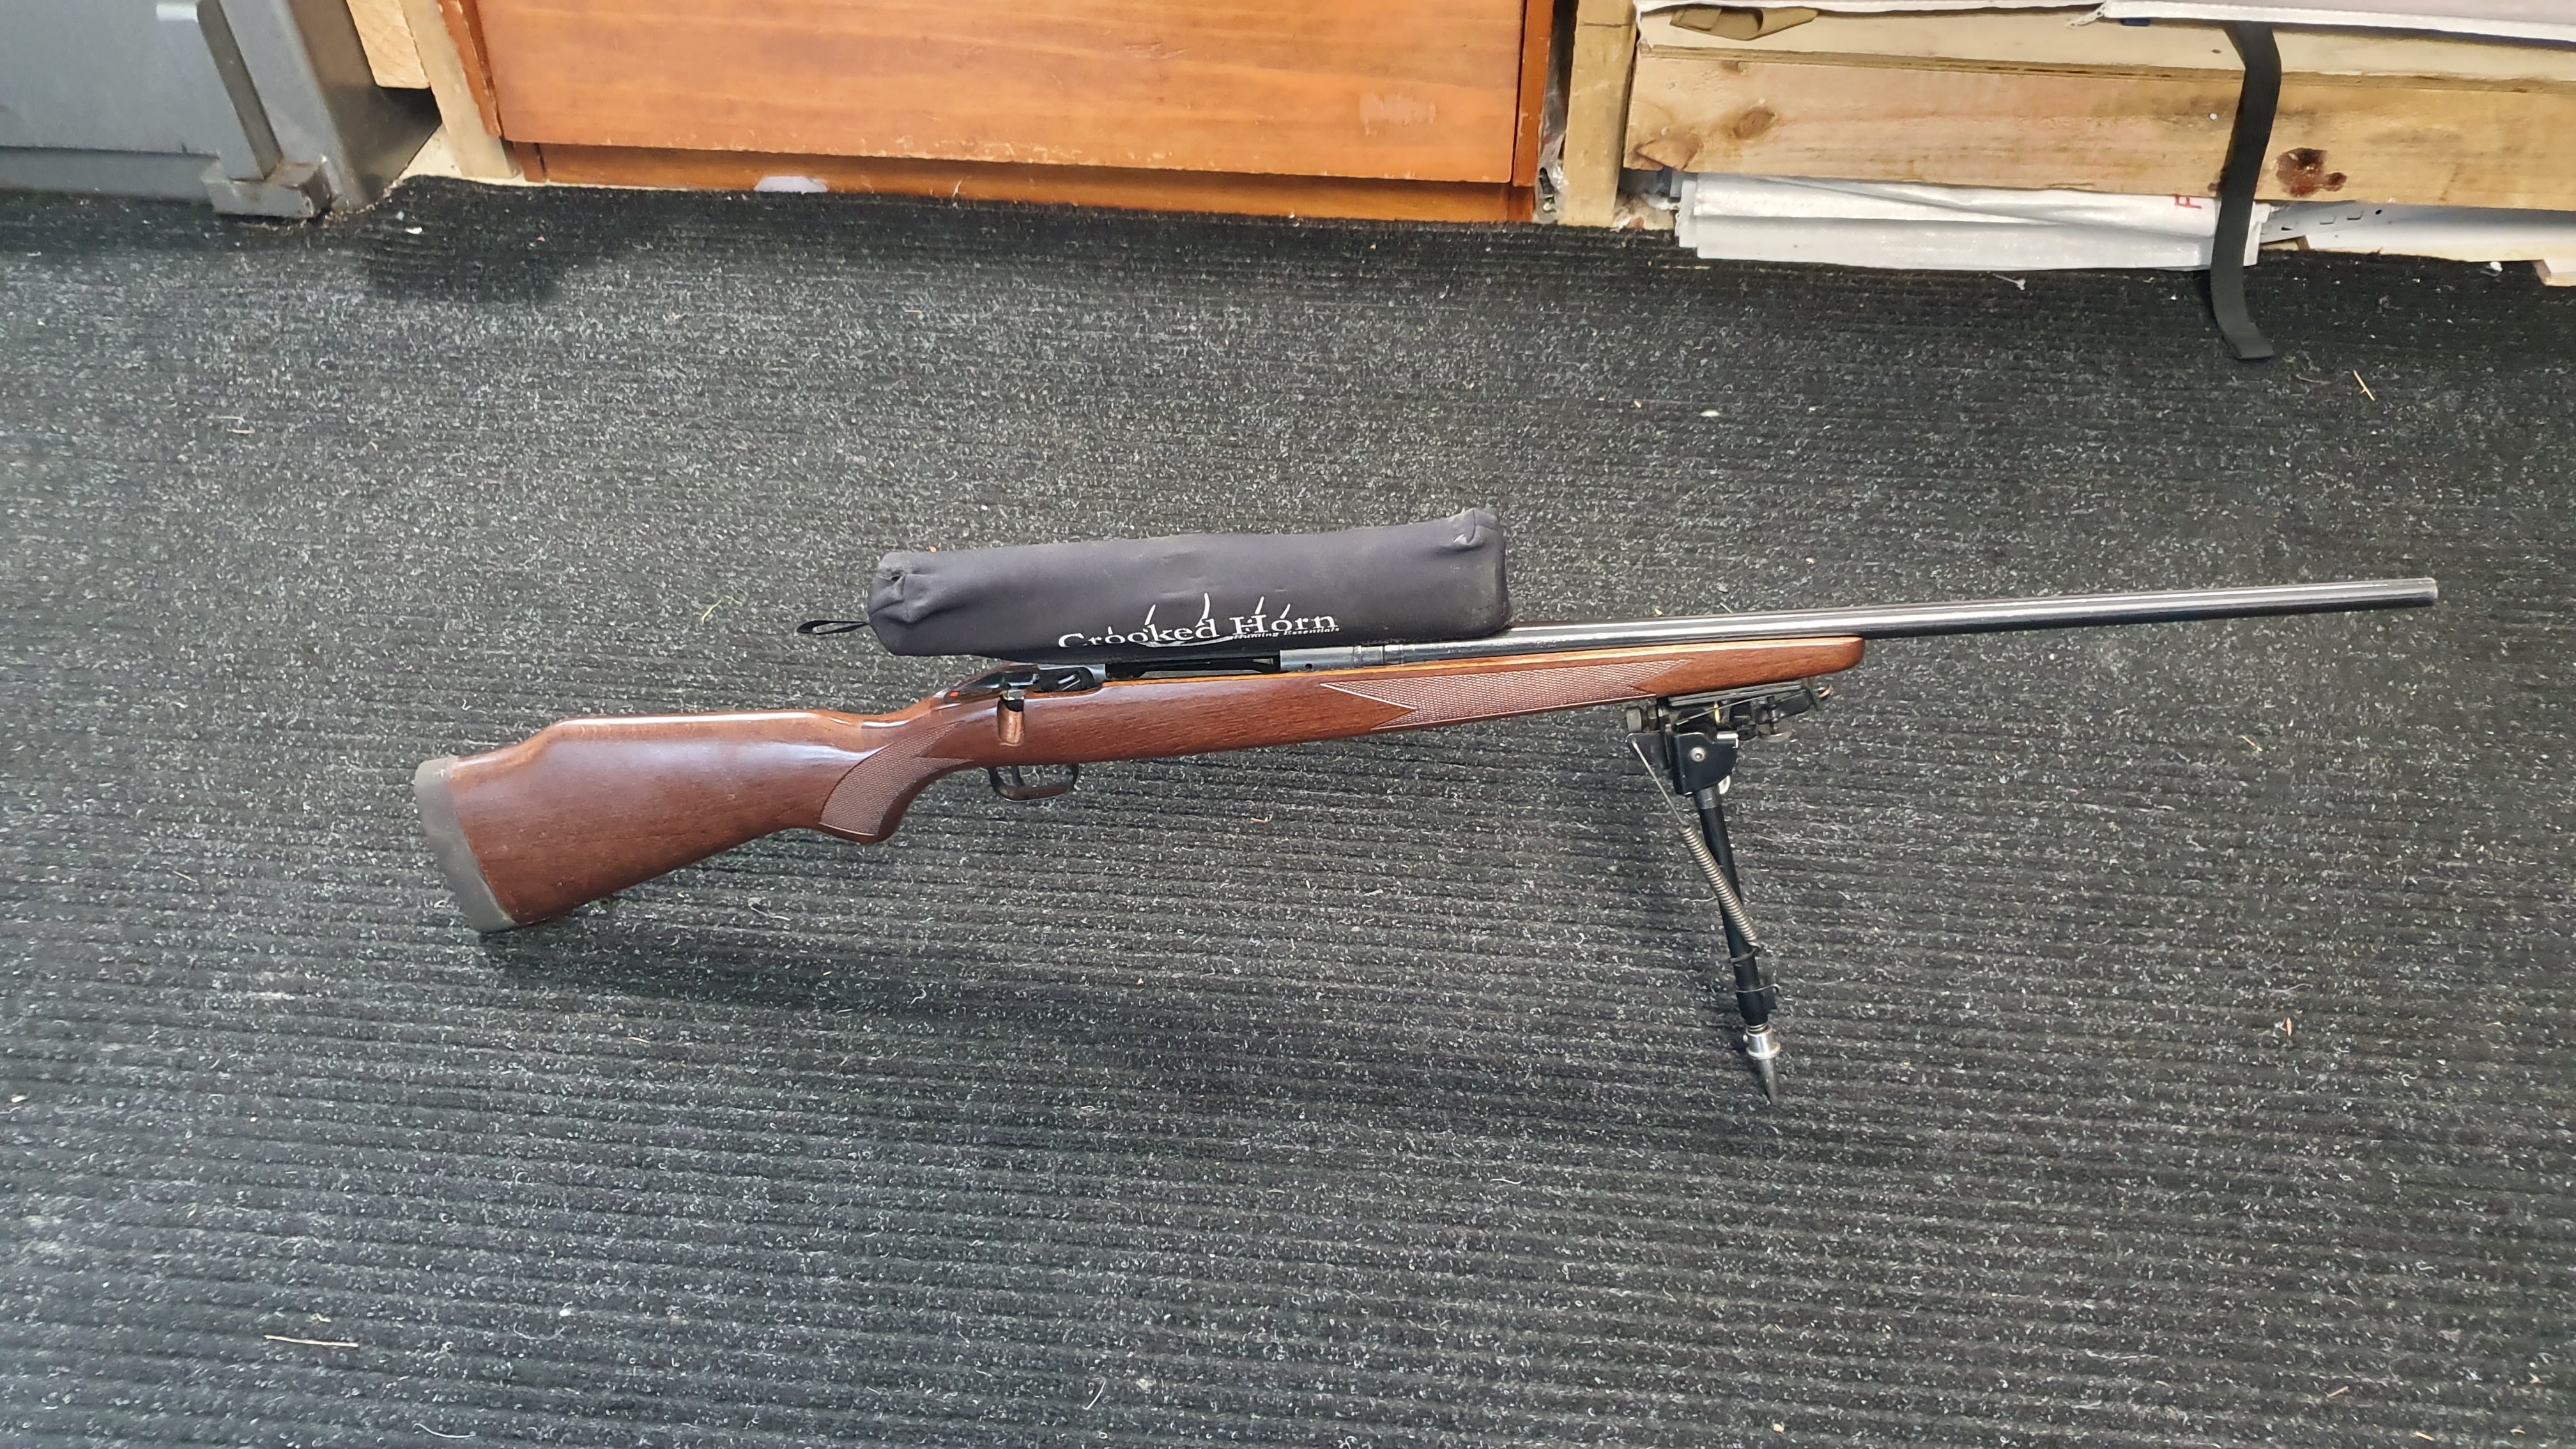
A while back I purchased a second hand Savage Model 110 chambered in 30-06. It was and is a perfectly functional rifle and after a bit of load development manged to get shooting well with a diet of 150gr SSTs I had left over from another project.
*
*
After using the rifle successfully on a number of trips I developed a niggling annoyance at the shape and balance of the stock, it just didnt feel right. The last straw for me was after a trip to Stewart Island where the rifle got fairly wet, I noticed on return that the rifles point of impact has shifted. Probably due to swelling and contracting of the wooden stock. It was time for a new stock, preferably in Carbon Fibre.
After a bit of online research it became apparent that getting a Carbon Fibre stock for a Savage in NZ was near impossible and the thought of trying to import one with all the recent issues, was not appealing.
*
So after a lot of research, looking at youtube, other forum sites and getting advice from members on this forum I decided to have a go at making my own Carbon Fibre stock. I did notice that there was very little in the way of instructions / guides on how to go about this.
Now I am far from any expert and this is my first time ever doing anything with Fiberglass or Carbon Fibre, but I thought I would document what I did, warts and all for others to use who are wanting to make their own stocks.
*
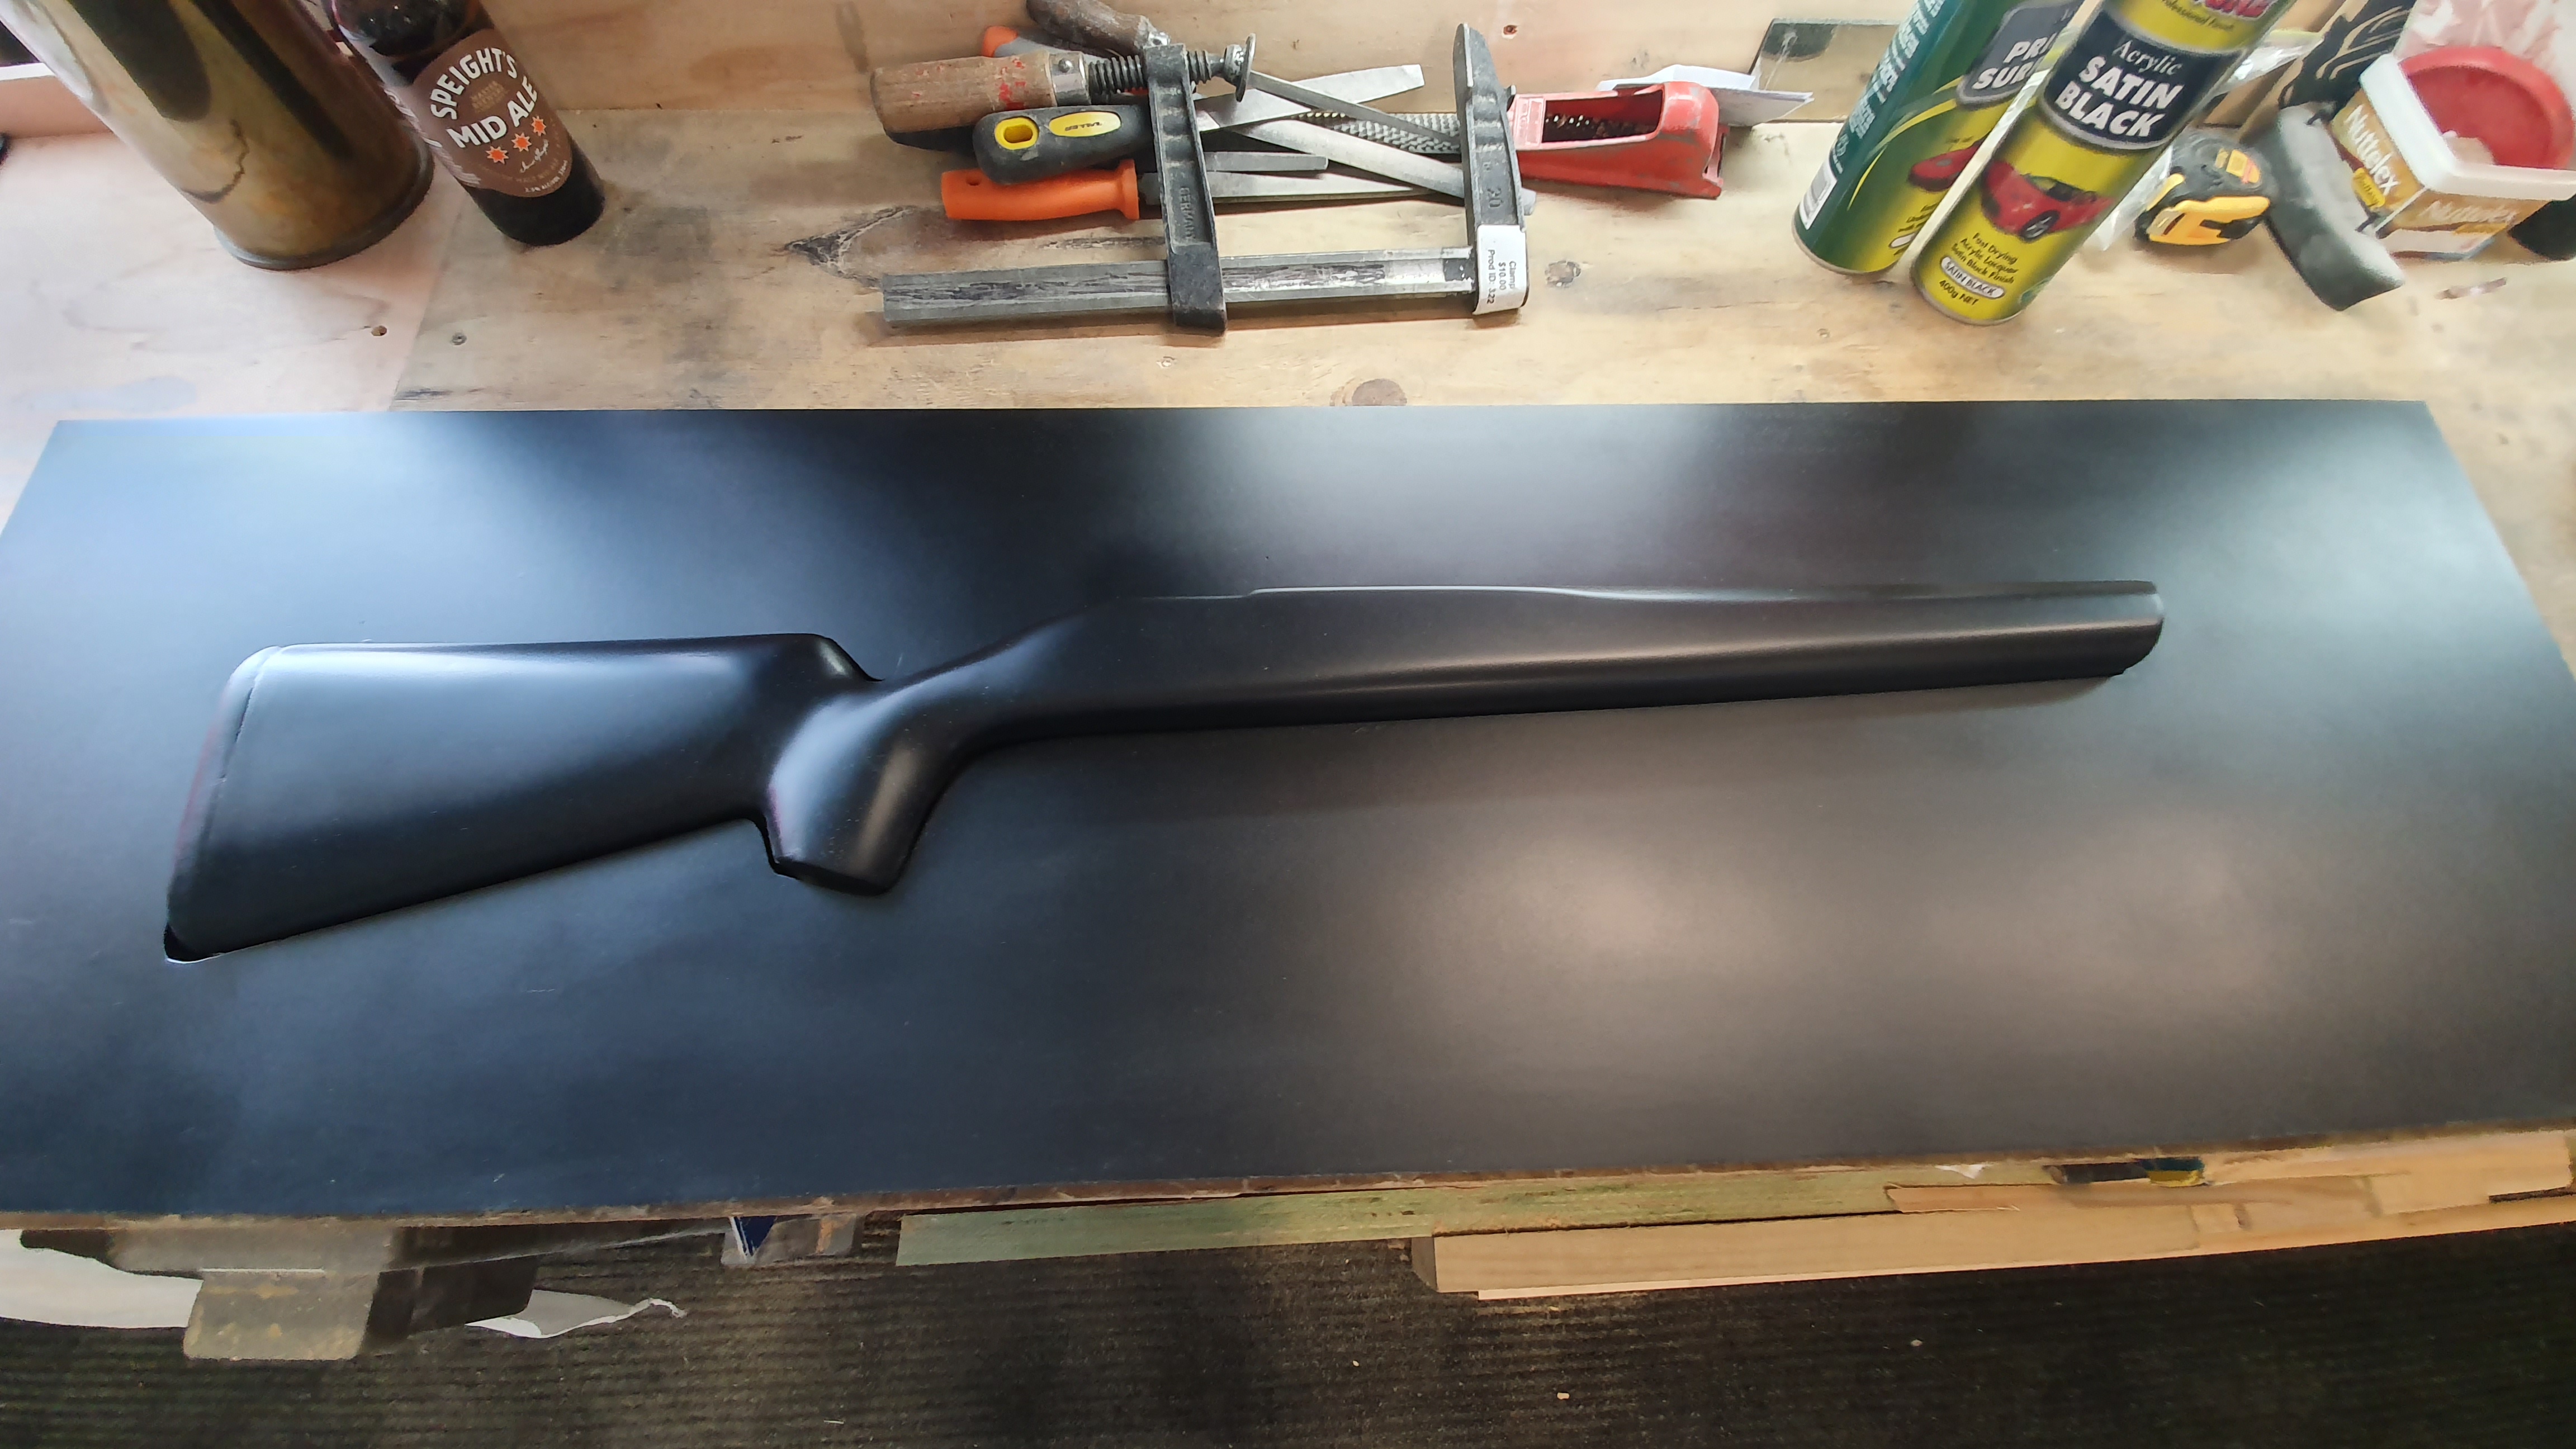
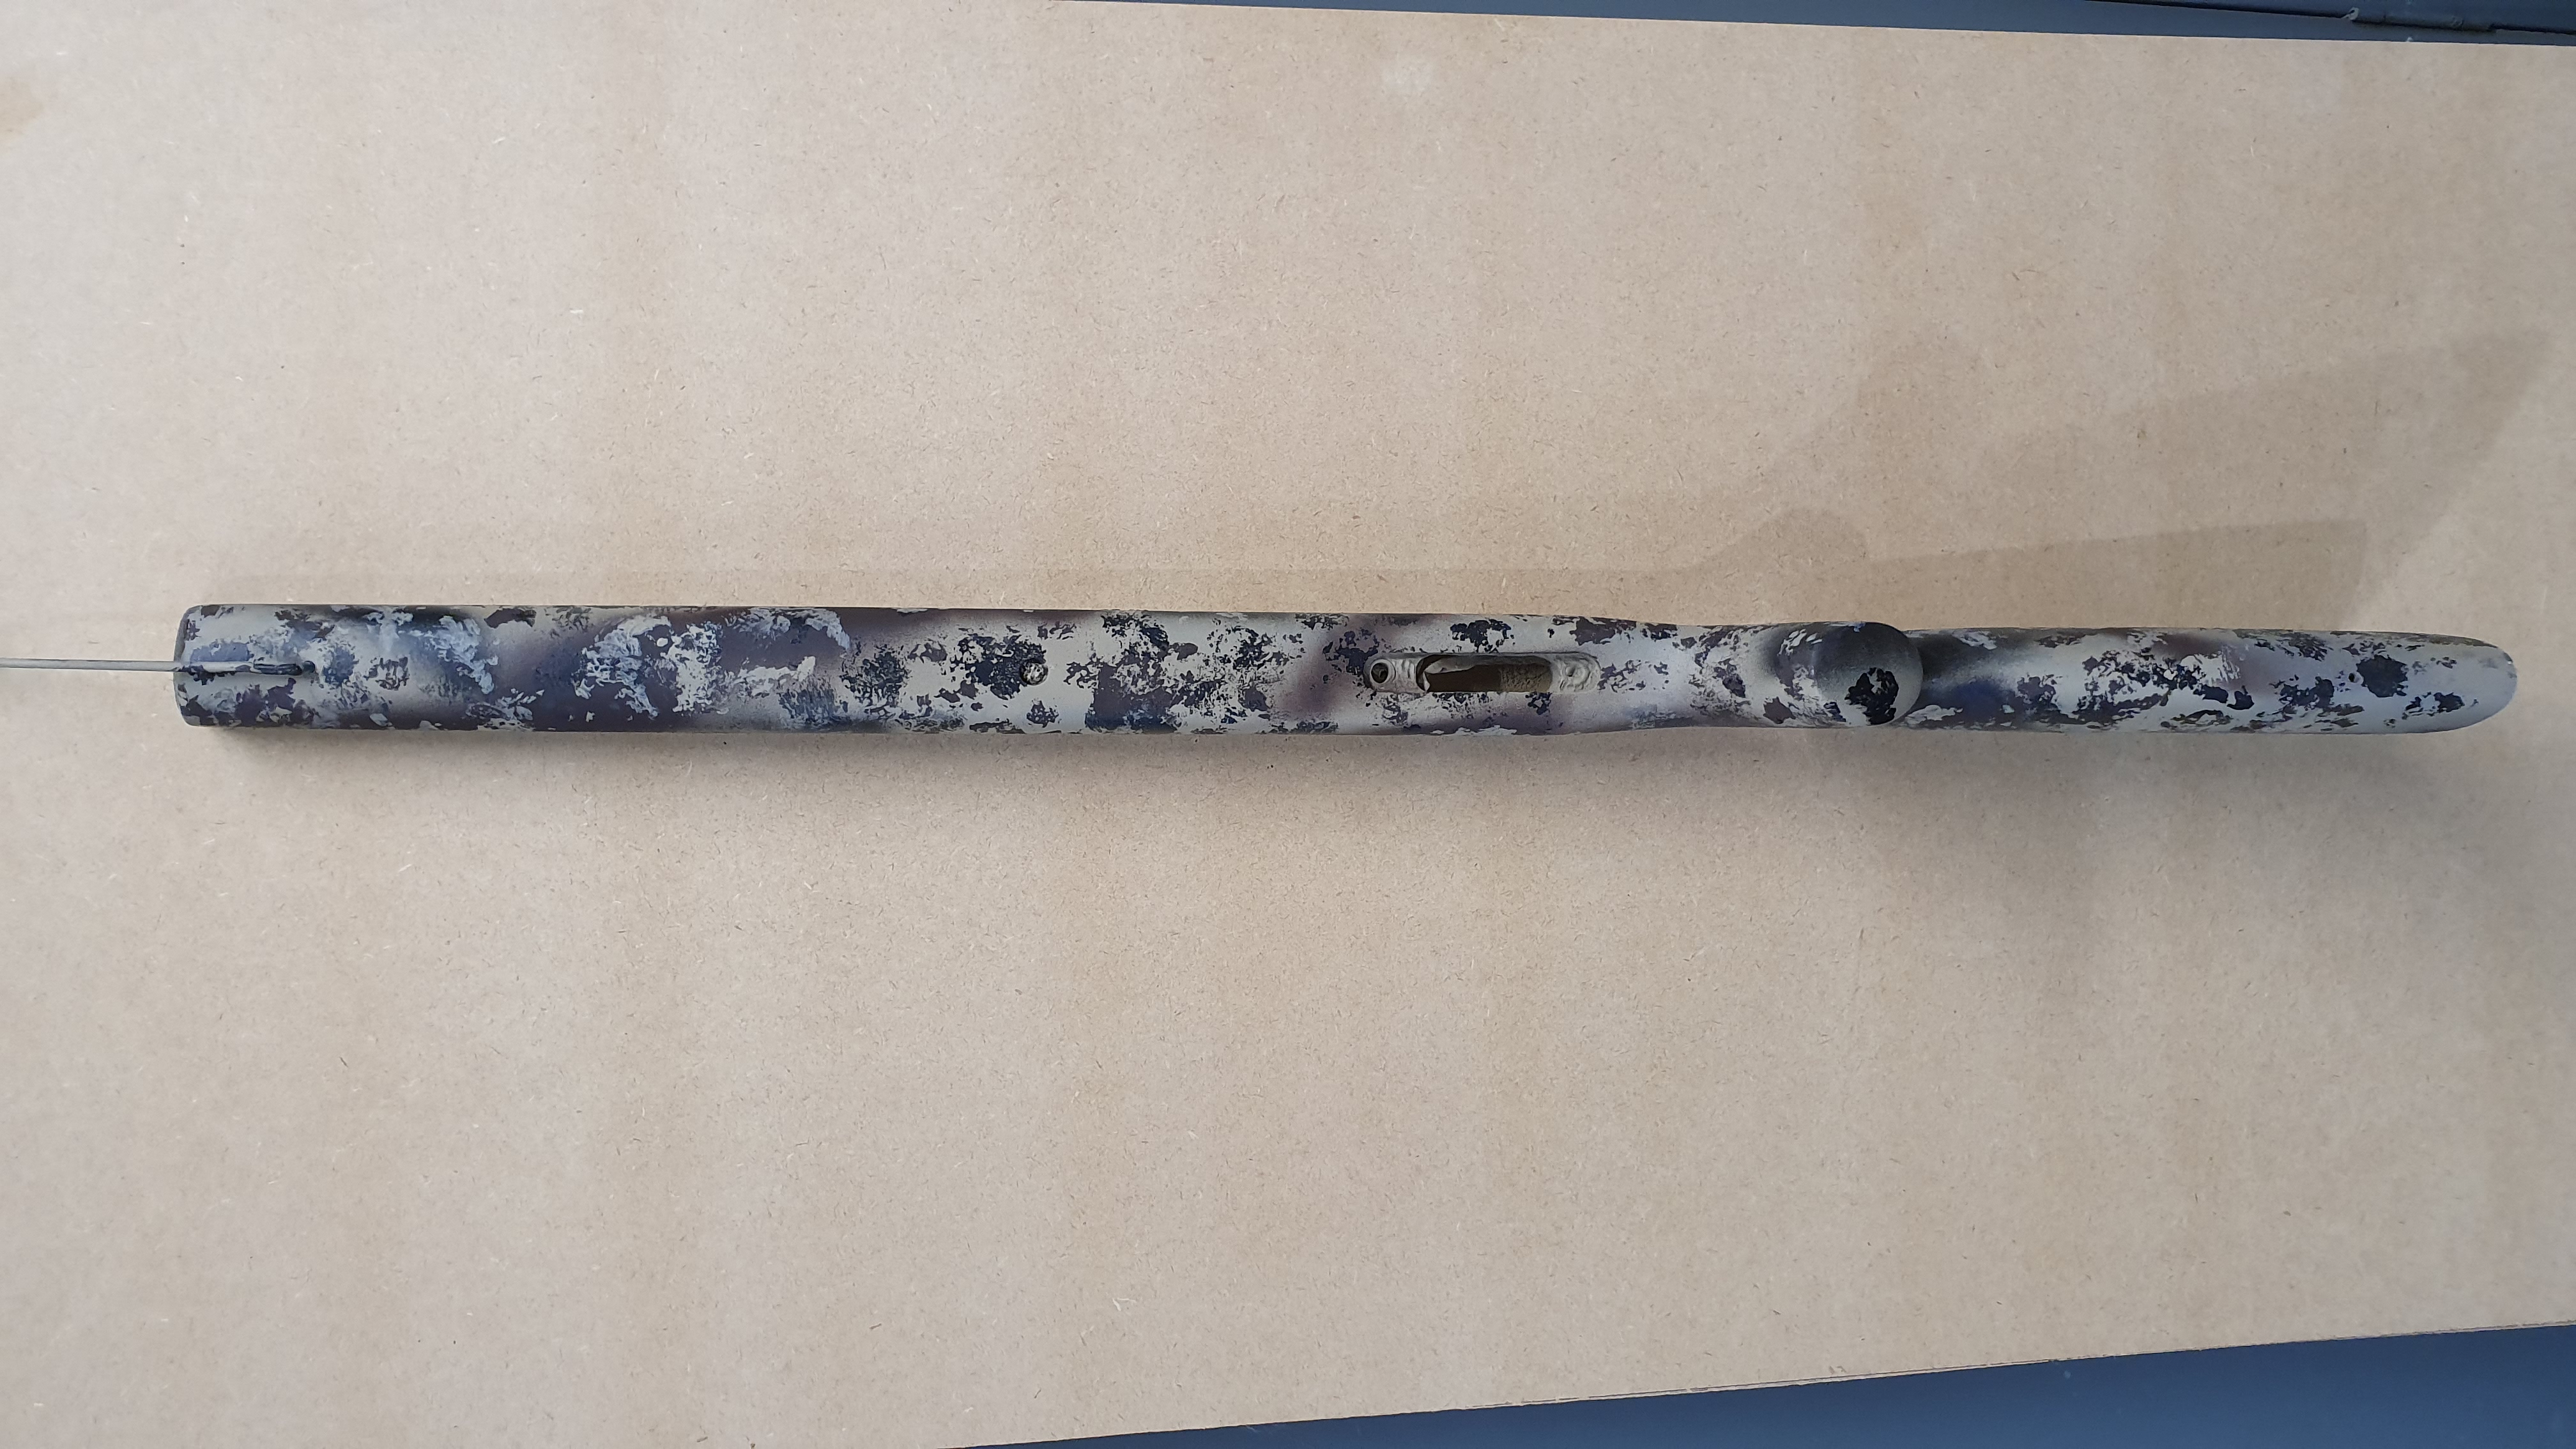
Due to the cost of Carbon Fibre and the fact that I was highly likely to make some F ups along the way I decided to make a Fiberglass stock first before attempting Carbon Fibre.
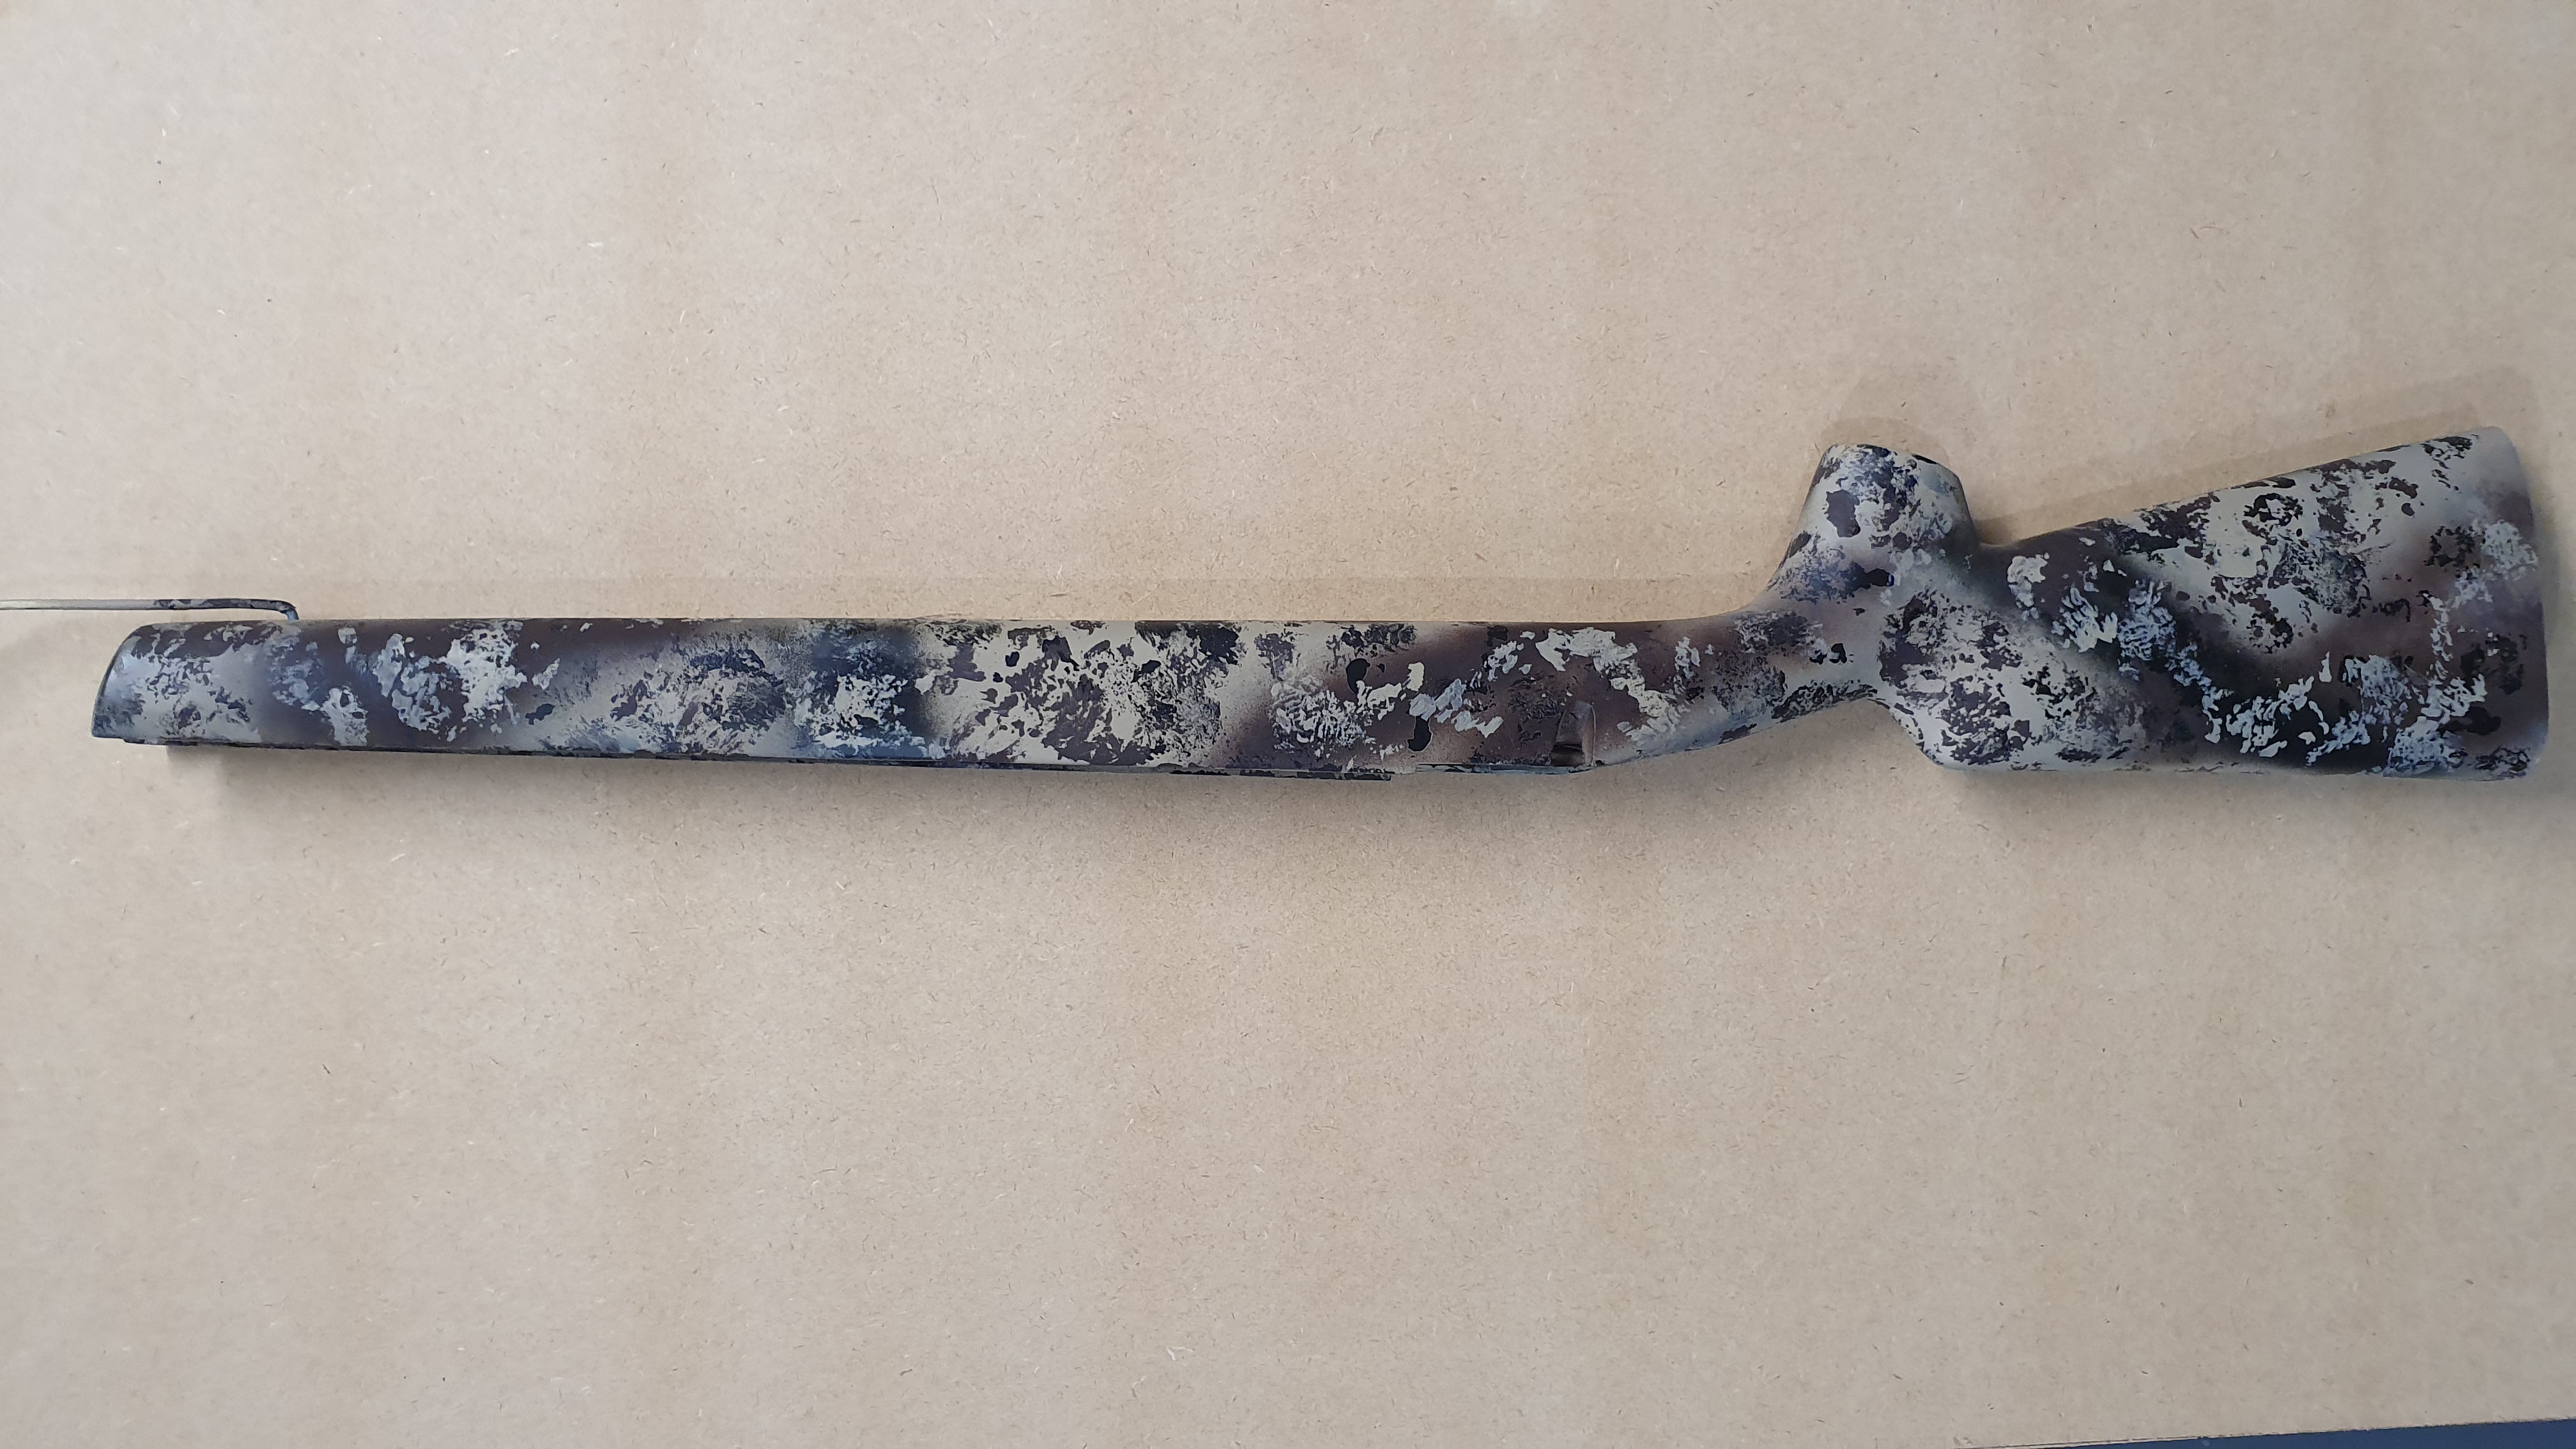
*This is the result of my attempt at a Fibreglass stock., still needs a little bit of cleaning up.
More to follow on the how:
*
Welcome guest, is this your first visit? Create Account now to join.
Welcome to the NZ Hunting and Shooting Forums.
Search Forums


User Tag List
+ Reply to Thread
Results 1 to 15 of 74
Thread: DIY Carbon Fiber Rifle Stock
-
24-02-2020, 01:02 PM #1Member

- Join Date
- Dec 2011
- Location
- North Island
- Posts
- 389
DIY Carbon Fiber Rifle Stock
-
-
24-02-2020, 01:04 PM #2Member
- Join Date
- Dec 2011
- Location
- North Island
- Posts
- 389
-
24-02-2020, 01:04 PM #3Member

- Join Date
- Jun 2015
- Location
- christchurch
- Posts
- 18,530
ask "Stug" on the forum, seen a few of his stocks (dont own one) nicely made
dannyb likes this.
-
24-02-2020, 01:23 PM #4Member
- Join Date
- Dec 2011
- Location
- North Island
- Posts
- 389
Agree STUG's are very nicely made, he was the first person I asked, but is no longer making them. Originally Posted by gonetropo

-
24-02-2020, 02:43 PM #5Member
- Join Date
- Dec 2011
- Location
- North Island
- Posts
- 389
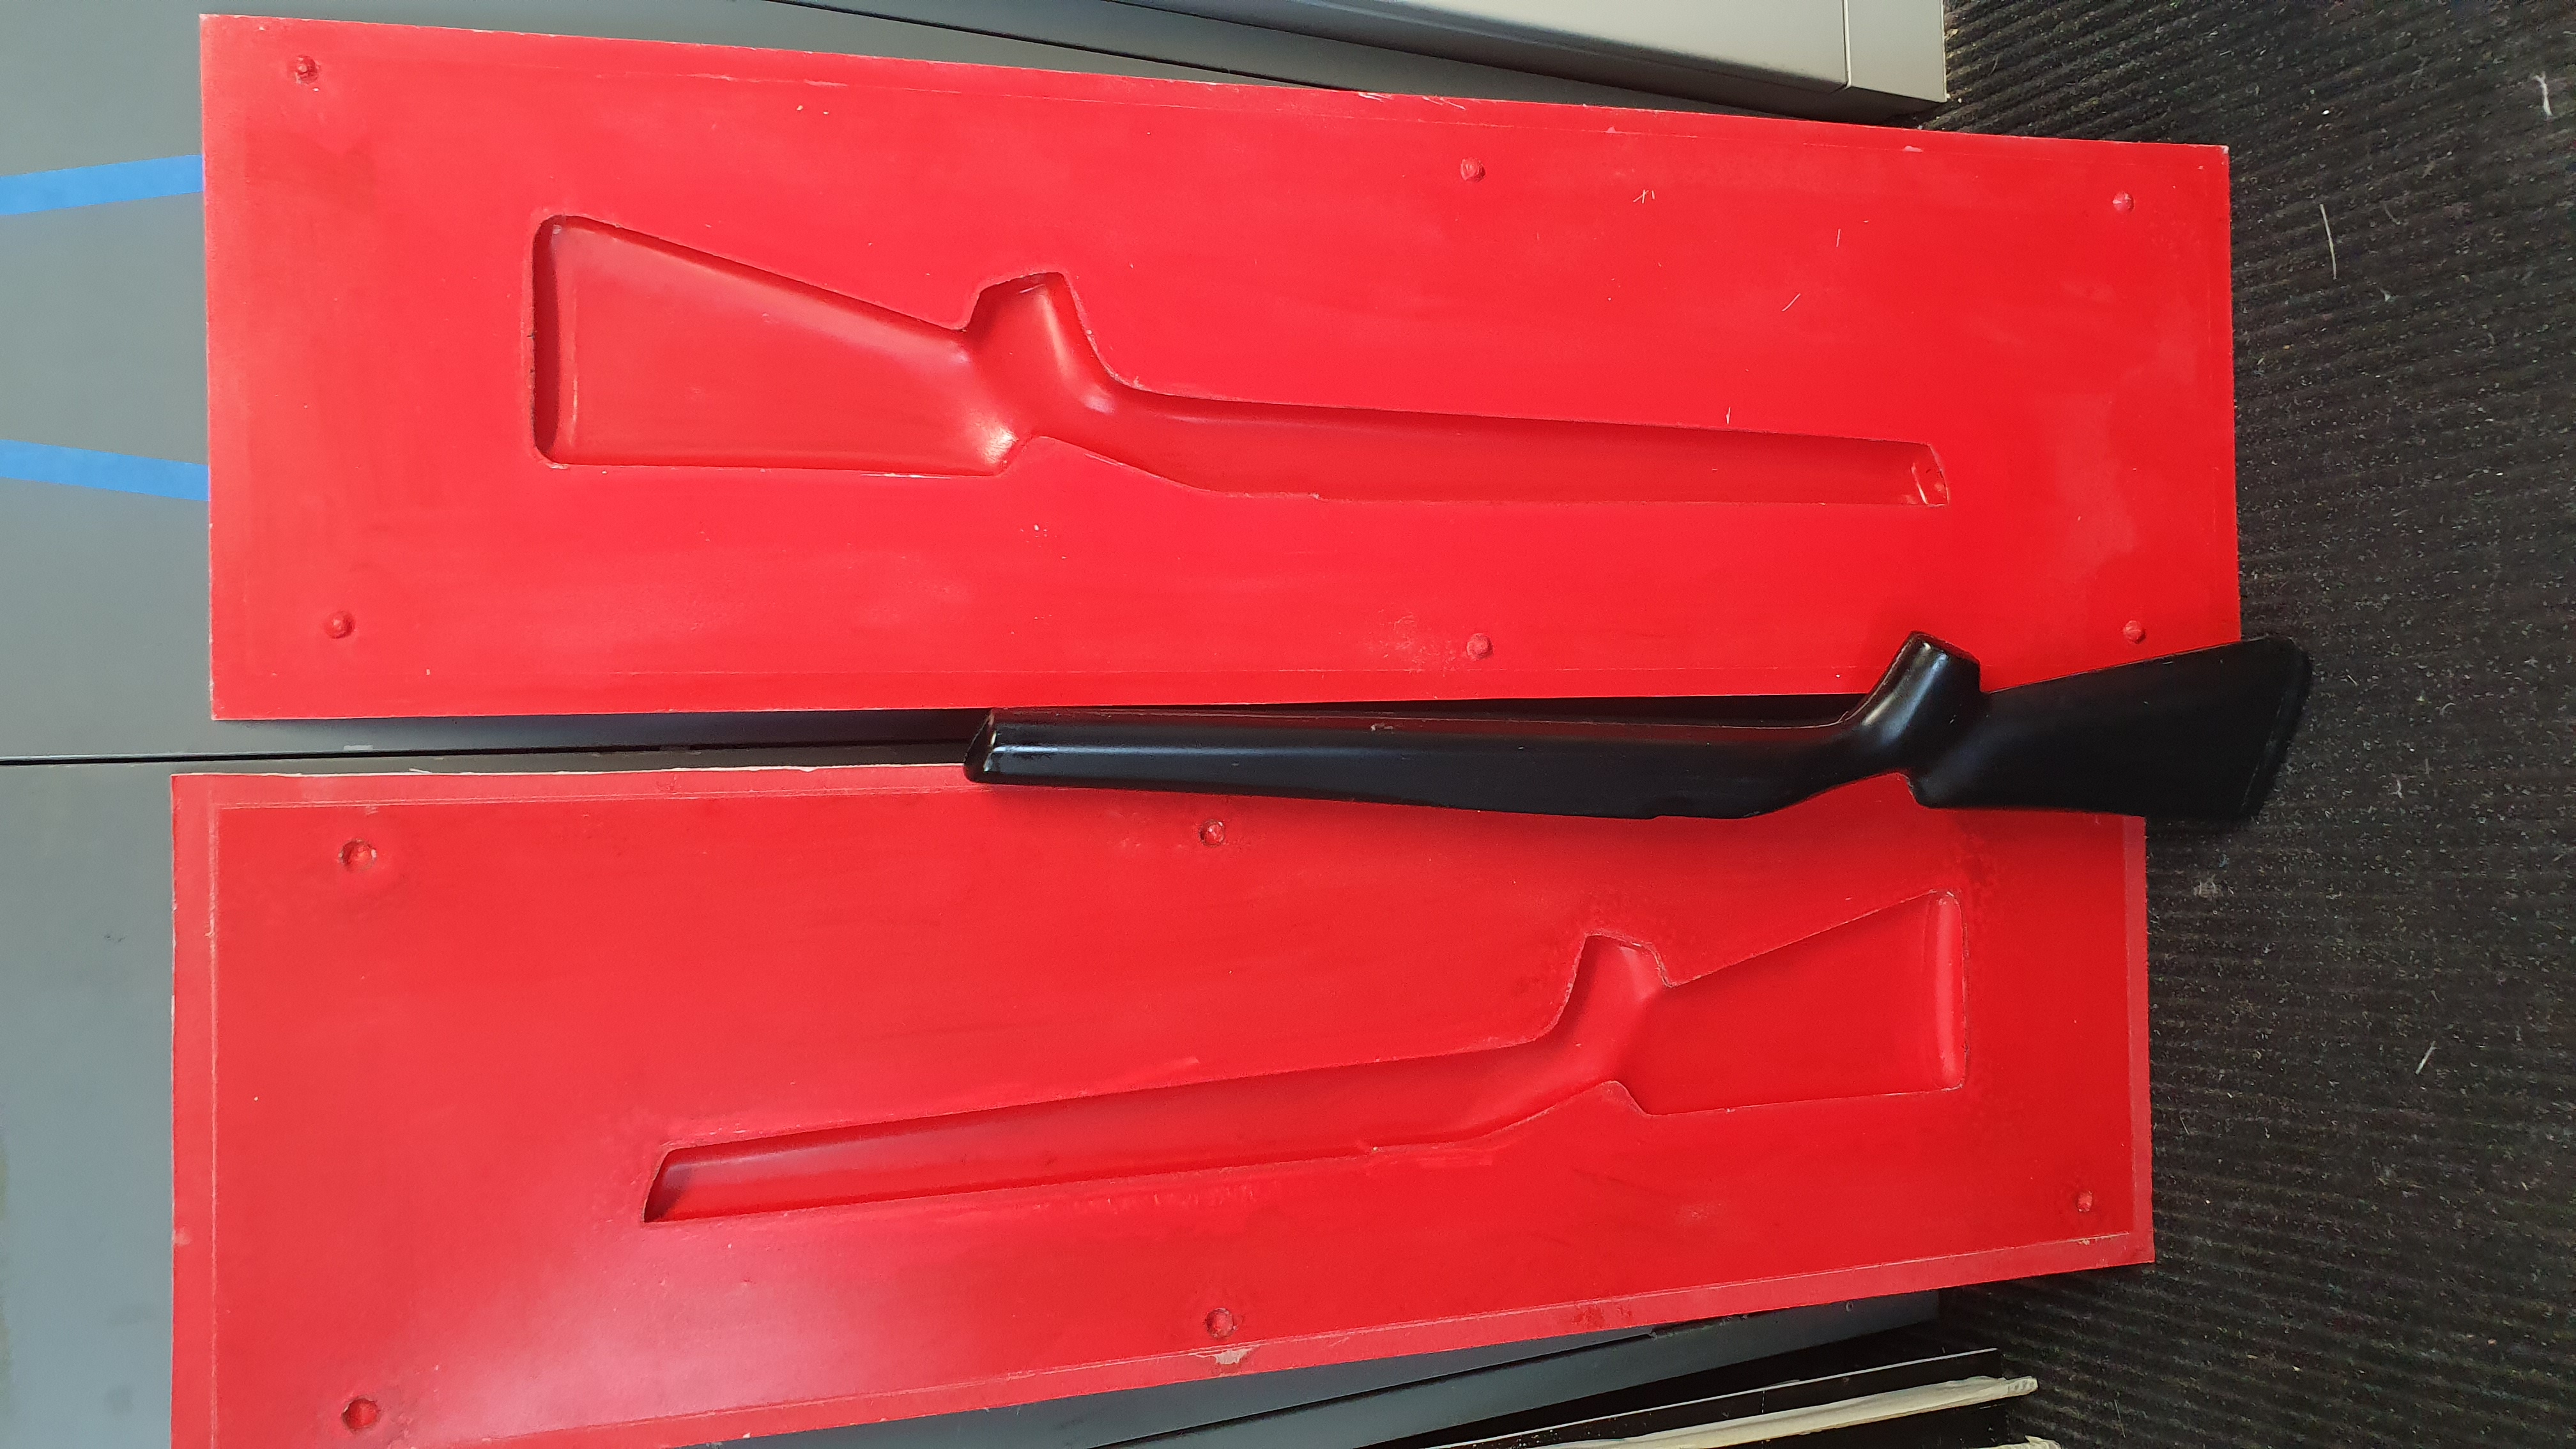
FIRST STAGE CARVE THE PLUG
Now having only the one stock for a Savage rifle and no easy way to get a replacement if I destroyed it in the process, I made the decision to make a new rifle stock ‘plug’ from some ply I had lying around at home. I chose the ply as it was dry and less prone to warping.* If it had been a Remington 700 or a Tikka I wouldn't have been too fussed as replacement stocks are easily found for them in NZ.
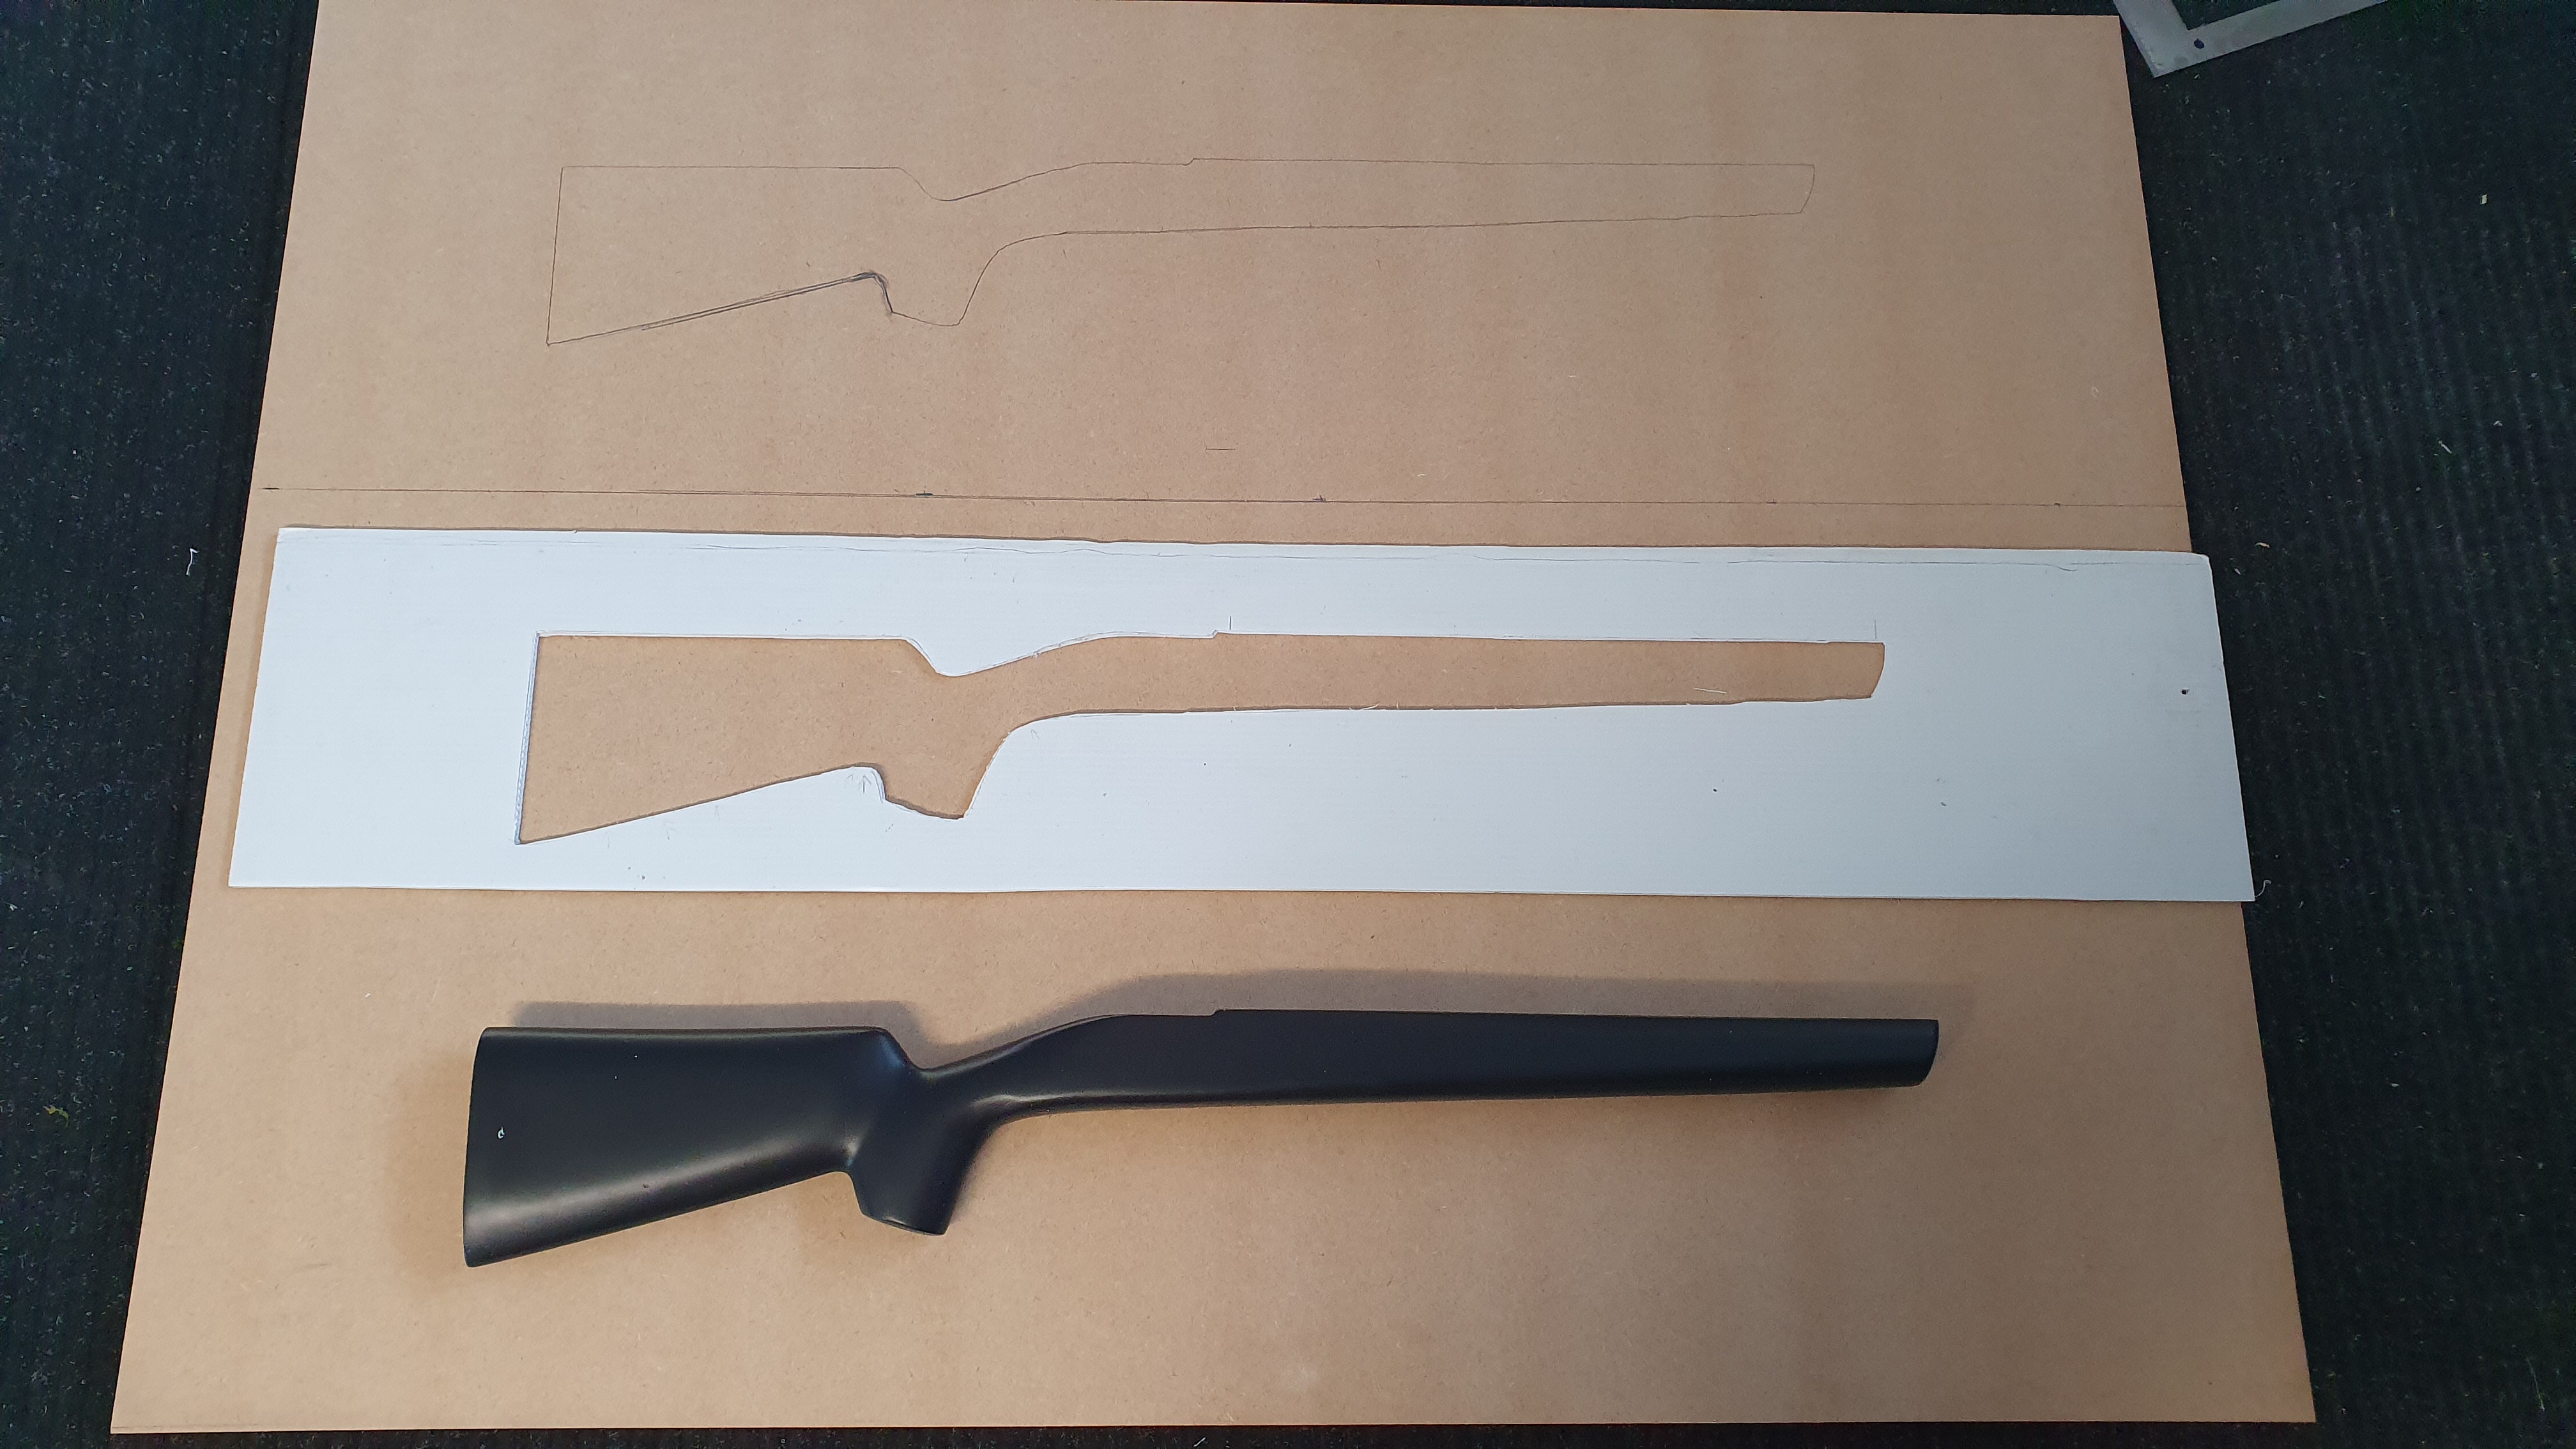
The first step was to strip down and measure the rifle followed by tracing the factory stock outline on a piece of corflute. The key here was to ensure I had the correct shape and contour where the action and rear tang fit into the stock. From here it was a simple matter of drawing in the shape I wanted the stock to be. And transposing onto the ply.

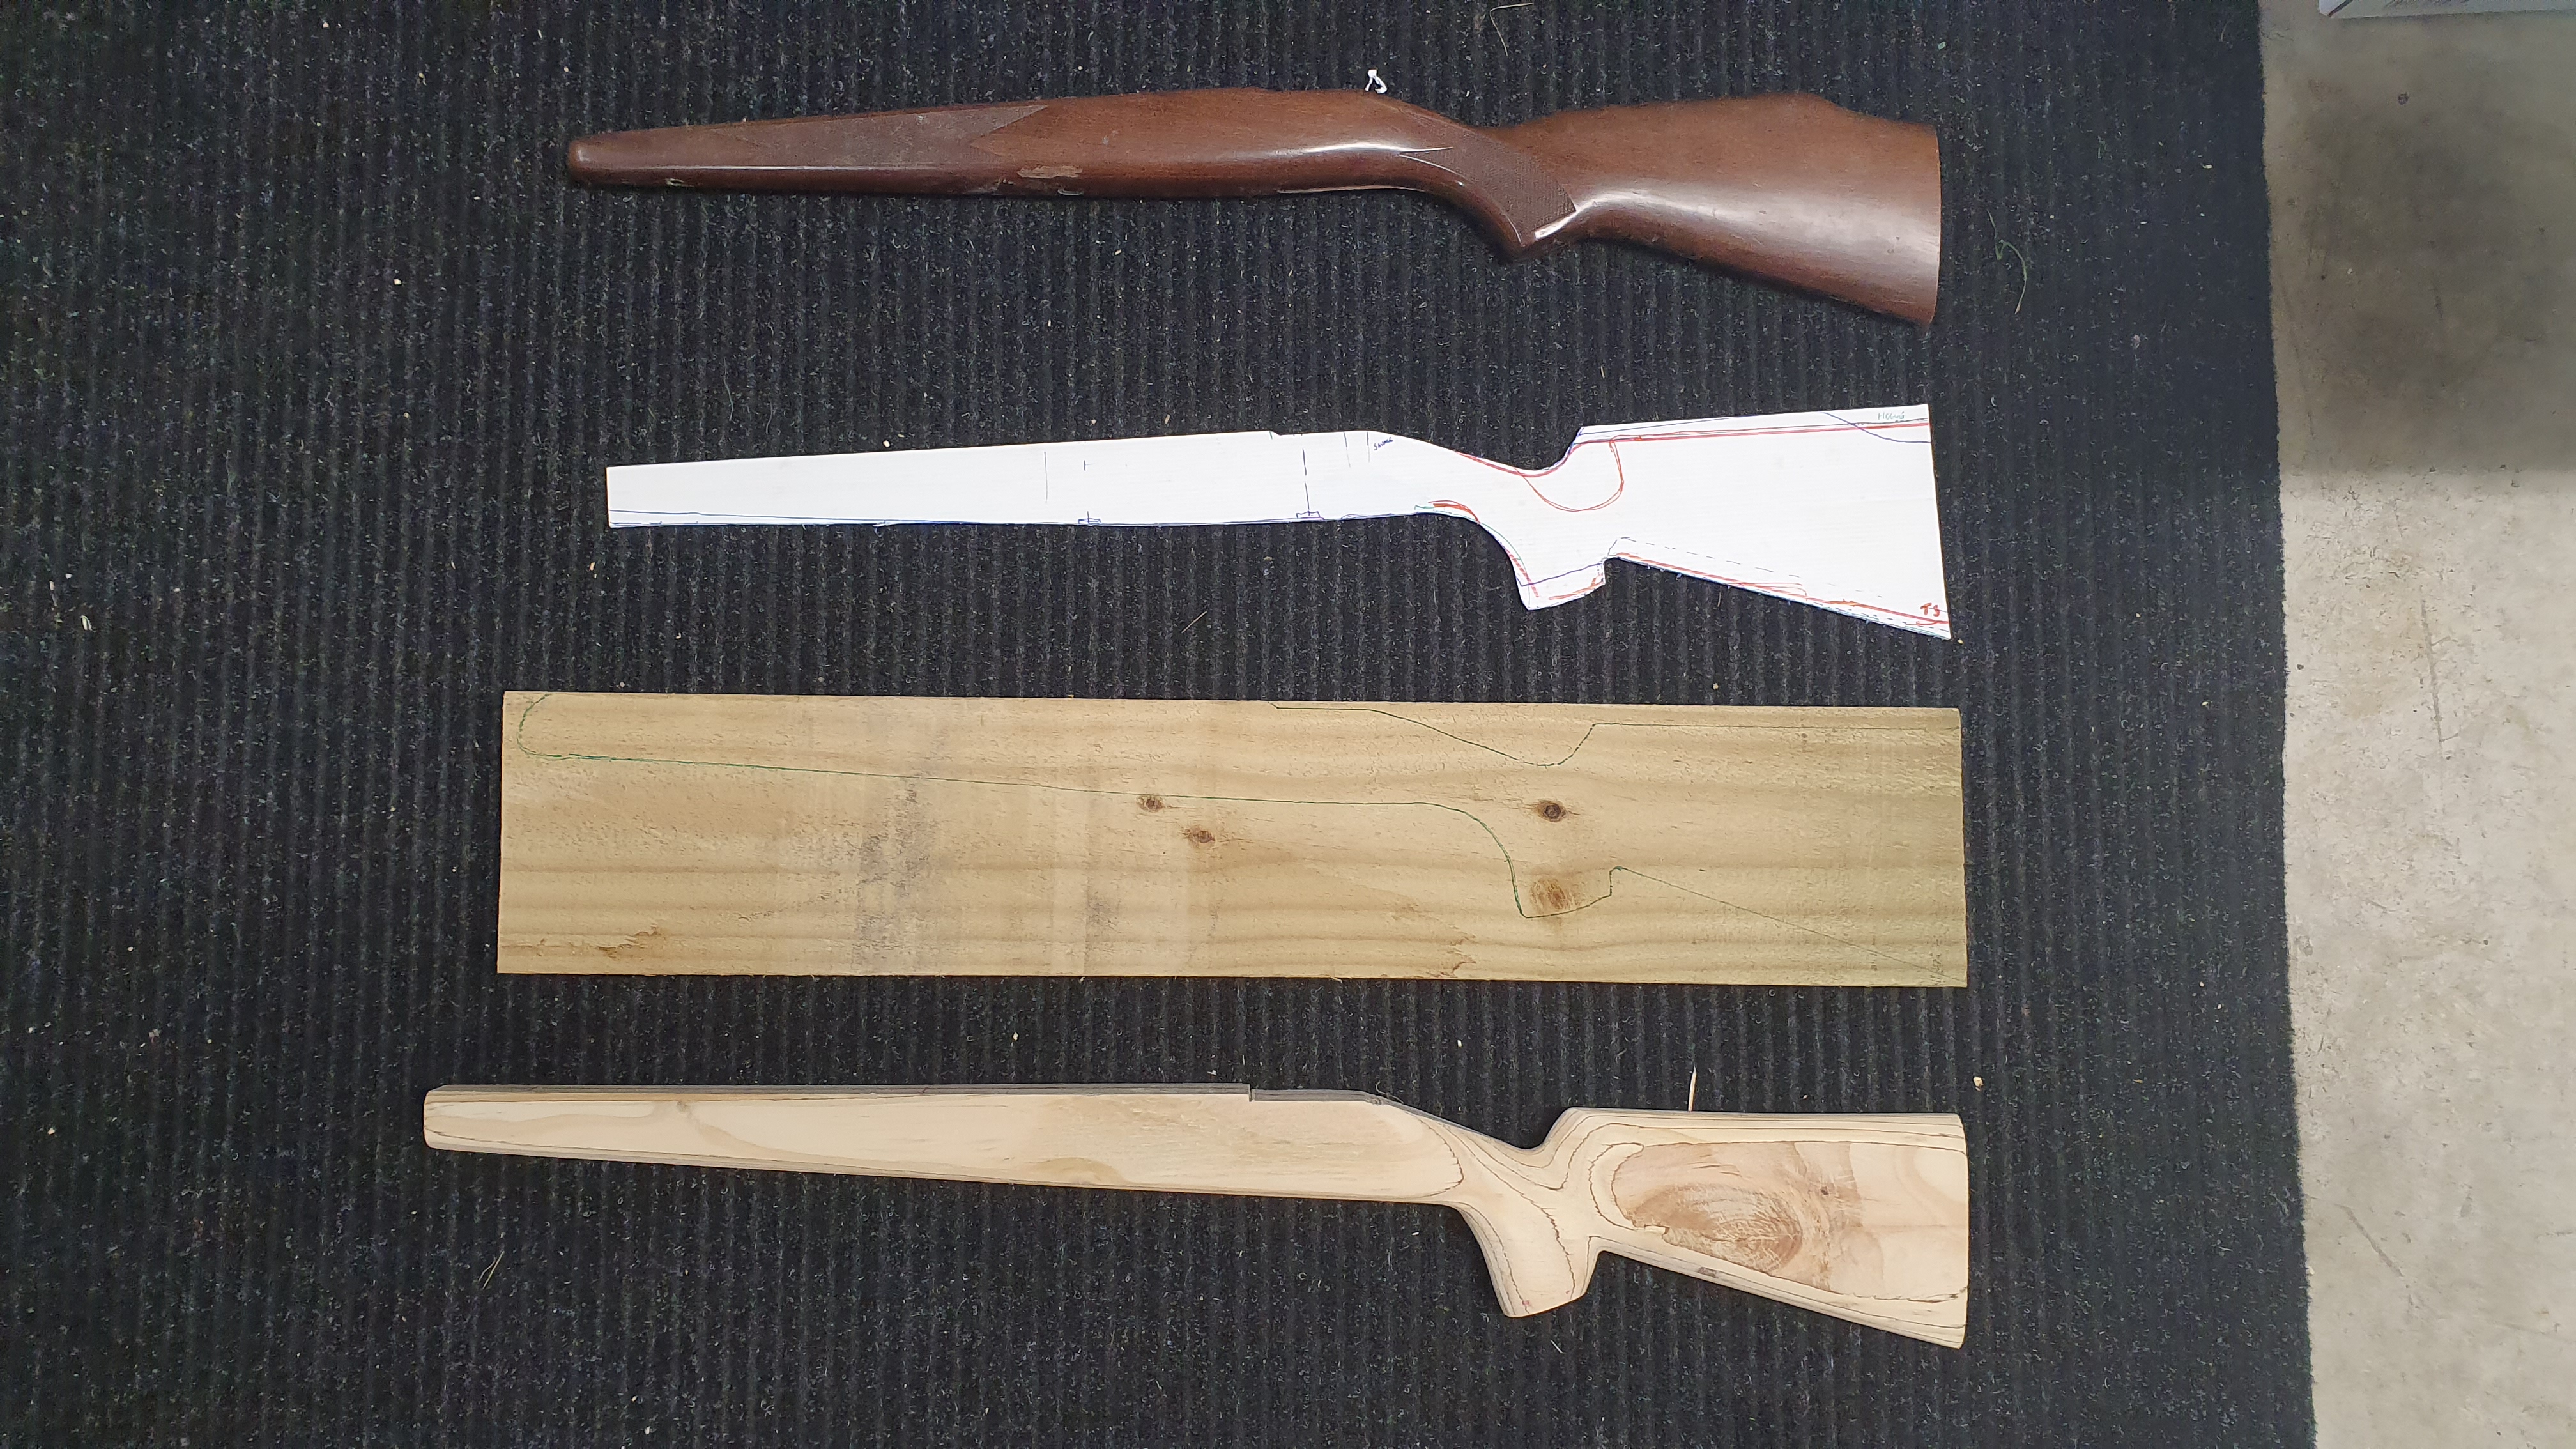
I was after a more vertical pistol grip, a straight buttstock that was in line with the rifle bore and a slightly longer and beaver tailed fore-end. I used some other rifle stocks I had at home to trace out some shapes.
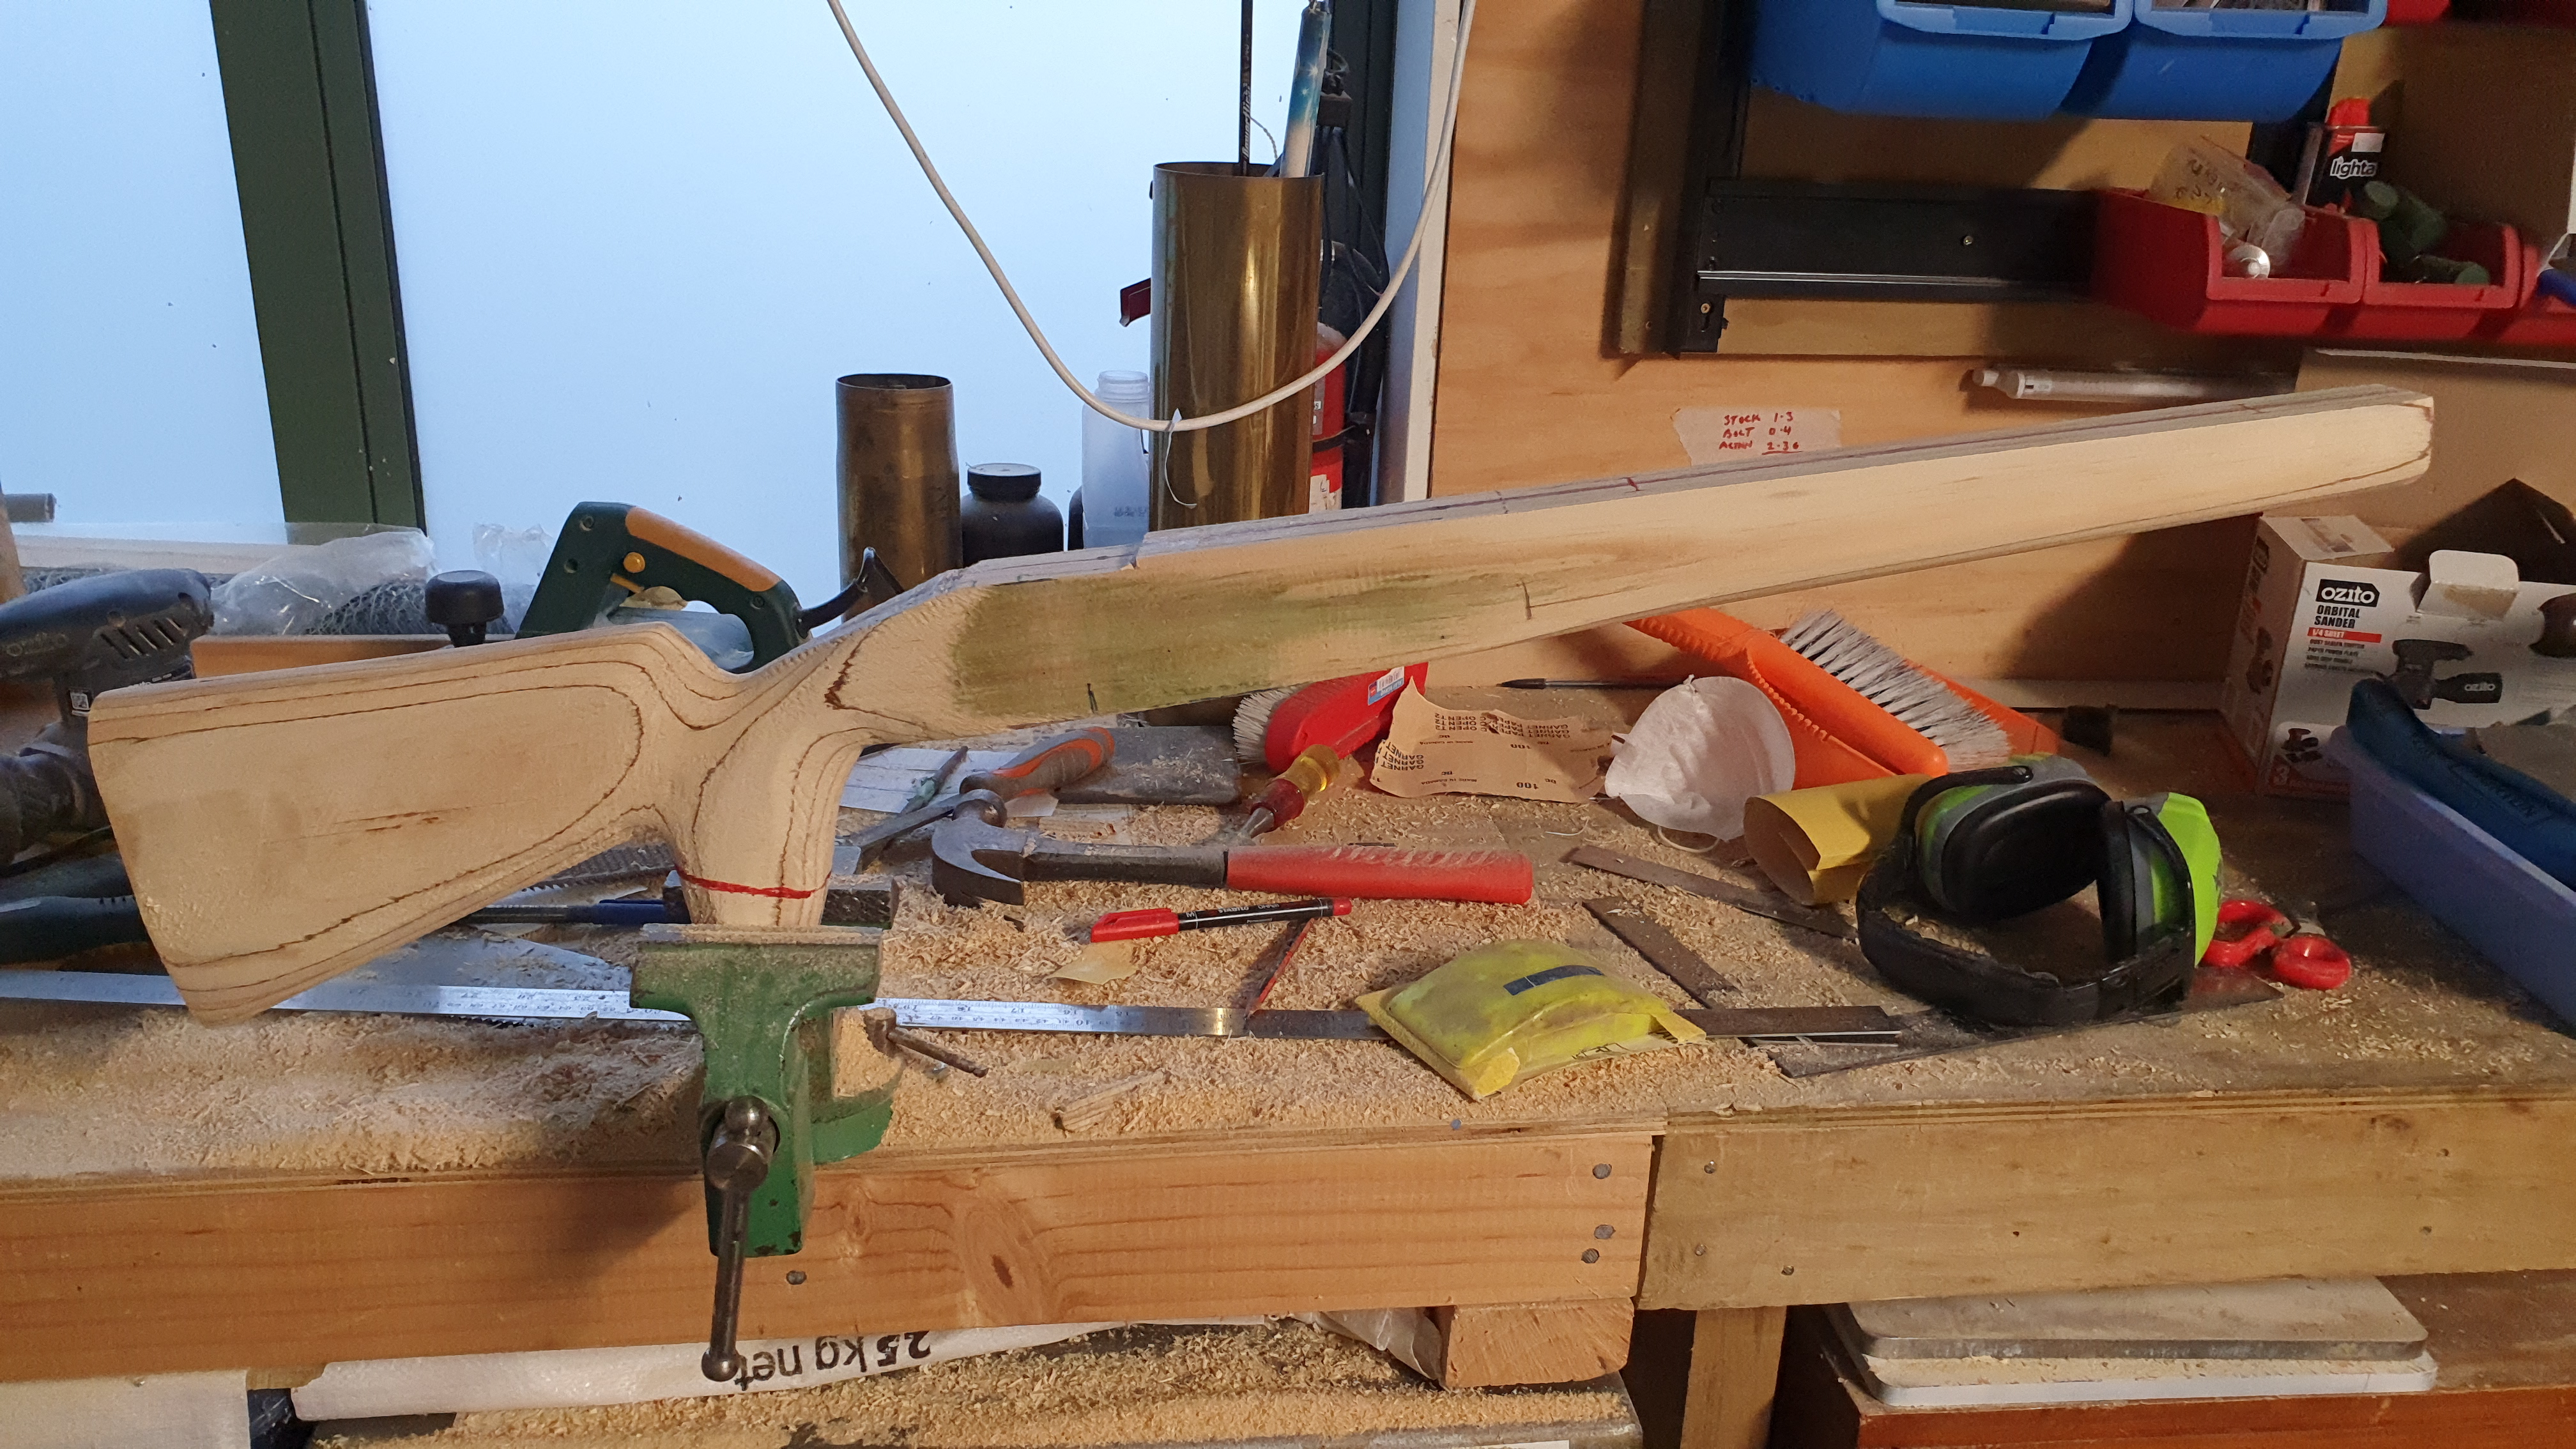
The next step was to laboriously carve out the ply to the shape and length of pull I wanted making sure I retained the original stocks upper rear tang shape and depth to accommodate action, blind magazine and bottom metal/trigger guard.
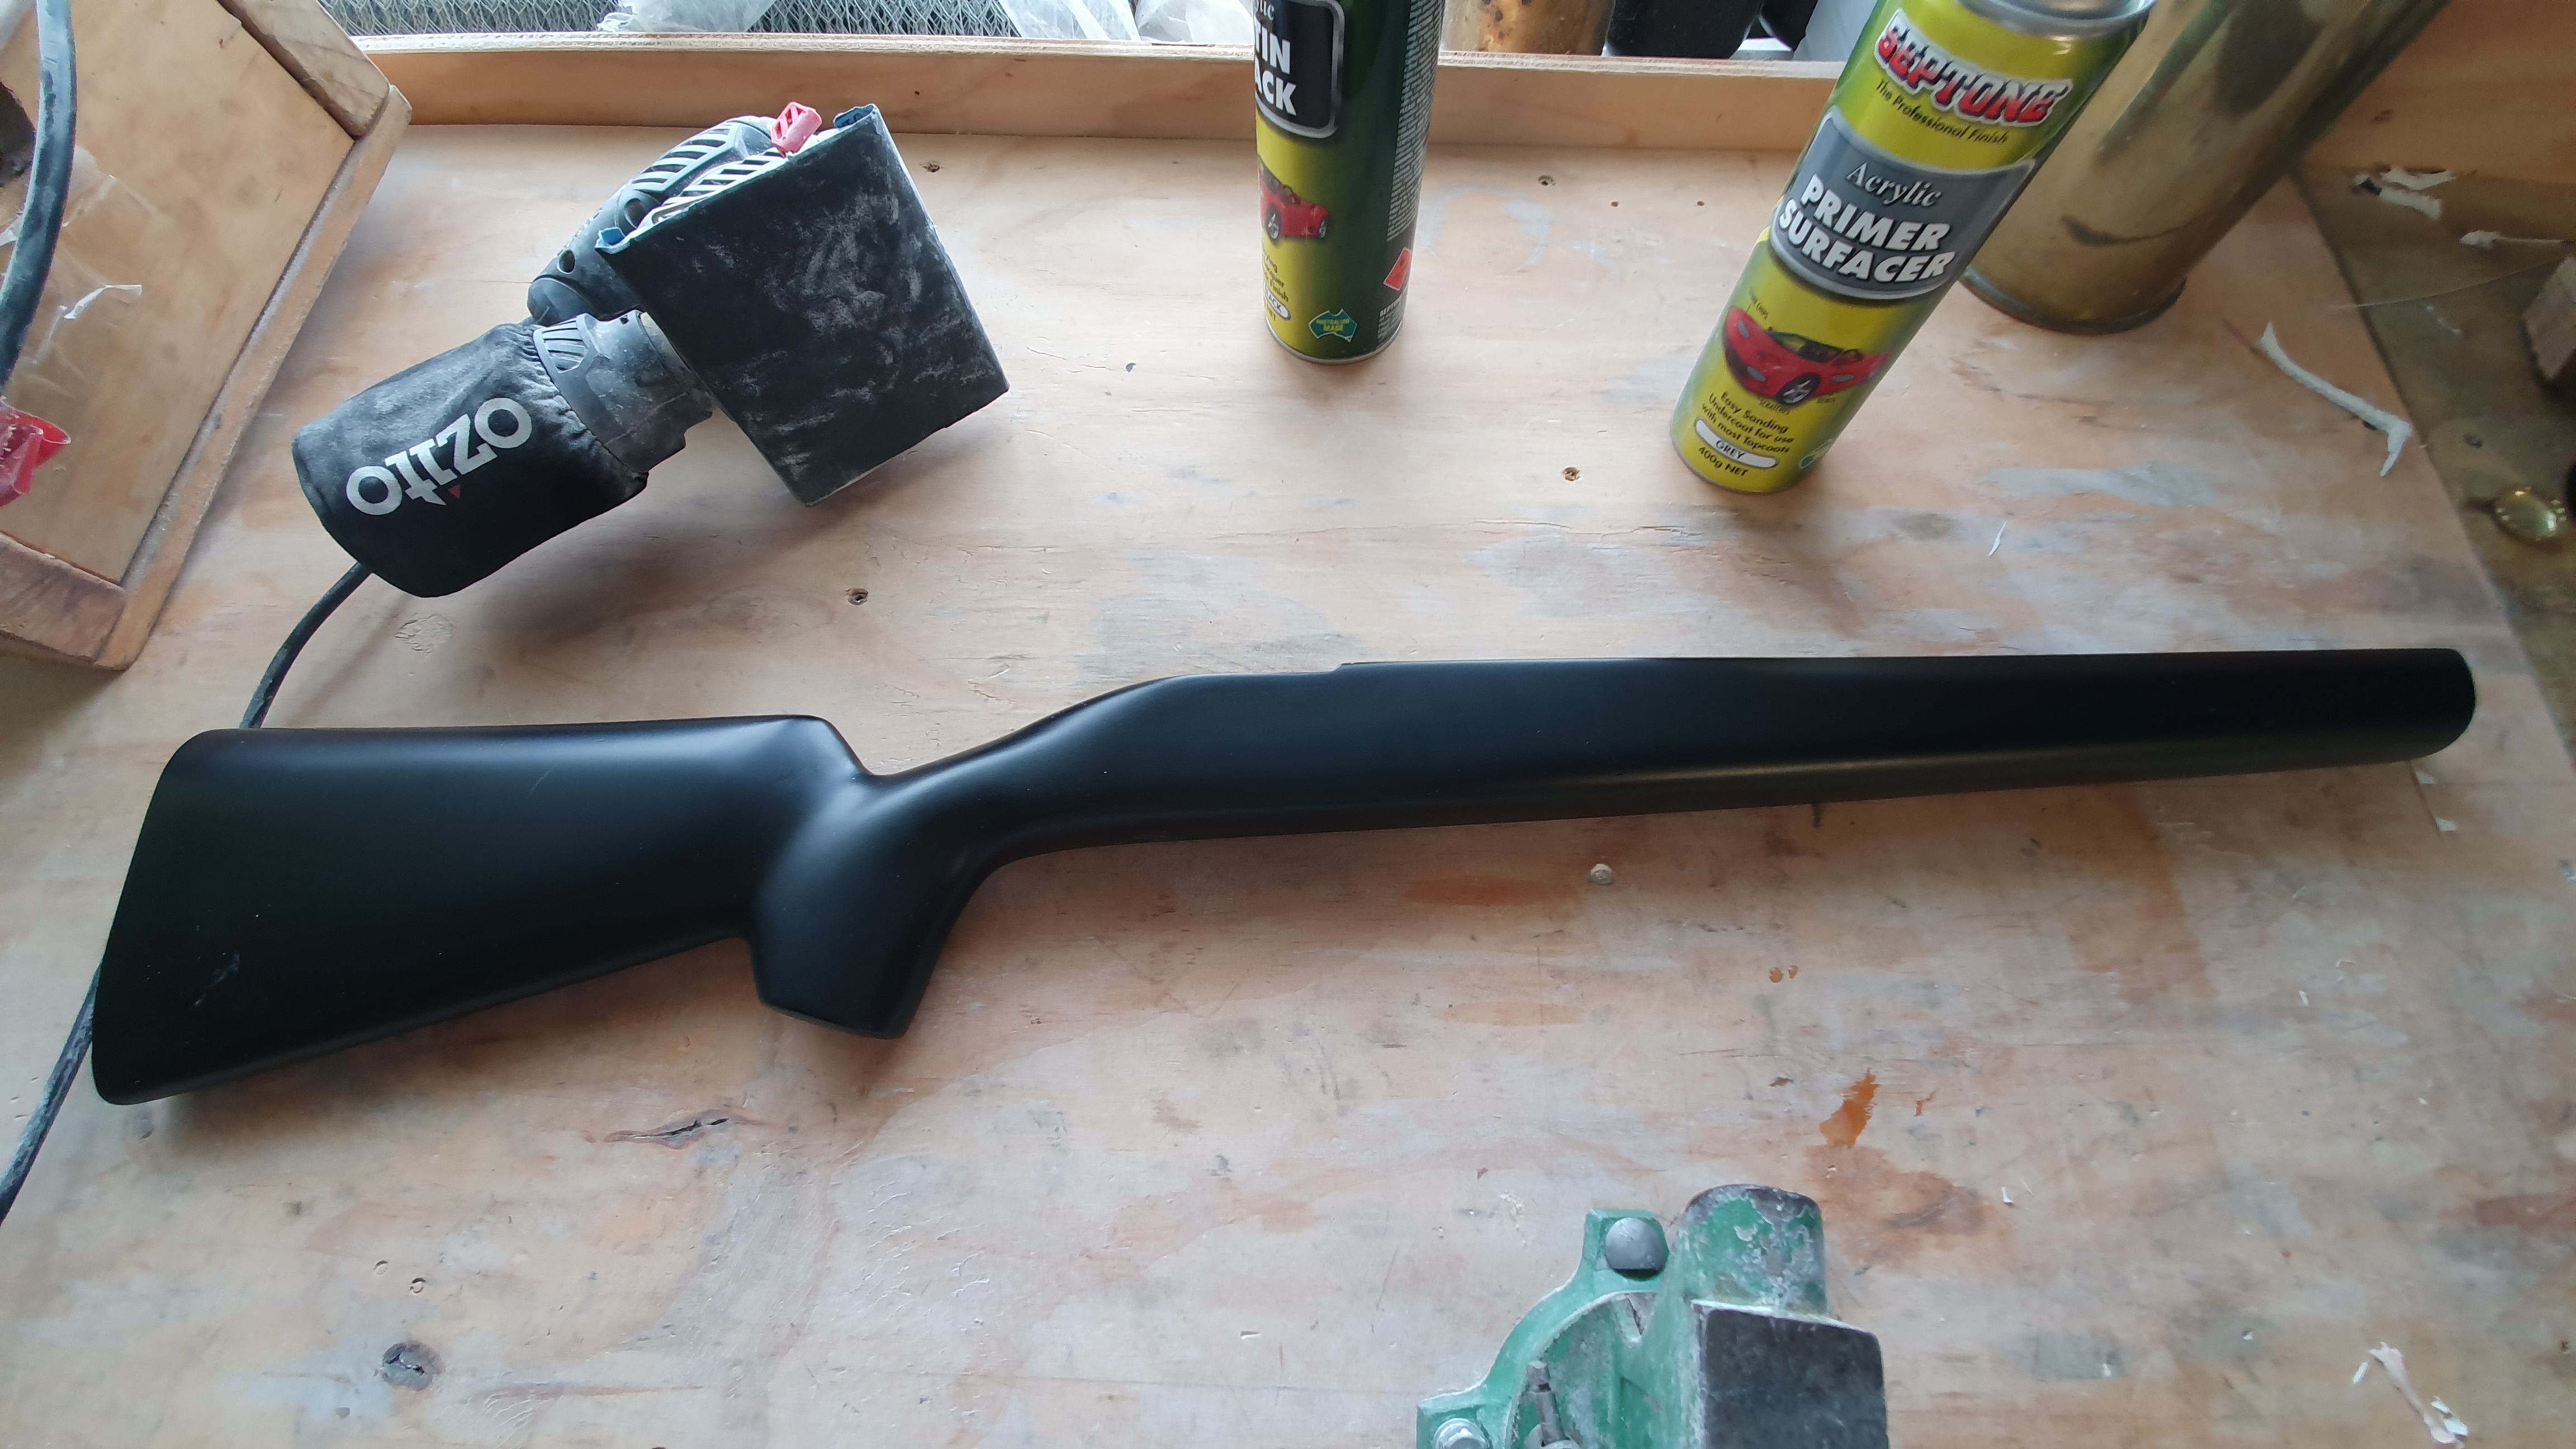
I used an acrylic primer filler and satin finish topcoat to seal the finished plug. The main problems I had in this stage was keeping track of where the centreline of the plug was so that I ended up with a symmetrical shape with no potential traps/overhangs to create the mold on. The last thing I wanted was to have the plug trapped in the mold.
*
More to follow.
-
24-02-2020, 02:48 PM #6Member
- Join Date
- Dec 2017
- Location
- North Canterbury
- Posts
- 2,368
Nice mate looking forward to seeing more.
-
24-02-2020, 05:10 PM #7Caretaker

- Join Date
- May 2012
- Location
- Rolleston, Canterbury
- Posts
- 5,186
Seeing as I have stopped making them I am happy to answer any questions etc. Plug looks good though.
-
24-02-2020, 05:12 PM #8Caretaker
- Join Date
- May 2012
- Location
- Rolleston, Canterbury
- Posts
- 5,186
NZ Fibreglass is a good source of carbon fibre. I used 200gsm plain weave. You need about 1 m for a stock if you do 4 layers of carbon fibre.
-
24-02-2020, 05:28 PM #9Member

- Join Date
- Jun 2018
- Location
- Christchurch
- Posts
- 731
An idea for next time - I imagine you laminated up more than one piece of ply to get the total thickness you were after. Sandwich a piece of coloured paper or fabric in the middle, or mix some acrylic paint through the PVA glue so there's always a line no matter what you sand away. Originally Posted by Robojaz
-
24-02-2020, 08:48 PM #10Member
- Join Date
- Dec 2011
- Location
- North Island
- Posts
- 389
Great idea, will remember that one for the future. Originally Posted by mopheadrob
dannyb likes this.
-
25-02-2020, 08:19 AM #11Member
- Join Date
- Apr 2019
- Location
- Rotorua
- Posts
- 656
Following this with interest. Looking at doing the same in the near future
Agree not much info out there on making them.
-
25-02-2020, 08:27 AM #12Member
- Join Date
- Dec 2017
- Location
- Scotland
- Posts
- 127
@Robojaz pm me if you want to share some info. I found some of Stug's instructions online a few years back and made myself a nice fibreglass stock and have done a few CF attempts and finally figured out how to mould CF nicely with vacuum bagging.
-
25-02-2020, 12:20 PM #13Member
- Join Date
- Dec 2011
- Location
- North Island
- Posts
- 389
Originally Posted by takbok
That would be great, will PM later on this arvo.
-
25-02-2020, 04:43 PM #14Member
- Join Date
- Dec 2011
- Location
- North Island
- Posts
- 389
Apologies guys this next post is going to be quite long.
-
25-02-2020, 05:08 PM #15Member
- Join Date
- Dec 2011
- Location
- North Island
- Posts
- 389
MAKING THE MOLD
Up until this stage I was fairly comfortable with what I had to do and how to proceed, from here I was in unfamiliar territory. Consequently, I sought advice and received some very good guidance from both STUG and especially FISHERMAN from this forum, I would now like to take the opportunity to acknowledge both of them.
The next step after having made the plug was to make a mold using the plug I had designed. The advice and research I got was to use a Tooling Gelcoat and Polyester resin with chopped strand Fiberglass matting and for the construction of my mold. (Note: I used epoxy resin for the construction of the rifle stock)
Now experts please feel free to correct me if I am wrong,
Gelcoat produces a hard wearing smooth surface that is suited to the rigors a mold is put under, and
Polyester resin works best with Fiberglass chopped strand matting which in turn is easier to mold around complex curves.
I ordered the Fibreglass and resins:
4 litres Polyester Resin / hardener
1 litre Tooling Gelcoat / hardener
3 metres of 200g Fibreglass cloth
3 metres of chopped strand mat
1 litre bag of West system 411 microsphere filler
1 litre of PVA release agent
While waiting for the resins/fiberglass to turn up I proceeded to make the parting board that I would use to make the first half of the mold.
I used a sheet of MDF and cut out an outline of the plug and then sealed it with acrylic primer and satin top coat to produce a smooth finish that would serve as the base of my mold half.
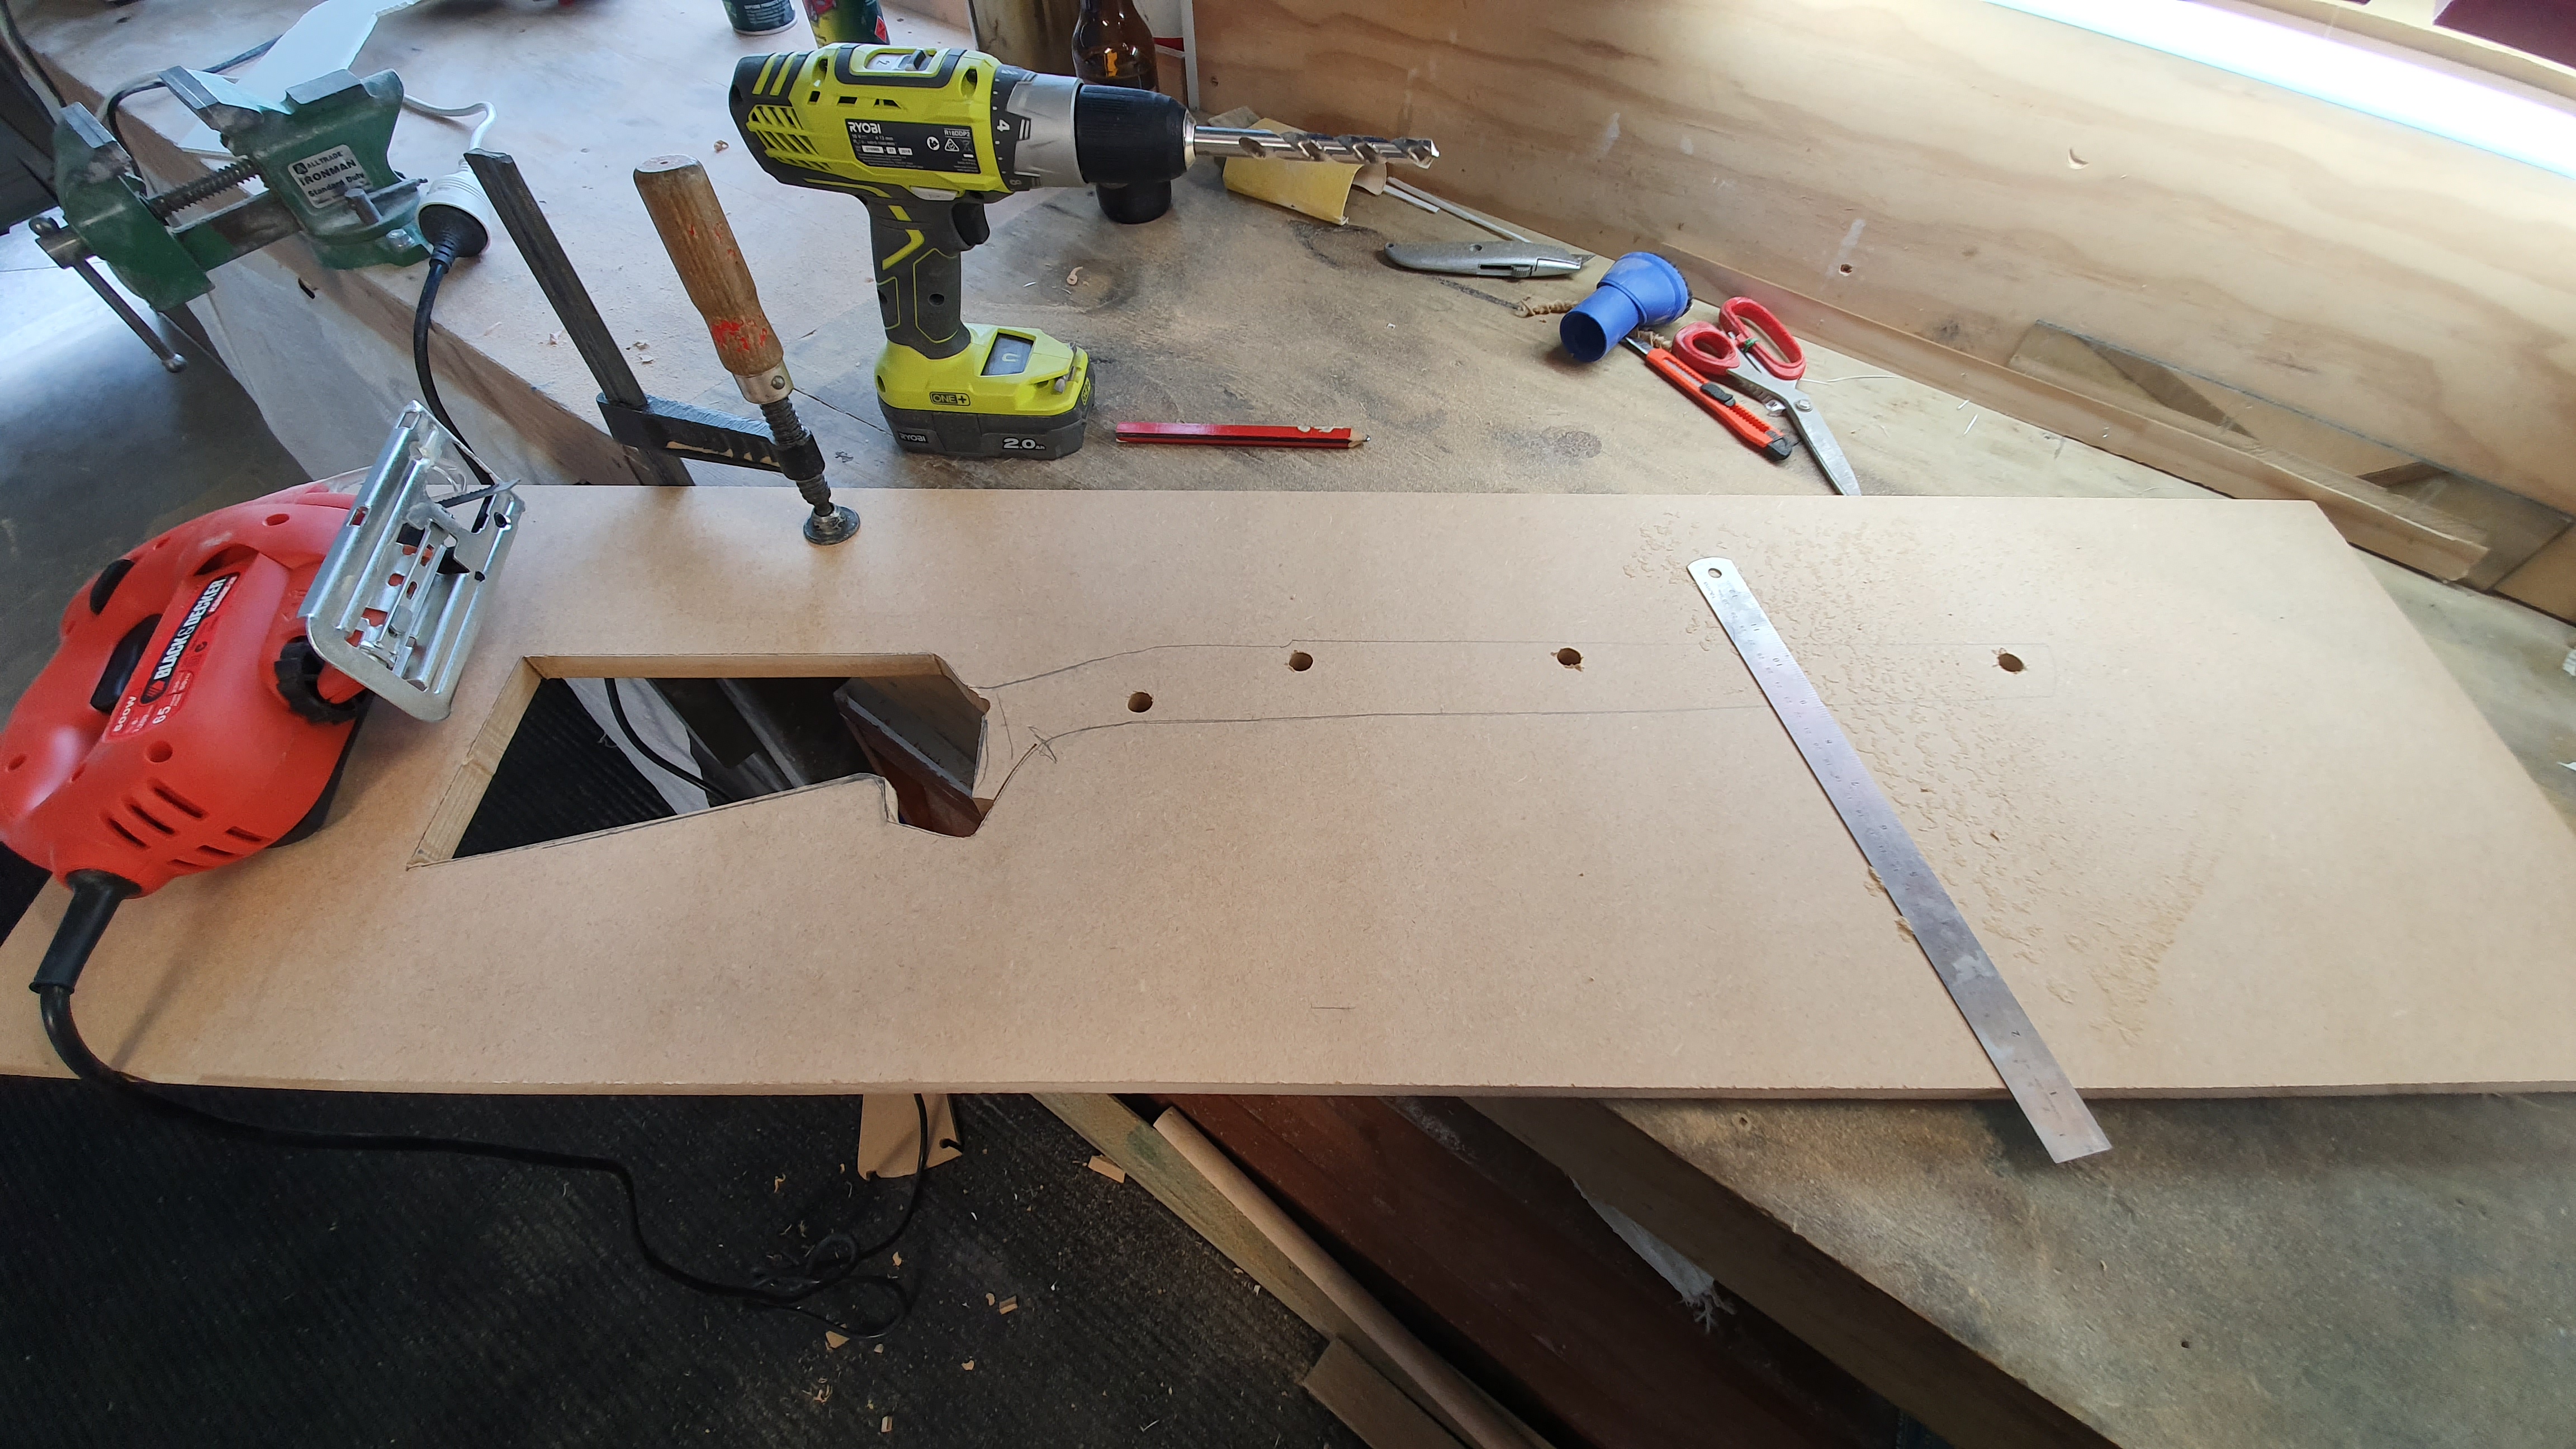
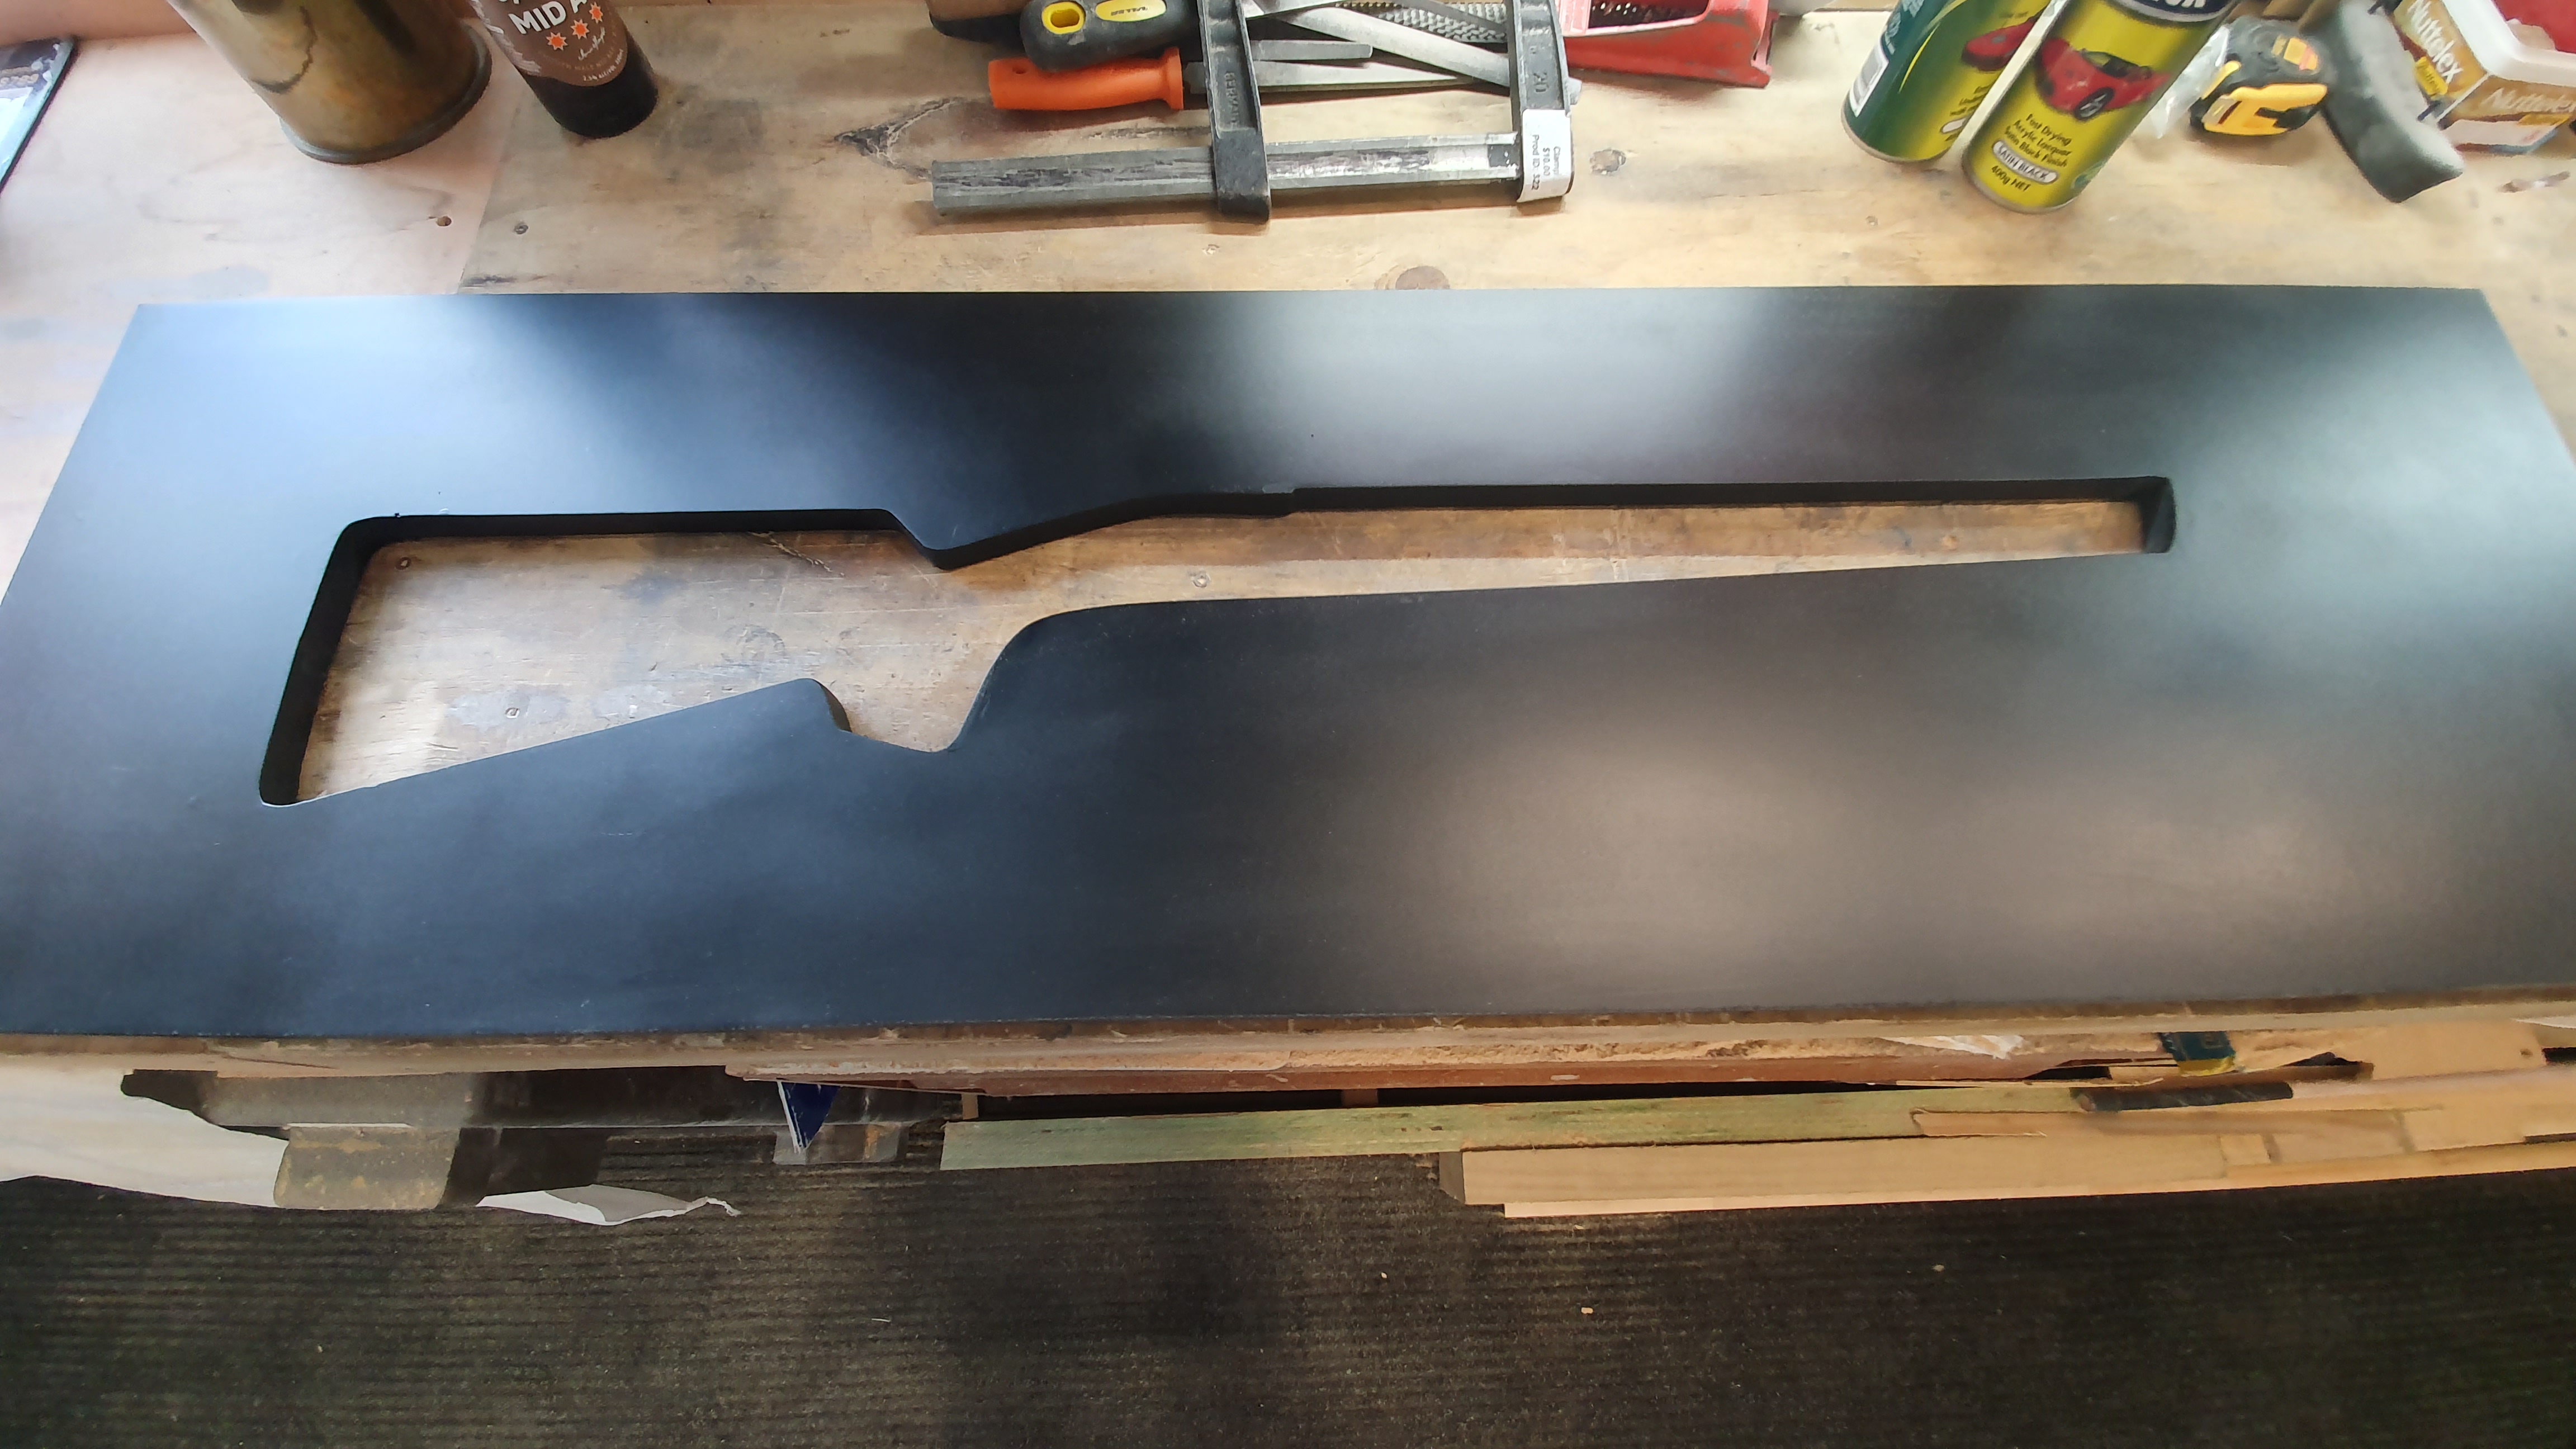
The next step was to set the plug into the parting board so that its centreline from fore-end to butt-stock lined up with the top surface of the parting board. To be honest I found this part an absolute pain in the ass. I eventually used small pins tacked into the plug to hold it in place while I used plasticine to seal the gap between the plug and parting board. (I used plasticine as I did not have any filleting wax)
It is important to get the parting board / plasticine / plug join as smooth as possible as this will be transposed onto the mold. I drilled six 12 mm shallow indents into the parting board (corners and middle) to act as indexing studs once the 2 mold halves were made. These would ensure that the 2 halves would come together perfectly during the stock making stage.
Once I was satisfied that the plug was in the correct place in the parting board I applied 4 coats of carnuba car wax on the plug and parting board letting each layer dry to a haze before buffing off. I then applied a light mist coat of PVA release agent and let it dry before applying an additional two heavy coats allowing to dry between coats.
Now I dont have an air spray gun system, but I did find a PREVAL portable sprayer for about $15 from Supercheap Auto which I used to apply the PVA release agent.
The resins / fiberglass had arrived and it was time to make the first half of the mold. Now I cant stress enough to do your prep BEFORE you mix any resin. I learned the hard way ending up with
considerable more mess that required.
So,
Have plenty of rubber gloves available, I threw them out as they became too messy.
Have a quantity of popsicle sticks on hand to use for mixing resin and poking fiberglass into place.
I used disposable paper cups/bowls to mix my resin in.
Use a ground sheet to catch any spills
Use a respirator, polyester resin stinks and I mean really stinks the fumes are nasty.
I also used eye protection.
Have a few paint brushes (25 50mm) on hand I threw them out as I went along.
Use acetone to clean up
A measuring jug to measure quantities of resin / hardener (I measure each in separate containers and then poured both into mixing bowl.
Layout and pre-cut all your fibreglass to the right dimensions, use the plug as a guide. Ensure you leave extra around the edges (I used 25mm as a guide) I initially started with large cut out pieces covering the whole mold but very quickly realised that
these were unmanageable and ran the risk of creating bridges /air pockets within the layup. I had to cut them down into more manageable sizes and overlap midway through my layup resulting in bloody annoying balls of sticky fibre on the end of my fingers (rubber gloves)
Thats all I can remember for now, I am sure others can provide further preparation advice.
Prep completed, I applied two thick coats of tooling gelcoat allowing to tack off in between. The ratios of hardener will be on the Gelcoat container. The best method would be to spray the gelcoat to get an even layer, but as I did not have this I used a sponge foam paint brush. If using a standard paint brush you run the risk of getting brush hairs stuck in the gelcoat. It is important to get the best coating you can avoiding risk of air bubbles, as this is going to be your mold surface. Any imperfections here will be transferred to you rifle stock.
While the second coat was tacking off I mixed a compound of polyester resin and microsphere filler to a toothpaste consistency and applied it to the mold (once Gelcoat had tacked off) in order to smooth out the sharp corners where the plug meets the parting board. This helps the layup of Fibreglass as it doesnt like to go around sharp complex corners.
Next was the application of the Fibreglass. Once the filler had tacked off. I mixed a batch of polyester resin and applied a coating on top of the gelcoat / filler surface ensuring I wetted out the entire surface of the plug and parting board. On top of this I gently pressed down my first layer of fiberglass 200g cloth and pressed into place with more resin using a dabbing motion with a paintbrush. It is important to note that you must ensure you wet-out each layer before applying the next. You can see this as the fibreglass goes from a white colour to slightly transparent. I ensured I overlapped the pieces and had a minimum 25mm overhang over the edges of the parting board.
I repeated this with 3 more layers of chopped strand matting and a final layer of 200g cloth resulting in 5 layers in total. (using a mix of cloth and chopped strand was my idea, I am sure that there are many other effective combinations) I also bedded in a couple of strips of metal channel to stiffen up the mold. Was this a bit of overkill? I dont know, I just wanted to make sure that my mold was going to be robust.
The first half of the mold was complete and left to harden for 24 hrs.
The next step was to trim the overhanging edges of fiberglass to the parting board (I used a dremmel with a cutting blade) I flipped the whole thing over so the bottom of the parting board was facing up and CAREFULLY pried (with a plastic ruler and wedge) the parting board off the fiberglass mold keeping pressure down on the plug. The aim here is to get the parting board off the mold whilst LEAVING THE PLUG IN THE MOLD.
With the parting board removed I cleaned up all the leftover plasticine, and washed off the old PVA release agent with a damp cloth. I also cleaned up the indexing studs created by the holes I drilled into the parting board. More coats of wax and PVA release agent were reapplied to the plug and new mold surface as well as a 10mm strip of masking tape (2 layers) along the outer edge of the mold to create a thin gap enabling the 2 mold halves to be prised apart when completed.
It was then a case of applying Gelcoat, filler and Fiberglass as per the first mold half and leaving 24hrs to harden.
The second mold half was trimmed to the edges of the first mold half whilst still stuck together and then the 2 halves were CAREFULLY prised apart.
Once apart I had one half of the mold with the plug still in it and the other not. I carefully removed the plug (Noting the mold halves had not yet reached their full hardness) cleaned up the molds removing any sharp edges with 2000 grit sand paper and set aside for 2 weeks to fully cure and harden.
A great sigh of relief was had at this stage.
More to follow.Last edited by Robojaz; 25-02-2020 at 05:27 PM.


 Reply With Quote
Similar Threads
-
Hardys Carbon fiber Bipod - Any thoughts?
By Larskramer in forum Firearms, Optics and AccessoriesReplies: 35Last Post: 07-11-2019, 11:28 AM -
Carbon Fiber Stocks
By Ham 7mm in forum Firearms, Optics and AccessoriesReplies: 13Last Post: 09-10-2018, 08:58 AM -
carbon fiber vs steel
By r87mm in forum Firearms, Optics and AccessoriesReplies: 14Last Post: 26-07-2017, 07:55 PM -
Carbon Fiber stock maker Morrinsville area
By 260rem in forum Firearms, Optics and AccessoriesReplies: 2Last Post: 24-05-2012, 07:34 AM
Tags for this Thread
 Posting Permissions
- You may not post new threads
- You may not post replies
- You may not post attachments
- You may not edit your posts
Welcome to NZ Hunting and Shooting Forums! We see you're new here, or arn't logged in. Create an account, and Login for full access including our FREE BUY and SELL section Register NOW!!
All times are GMT +13. The time now is 03:52 PM.

Bookmarks