For anybody who has ever wanted functional night vision, but can't realistically go out and buy good Gen 2 or 3 gear, this might be for you, and it saves wasting money on junk digital or Gen 1 crap.
This is currently a work in progress for me, I aim to have this unit built and wired more robustly so I can mount it on a rifle for use with an IR laser, but this guide will get it up and running at low cost. The housing parts I scrounged off my partner's dad, the eye piece cost $6 from the local hobby store, the intensifier tube is 80 pound from the UK and the battery pack and terminals cost next to nothing. I probably have less than $200 invested in this as it stands.
Getting started - the gear you need
Soldering gun
Crimping tool, or something that will strip wire
Lens pen to tidy up the input and output windows
Waste water or down pipe, I think mine is 80mm dia, cut to a suitable length
Two end caps
A high speed camera lens and preferably a C mount, but it isn't totally necessary
4xAA (6V) battery holder
Spray can lid
Jeweler's loupe
Electric tape and tin/lead or equivalent solder
Blue -Tak
A hole saw is extremely helpful
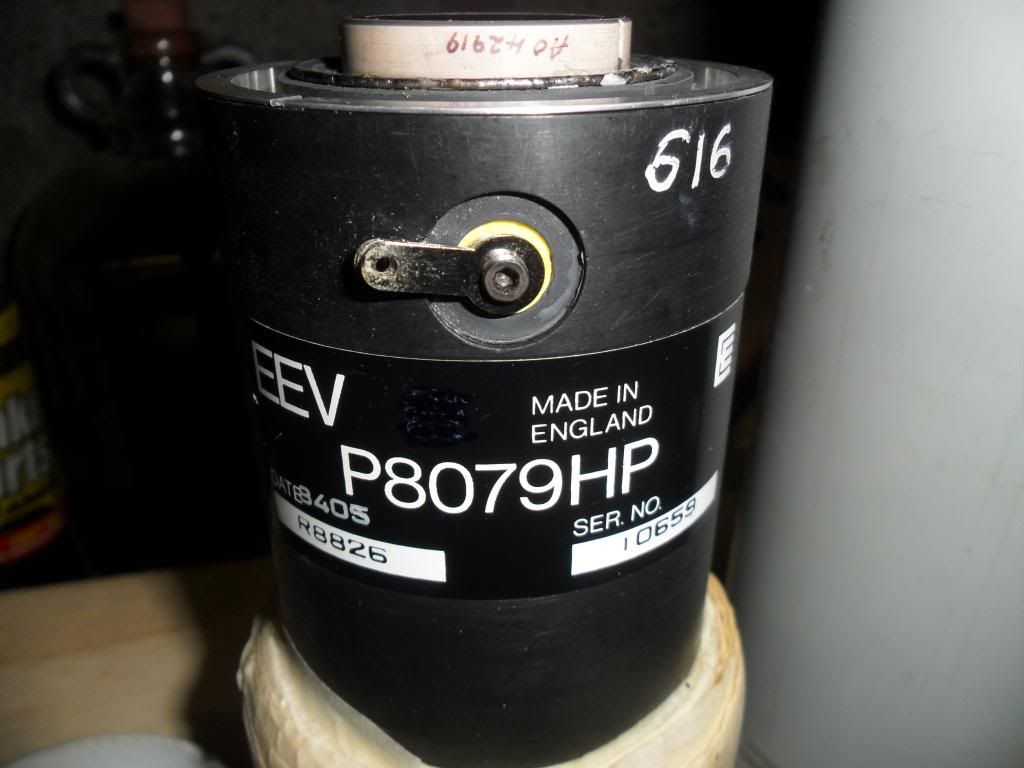
First off, you will need one of these
What is it? It's a P8079 image intensifier tube, yes it is a generation 1 tube, but it is actually 3 generation 1 tubes wired together (known as a cascade tube). Each tube gains off of the next, so you end up with a lot of light being amplified, maybe 10x more than a regular gen 1 tube. Some people have quoted 50 - 100,000x gain, which is staggering and more than a lot of gen 3 tubes. Does this make it better than gen 3? No, gen 3 tubes give high light gain in a much smaller package, and lack the geometric distortion (fish eye) that is inherent in gen 1 tubes. They also have a much longer useable lifespan than any gen 1, you might get 1000 hours out of one of these tubes if you are lucky, but beggars can't be choosers, and these are mil surp tubes. In saying that, you would have to spend a shit load more money than you will on this project, to get significantly better night vision (in terms of viewing quality, size and weight is another consideration). If you are wondering, these cascade tubes come from AN/PVS 2 starlight scopes, as used in Vietnam and the Falklands conflict.
I purchased mine here Starlight Night Vision. DIY Night Vision Monocular Julian is a good bastard, the first tube he sent me got broken in the post, so he sent me a new one. This left me with a broken spare tube I could prototype off of and not have to worry about fucking it. They are also available here Image Intensifier Tube 1st Generation though I hear shipping is expensive. And from this dude in Israel Varo Image Intensifier Tube IR Laser Viewer Night Vision | eBay
I can highly recommend Julian at Starlight UK, he will help you out if you have problems.
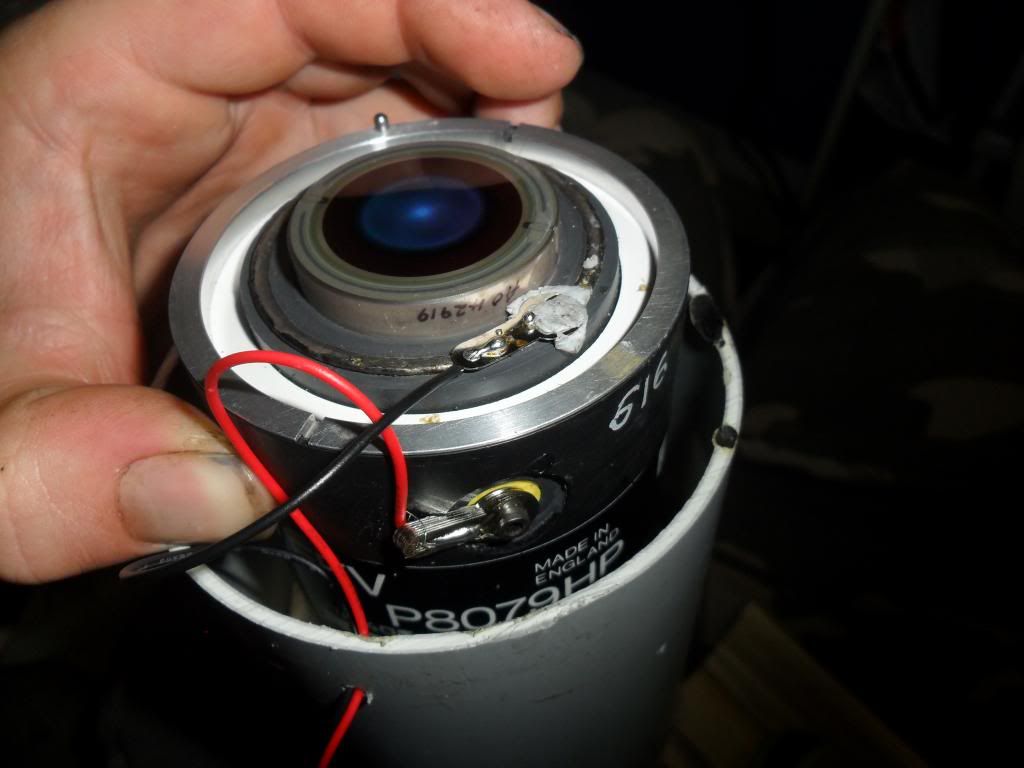
While we are looking at it, you will want to get a 2.5mm screw for the positive output, so you can attach a terminal as pictured. I had a prick of a time trying to find one, the hobby store came to the rescue.
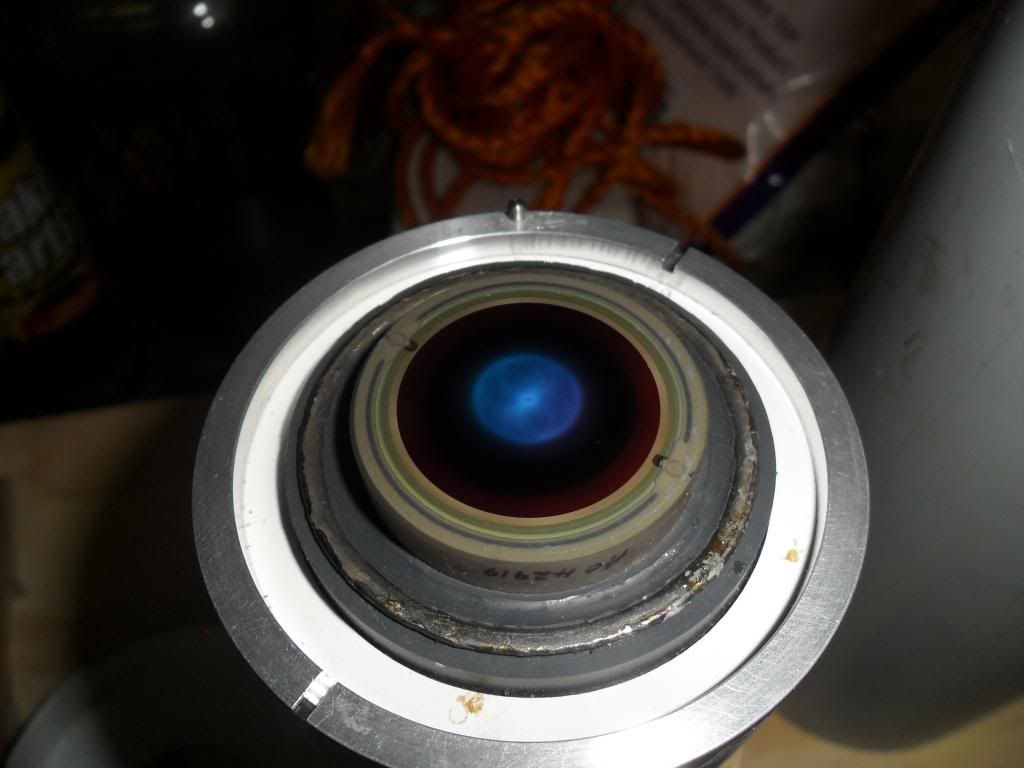
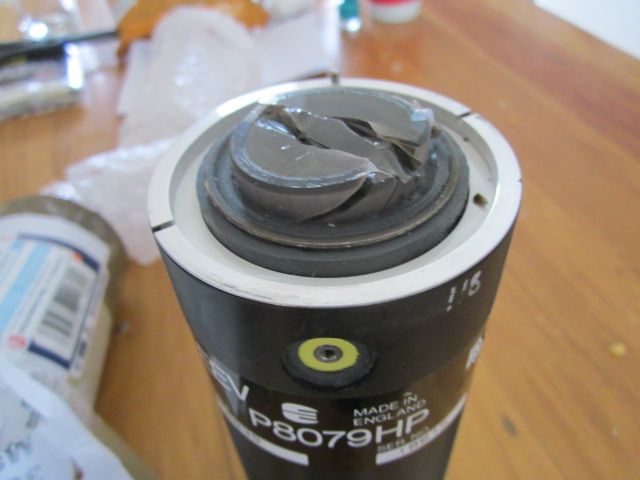
The input window. Where the magic happens. Keep this MINT.
It shouldn't look like this...
The output window, where the image will appear.
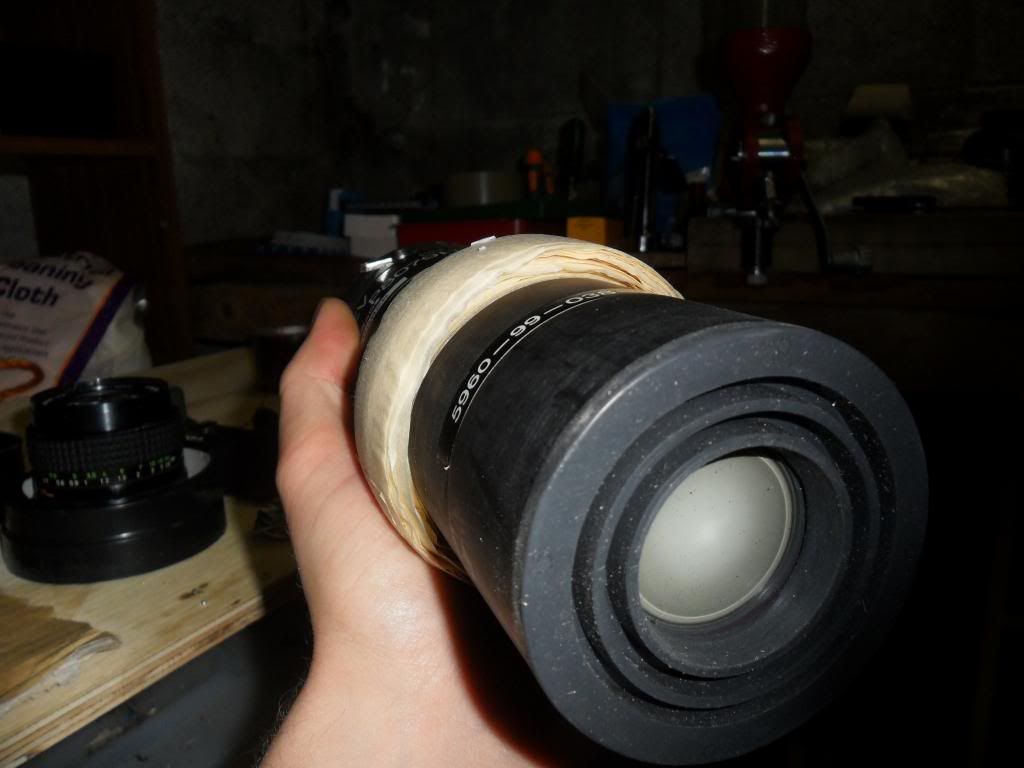
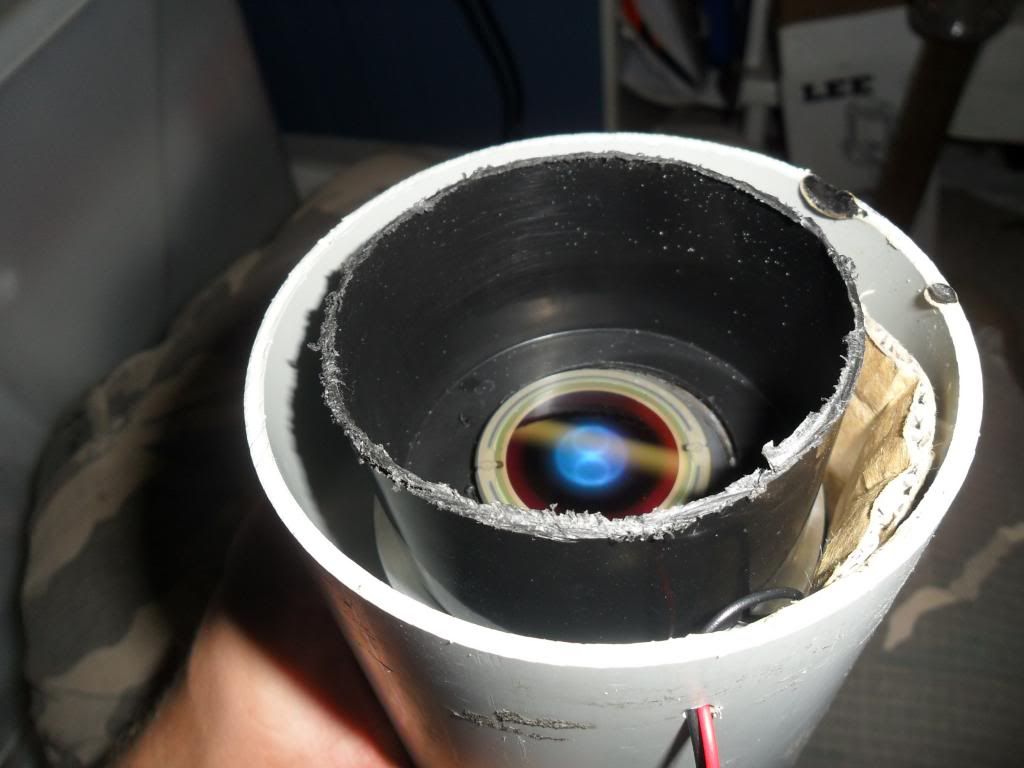
Note how I have used masking tape to shim the NV tube to fit in the drain pipe. This is a temporary solution but it works. I will probably use expanding foam in the final build. The reason you use a wider drain pipe is so you have room to play around with the wiring. The beauty with this project is you can get as involved as you want. You can make the thing out of cardboard and duct tape, or you can machine a nice alloy housing if you are handy with a lathe. You could even buy a broken AN/PVS 2 and use that.
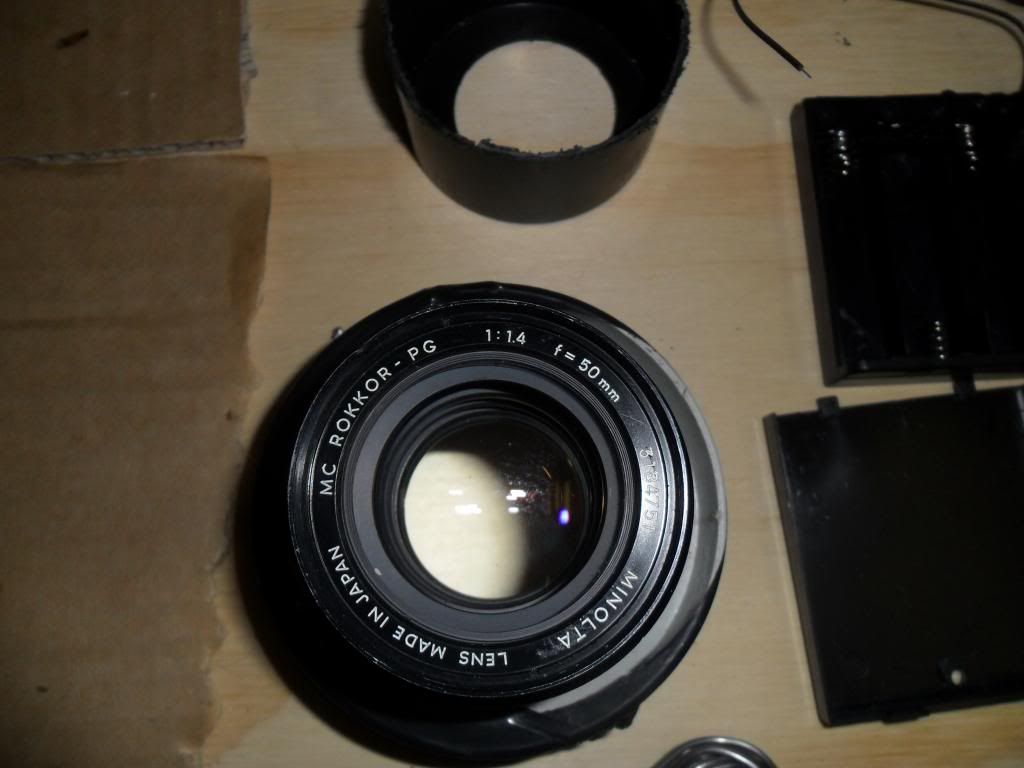
The objective.
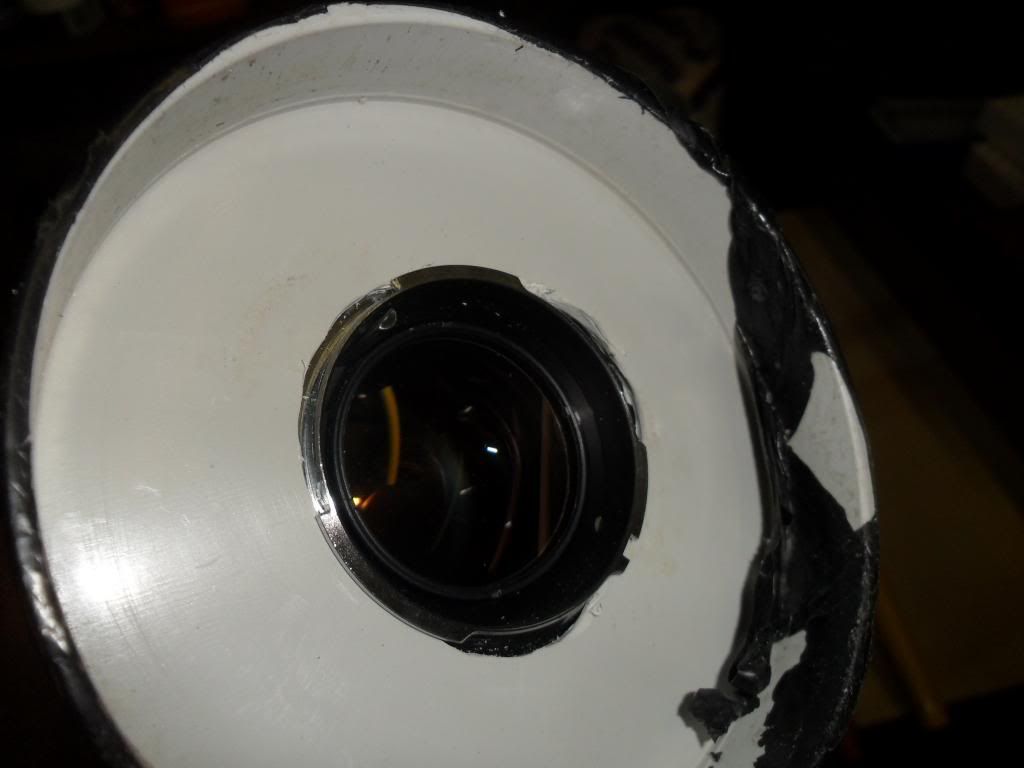
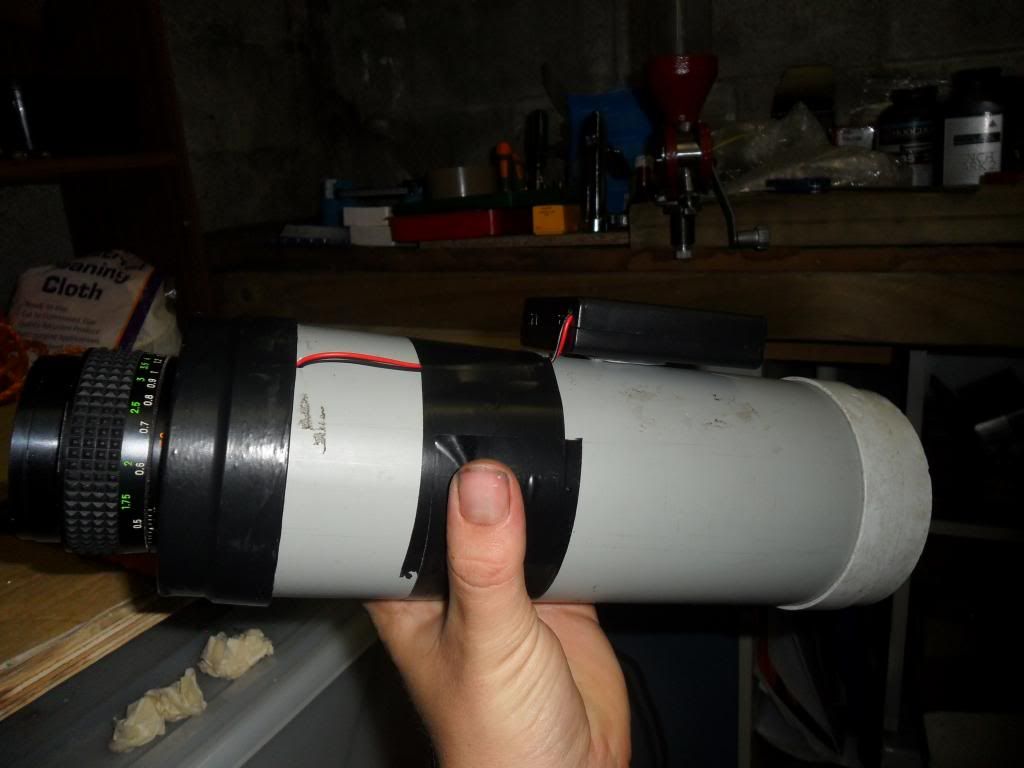
You want a "high speed" lens, anything under F2 will work, but honestly I wouldn't want anything slower than what I have (F1.4). F1.2 would be outstanding, but they can be difficult to come by cheap, they are generally very expensive, though you sometimes see them on Ebay for cheap. Most people seem to use CCTV lenses, which can be bought cheap and are fine for the purpose. An example 50mm F1 4 CCTV Lens C Mount for GF3 GF2 GF1 G3 GH1 GH2 EP1 EP2 EPL1 EPL2 | eBay Ideally you would get a C mount for the lens, and glue the C mount to one of the end caps (after cutting a hole in it to see through). I didn't have one/couldn't be bothered buying one, so after cutting a slightly undersized hole for the lens mount, I got my dremel tool and shaped the hole, so the I could insert the rim of the lens mount and then twist it, so the tabs hold it to the end cap.
I should add that you want to try and get a lens that has an adjustable iris - so you can manually control the light gain. There are curtain situations, such as under street lights, where you need to restrict the available light to get a sharper image, and possibly prevent damage to the tube. These tubes are very sensitive to any light, and unlike some modern gen 3, they are not "auto gated", meaning they won't cut or reduce the power supply to stop themselves being damaged by excessively bright light. Be careful with them.
Wiring it up.
I drilled a hole towards the front of the housing, just short of where the end cap will start when it is on. Feed the wires from the battery holder through the hole and give yourself enough slack to work with. My 2.5 mm screw was a lot longer than it needed to be, so I shimmed it with a bunch of terminals stacked up. I then slid an exposed strip of the positive wire up underneath the terminals and soldered it to the top. I soldered the earthing wire to a terminal and attached the terminal to the earthing ring with blue - tack. Pretty ghetto arrangement, but I have found it damn near impossible to solder the wire to the earth ring. Maybe I don't have a powerful enough soldering gun to heat the components, or it could be alloy, which makes it kind of impossible to solder toIn all the other guides I have seen online people talk about soldering it so maybe it's just me. Anyway it works.
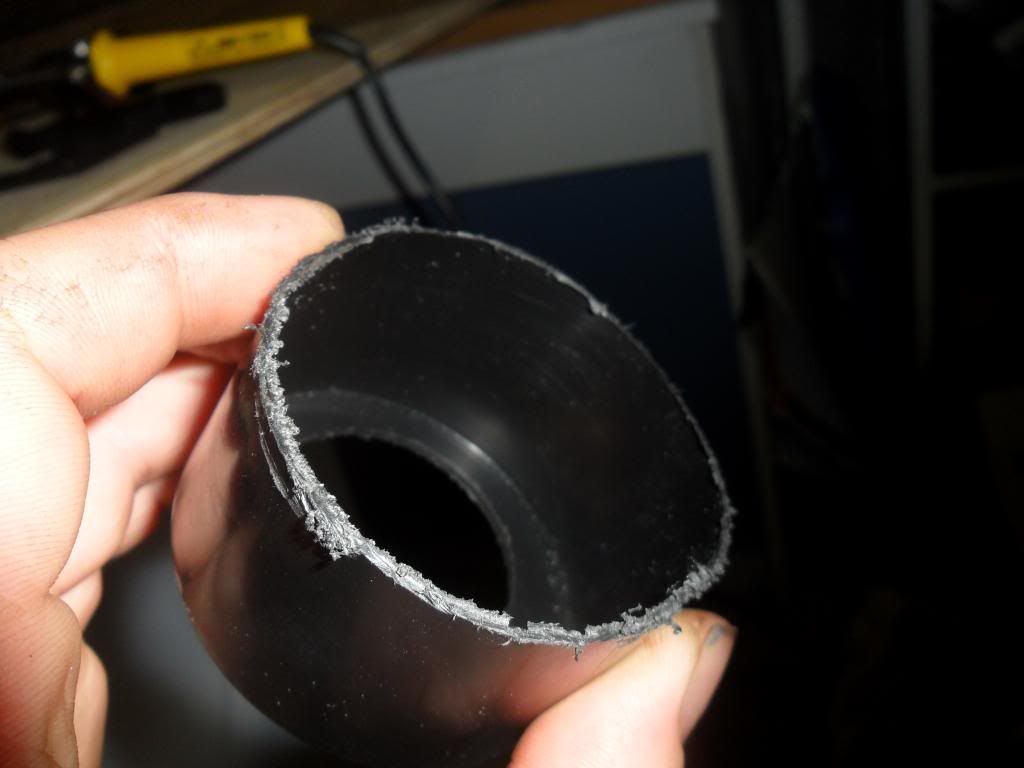
Spray can lid. This is a very important piece of engineering.
This is used to set the correct focal distance for your lens. With my 50mm camera lens, I want the camera lens to be right on 35mm from the input window on the NV tube for it to be in focus. So cut a hole in the lid big enough to fit over the input window, and cut it to 35mm long (for a 50mm lens) to act as the spacer. This will restrict how far back you can slide on the objective lens end cap.
Note how I have used cardboard to help keep everything centered. Hey, it works...
You can now slide the objective assembly on.
You will now be left with the out put window poking out the back. I had the pipe cut short so that the NV tube sticks out the back. This meant that when I put the ocular end cap on, it would sandwich the tube into the assembly nice and tight. You can do it however you want.
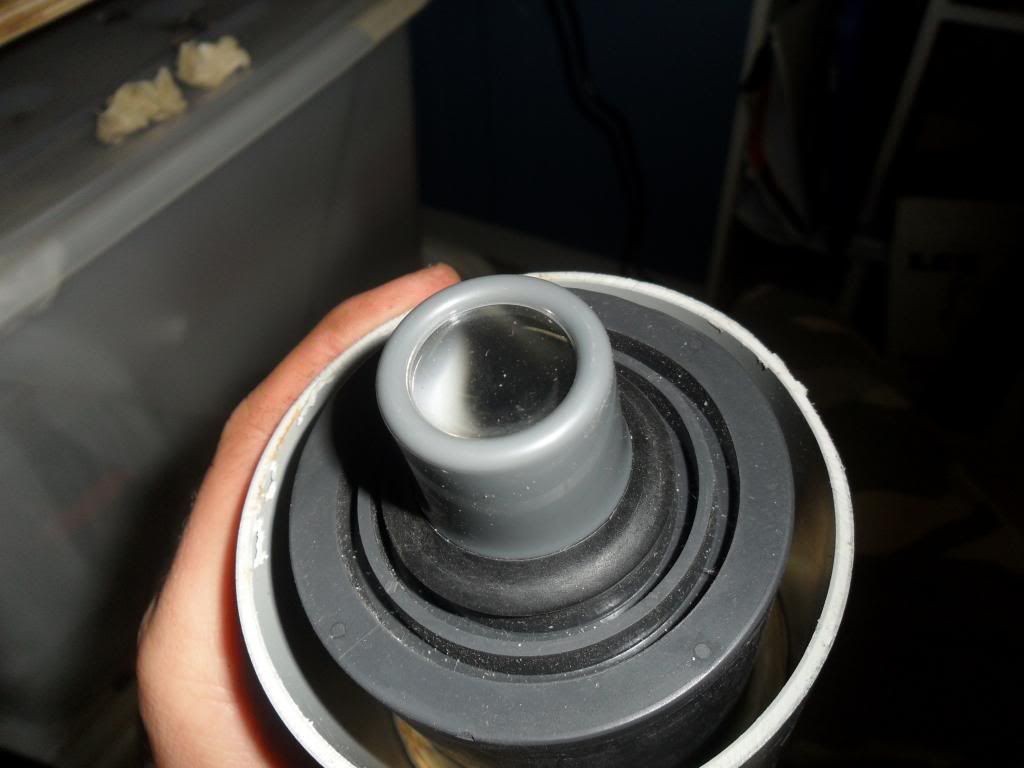
I then placed the jeweler's loupe on the out put window (it's just sitting there). This is an 8x loupe. It's purpose is to magnify the image in the output window, which is tiny and not particularly useful. I got this from the hobby store as well. It works, but I find it reduces the image quality quite a bit, compared to what you would see in the naked out put window. With the lens iris all the way open, it tends to bloom quite a lot. This is possibly because I don't have the loupe or the objective at the optimal distance from either window, or I am expecting too much from a $6 magnifying glass. I have ordered an AN/PVS 2 eye piece to replace it, but it will do for now.
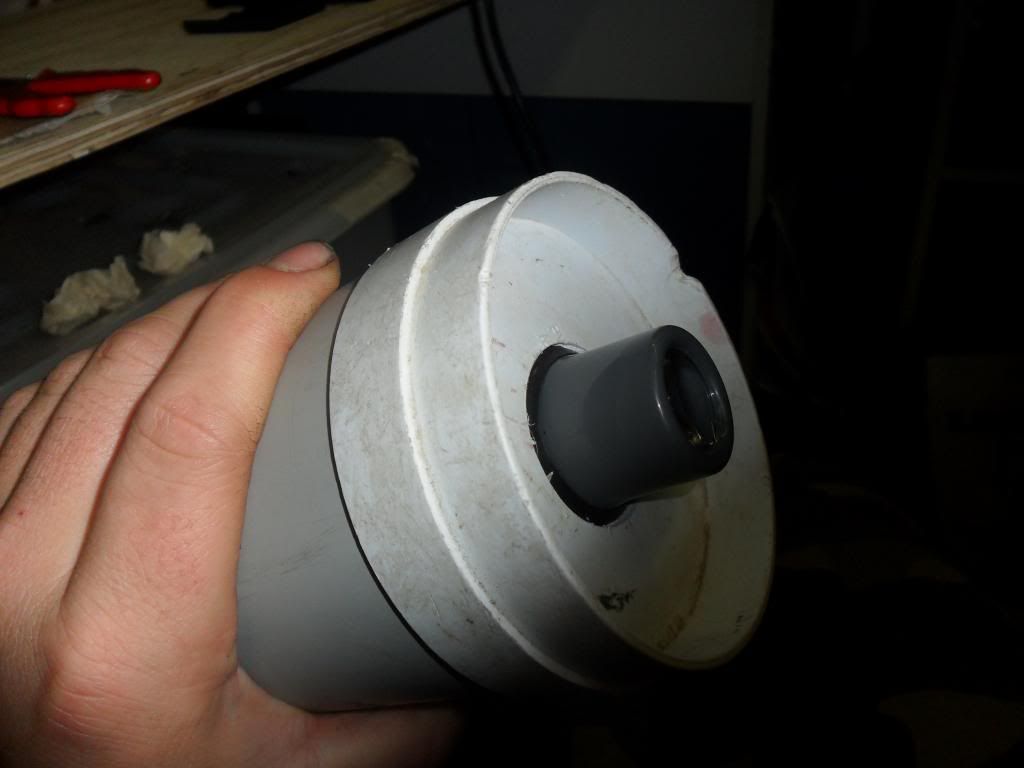
Cut a hole in the other end cap for the loupe and slide it on snug
And there we go, a functional night vision viewer. I have blue tacked the battery box to the housing, I think on the final build I will construct a battery tube and permanently glue it to the top.
I haven't had much luck trying to take a photo through it, but there are plenty on line from other builds.
I need to give credit to cj7hawk. His page : AUSTRALIAN NIGHT VISION FORUMS
A good thread on Arfcom : DIY Cascade Tube Thread... - AR15.COM
A few good videos from You Tube:
A video of a Varo Cascade tube, I'd like to try one.
Beavis
Welcome guest, is this your first visit? Create Account now to join.
Welcome to the NZ Hunting and Shooting Forums.
Search Forums
User Tag List
+ Reply to Thread
Results 1 to 15 of 118
Thread: DIY Night Vision
-
23-03-2014, 12:17 PM #1
DIY Night Vision
-
-
23-03-2014, 01:00 PM #2Member

- Join Date
- Jun 2013
- Location
- NI
- Posts
- 468
Cool thread man, never even thought you could do this, might give it a wirl.
-
23-03-2014, 05:38 PM #3
Well done, looks like a cool project. Let us know how it goes
-
23-03-2014, 07:33 PM #4
Very cool Beavis
 Viva la Howa ! R.I.P. Toby | Black rifles matter... | #illegitimate_ute
-
23-03-2014, 07:43 PM #5
Looks great MacGyver .....I mean Beavis!
SOMETIMES I QUESTION MY SANITY......OCCASIONALLY IT ANSWERS BACK .!
-
23-03-2014, 08:57 PM #6Ejected

- Join Date
- Dec 2012
- Location
- HBC, NORTH of Auckland
- Posts
- 5,249
Now that is a proper project!
-
23-03-2014, 09:00 PM #7Member

- Join Date
- Aug 2012
- Location
- South of Wellington
- Posts
- 472
Well done Beavis. The Gen1- 3 stage cascade tube in the AN/PVS-2 was about the best Gen1 tube made. I see its a EEV English tube and not the Litton or Varo U.S tube.
My only suggestion to be on the safe side is a layer of metal sheeting around the tube on the inside of the PVC pipe. A few layers of tin foil would probably do the trick.
Some of the older Gen1 tubes had a issue of leaking amounts of X-ray`s out the sides and rear eyepeice. I don`t remember the U.S cascade tubes being a problem but you never know with this older equipment.
Looking foward to seeing it with your first deer.
-
23-03-2014, 09:14 PM #8


Will read properly when not pissed and suffering the effects of arc eye."Hunting and fishing" fucking over licenced firearms owners since ages ago.
308Win One chambering to rule them all.
-
23-03-2014, 10:09 PM #9
-
24-03-2014, 07:21 AM #10
modern day mc gyver man good work
OPCz
If in doubt double tap
-
24-03-2014, 04:48 PM #11
Good job Beavis, well described too, thanks.
 10MRT shooters do it 60 times, in two directions and at two speeds.
-
25-03-2014, 12:11 PM #12
Well done Beavis, good on yer for attempting it....
While I might not be as good as I once was, Im as good once as I ever was!
Rule 4: Identify your target beyond all doubt
-
25-03-2014, 06:06 PM #13
-
28-03-2014, 04:08 AM #14Ejected

- Join Date
- Dec 2012
- Location
- HBC, NORTH of Auckland
- Posts
- 5,249
Going to have to give this a crack when I have some spare coin.
-
28-03-2014, 06:33 AM #15
Got any pictures of looking threw it at night ?
"Hunting and fishing" fucking over licenced firearms owners since ages ago.
308Win One chambering to rule them all.
Similar Threads
-
Night Vision scope
By Wirehunt in forum Firearms, Optics and AccessoriesReplies: 34Last Post: 21-06-2013, 04:54 PM
Tags for this Thread
Welcome to NZ Hunting and Shooting Forums! We see you're new here, or arn't logged in. Create an account, and Login for full access including our FREE BUY and SELL section Register NOW!!


 25Likes
 LinkBack URL
 About LinkBacks


 Reply With Quote


Bookmarks