After 20 years, rubber perishes. Your recoil pad changes shape, goes shiny and slippery on your shoulder.
Putting on a new one is a fairly straightforward project but there are a couple of pitfalls and solutions, which I'l show here.
First, cut off the old pad. If you can, take out the screws and it can be easier if you cut off the old rubber with a knife to expose them. But if they are siezed hard you'll need to cut the wood by hand saw and the screws with a hacksaw. Sand the butt with 40 or 60 sandpaper to give a concave shape and tidy round the edges with fine paper. Try to avoid too much chipping and damage to the wood. If you have had to cut through the screws then you will need to drill and router round the stubs a bit to get them out.
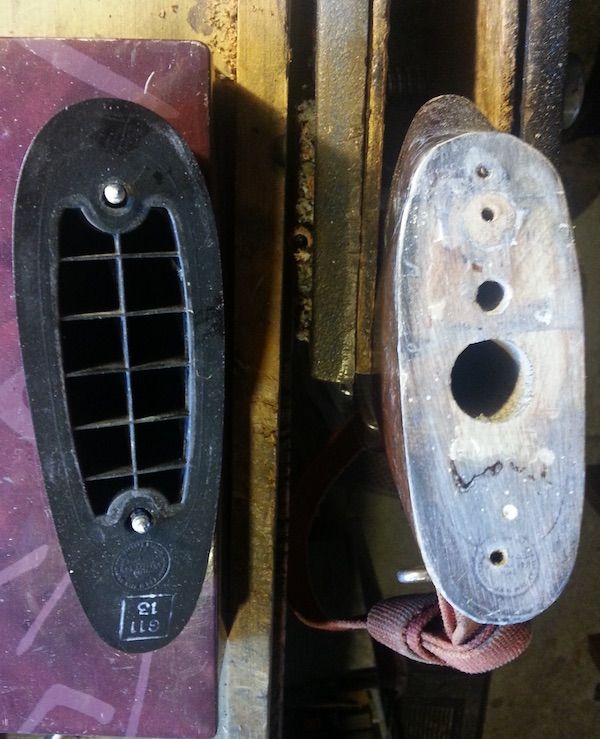
The Pachmayr decelerator was the industry standard before Limbsaver came along and I specially like the basketweave face. So I ordered two through a NZ mail order company. It looks big and thick but is actually hollow inside so it is is much lighter than the old honeycomb one I had before.
Good instructions come with the pad and they warn that some models have a metal plate inside. This must be just a few mm inside the outer profile of the plate. Unfortunately, the dimensions of the metal plate aren't given. So:
Measure your butt and buy one that matches closely. Pachmayr make 3 sizes. You will cut off material from the toe but should do very little grinding on the top end.
The top of the pad should be placed only 1 or 2 mm above the wood.
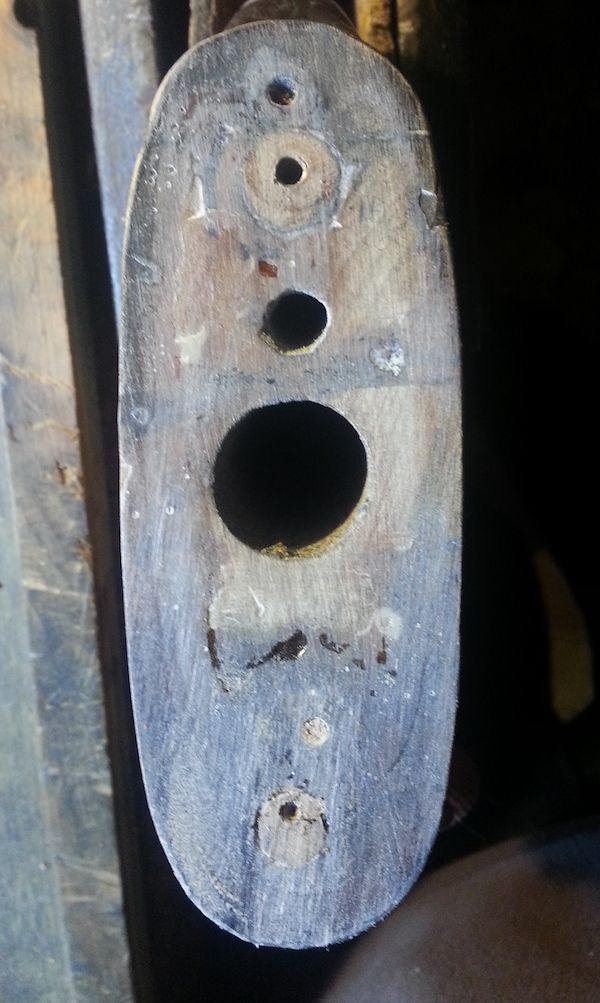
The locations where you will need to place the screws in the stock are therefore determined. Inevitably, they will be close to previous screw holes. You may have big gaps there from hacking out old screws or maybe just a simple hole, which you will be tempted to fill with glue and reuse. However, even super strength epoxy offers little resistance to a screw and only minimal tension will ever be achieved to hold the new recoil pad on.
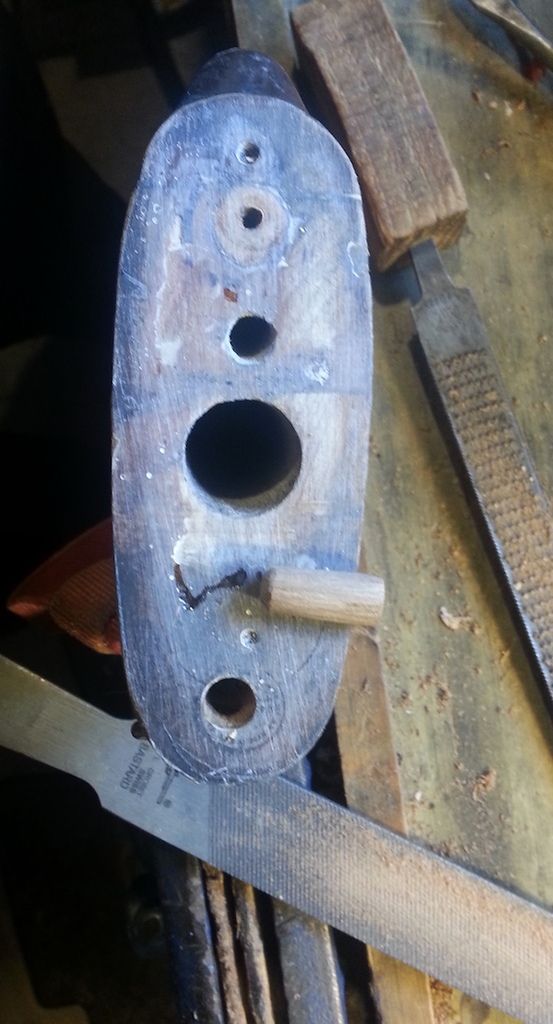
Drill out the locations of the new screw hoes with a 10mm bit and fill it with a wooden dowel. I made two from wood whittled and rasped down out of an old piece cut off another rifle butt years ago and carefully stored in a box of "gun junk".
Of course, the lower screw runs into the screw holding the sling swivel in. I actually took out this swivel screw and drilled the dowel hole past it. Then when the dowel was in place, ran the swivel screw through it which helps hold the dowel in place. The upper dowel was about 30mm long, to accommodate all of the recoil pad screw within it and had plenty of purchase to stay in place. I shortened the lower screw to only 10mm and that gave enough grip in the new hard dowel.
Once it was small enough to almost fit, I mixed up some super strength epoxy and tapped the short dowel into place. Next day I sanded it all off and there was a nice hard bit of wood to put the recoil pad screws into. I predrilled these with about a 2mm bit so the screw would go in easily.
Here are the two dowels filling the damaged areas of wood.
To fix the recoil pad in place, I ran epoxy glue around the edge but not all over the middle. I dipped the screws threads in linseed oil to lubricate them into the wood and it will provide a waterproof seal and over a period of months harden up a bit like glue too. The instructions explain how to make a small nick in the outer layer of rubber, cutting down onto something like a pencil pushed up through the hole in the plastic base. I'm not sure why they don't come with a slit in them but never mind, it was easy enough to do. The screw and screwdriver then need to be lubricated with silicone spray or, in this case, linseed to let it slip through the tight self closing slt in the rubber. I tightened the screws softly at first and later on more firmly after the glue had a chance to squeeze out. There was a small bead of glue all around, which is best wiped off using a rag dampened with meths.
Once the pad is in pace, then it's time to cut off excess from the toe, carefully checking the line of the stock so you don't take off too much. A wood saw is OK for this. Leave plenty of material because it is easy to grind it off later.
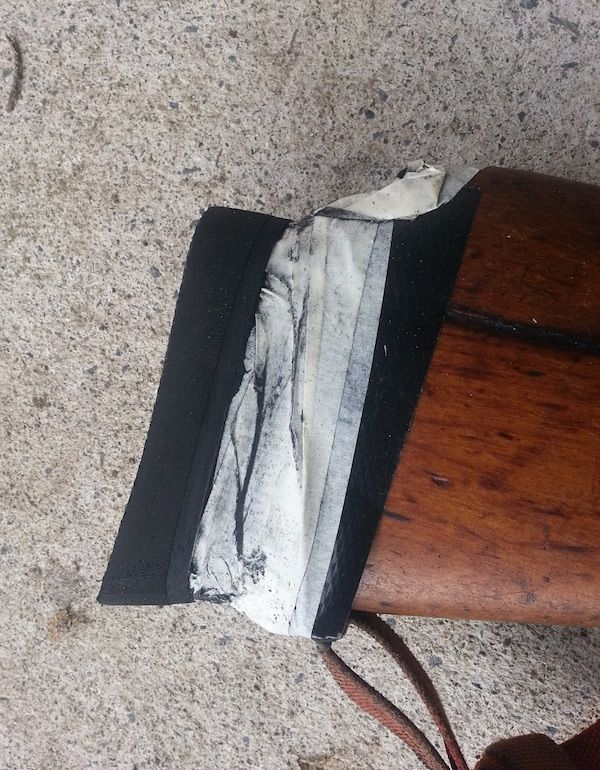
Wind tape around the wood to protect it from sandpaper. Here, I've got duct tape and then masking tape over the top.
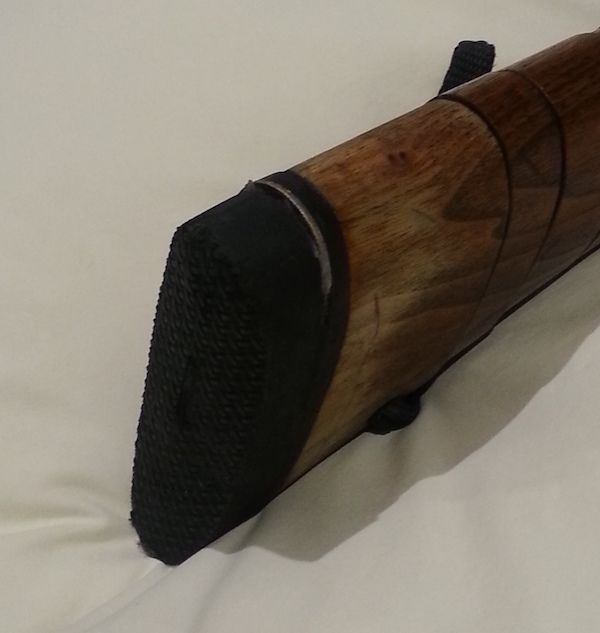
Next, use an angle grinder with sandpaper attachment to gently, carefully shape he recoil pad to the stock. In this case, I left the base of the recoil pad about 0.5 mm proud of the wood all around, so it's a bit oversize. If you are happy to redo the finish on the wood, you can use a flatbed orbital sander to take off wood as well as the recoil pad and it will be nice and flush. Then sand the sides of the recoil pad with 120 180 and 240 grit paper (more or less) so that it's fairly smooth and won't hang up in your clothes. Again, sand gently without too much pressure or the rubber will bulge out afterwards. The instructions suggest finishing with "armourall" which is a rubber blacking liquid used to make car tyres look newish. I might try this if I have trouble in future, but not for now.
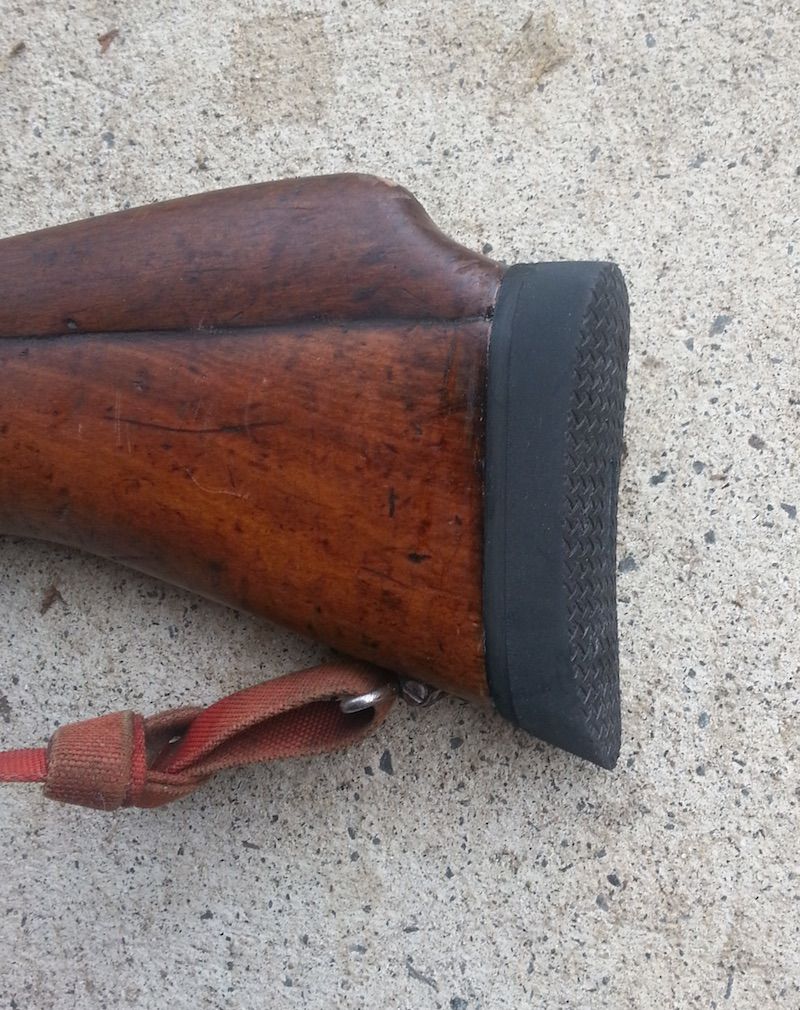
Here it is, finished:
This shows the metal plate exposed by grinding when I tried to mount the recoil pad high to avoid old screw holes and took off about 10mm off the top. It also shows the effect of using an angle grinder without protective tape over the wood (after quite a bit of sanding away to minimise gouges). You can't see it here but the toe of the pad comes out horizontally, not following the line of the stock, due to cutting off too much material before I attached the pad to the stock.
Like I said, it's not too hard to do it well the second time, but also easy to stuff it up if you just rip into it.
Welcome guest, is this your first visit? Create Account now to join.
Welcome to the NZ Hunting and Shooting Forums.
Search Forums
User Tag List
+ Reply to Thread
Results 1 to 5 of 5
 7Likes
Thread: How to replace a recoil pad Pachmayr Decelerator on SMLE
-
07-07-2016, 11:12 PM #1Member

- Join Date
- Mar 2012
- Location
- Waikato
- Posts
- 2,175
How to replace a recoil pad Pachmayr Decelerator on SMLE
-
-
08-07-2016, 09:52 AM #2Ejected

- Join Date
- Dec 2011
- Location
- Shaky City
- Posts
- 1,446
Thats a great guide. My old man always taught me to wrap the stock in one layer of tape then a second layer of a different color. Stop grinding when you get through the top layer and can see the color of the second layer.
-
08-07-2016, 12:36 PM #3Member

- Join Date
- Nov 2013
- Location
- Waikato
- Posts
- 597
I have a jig that I made some years back for grinding recoil pads and it works very well. Ali removal of excess pad material is done off stock so no problems with any "ah shit" moments using a angle grinder.
Forgot to mention that the whole job only takes about 15 minutes and the finish is very nice
-
08-07-2016, 05:54 PM #4
-
09-07-2016, 11:44 AM #5Member

- Join Date
- Nov 2013
- Location
- Waikato
- Posts
- 597
Bastard

Similar Threads
-
At least it's a nice colour green - NZDF choose AR to replace Steyrs
By Kscott in forum Firearms, Optics and AccessoriesReplies: 180Last Post: 06-07-2017, 09:58 AM -
Pachmayr recoil pad questions
By Scouser in forum Projects and Home BuildsReplies: 11Last Post: 08-06-2016, 03:01 PM -
SMLE mklll 303.25
By ritchie426 in forum Firearms, Optics and AccessoriesReplies: 46Last Post: 26-04-2015, 10:03 AM -
What to replace it with?
By Shootm in forum Gear and EquipmentReplies: 7Last Post: 07-01-2012, 09:00 AM
Tags for this Thread
Welcome to NZ Hunting and Shooting Forums! We see you're new here, or arn't logged in. Create an account, and Login for full access including our FREE BUY and SELL section Register NOW!!


 LinkBack URL
 About LinkBacks


 Reply With Quote


Bookmarks