Hello everyone,
I picked up an old .22 Voere, and I decided to take the plunge and refinish the rifle, my first refinishing job. It was in cosmetically rough condition, but very good mechanical condition. I first stripped the old varnish using Citristrip, and then steamed out the dents and old stain off the wood. I then sanded the stock down using 100, 150 and 220 grit sandpaper, and raised the grain between changing grits.
At this point I was going to straight stain the stock using Birchwood Casey Walnut stain, however unfortunately I was misguided and was told to go ahead and fill and seal the stock before staining...
As you can guess, I had to start over from step 1, re-stripping, steaming, sanding...etc.
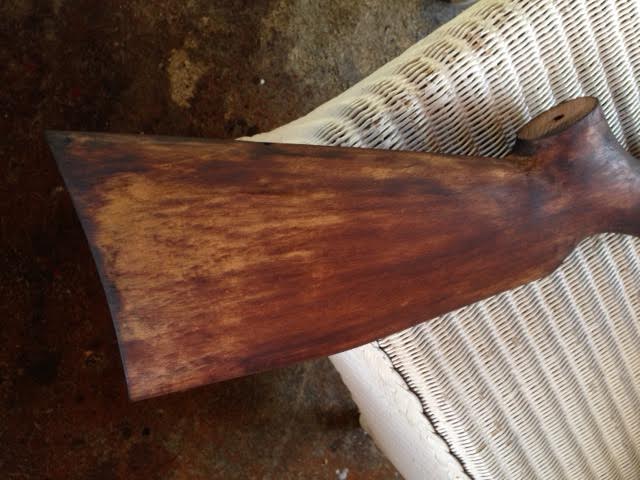
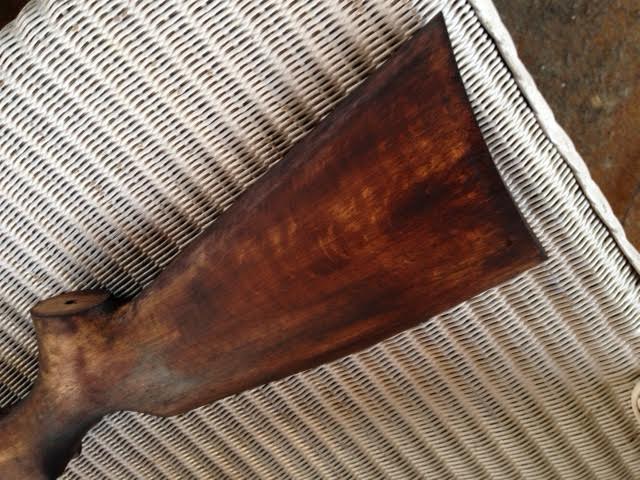
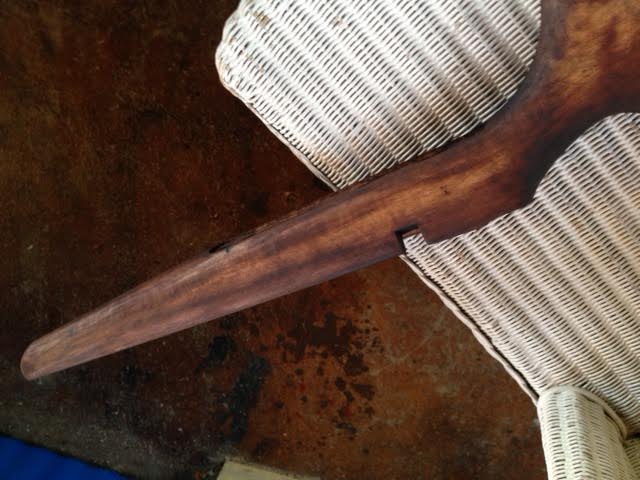
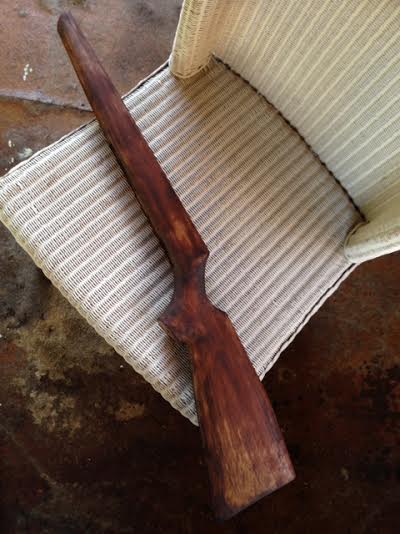
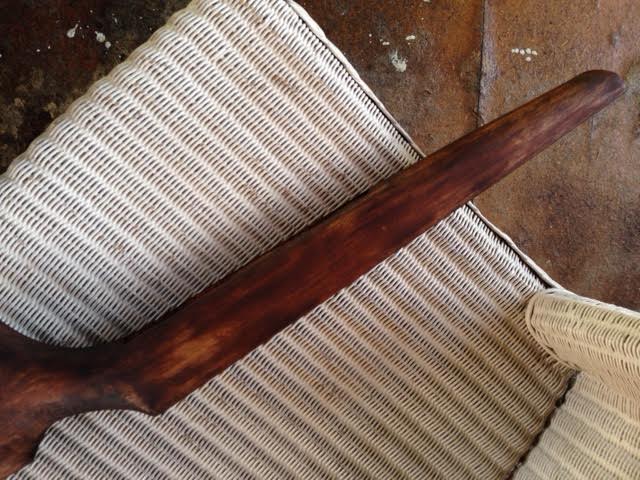
Now, back to where I finished off, I've begun staining the stock, however it's come out as patchy. My plan is to finish the stock using Birchwood Casey Tru-Oil, and I'm hoping that the inconsistencies of the stain will blend together nicely. However, I'd like to get some advice from more experienced peeps out there, and see what I can do to make the stain more consistent. Basically I'm wondering if it's fine as is, or will require a lot more work before finishing?
From what my inexperienced eyes tells me, it looks like flippin' crap.
Thanks,
Apocalypticaman
Welcome guest, is this your first visit? Create Account now to join.
Welcome to the NZ Hunting and Shooting Forums.
Search Forums
User Tag List
+ Reply to Thread
Results 1 to 15 of 20
-
24-06-2016, 11:32 AM #1Member

- Join Date
- Jan 2016
- Location
- N/A
- Posts
- 265
Issues with stock staining - with pictures
-
-
24-06-2016, 12:39 PM #2Member

- Join Date
- Jan 2016
- Location
- N/A
- Posts
- 265
Thanks so much for the input hamsav. Would you recommend starting over? I'd have to be very conservative with any more sanding if I did.
I've been giving it drying time between coats, as well as a buff with 0000 steel wool. In hindsight, I may not have rinsed it out well enough after varnish stripping. Would you dump the stock in hot water and scrub it out with a brasswire brush? Hope I can get this looking the way I'm wanting it to.
-
24-06-2016, 04:07 PM #3
Hope this helps last, black spots are torn endgrain, it soaks stain like blotting paper, the lighter patches have correctly been I'd as partially sealed still, but could also be filler wiped over the surface.
What type of filler was it cause if epoxy its back to sandpaper.
Try washing the stock with lacquer thinners to remove the stain and filler residue ( I assume its solvent based) if not then water but expect sanding again as the grain will raise.
To control stain uptake when you redo it use a non grain raising solvent based dye stain if the birchwood one isnt (eg wattyls handyman ngr) dampen the surface with thinners before starting and always keep a wet edge going back over a dry bit will deepen the colour. Good luck voeres are bloody nice rifles.
-
24-06-2016, 07:26 PM #4Member

- Join Date
- Nov 2013
- Location
- Waikato
- Posts
- 597
What Marty said plus it could also be oil in the stock but most likely you havent got the original finish off. I very rarely stain stocks as I am of the thoery that what you have is what you got so work with it.
Quite often the finish that is used can make a big difference
-
24-06-2016, 08:04 PM #5Member

- Join Date
- Jan 2016
- Location
- N/A
- Posts
- 265
Thanks Marty. The original finish on the rifle stock was a varnish. I used citristrip to remove that varnish entirely, then washed down the stock with water and steamed out dents and old stain, and then sanded the stock down. I then used a Birchwood Casey Gunstock Sealer and Filler, which I then had to remove with citristrip as I couldn't stain the stock (I was misguided unfortunately). Then repeated the whole process again.
I'm going to go ahead and re-start the process for a 3rd time again, this time I might dunk and scrub the stock in warm water and lacquer thinners before steaming and sanding. And I'll use the stain you're recommending - I'd ideally like a darker walnut finish.
-
25-06-2016, 06:39 PM #6Member

- Join Date
- Jan 2016
- Location
- N/A
- Posts
- 265
Just an update guys, I've just been speaking to a few people in the woodwork business, with lots of experience. They advised me that beechwood or birchwood are generally very difficult woods to stain, and usually end up in a blotchy mess, such as above. While a ngr dye might work, they tend to hide the natural grain of the wood in beech, and may react similarly to stains - one can't know until you try. I hope my experience may serve to help people attempting to refinish a beech rifle stock.
At this point I'm just going to finish the stock with tru-oil and forget about staining entirely - I'll post pics up once this project has been completed.
Cheers, Apocalypticaman
-
26-06-2016, 09:42 AM #7Member

- Join Date
- Jul 2015
- Location
- Christchurch
- Posts
- 450
Ive been looking into refinishing a birch/maple stock. Have read lots similar comments about them being hard to accept stains and they come out patchy looking as yours has. I think this is possibley the reason alot of the factorys using these timbers for rifles generally use a polyurethane finish with a tint in it for a more consistent colour across the stock......
-
01-07-2016, 06:51 PM #8Member

- Join Date
- Jan 2016
- Location
- N/A
- Posts
- 265
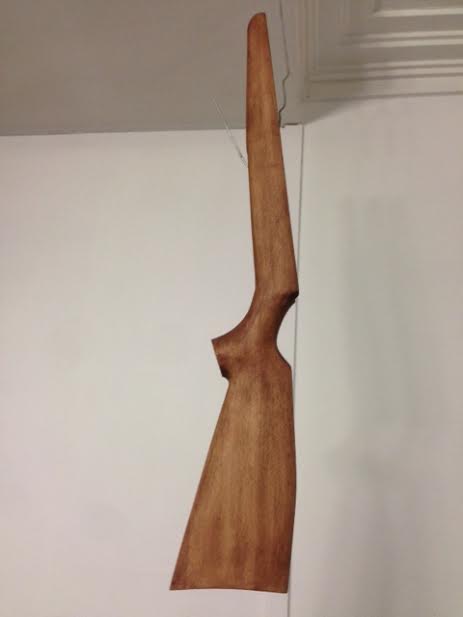
Update, after the mess up (see photos above) I stripped it again with Citristrip and rinsed it under hot water, and gave it a good scrub with the scouring side of a kitchen sponge, and added a wee bit of detergent to the mix.
I did go down the route of refinishing with plain Tru-Oil, but the light stock on it looked damned awful, with every single minor imperfection standing out like dog's balls.
Thankfully only did one coat of Tru-Oil, which was easy to take off. This time round I sanded 100, 150, 220, 400, 420 and 600 grit, raising the grain between changing grits.
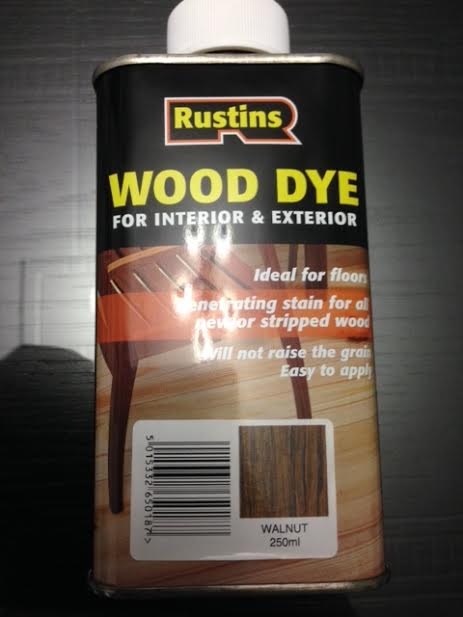
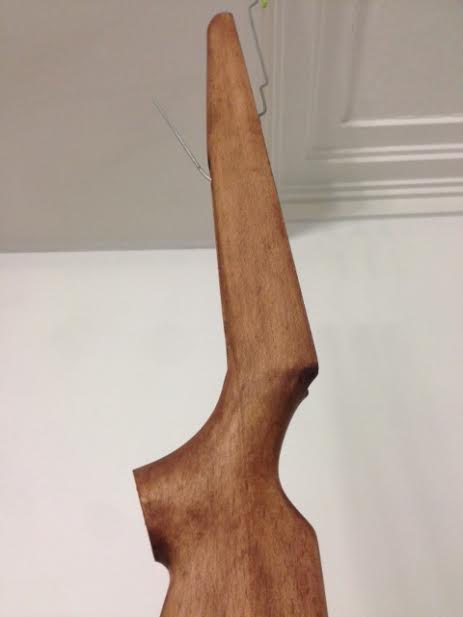
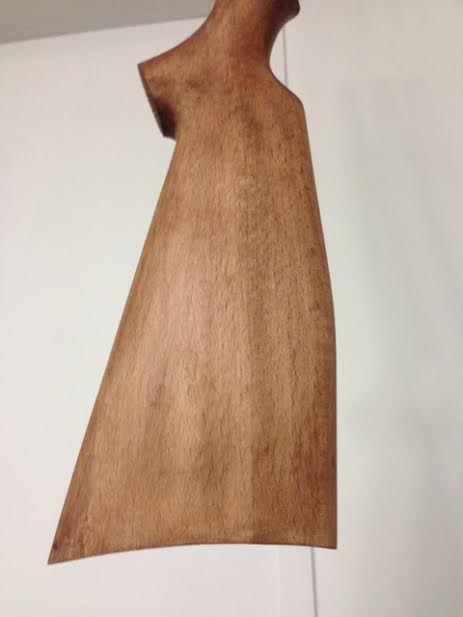
I then bought some Rustin's Wood Dye, non-grain raising (ngr), walnut colour. I applied a conservative amount on a cloth and rubbed it into the stock. Good results!! Now at the stage of deciding a nice finish.
Thank you guys for the input, looks like this project will work out as I hoped...
-
01-07-2016, 08:06 PM #9
Looking a lot better. You have the patience of job!
Where did you buy the stain?
One thing I have found when staining – when you apply the final finish (Tru-oil or whatever) the colour seems to lighten up a tad. I now stain darker than needed knowing it will lighten up. May not happen though for you, with your stain and finish.
-
01-07-2016, 08:18 PM #10Member

- Join Date
- Jan 2016
- Location
- N/A
- Posts
- 265
Thanks Zimmer, it's been a mission and a half, I bought the stain from Mitre 10. That's really good to know - I incorrectly assumed that the colour would darken with a Tru Oil finish. I might apply a second coat of dye to the stock to darken it up a bit.
I'm still undecided on a finish, but Tru-Oil is at the top of the list.
-
13-07-2016, 03:28 PM #11Member

- Join Date
- Jan 2016
- Location
- N/A
- Posts
- 265
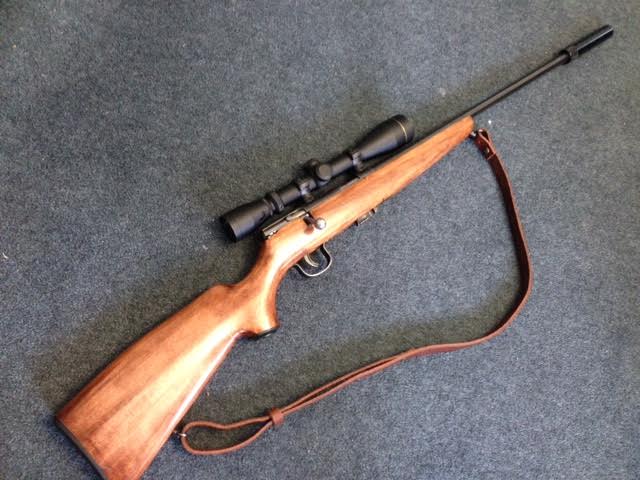
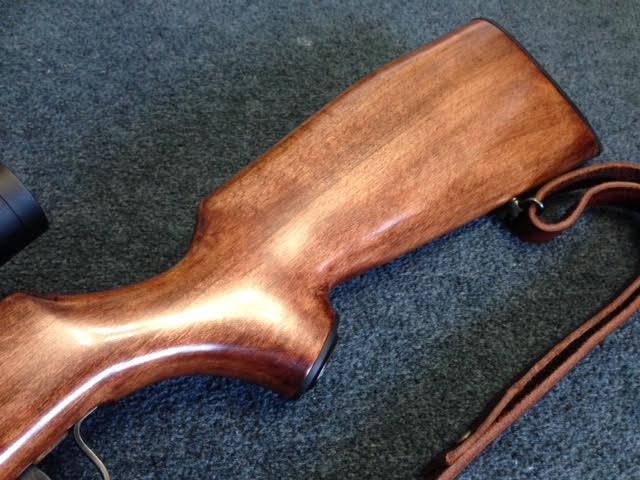
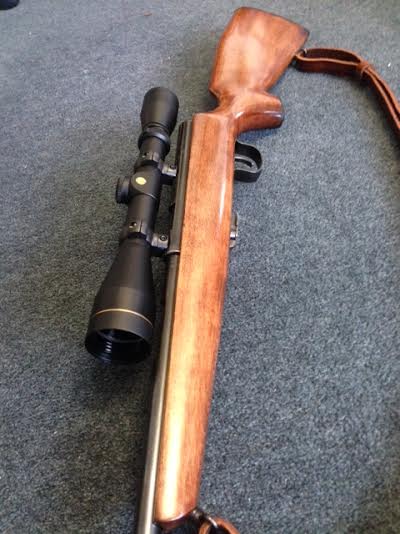
Completed! Took a long time, but this rifle turned out well.
10 coats of Tru Oil over 10 days, buffed between coats with 0000 steel wool.
I cold blued the action, barrel and trigger guard, and gave the bolt a polish.

-
13-07-2016, 03:40 PM #12
Good work, that sure looks good now, time to take it for a walk.
-
13-07-2016, 05:52 PM #13Member

- Join Date
- Dec 2011
- Location
- Wellington
- Posts
- 466
Right I'm motivated - I'm gonna strip one of mine that has a aweful sprayed finish.
That citristrip the business on varnish and spraypaint?
Is stripper going to rip out bedding?
-
13-07-2016, 07:09 PM #14Member

- Join Date
- Jan 2016
- Location
- N/A
- Posts
- 265
Awesome, let us known how you get on, and show us some pics when the time comes round.

Citritrip worked really well, got it from Mitre 10. Not sure about the bedding sorry. If you taped the area off well, and were careful not to get the stripper into the barrel/action channel, I think you shall be fine.
-
13-07-2016, 07:14 PM #15
Epoxy will swell and soften with citrus based strippers methylene chloride based strippers will make it flake. Keep them off any bedding and you'll be ok. Shouldnt be any bedding on the outside anyway.
Similar Threads
-
cleaning up an old set of antlers - staining
By Pointer in forum TaxidermyReplies: 15Last Post: 31-08-2018, 12:39 PM -
A few pictures
By BRADS in forum The MagazineReplies: 16Last Post: 18-01-2015, 03:45 PM -
Some pictures from my last 12 months.
By Matt2308 in forum Photography and VideoReplies: 3Last Post: 03-11-2012, 09:33 PM
Tags for this Thread
Welcome to NZ Hunting and Shooting Forums! We see you're new here, or arn't logged in. Create an account, and Login for full access including our FREE BUY and SELL section Register NOW!!


 8Likes
 LinkBack URL
 About LinkBacks


 Reply With Quote
 .
.


Bookmarks