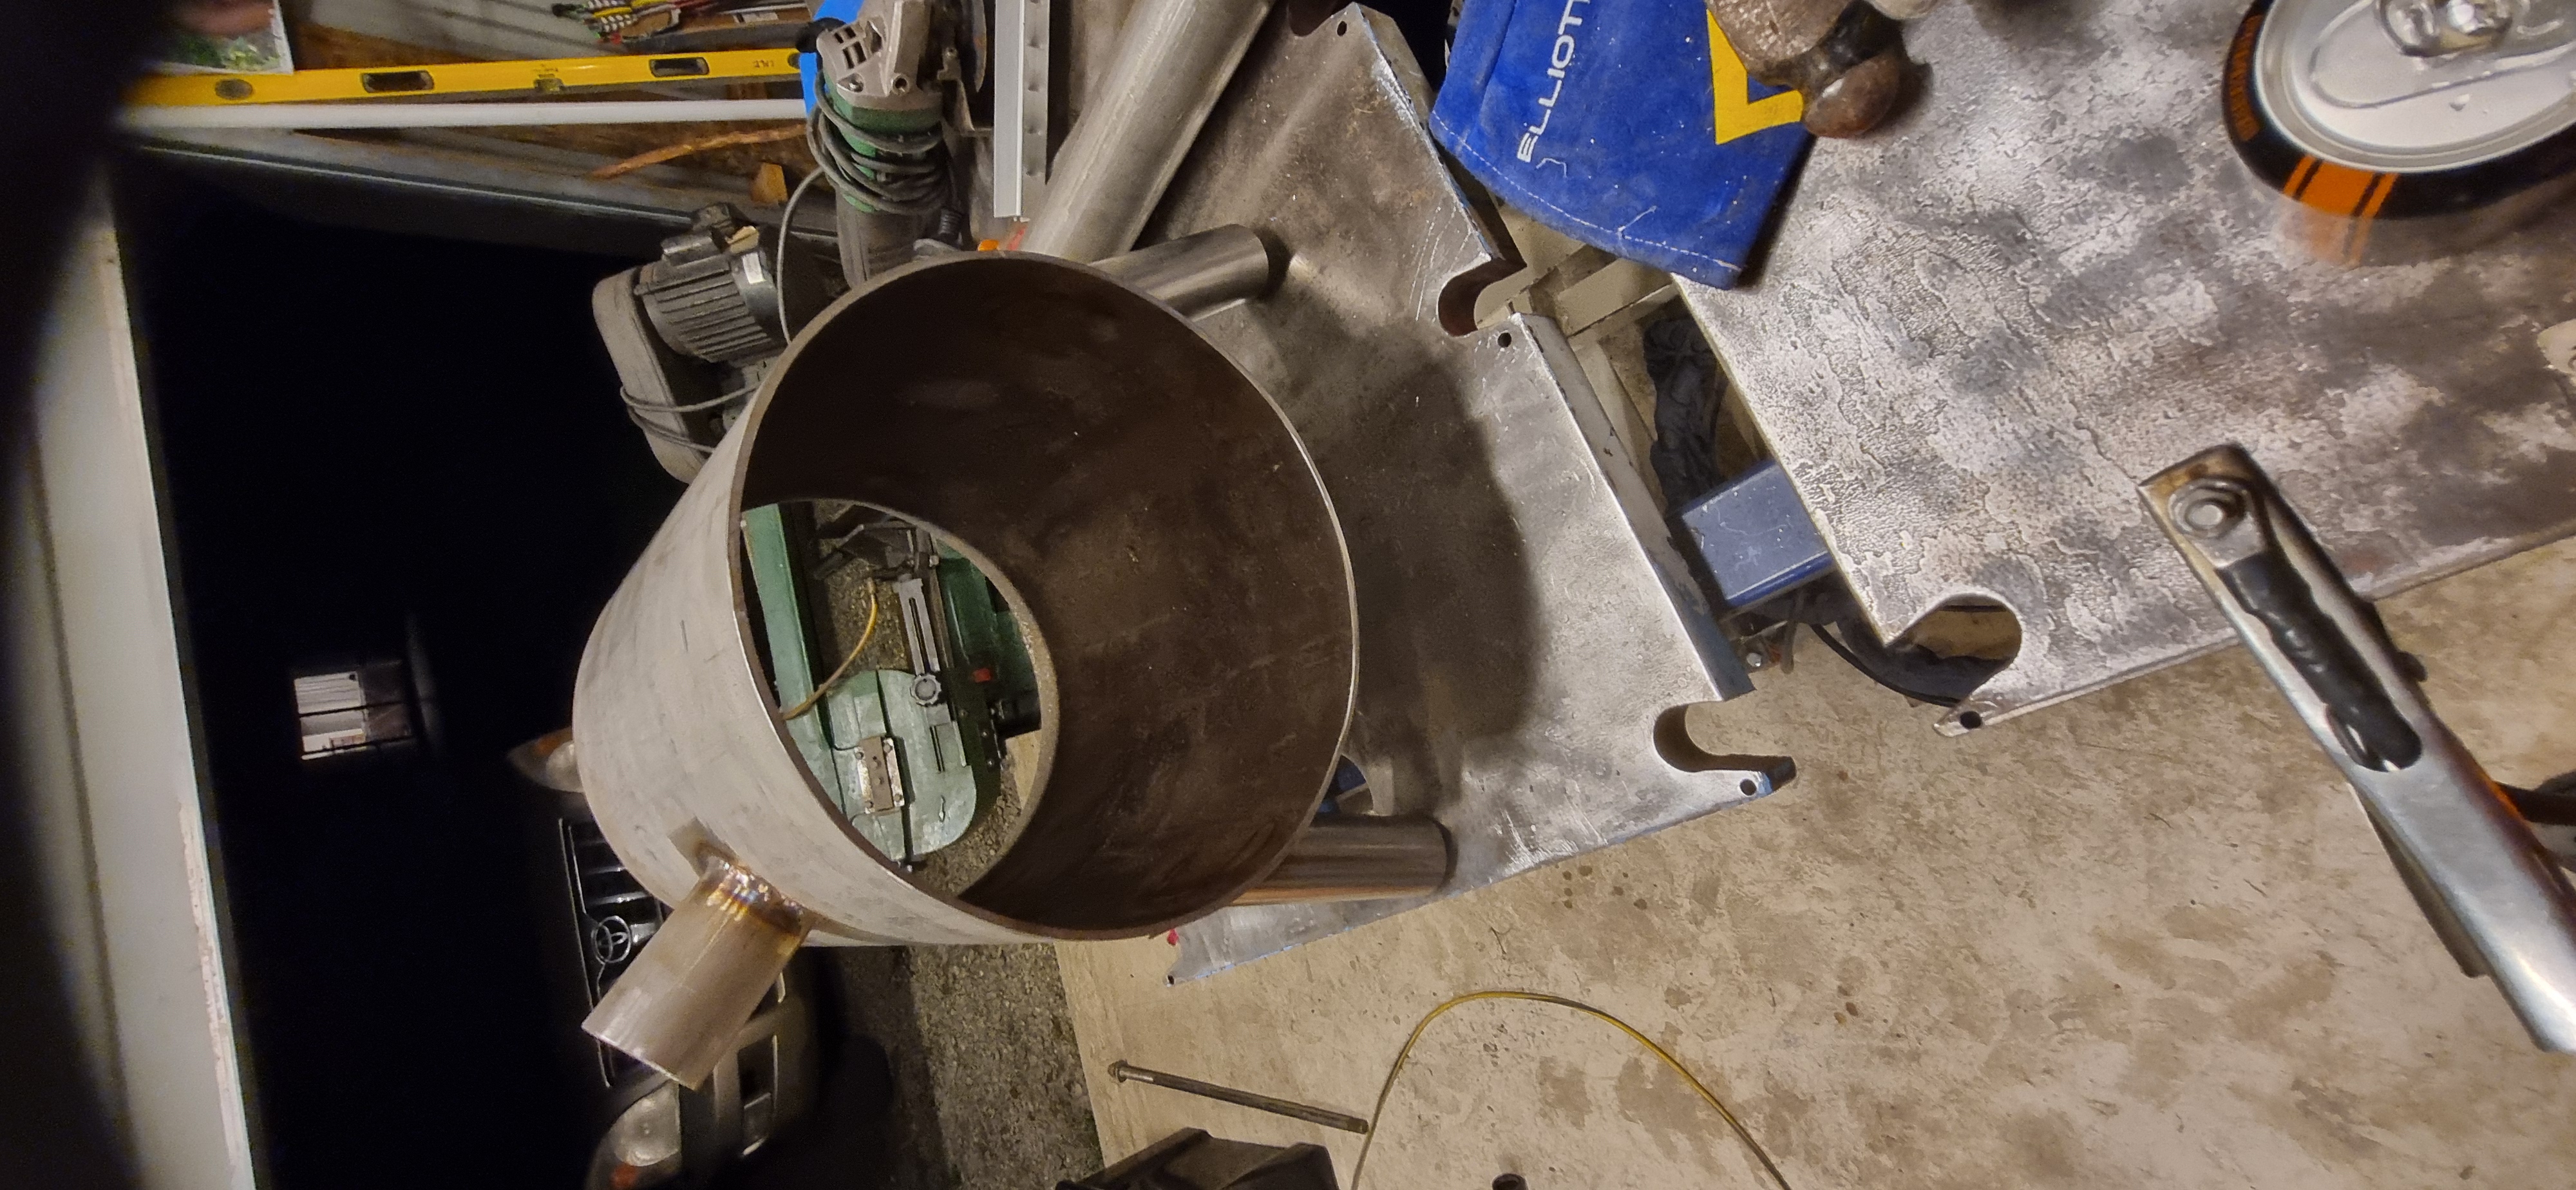
Making a start on a wee forge, if anyone has done much the same I'd be interested to see/hear opinions.
Debating weather to make my own burner, by the time I buy reg fittings and valves etc it's probably not much different to buying one through artisan supplies, and atleast that would be a proven design.
Likely use a ceramic blanket and rigidizer to stiffen then coat with some mortar.
Bit of scrap stainless and added some legs and burner inlet (excuse the rubbish welding). aiming to have about 150/300mm tunnel after insulation plus mortar. From the research I've done it's quite a bit of trial and error regarding the opening size so probably use a shelf and a bricks for the mean time.
Keen to make some knives and potentially some tooling and possibly try heat treating a reamer.
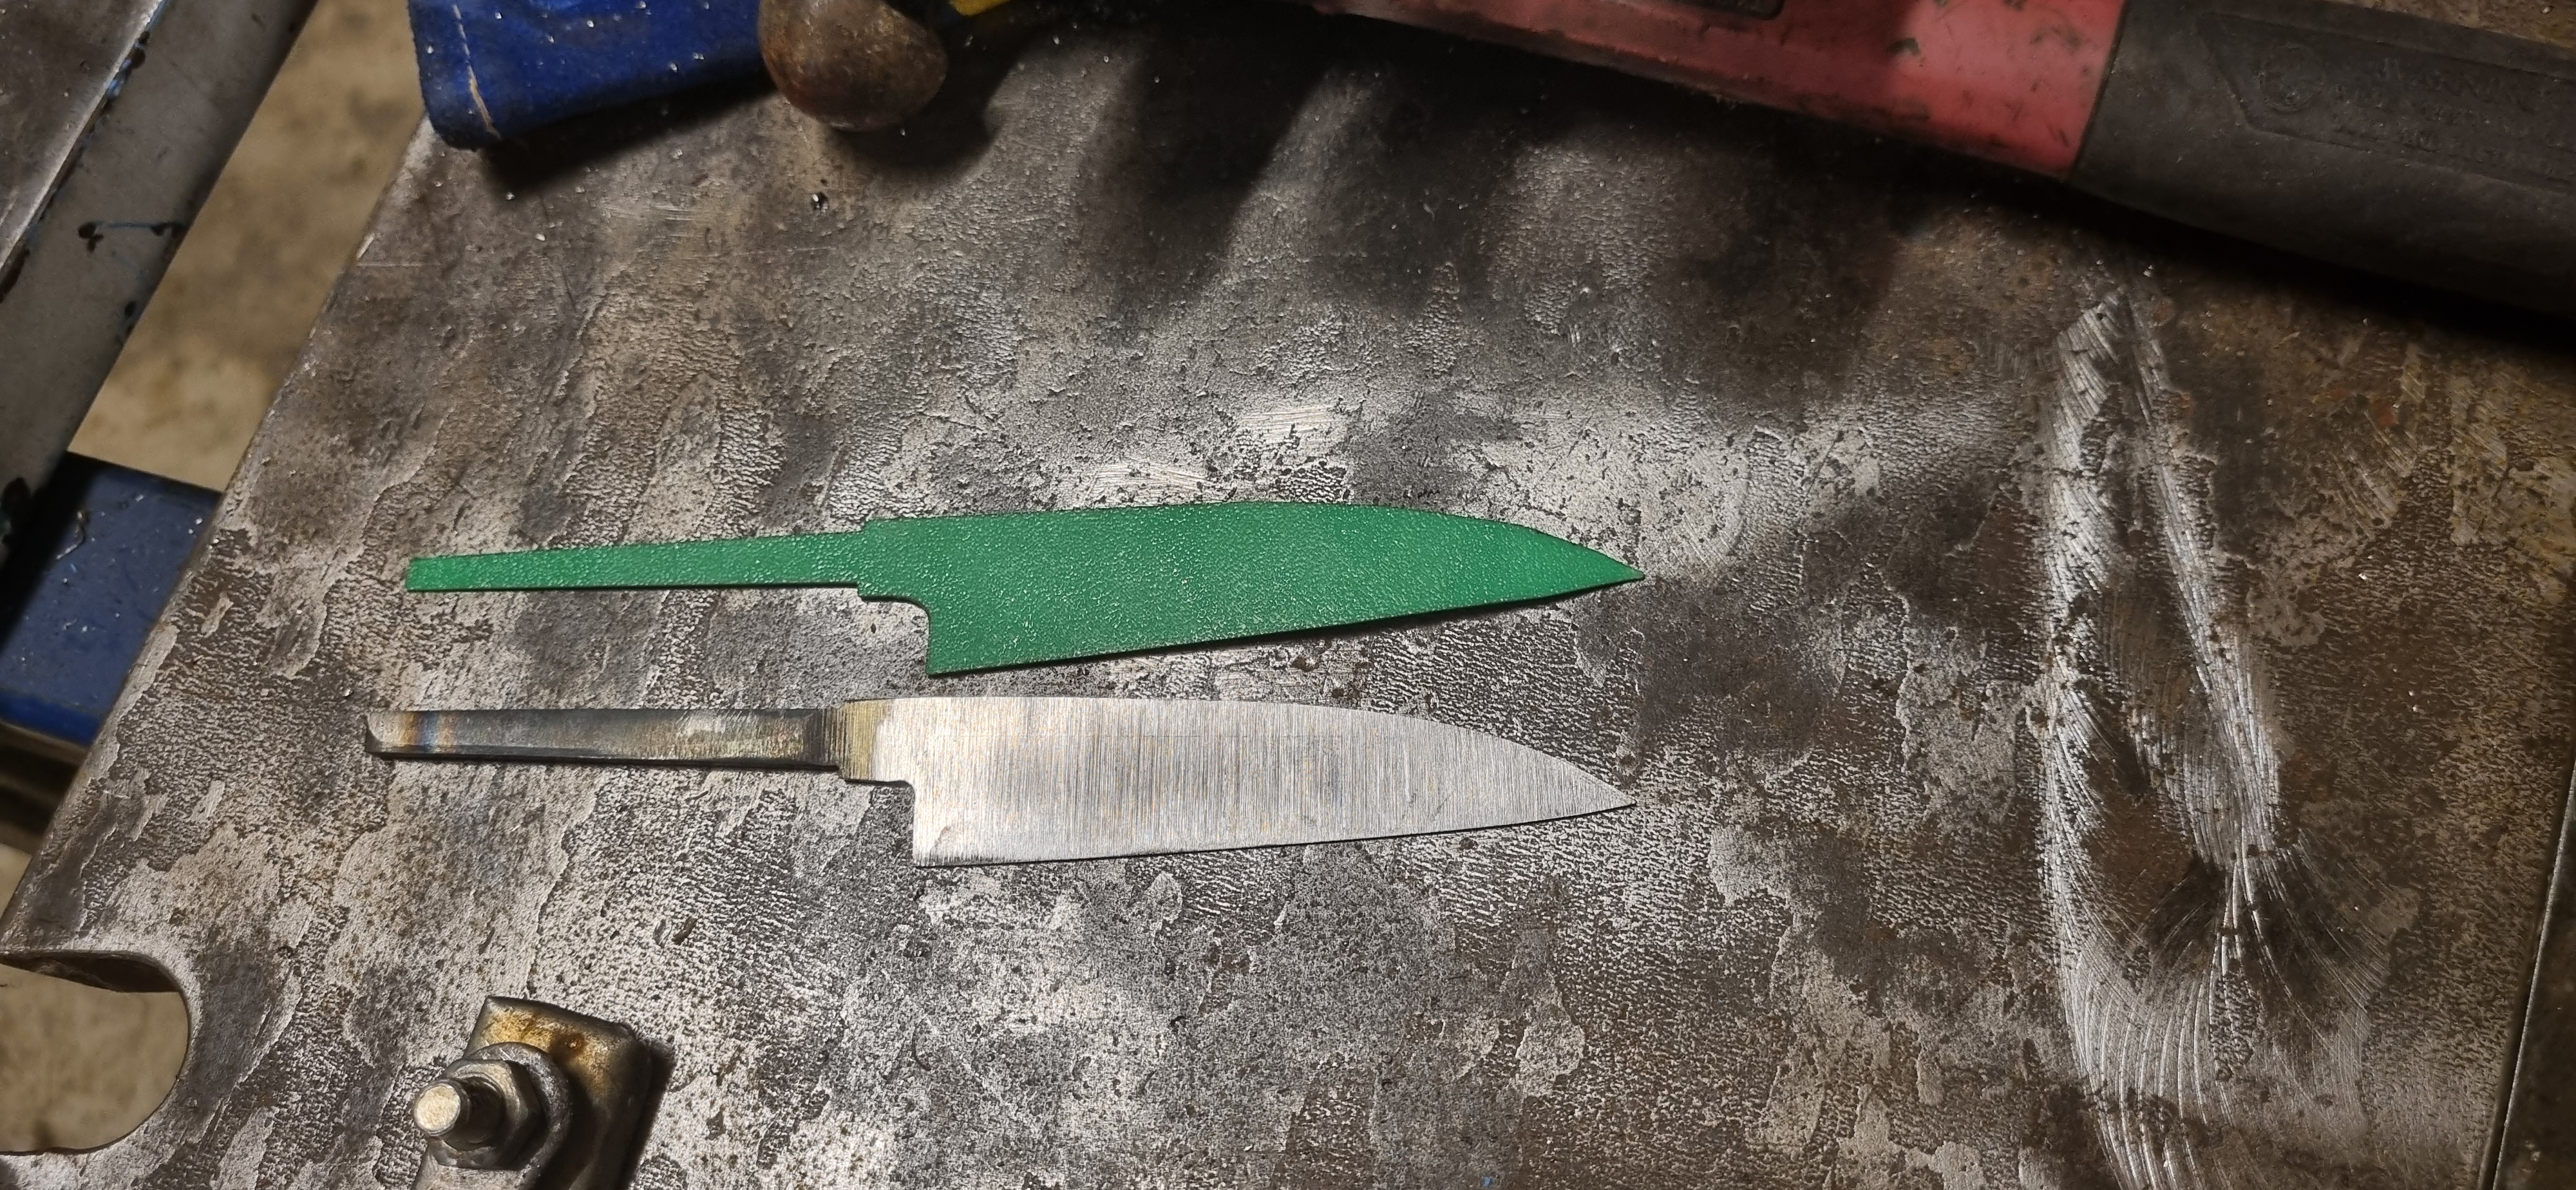
Knife blank I tried to heat with the map gas but couldn't get it hot enough,hence the forge build (green bit is the 3d print template) single bevel petty knife in 1084.
Welcome guest, is this your first visit? Create Account now to join.
Welcome to the NZ Hunting and Shooting Forums.
Search Forums
User Tag List
+ Reply to Thread
Results 1 to 15 of 15
 11Likes
Thread: Lpg forge
-
01-09-2024, 08:18 PM #1Member

- Join Date
- Mar 2018
- Location
- Darfield
- Posts
- 436
Lpg forge
-
-
01-09-2024, 08:32 PM #2Member

- Join Date
- Jun 2014
- Location
- wellington
- Posts
- 488
I Built my own burner and forge , I went for the blown air style burner instead of the venturi. works well and you can control the air flow easily . My first forge i went for the kaowool type which works great , but if you plan on any forge welding and using borax as flux you will want to go castable refractory. the borax will eat the kaowool like candyfloss. the kawol forge will heat quickly , the castable will take longer but will hold the heat better once up to temp. at least go for a fire brick base where most of the flux ends up. you want your burner to be slightly angled too so it swirls the flame around the forge a bit . not critical but will give you a hot spot otherwise.
-
01-09-2024, 09:14 PM #3Member

- Join Date
- Aug 2014
- Location
- wairarapa.
- Posts
- 75
Hoki mai. I came across a little devil twin burner lpg forge on dollar reserve, yep, the yellow site. Ended up paying 148 bucks delivered and it is a beaut, better than the shitter coal fired one l built. SIL built his own gas one and cost shit loads more. Just saying, sometimes it pays to check what's there, by the way, it was a brand new unit l got came with all the bricks and other shit that's needed.
-
01-09-2024, 09:17 PM #4
-
01-09-2024, 09:28 PM #5Member

- Join Date
- Sep 2020
- Location
- wairoa
- Posts
- 484
Don't use a standard regulator, you need an adjustable pressure regulator, for the burner 25mm pipe with .6 or .9 mig weilding nozzels and a ball tap you have your basic setup
-
01-09-2024, 09:42 PM #6Member

- Join Date
- Mar 2018
- Location
- Darfield
- Posts
- 436
no welding planned at this stage so think ill go the ceramic blanket. the inlet already slightly offset so hopefully works ok, should be easy enough to make an angled insert. Thinking the venturi is going to be an easier setup, no mucking around with an external fan. have you got any pics of yours, interested to see the blower setup. cheers
-
01-09-2024, 09:50 PM #7Member

- Join Date
- Mar 2018
- Location
- Darfield
- Posts
- 436
-
01-09-2024, 10:06 PM #8Member

- Join Date
- Feb 2017
- Location
- Jafa land
- Posts
- 5,518
my mate has a forge. ceramic heat tiles/bricks.
I'd say you'd get better results with ceramic wool and some sort of Ali foil tape. then some way to make a slit to keep most of the heat in.
-
03-09-2024, 11:56 AM #9Member

- Join Date
- Dec 2021
- Location
- Tauranga
- Posts
- 5,957
There was a really good write up on this in a back issue of the Shed magazine. Be worthwhile going to the website and having a look for it...
-
03-09-2024, 12:28 PM #10Member

- Join Date
- Jul 2012
- Location
- Timaru
- Posts
- 869
i used wool for mine and put a brick in the bottom so if your using flux for welding you can replace it once it gets chewed out.
CNC Machining
Hgprecision.net
-
04-09-2024, 07:26 AM #11Member

- Join Date
- Aug 2021
- Location
- south otago
- Posts
- 340
The Gameco ( https://www.artisansupplies.com.au/p...e-burner-65mj/ ) forge kit is the way to go. I have built a couple with one on a 9kg gas bottle using this kit and another 3 burner kit on a longer one for swords and longer chef knives etc. I used the supplied bricks for the forge floor with the rest being the wool with rigidiser. The bricks are supplied as a door but I use a heavy piece of angle iron which I find is much better. I bought an extra $20 soft brick from Mega mitre 10 (200x125x20) as a sacrificial floor for when I am forging using borax flux as that will eat away the wool even with the refractory cement. I am easily able to get to and hold forging temps over 2000 degrees F with the venturi but one thing you will find is that a single gas bottle will "freeze" so it is best to use a pair of bottles with a manifold connection. If you are going to use the forge for more than occasional use you will find that a pair of 18kg bottles will be better with a pair of 9kg bottles as a bck-up in case you are halfway through a project and the main bottles run out of gas so you can easily switch over the the smaller bottles to finish what you started.
-
04-09-2024, 10:11 AM #12Member

- Join Date
- Mar 2018
- Location
- Darfield
- Posts
- 436
Thanks for the replies, I've ordered the small brick kit for now and will get some ceramic blanket and rigidizer locally so should get me going, also got a couple of big bottles for the house cooking and hit water I can borrow if the 9kg doesn't keep up.
Will put up some pictures as I progress
-
04-09-2024, 12:00 PM #13
When I went on weekend course to make a knife.his forge was made from old lpg bottle.
75/15/10 black powder matters
-
14-09-2024, 03:05 PM #14Member

- Join Date
- Mar 2018
- Location
- Darfield
- Posts
- 436
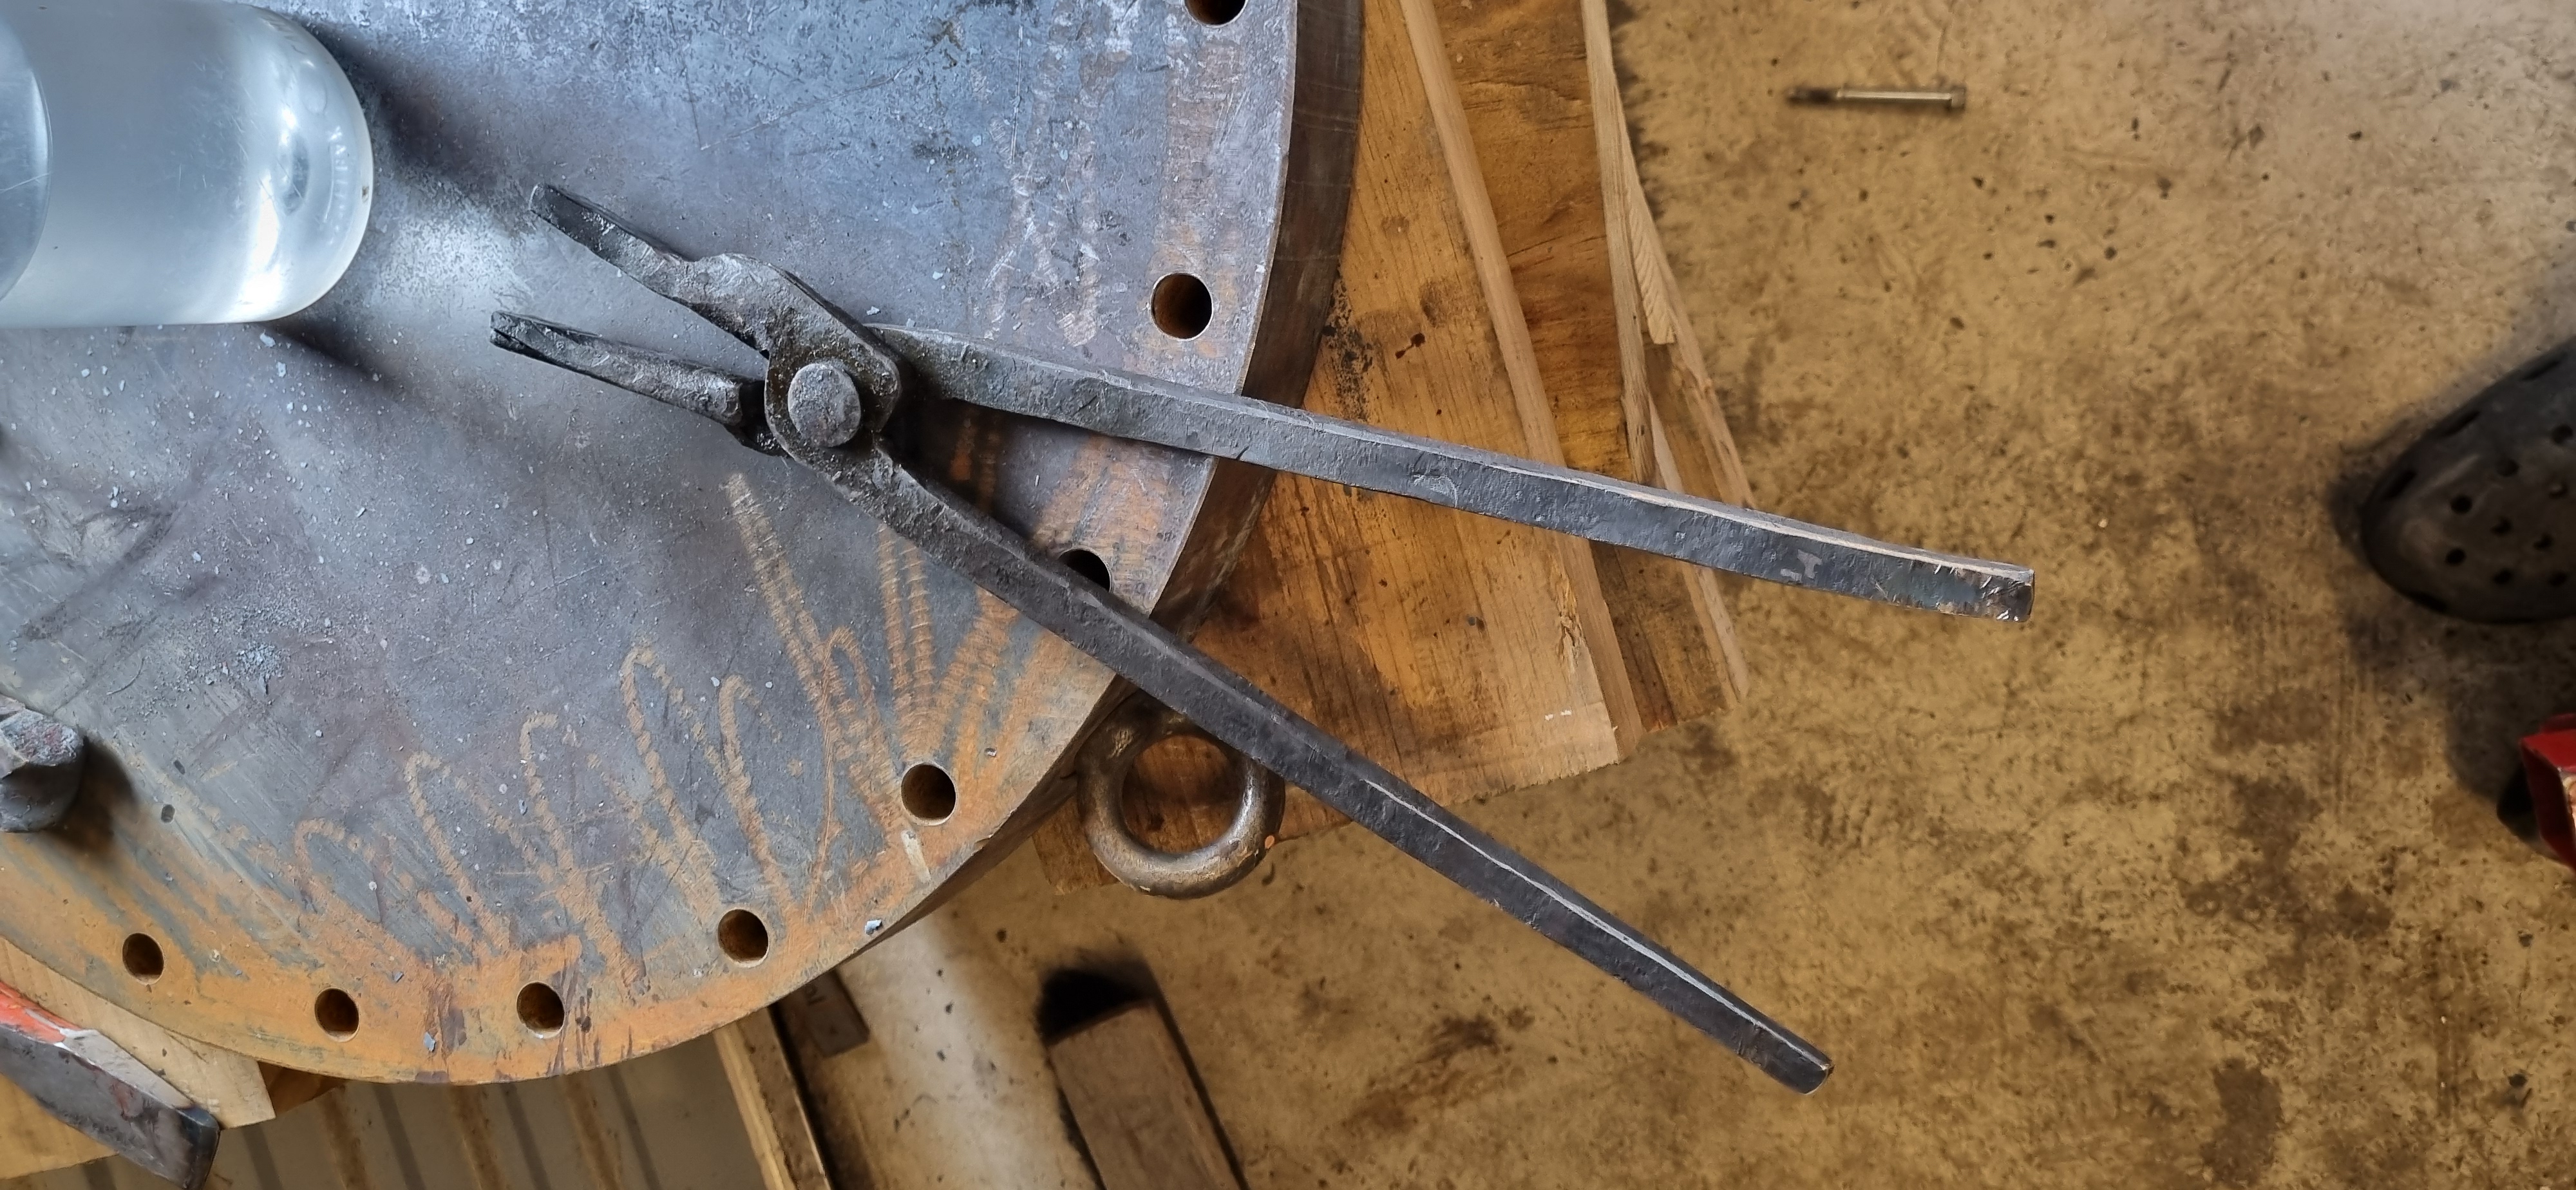
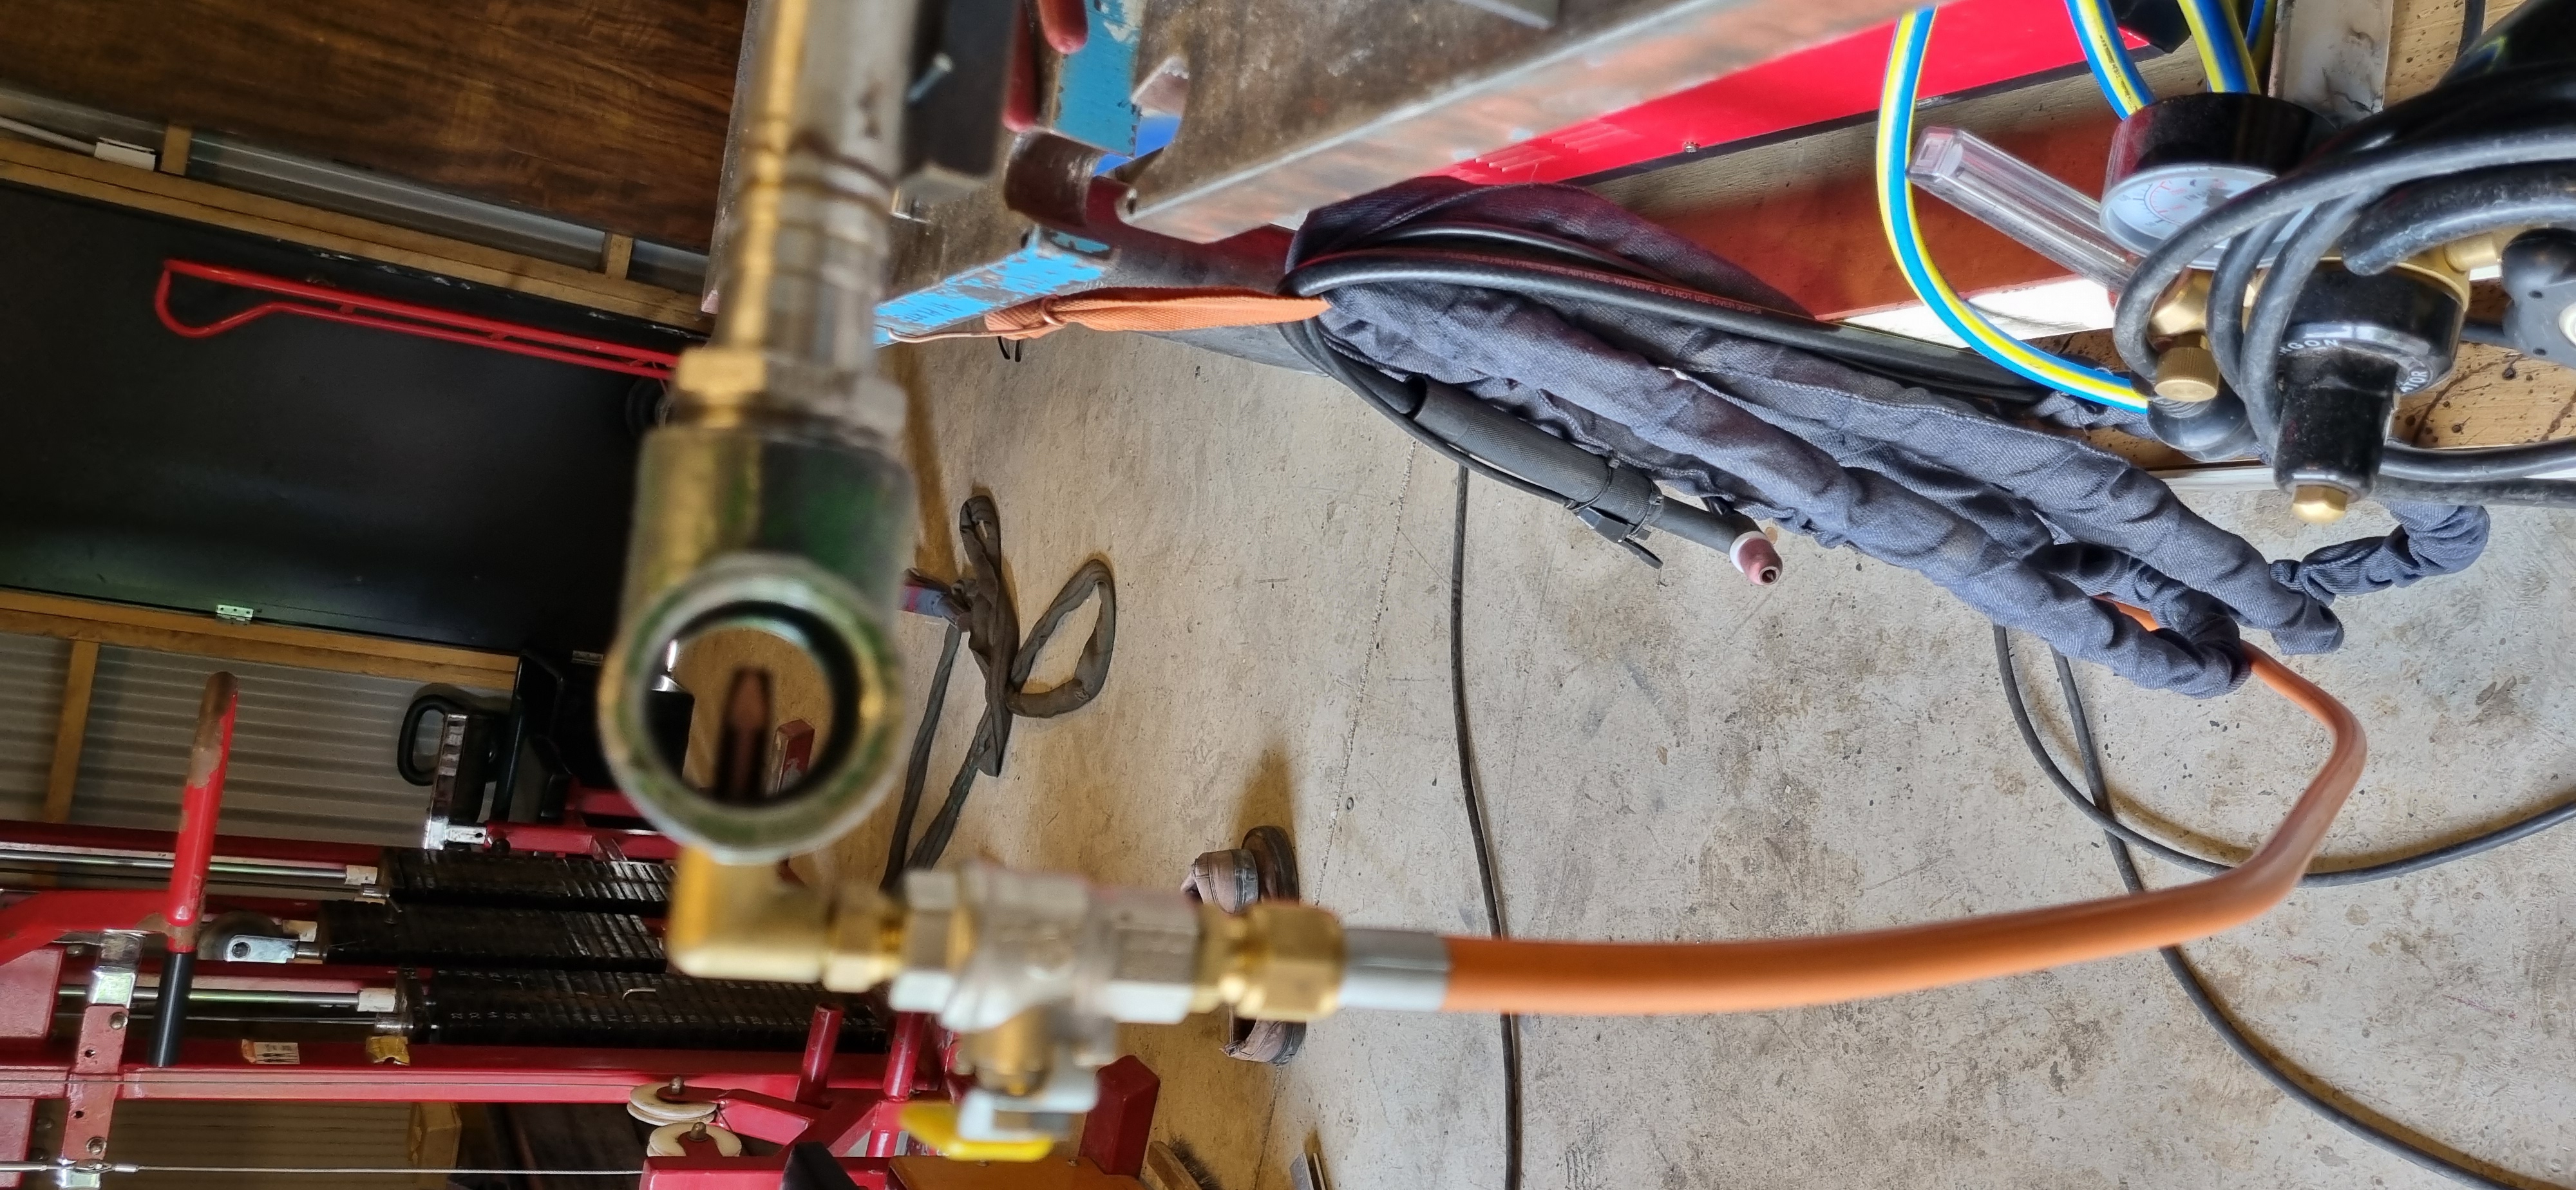
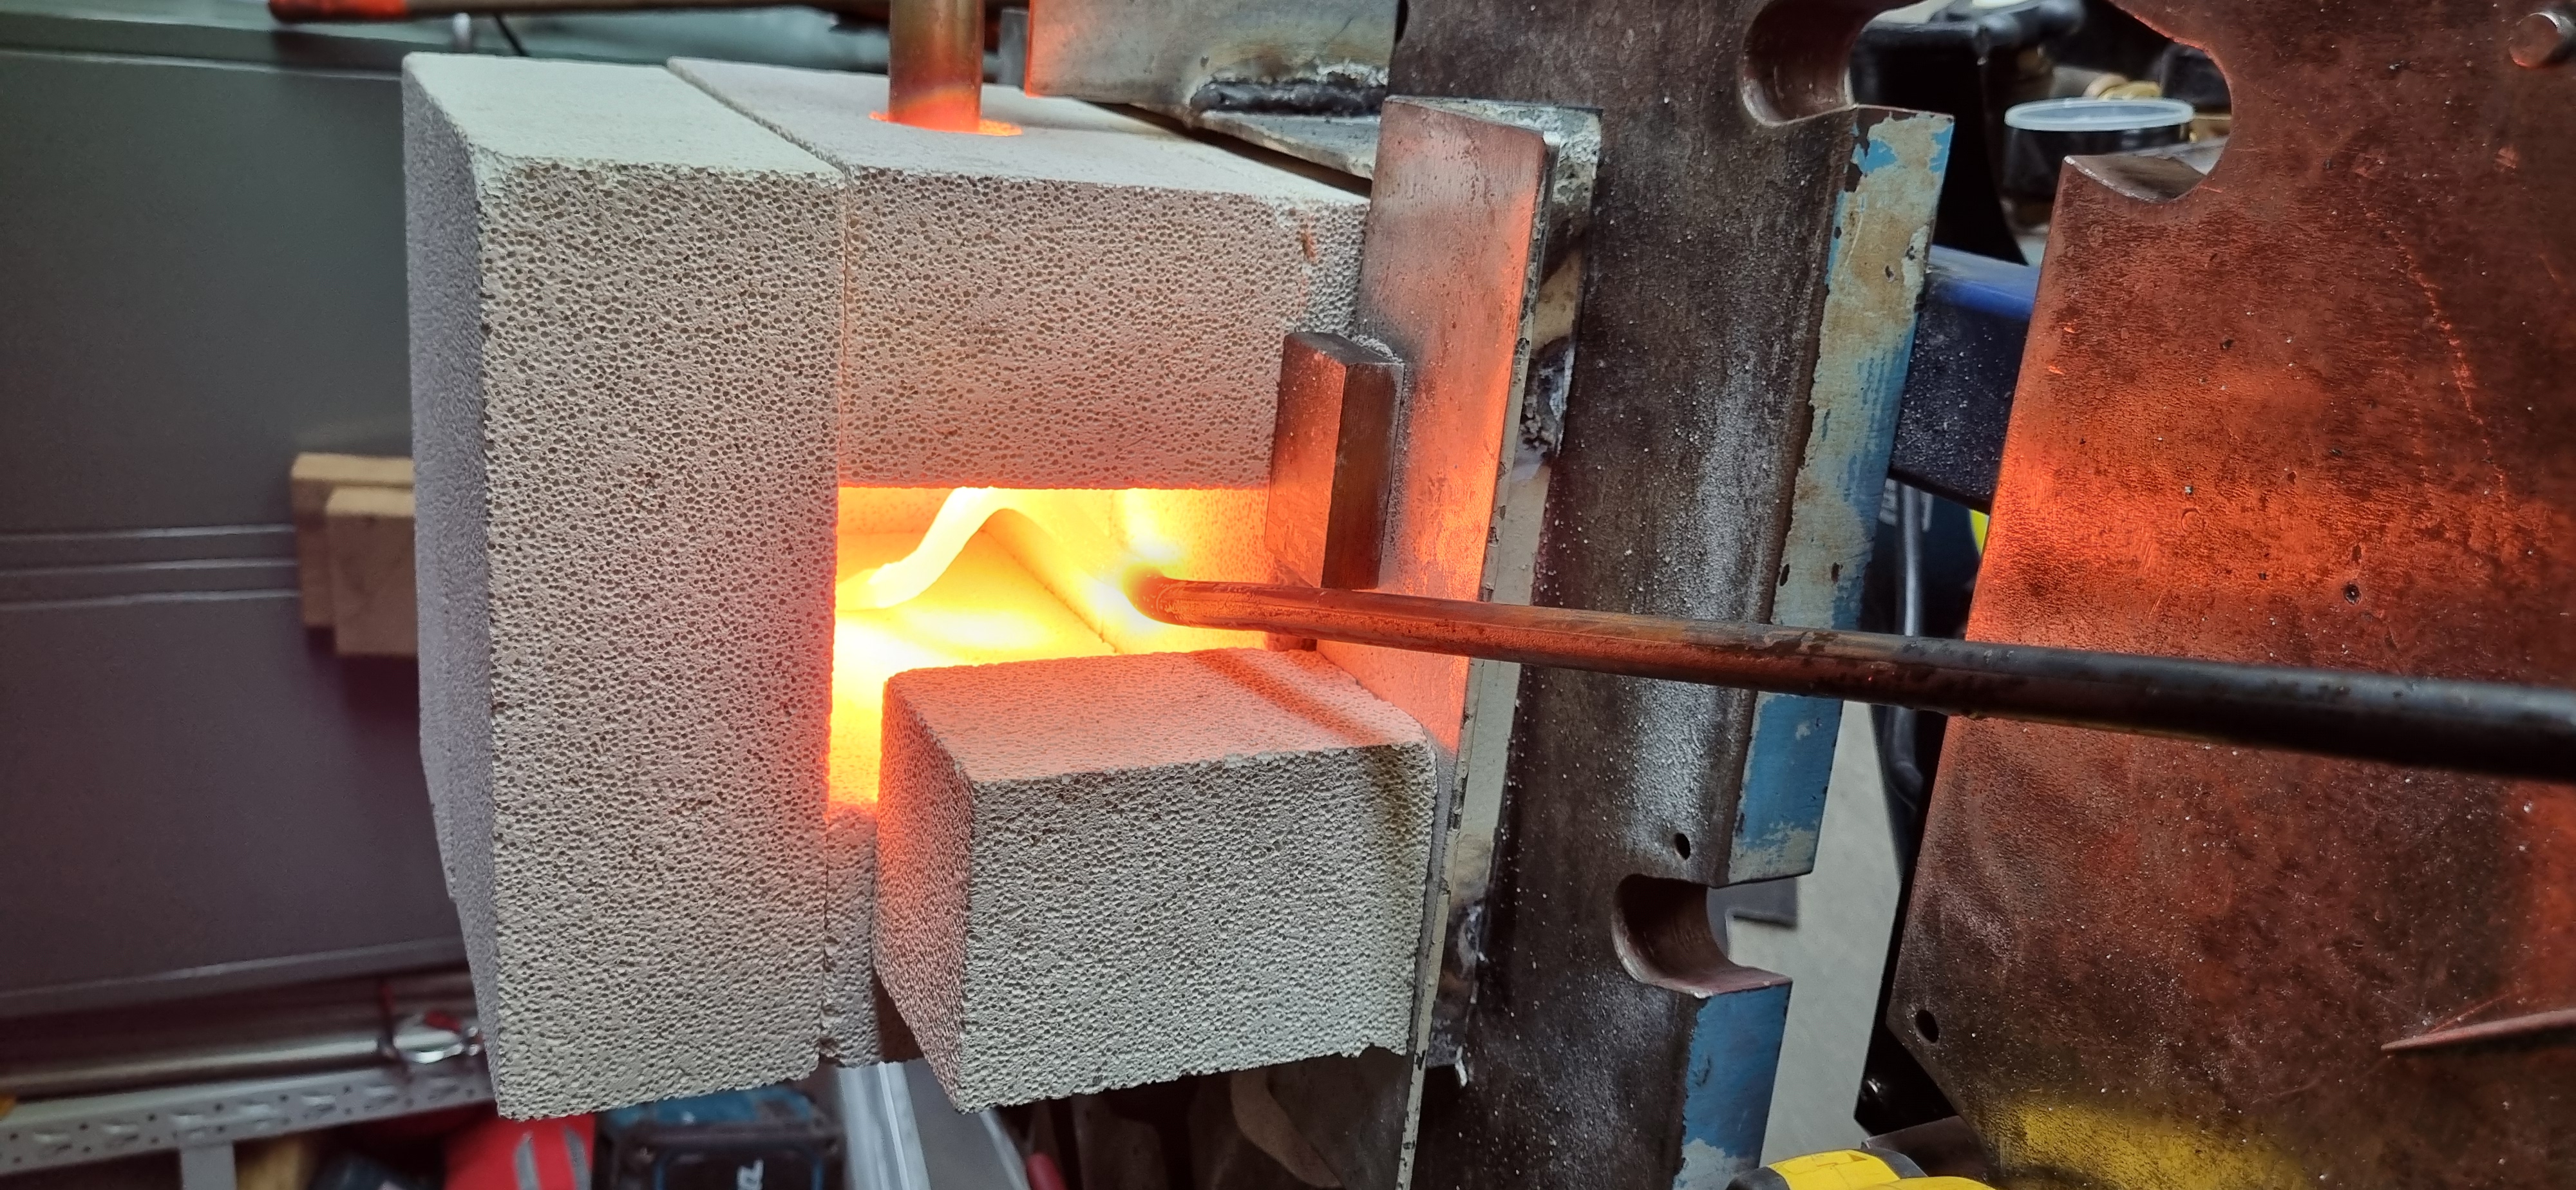
Ended up with the kit, few things learnt and ironed out, just using a basic Brick setup and made my own burner, the one supplied wasn't going to well so made a bigger one, 20mm pipe with 1 inch t. .9mm mig tip for the jet. The lpg bottle was a bit low so that was likely the main issue. Gets hot enough to soften 10mm, made some tongs, also got a wee cleaver in the oven for heat treat. Bit of fun anyway.
-
21-09-2024, 09:17 PM #15Member

- Join Date
- Mar 2018
- Location
- Darfield
- Posts
- 436
Finishing the original rig, went to a swap meet, picked up a couple of hammer handles and an abused meat cleaver, will see how the mortar goes on the forge, I'll make up some shelves as required.

Similar Threads
-
Forge
By Tuckerbox in forum Projects and Home BuildsReplies: 15Last Post: 11-06-2019, 05:33 PM
Tags for this Thread
Welcome to NZ Hunting and Shooting Forums! We see you're new here, or arn't logged in. Create an account, and Login for full access including our FREE BUY and SELL section Register NOW!!


 LinkBack URL
 About LinkBacks


 Reply With Quote


Bookmarks