Haven't posted in a while.
Been working on an updated stock design for ages, finally got my ducks lined up to make another prototype.
I bought a used CNC router off a farmer in Gore for a steal and this is the first major project I've done with it:
Bit of background;
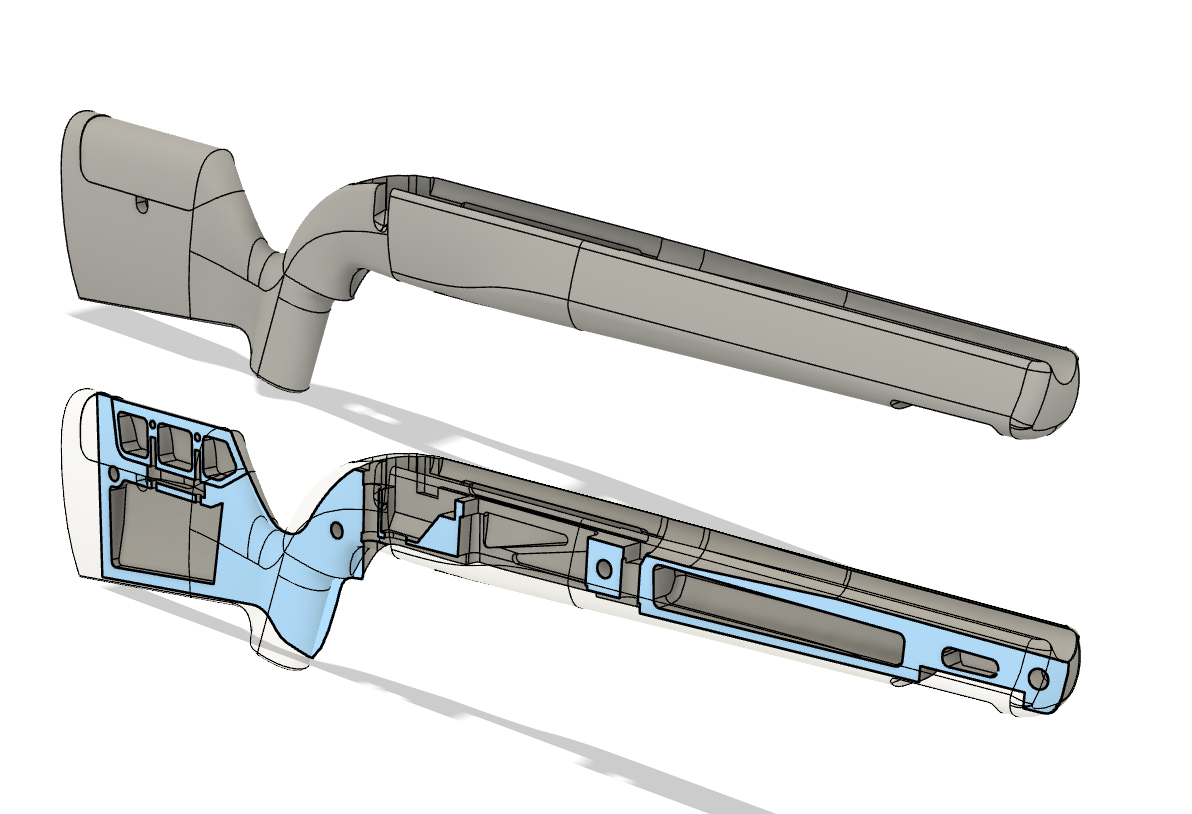
Cad done in Fusion 360. Hollowed voids to reduce weight like last time, but targeting better prone ergonomics and adjustability.
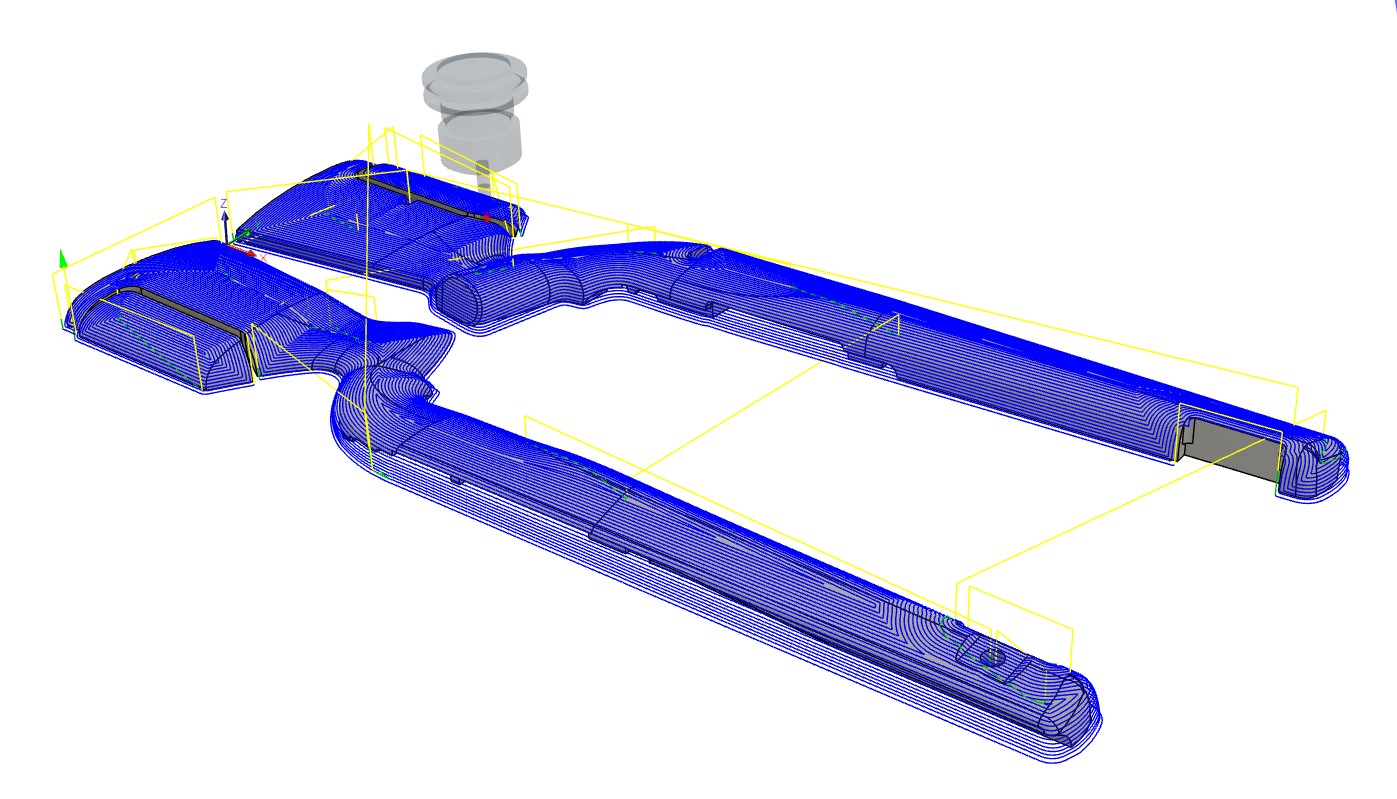
This was the first major CAM project for me. While it worked OK with only 2 set ups, the next time I will do this differently (likely more set ups, but should be a more accurate and consistent end result).
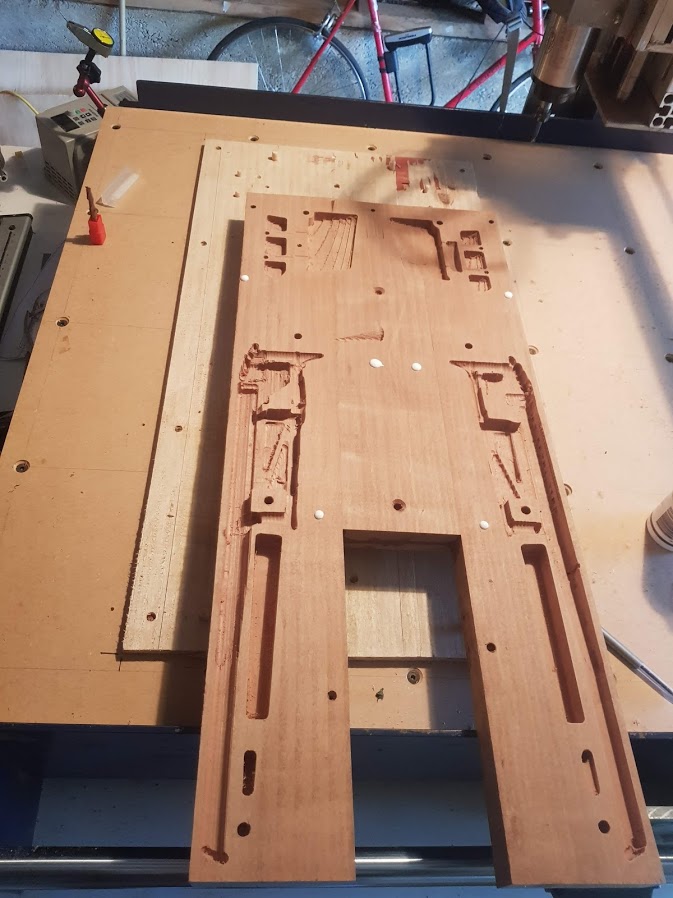
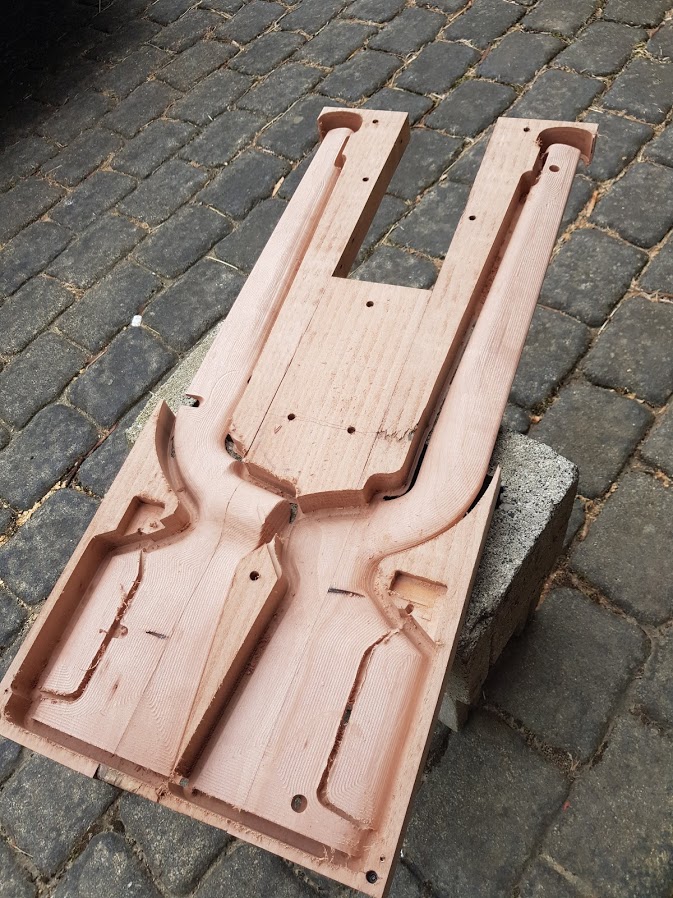
Blank surfaced and internal voids cut, including inletting.
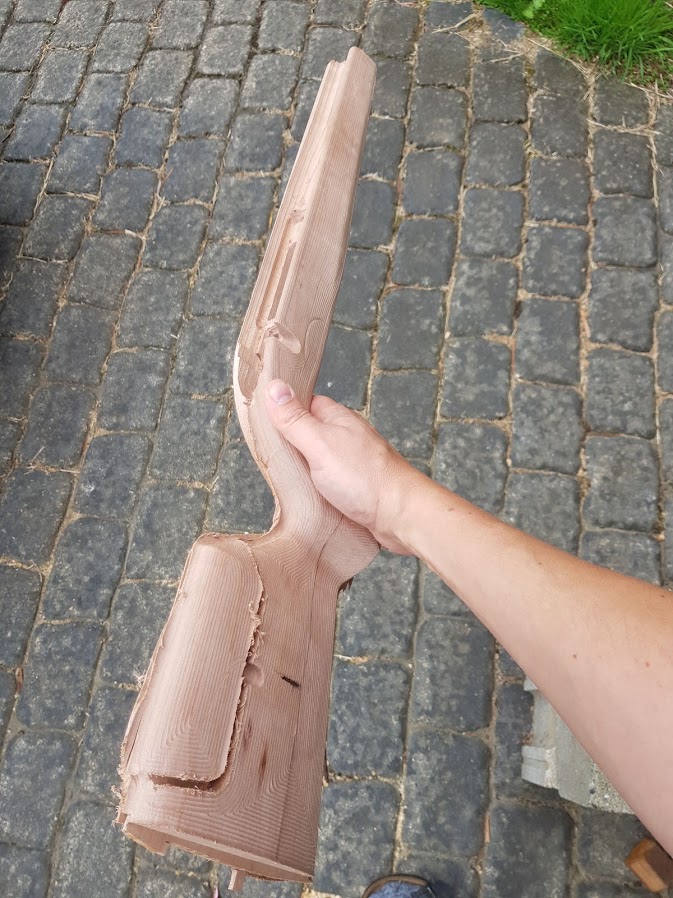
Outer surfacing cut. Unfortunately this revealed a couple of nail holes in the blank, and there were evidently a couple of tool path errors - see the diagonal cut across the bottom of the grip.
You can see here the sides aren't symmetrical - the grip is canted to the right by 5 degrees or so (similar to a GRS)
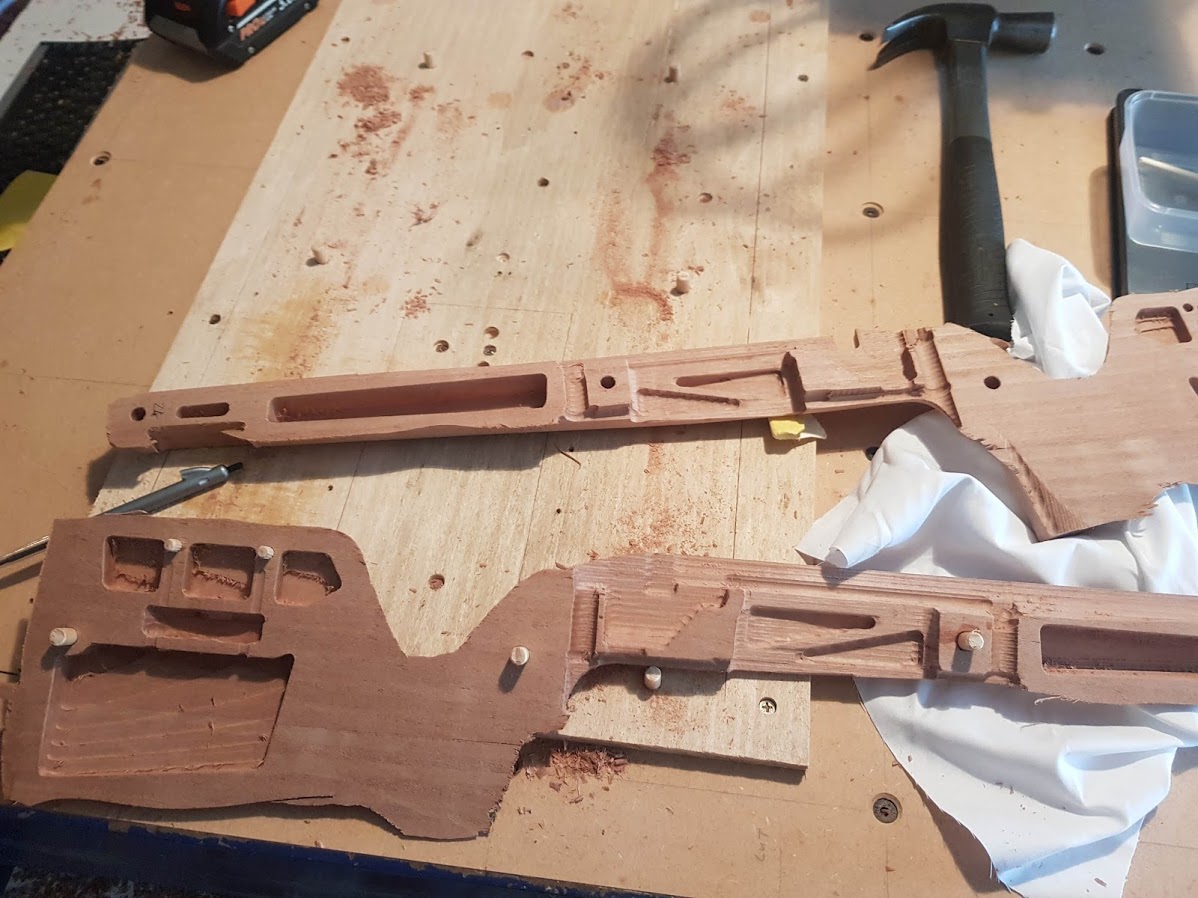
Two halves freed from the blank and mating holes pinned.
Two halves assembled
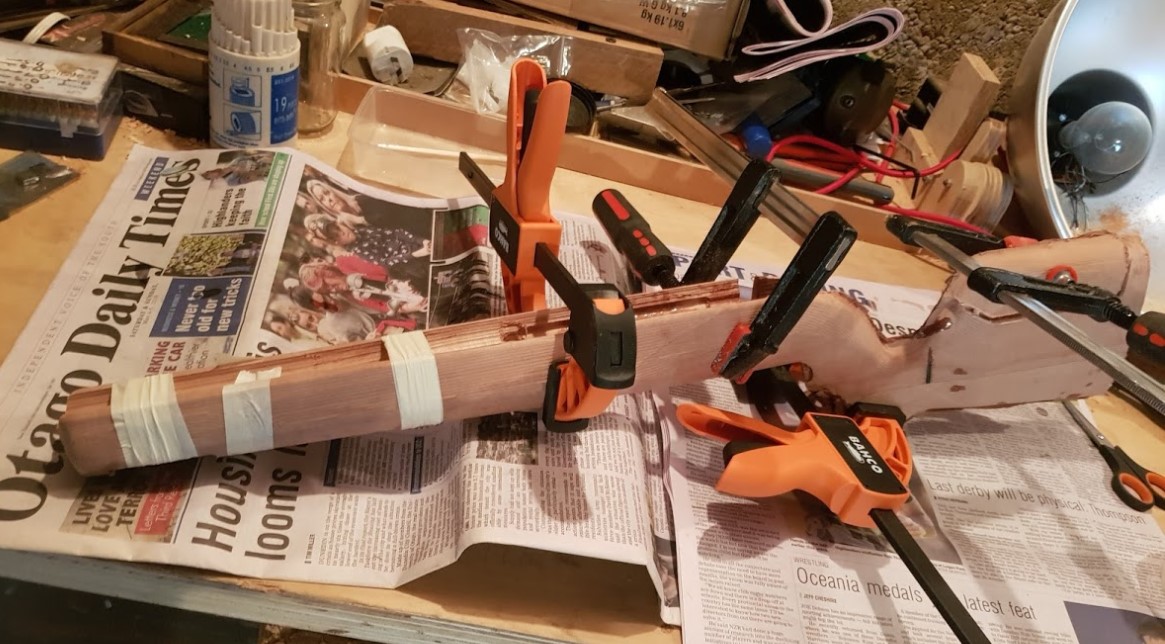
Gluing with epoxy
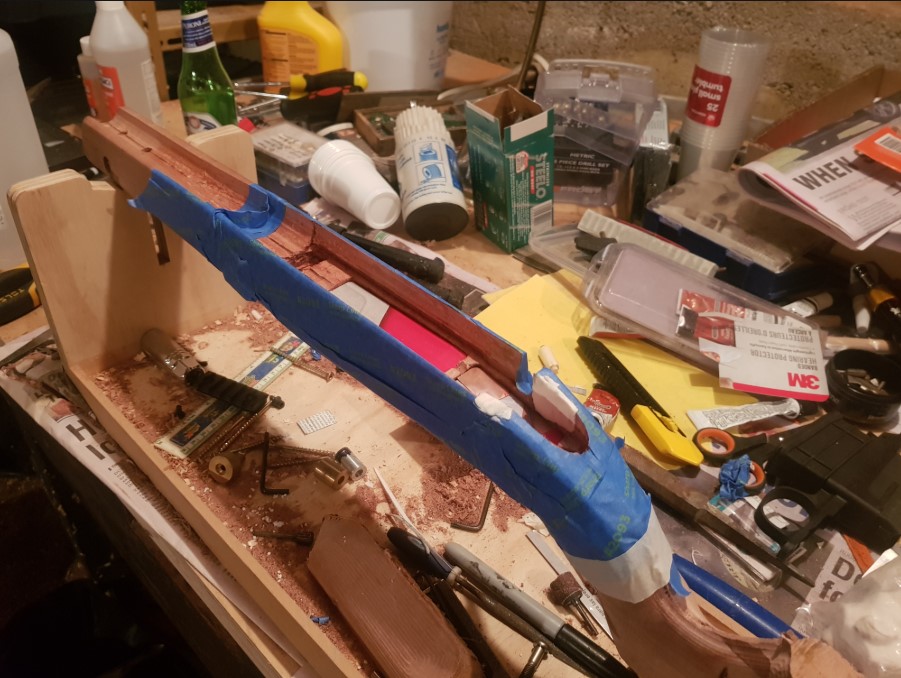
Before starting serious work on the outside surfaces, I pillar bedded the action. Work bench is getting pretty messy now.
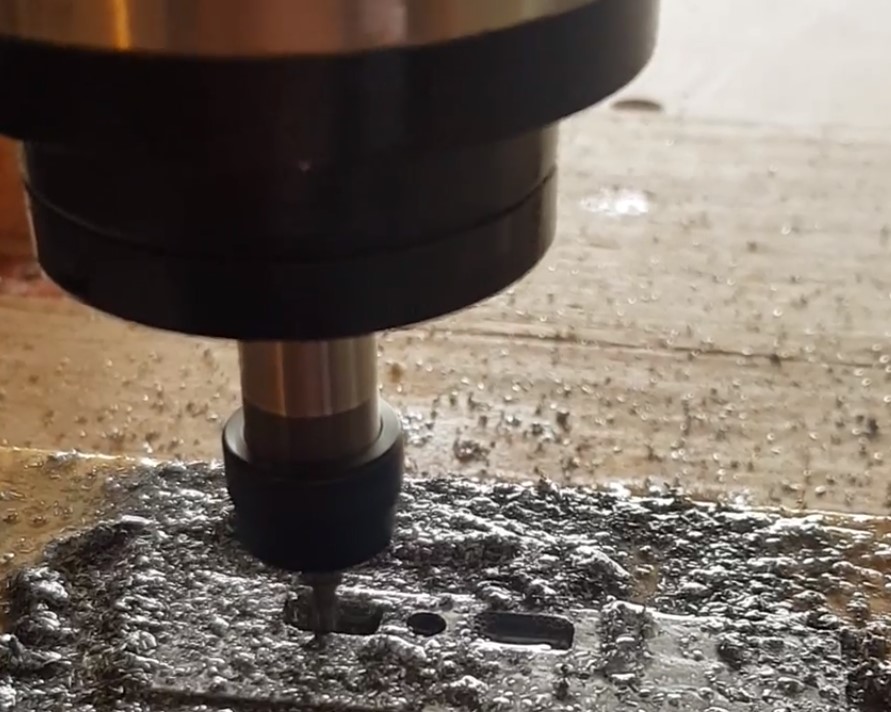
Was a bit of a push for my mill to cut the aluminium clamp for the adjustable height comb, but it did work!
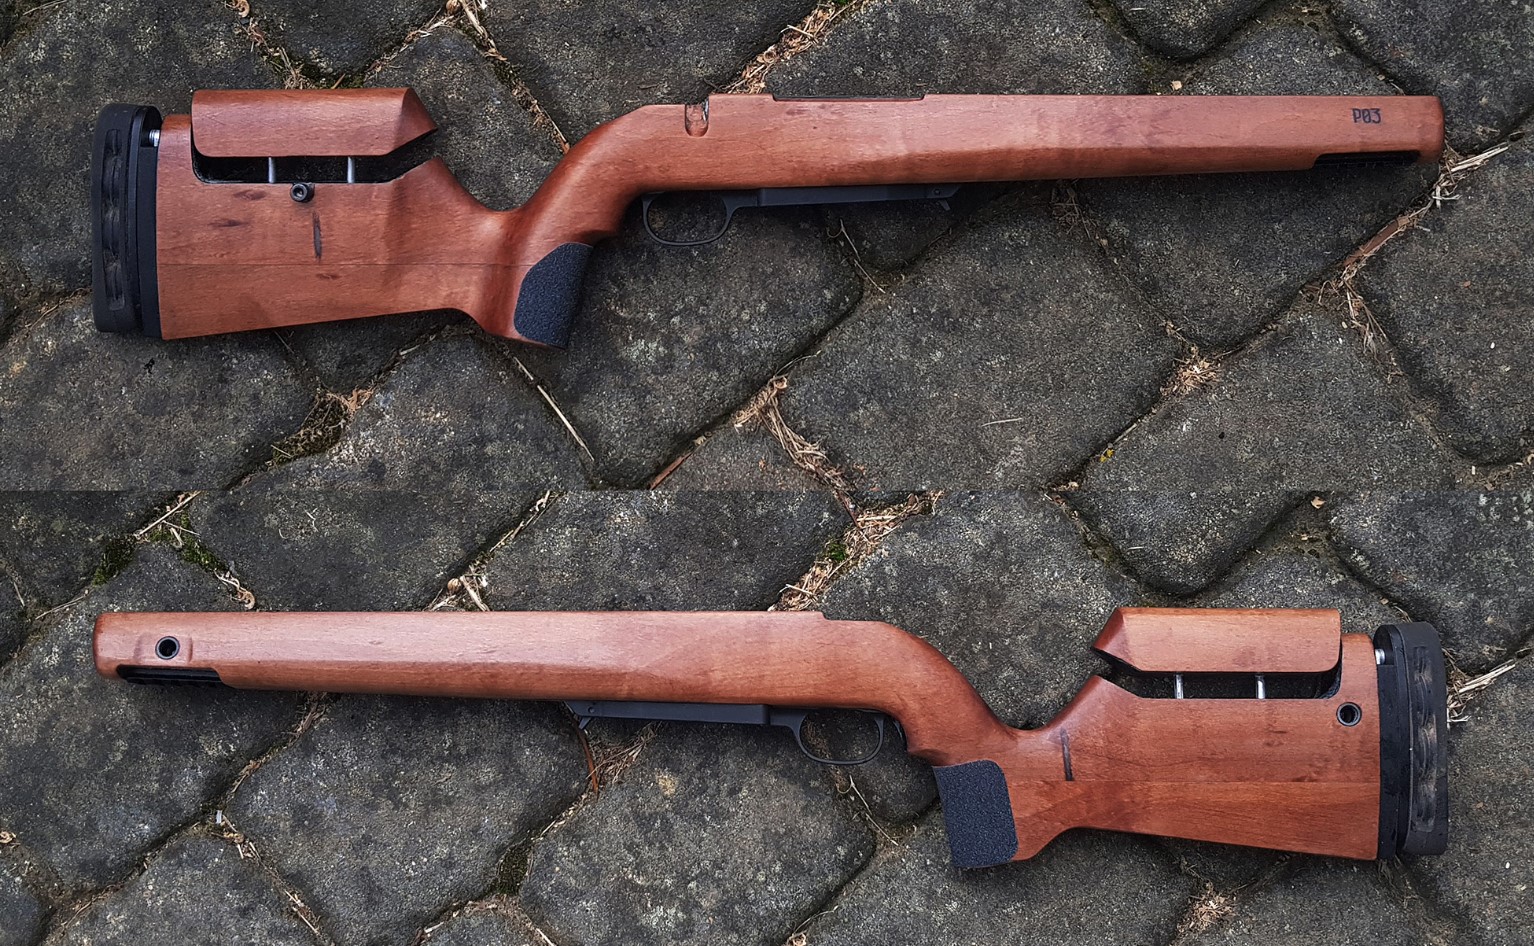
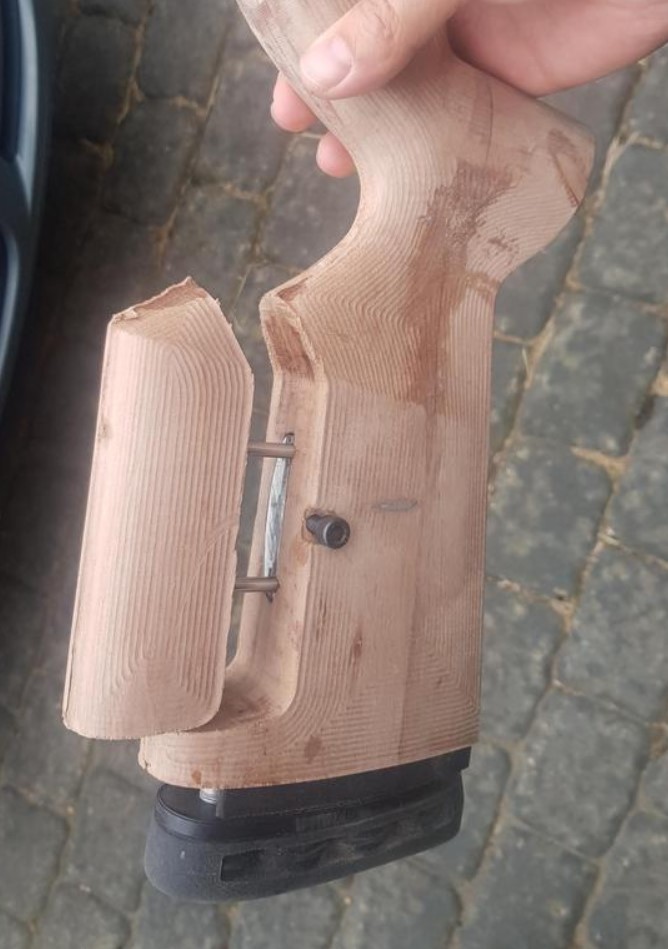
Adjustable height comb clamp fitted, and adjustable height & angle butt plate. I will replace the socket cap screw with a thumb screw once the lockdown is over. The adjustable butt pad slider housing is a 3d printed part - it should have been flush with the stock, but I made it months ago. Adjustment needed for next time.
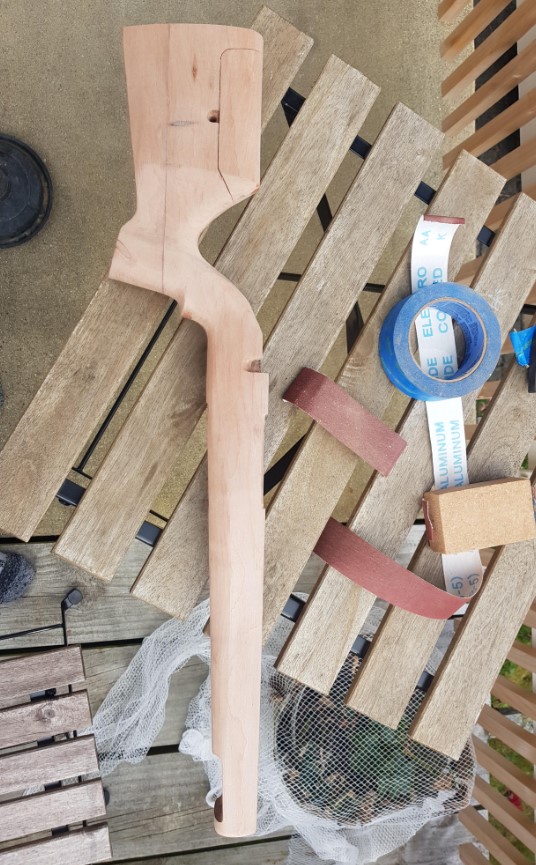
Inletting done and everything fitting up well, time for lots and lots of sanding.
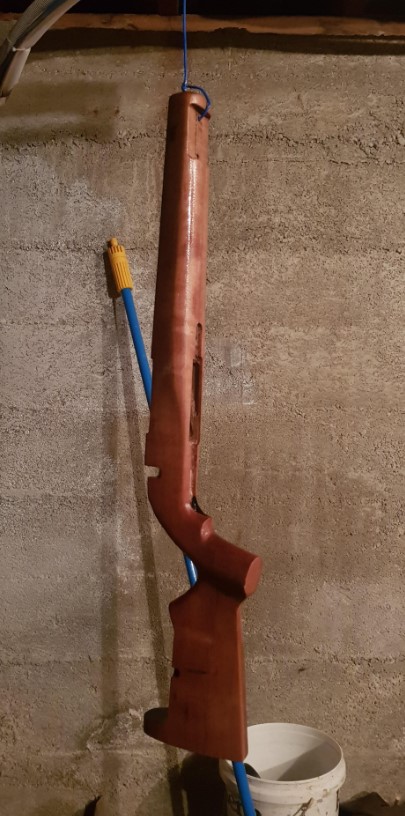
First coat of epoxy. Timber is red beech.
3 coats epoxy later, buffed down to matte finish with scotchbrite. Skateboard grip-tape for a little more security, flush cups and picatinny rail rail installed in the forend. I STILL didn't create enough bolt clearance to the comb in this design (it's becomming a tradition) so this got a minor adjustment - but I'm really happy with the outcome so far.
Unfortunately I'm missing ONE M4 screw to fully fasten the pic rail in the forend - I'll have to wait until after the lockdown unless I can rustle one up in the shed. Other than that I'm pumped to get behind it at the range.
Cheers
Welcome guest, is this your first visit? Create Account now to join.
Welcome to the NZ Hunting and Shooting Forums.
Search Forums
User Tag List
+ Reply to Thread
Results 1 to 15 of 20
-
14-04-2020, 11:05 PM #1Member

- Join Date
- Jul 2013
- Location
- Otago
- Posts
- 316
New stock
-
-
14-04-2020, 11:45 PM #2
Nice work! What CAM software are you using?
-
15-04-2020, 12:40 AM #3Member

- Join Date
- Feb 2017
- Location
- Jafa land
- Posts
- 5,520
Was the CNC router terribly expensive?
-
15-04-2020, 12:47 AM #4Member

- Join Date
- Nov 2014
- Location
- Christchuch New Zealand
- Posts
- 6,250
I do not know what you do for a job, but if you get the practise in, Boyds / GRS etc may be in trouble. Something like that could be worth buying local if you were able
Looks great. Very well done.
-
15-04-2020, 07:02 AM #5
Awesome all right what some people do in there sheds

-
15-04-2020, 09:58 AM #6
Thats an awesome idea for making a stock. I never thought of machining each half and gluing together.
That came out really nice. Looks like it would be comfortable to shoot too.
What model is the CNC?
If you find the skateboard grip too abrasive, try this stuff https://www.bunnings.co.nz/croc-grip...black_p3961694
its designed for beside spa pools and bathrooms and such to be comfortable on bare skin, it was the best product as far as a balance between grip and not hurting your hands.
I tried skateboard grip tape on my 3d pistol grips and they were too aggressive. I searched around and found this stuff at Bunnings. $11 will buy you enough to do 5 or 6 grips.
-
15-04-2020, 10:26 AM #7Member

- Join Date
- May 2012
- Location
- Far North
- Posts
- 4,883
thats really cool
can it mill out fiberglass/carbonfiber?
-
15-04-2020, 11:23 AM #8Member

- Join Date
- Dec 2014
- Location
- AT
- Posts
- 483
Well done that is bloody impressive.
-
15-04-2020, 03:02 PM #9Member

- Join Date
- Nov 2012
- Location
- AKL
- Posts
- 396
awesome job! how lkng did it take for the machining? keen to do a few for us?
regards
-
16-04-2020, 12:11 PM #10
That looks bloody good!
Stock making really is part art and part science.Those who live in glass houses, shouldn't piss off Geologists.
-
16-04-2020, 12:51 PM #11Member

- Join Date
- Jul 2013
- Location
- Otago
- Posts
- 316
Thanks all. All of the scales in my house are broken so I can't weigh it - I'm hoping it'll be around a kilo. I'll confirm once I get my hands on some real scales though!
CAM is all done within Fusion 360, and the router runs Mach3
The router was built by the guy I bought it off. I paid $900, but have had to fix & replace some bits (including the spindle and VFD) which pushes the cost up. However the last stock I got cut by a pro outfit nearly cost my $900 so I'm happy with the outcome!
I'd love to make more for other people. This requires some more refinement of the process - I think I have a way to do it with more setups but better accuracy (and less hand finishing), so will be making another for my .22 to test this.
I the cost to someone else would almost certainly be north of $1k to make it worth my time, which is pretty steep really.
Carbon fibre is definitely an option, I need to learn more about the process but I think it could be done DIY with machining a two sided bladder mold. That definitely requires more thinking about how to mount the action though (likely aluminium bedding block) which adds more complexity.
Thanks for all the kind comments
-
16-04-2020, 12:53 PM #12Member

- Join Date
- Feb 2017
- Location
- Jafa land
- Posts
- 5,520
You may have to see what happens with the second round of gun control.
@stug had to stop his side business of making carbon fibre stocks as they were going to require a dealers license to make.
-
16-04-2020, 01:01 PM #13
At the moment to make firearms parts like stocks you only need a firearms licence. But if the second round of legislation goes through you will need a dealers licence to make and sell to other people.
-
16-04-2020, 01:10 PM #14Member

- Join Date
- Dec 2011
- Location
- Southern Alps
- Posts
- 4,940
Skilled craftsman at his best,very nice.They reckon walnut tree trunk nice to cut rifle stocks out of.
-
16-04-2020, 07:15 PM #15Member

- Join Date
- Jun 2013
- Location
- Middle Earth
- Posts
- 4,521
Red cedar would be pretty nice as well.
Tags for this Thread
Welcome to NZ Hunting and Shooting Forums! We see you're new here, or arn't logged in. Create an account, and Login for full access including our FREE BUY and SELL section Register NOW!!


 38Likes
 LinkBack URL
 About LinkBacks


 Reply With Quote


Bookmarks