Welcome guest, is this your first visit? Create Account now to join.
Welcome to the NZ Hunting and Shooting Forums.
Search Forums
User Tag List
+ Reply to Thread
Results 76 to 90 of 112
Thread: Classy lightweight takedown
-
14-11-2019, 09:49 PM #76Member

- Join Date
- Dec 2014
- Location
- canterbury
- Posts
- 6,832
-
-
14-11-2019, 10:13 PM #77Member

- Join Date
- Sep 2017
- Location
- BOP
- Posts
- 501
-
15-11-2019, 07:26 AM #78Member

- Join Date
- Dec 2014
- Location
- canterbury
- Posts
- 6,832
Ok @joelhenton
I will put it in my long list of problems to solve.
I have 416 ss for barrel lugs and extractors and some roughed out
I have ss spring steel for the extractor flat spring
I have tracked down ss roll pins
If the weld test results arw possative i will push on with a run of 4 or 5
-
15-11-2019, 07:02 PM #79Member

- Join Date
- Aug 2019
- Location
- Wellington
- Posts
- 334
-
16-11-2019, 11:59 AM #80Member

- Join Date
- Dec 2014
- Location
- canterbury
- Posts
- 6,832
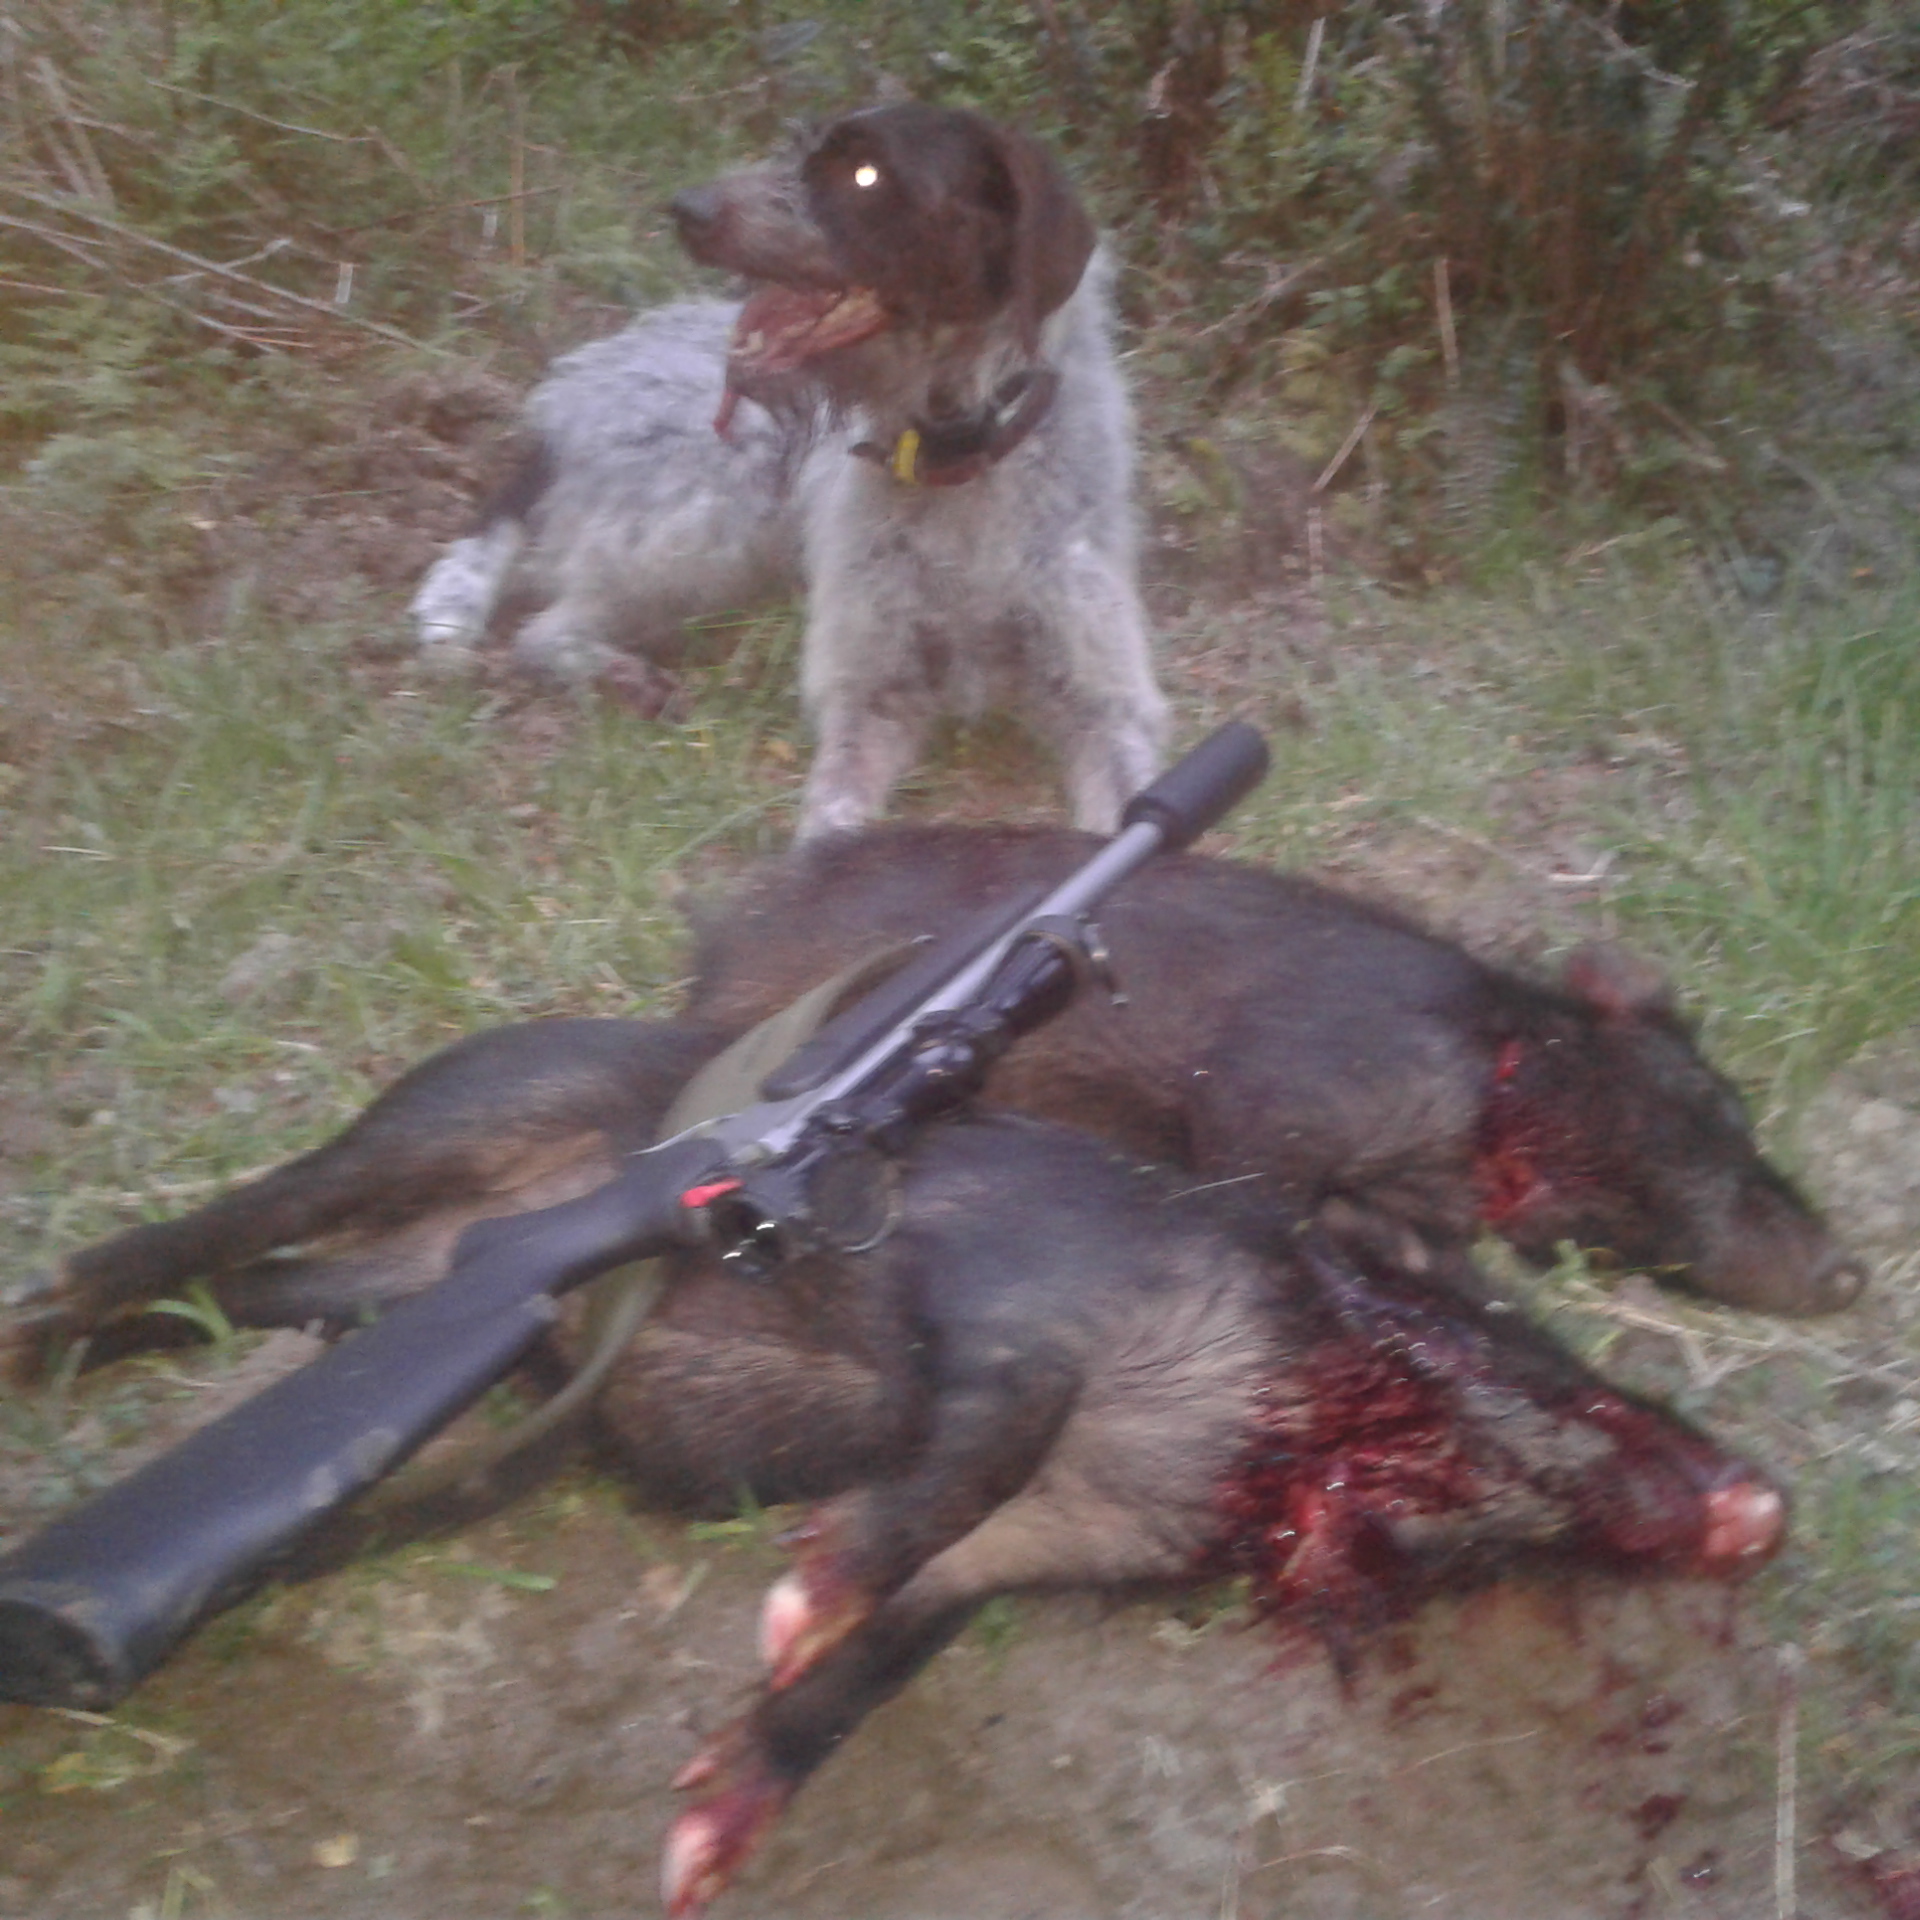
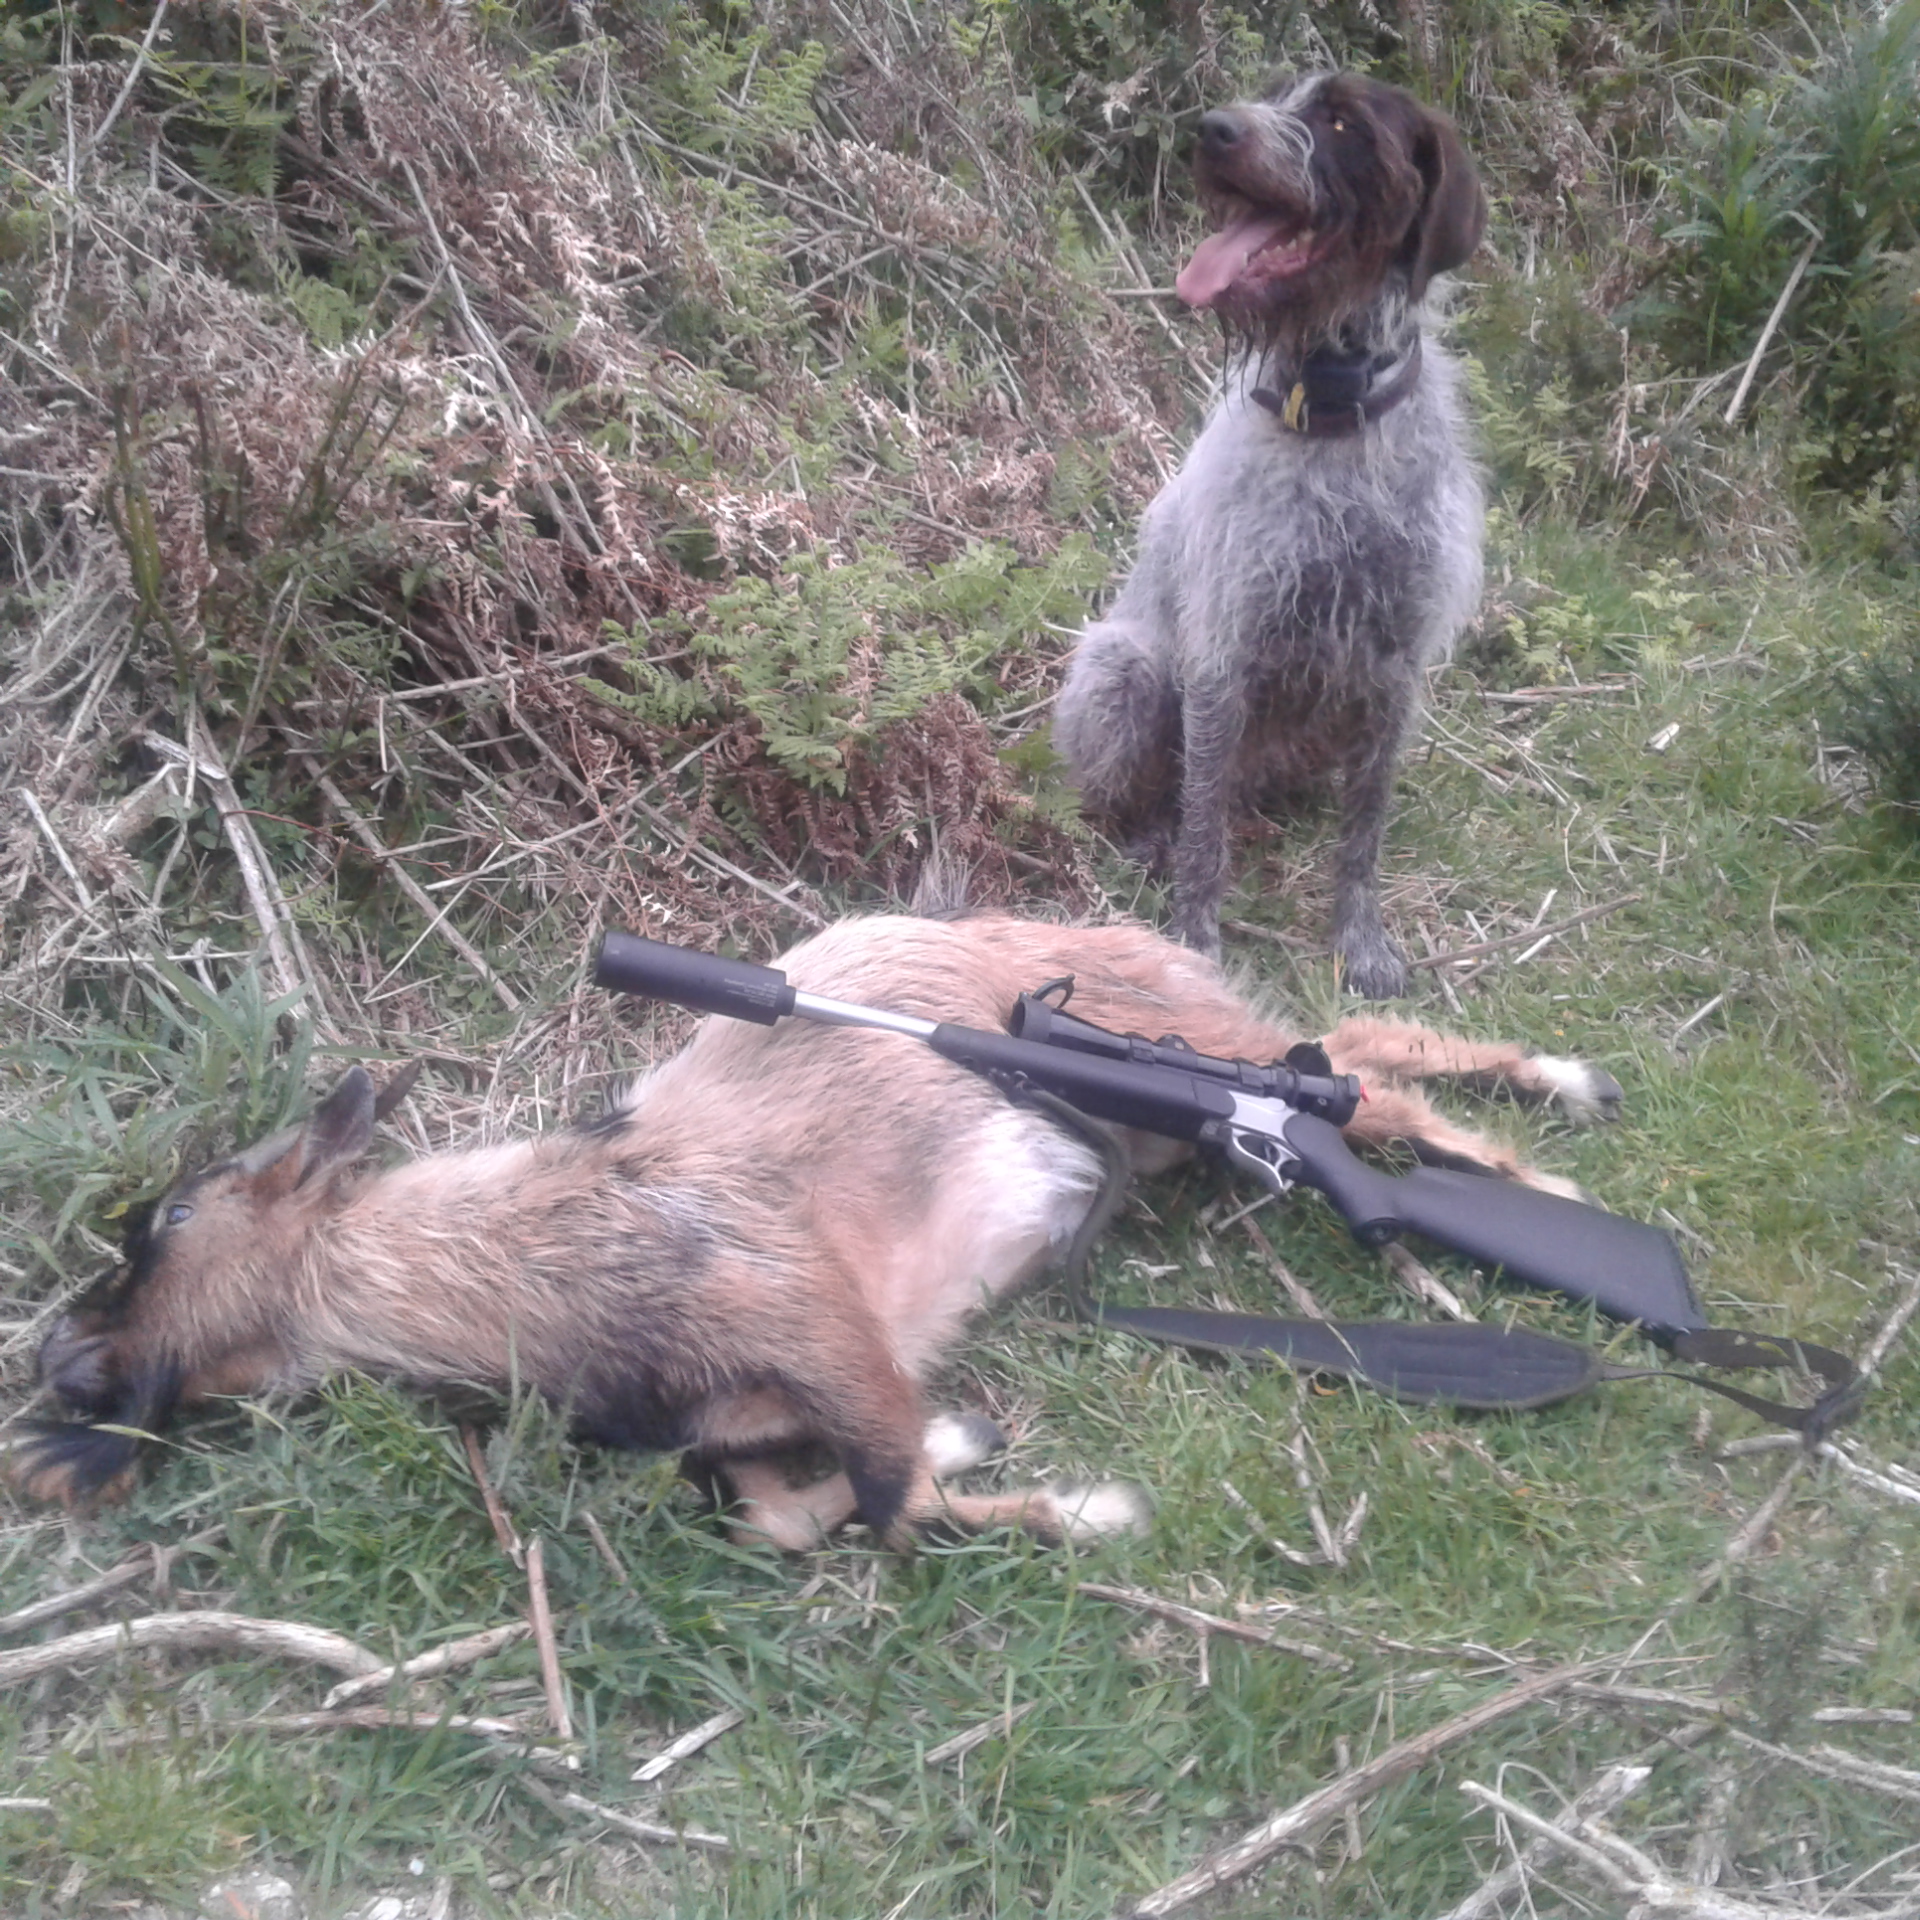
The other nice thing with the G2 is it sits nicely in the front passengers side of the truck while i was working on a west coast farm recently. Always there and easier to get out.
Saw heaps of the wrong breed and sex of deer but did get some pigs and a goat.
Down side is its to short for the overhead carrier in my kubota side by side
-
17-11-2019, 05:57 PM #81
-
09-12-2019, 08:50 AM #82Member

- Join Date
- Dec 2014
- Location
- canterbury
- Posts
- 6,832
@joelhenton
I solved the tool less take down problem.
Don't take down at the hinge pin
Take down at the butt stock bolt.
Barrel plus action stay together and are only 40mm longer than barrel alone.
I have still ditched the fore end and using a very small shouldered hinge pin I made.
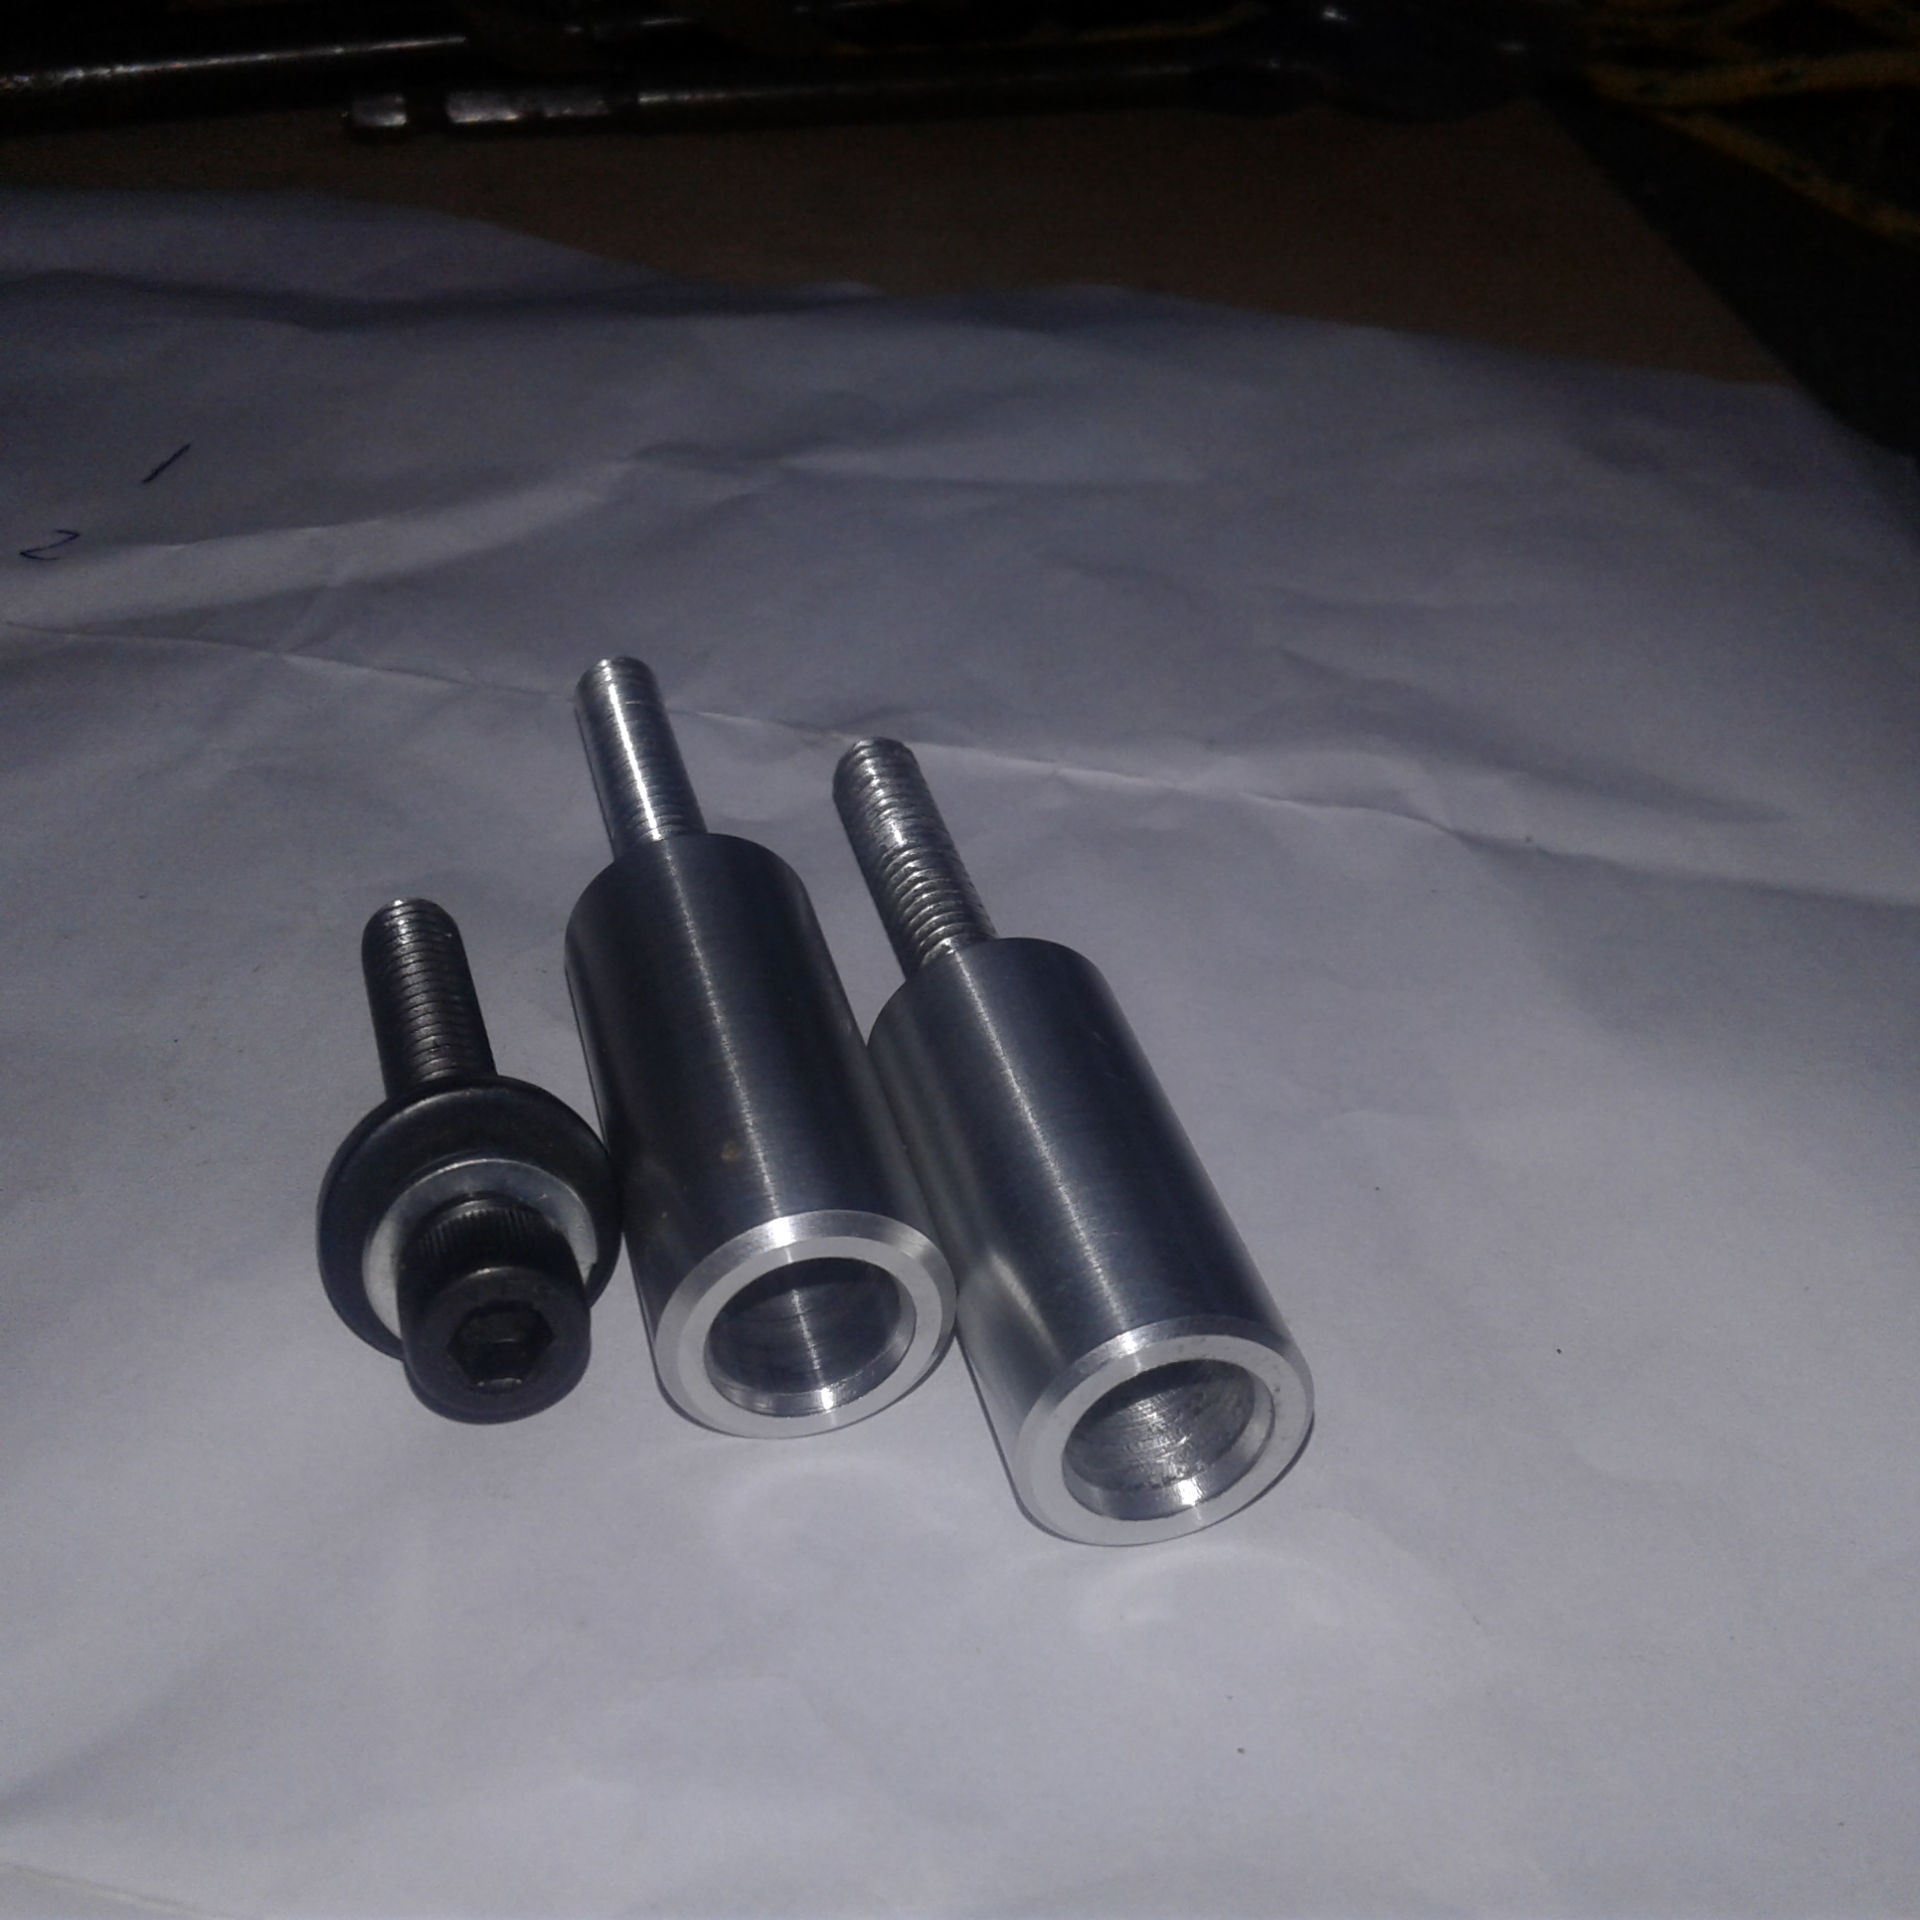
The alloy take down screw comes out the pistol grip cap and they just need knurling to be complete.
They are counter bored to save weight and are identical to the original factory steel cap screw.
They are captive inside the pistol grip cap which they come through
Easy and quick to use even without the knurling.
But will need the knurling when wet.
Scope is quick release also
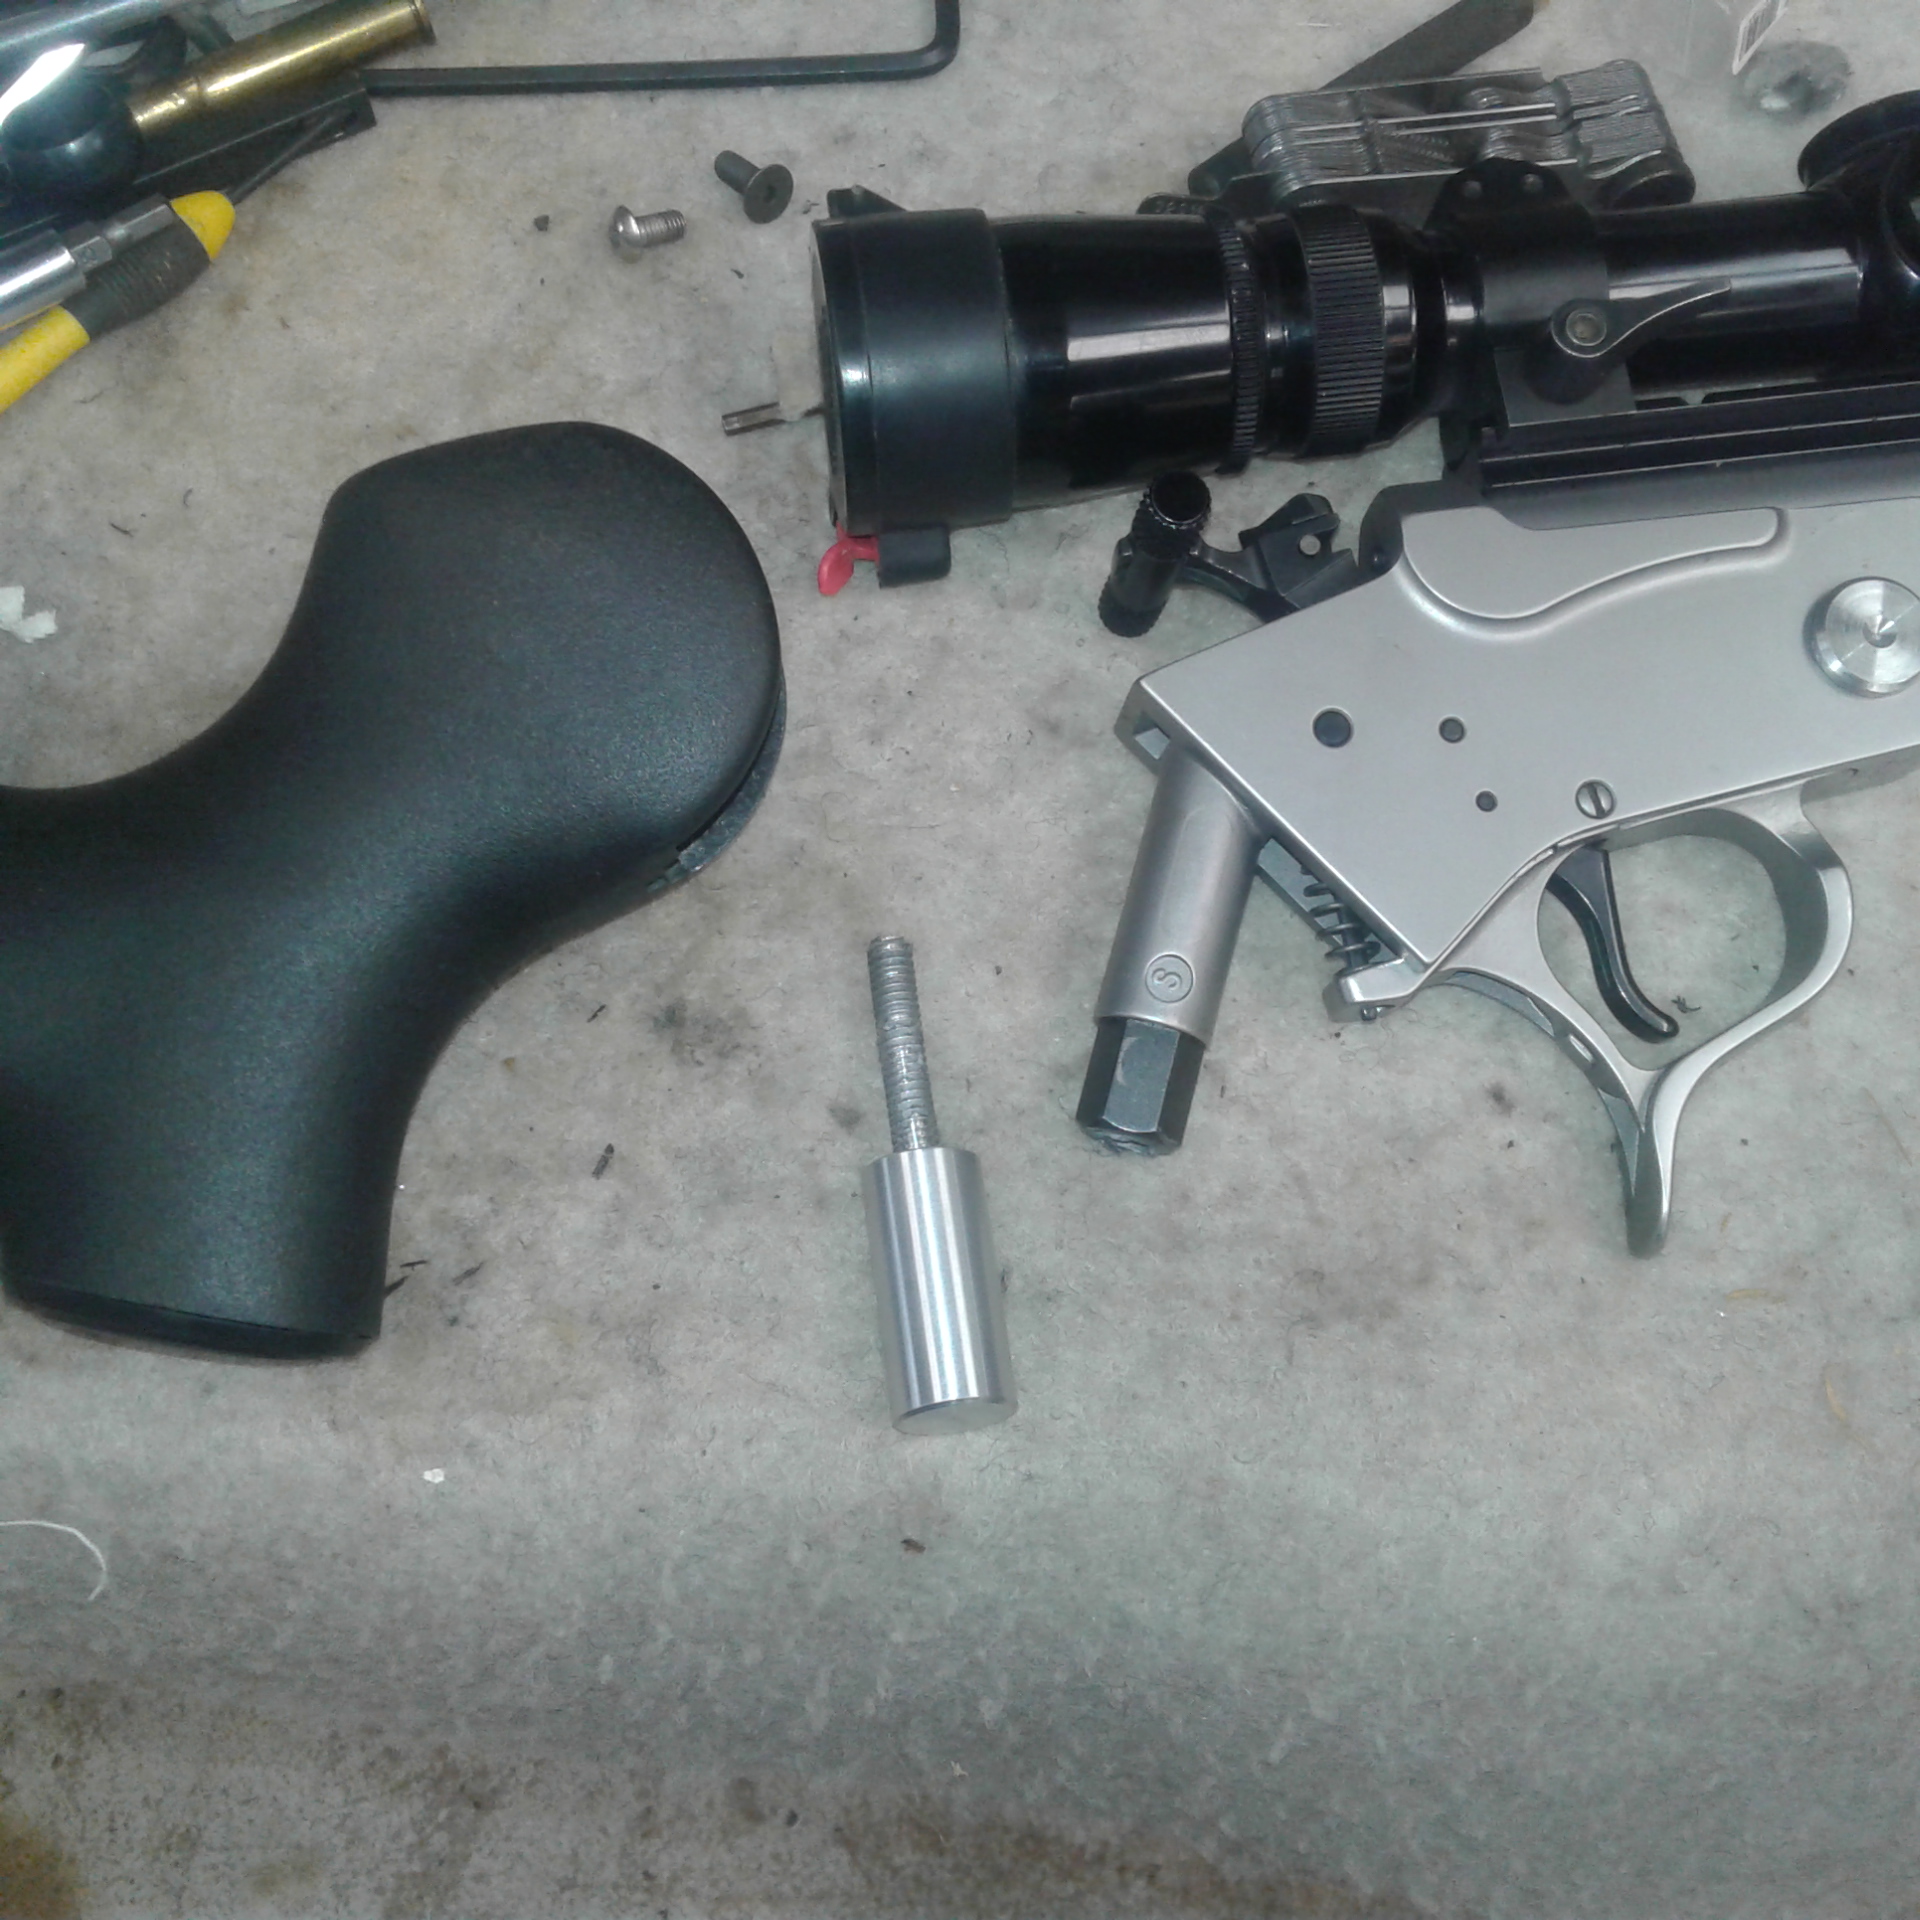
This is the shorter of the 2 take down screws I made. 3mm longer one is better and knurling will be added
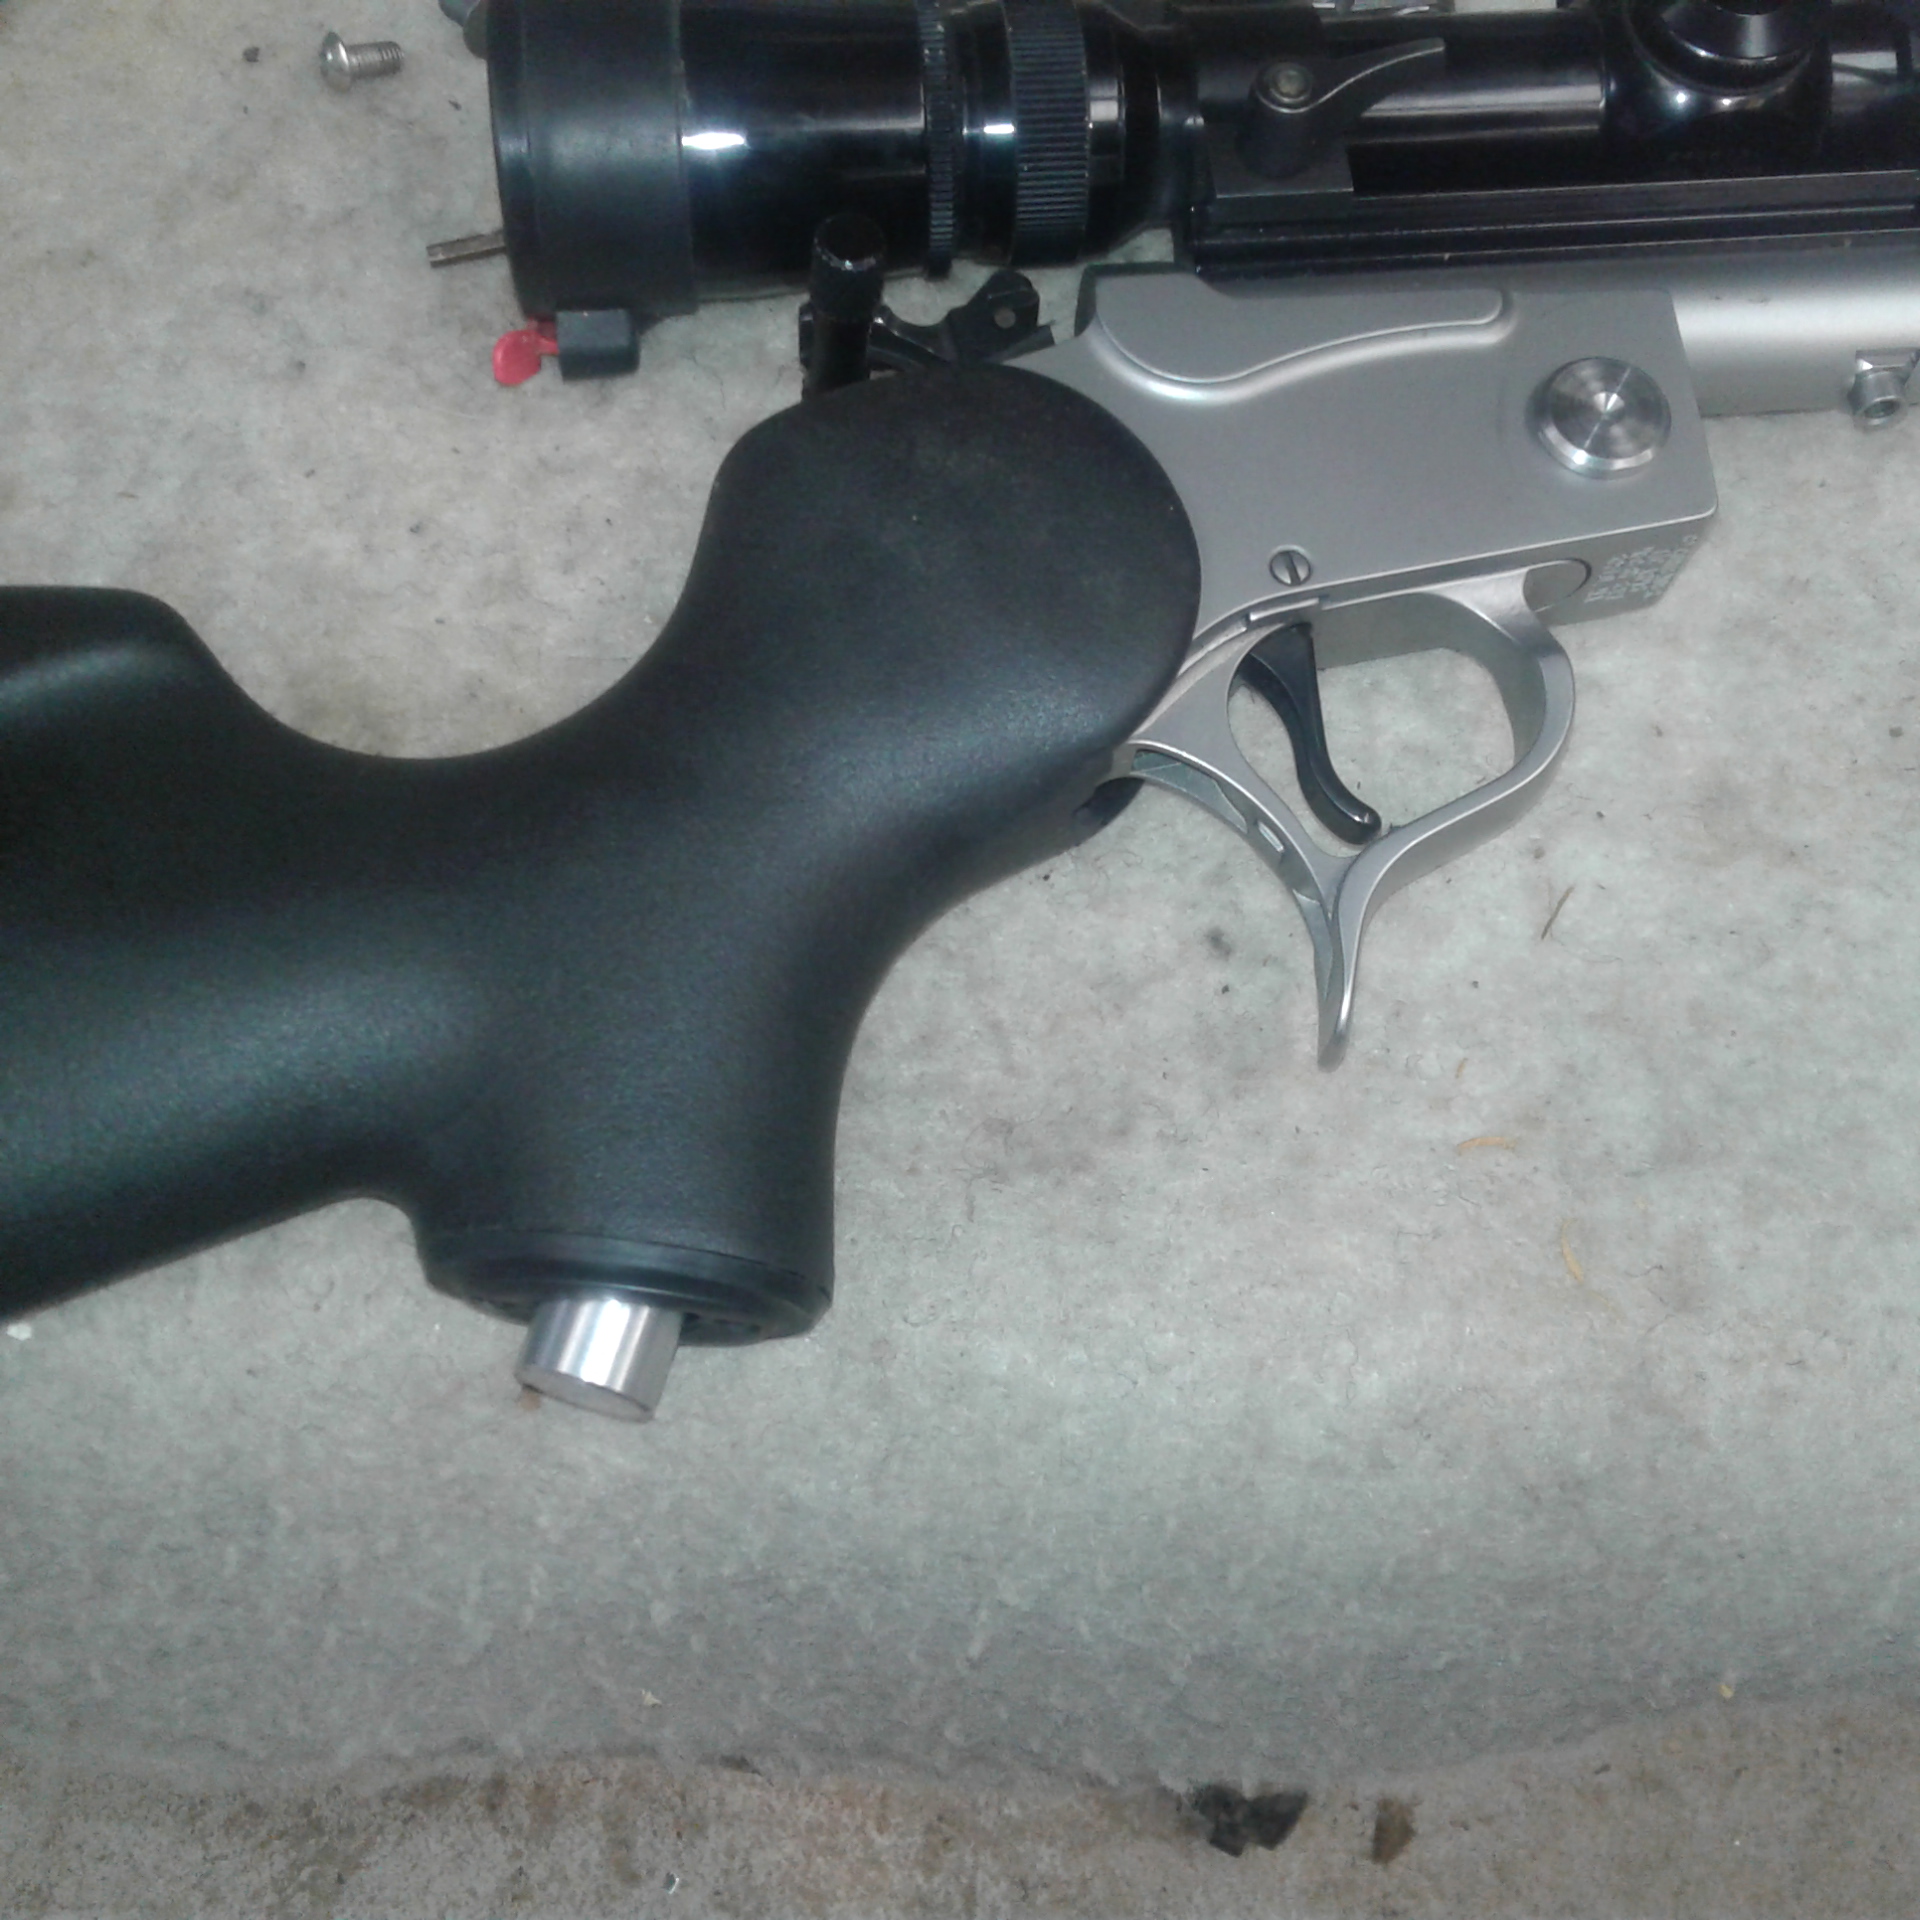
Alloy counter bored to be exact same weight as the original factory steel cap screw. A bit of anti seize on the thread and it's easy to use.
-
09-12-2019, 08:56 AM #83Member

- Join Date
- Dec 2014
- Location
- canterbury
- Posts
- 6,832
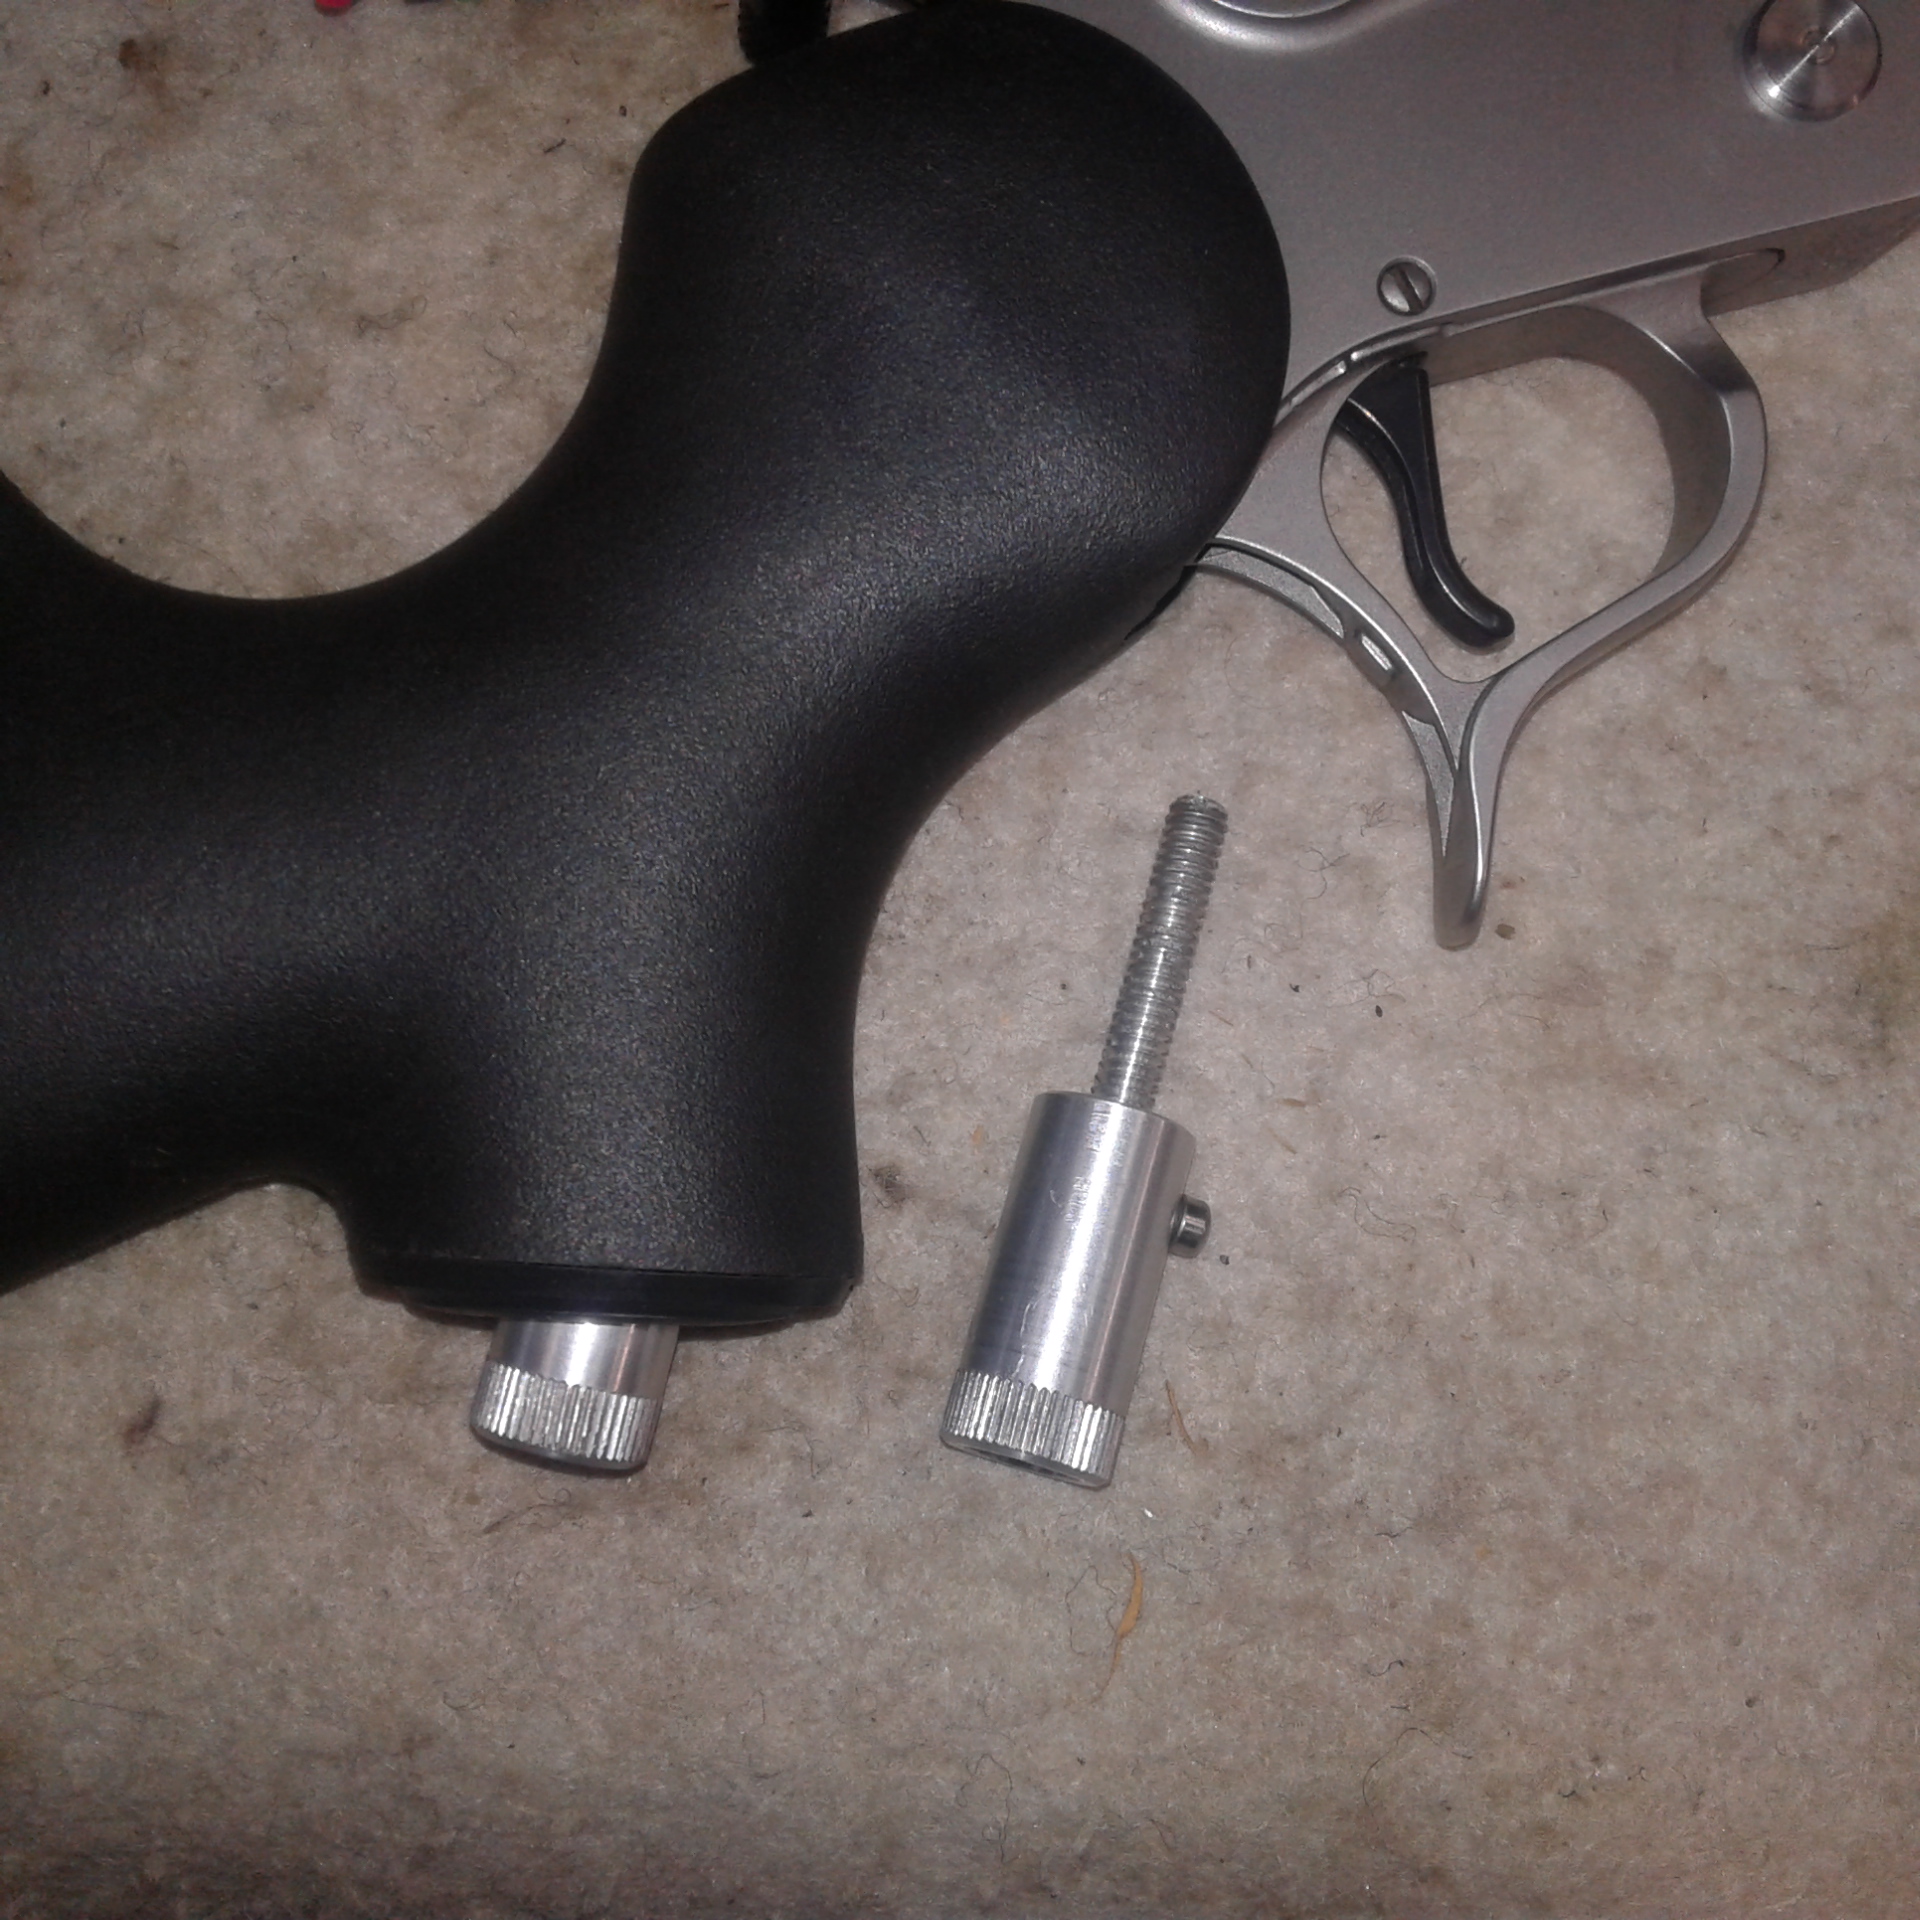
I just popped the T.C. emblem off the pistol grip cap and bored it out 18mm for the 16mm take down screw diameter which comes through in a slight angle and it comes out through the center of where the 20mm molded recess was for the emblem
Very tidy looking modification
-
09-12-2019, 09:48 AM #84
That looks like a great solution.
Making the bolt captive might save a hunt around in the long wet grass someday."Sixty percent of the time,it works every time"
-
09-12-2019, 10:31 AM #85Member

- Join Date
- Jul 2012
- Location
- Invervegas
- Posts
- 5,620
@akaroa1 - now all you have to do is cut off the silly "extension" that makes it impossible to get a "rifle style" grip angle and re-thread it (possible quite a bit of machine work to get it set up just right) , THEN after you make up a classic style stock from a bit of walnut you will have a really nice rifle!!
@norsk - thats a great addition to the ideas pot!
-
09-12-2019, 11:49 AM #86Member

- Join Date
- Dec 2014
- Location
- canterbury
- Posts
- 6,832
There is 20mm under the pistol grip cap.
So the captive screw sits in that space and stops it coming out past the hole bored in the cap
Nice to see you are on air @norsk
-
09-12-2019, 12:02 PM #87Member

- Join Date
- Jul 2013
- Location
- Waikato
- Posts
- 2,574
I think ssrnz used to make a mean 7.62x39 setup in single shot bolt action..pricey though.
-
09-12-2019, 12:52 PM #88Member

- Join Date
- Sep 2017
- Location
- BOP
- Posts
- 501
Thanks mate, I'm quite fond of the setup. Back in summer 2016-17 I fast pack hiked over 2000km from Lottin Point (East Cape) to Bluff through all the public land I could piece together. A great test for a lightweight takedown rifle! It's a little bit lighter now than when I did that trip. Definitely proved up for the task. I have some thoughts about more trips to get it back in the hills.
@akaroa1 I've been out of this thread for a bit and I like your solution! This is actually how I used it on my hike, albeit I removed the grip plate permanently and used an allen key for disassembly. Then I could pack my Contender discreetly when I needed to resupply food in towns. This is probably a more convenient method I think because as you know the tighter the hinge pin the accuracy potential improves. So it can be a bit of a pain to remove the hinge pin without a punch or something. Since I don't have the G2 in my safe anymore I'm not sure if the G1 and G2 stock screws are the same dimensions?I solved the tool less take down problem. Don't take down at the hinge pin. Take down at the butt stock bolt.
@Tentman Personally I prefer the more vertical grip style Contender stocks over the more traditional hunting style stock. I find married with the Aimpoint it makes a very nice ergonomic feel (for me) for quick snap shots in the bush.
-
09-12-2019, 01:51 PM #89Member

- Join Date
- Dec 2014
- Location
- canterbury
- Posts
- 6,832
[QUOTE=joelhenton;928550]
@akaroa1 I've been out of this thread for a bit and I like your solution! This is actually how I used it on my hike, albeit I removed the grip plate permanently and used an allen key for disassembly. Then I could pack my Contender discreetly when I needed to resupply food in towns. This is probably a more convenient method I think because as you know the tighter the hinge pin the accuracy potential improves. So it can be a bit of a pain to remove the hinge pin without a punch or something. Since I don't have the G2 in my safe anymore I'm not sure if the G1 and G2 stock screws are the same dimensions?
The screw is 1/4" x 20 TPI and its 32mm long on the G2.
I would expect the G1 will be the same screw but the other sizes might need to be fiddled with just a little bit.
As I have made this the parallel section is 16mm diameter and 40mm long and I will knurl the last 15mm or so.
There is 20mm of float between the inside face of the grip cap and the shoulder inside for the captive screw to be contained inside
-
18-12-2019, 10:27 AM #90Member

- Join Date
- Dec 2014
- Location
- canterbury
- Posts
- 6,832
Wet day so finished the take down thumb screw.
Knurled the end and tapped in the m3 cap screw that makes it captive under the grip cap.
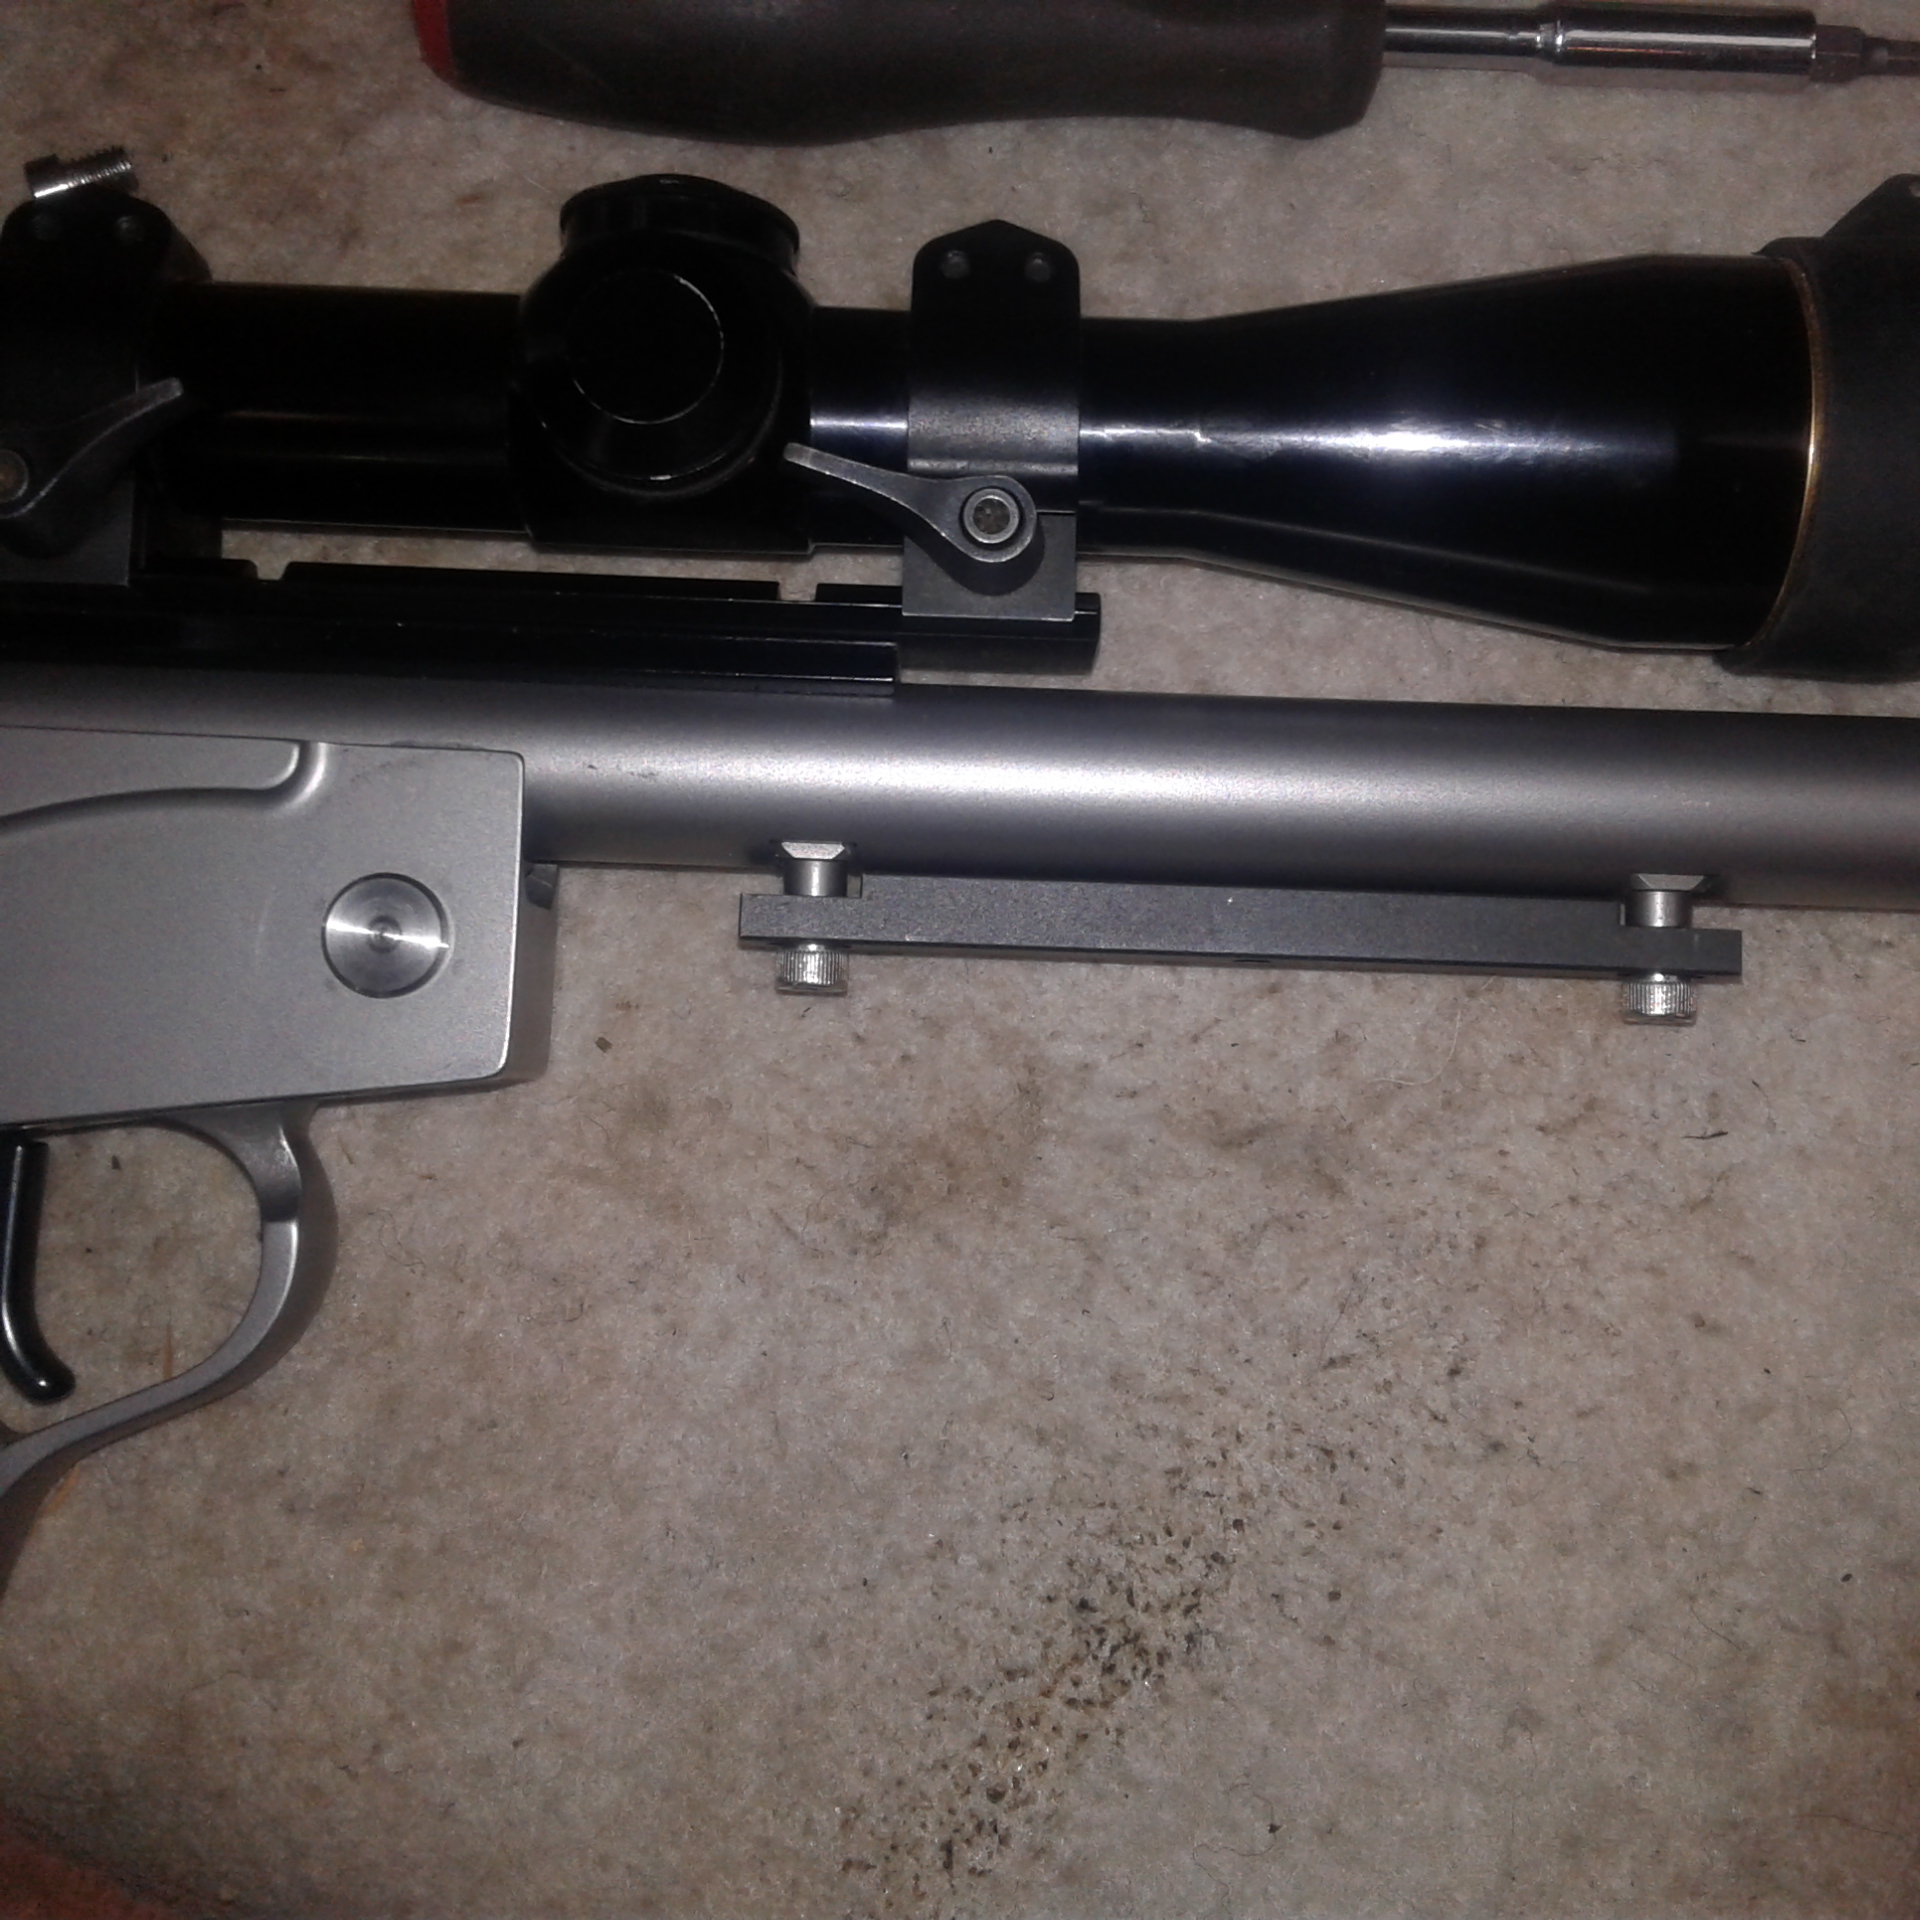
Fitted a hanger bar also and will start on a splinter fore end.
Then a barrel band sling mount well forward and it's done.
Similar Threads
-
Classy 222's/223's
By Tentman in forum Firearms, Optics and AccessoriesReplies: 71Last Post: 25-08-2019, 06:05 PM -
Considering a .22 Takedown
By Fireflite in forum Firearms, Optics and AccessoriesReplies: 35Last Post: 16-09-2017, 10:53 PM
Tags for this Thread
Welcome to NZ Hunting and Shooting Forums! We see you're new here, or arn't logged in. Create an account, and Login for full access including our FREE BUY and SELL section Register NOW!!


 136Likes
 LinkBack URL
 About LinkBacks


 Reply With Quote
 Nicely done mate.


Bookmarks