

 483Likes
 LinkBack URL
 About LinkBacks
I had almost forgotten the teaspoon @Ftx325.Having the right tools makes things easier but, as you say it's surprising what you can achieve with what you have on hand
Sent from my SM-G525F using Tapatalk
Welcome guest, is this your first visit? Create Account now to join.
Welcome to the NZ Hunting and Shooting Forums.
Search Forums


User Tag List
+ Reply to Thread
Results 226 to 240 of 320
Thread: Playing with leather
Hybrid View
-
01-09-2021, 07:45 PM #1Member


- Join Date
- Sep 2019
- Location
- Ohakune.NZ
- Posts
- 463
Ftx325 likes this.
-
22-01-2022, 10:19 AM #2Member

- Join Date
- Apr 2015
- Location
- Geraldine
- Posts
- 25,441
well done indeed. pleased you put lighter there for size as no idea otherwise. if you find it opens you could put hole in end of flap and simply thread string through it so it would be too fat to return through hole unless string removed.
-
22-01-2022, 10:28 AM #3Member

- Join Date
- Jul 2020
- Location
- Nelson
- Posts
- 3,144
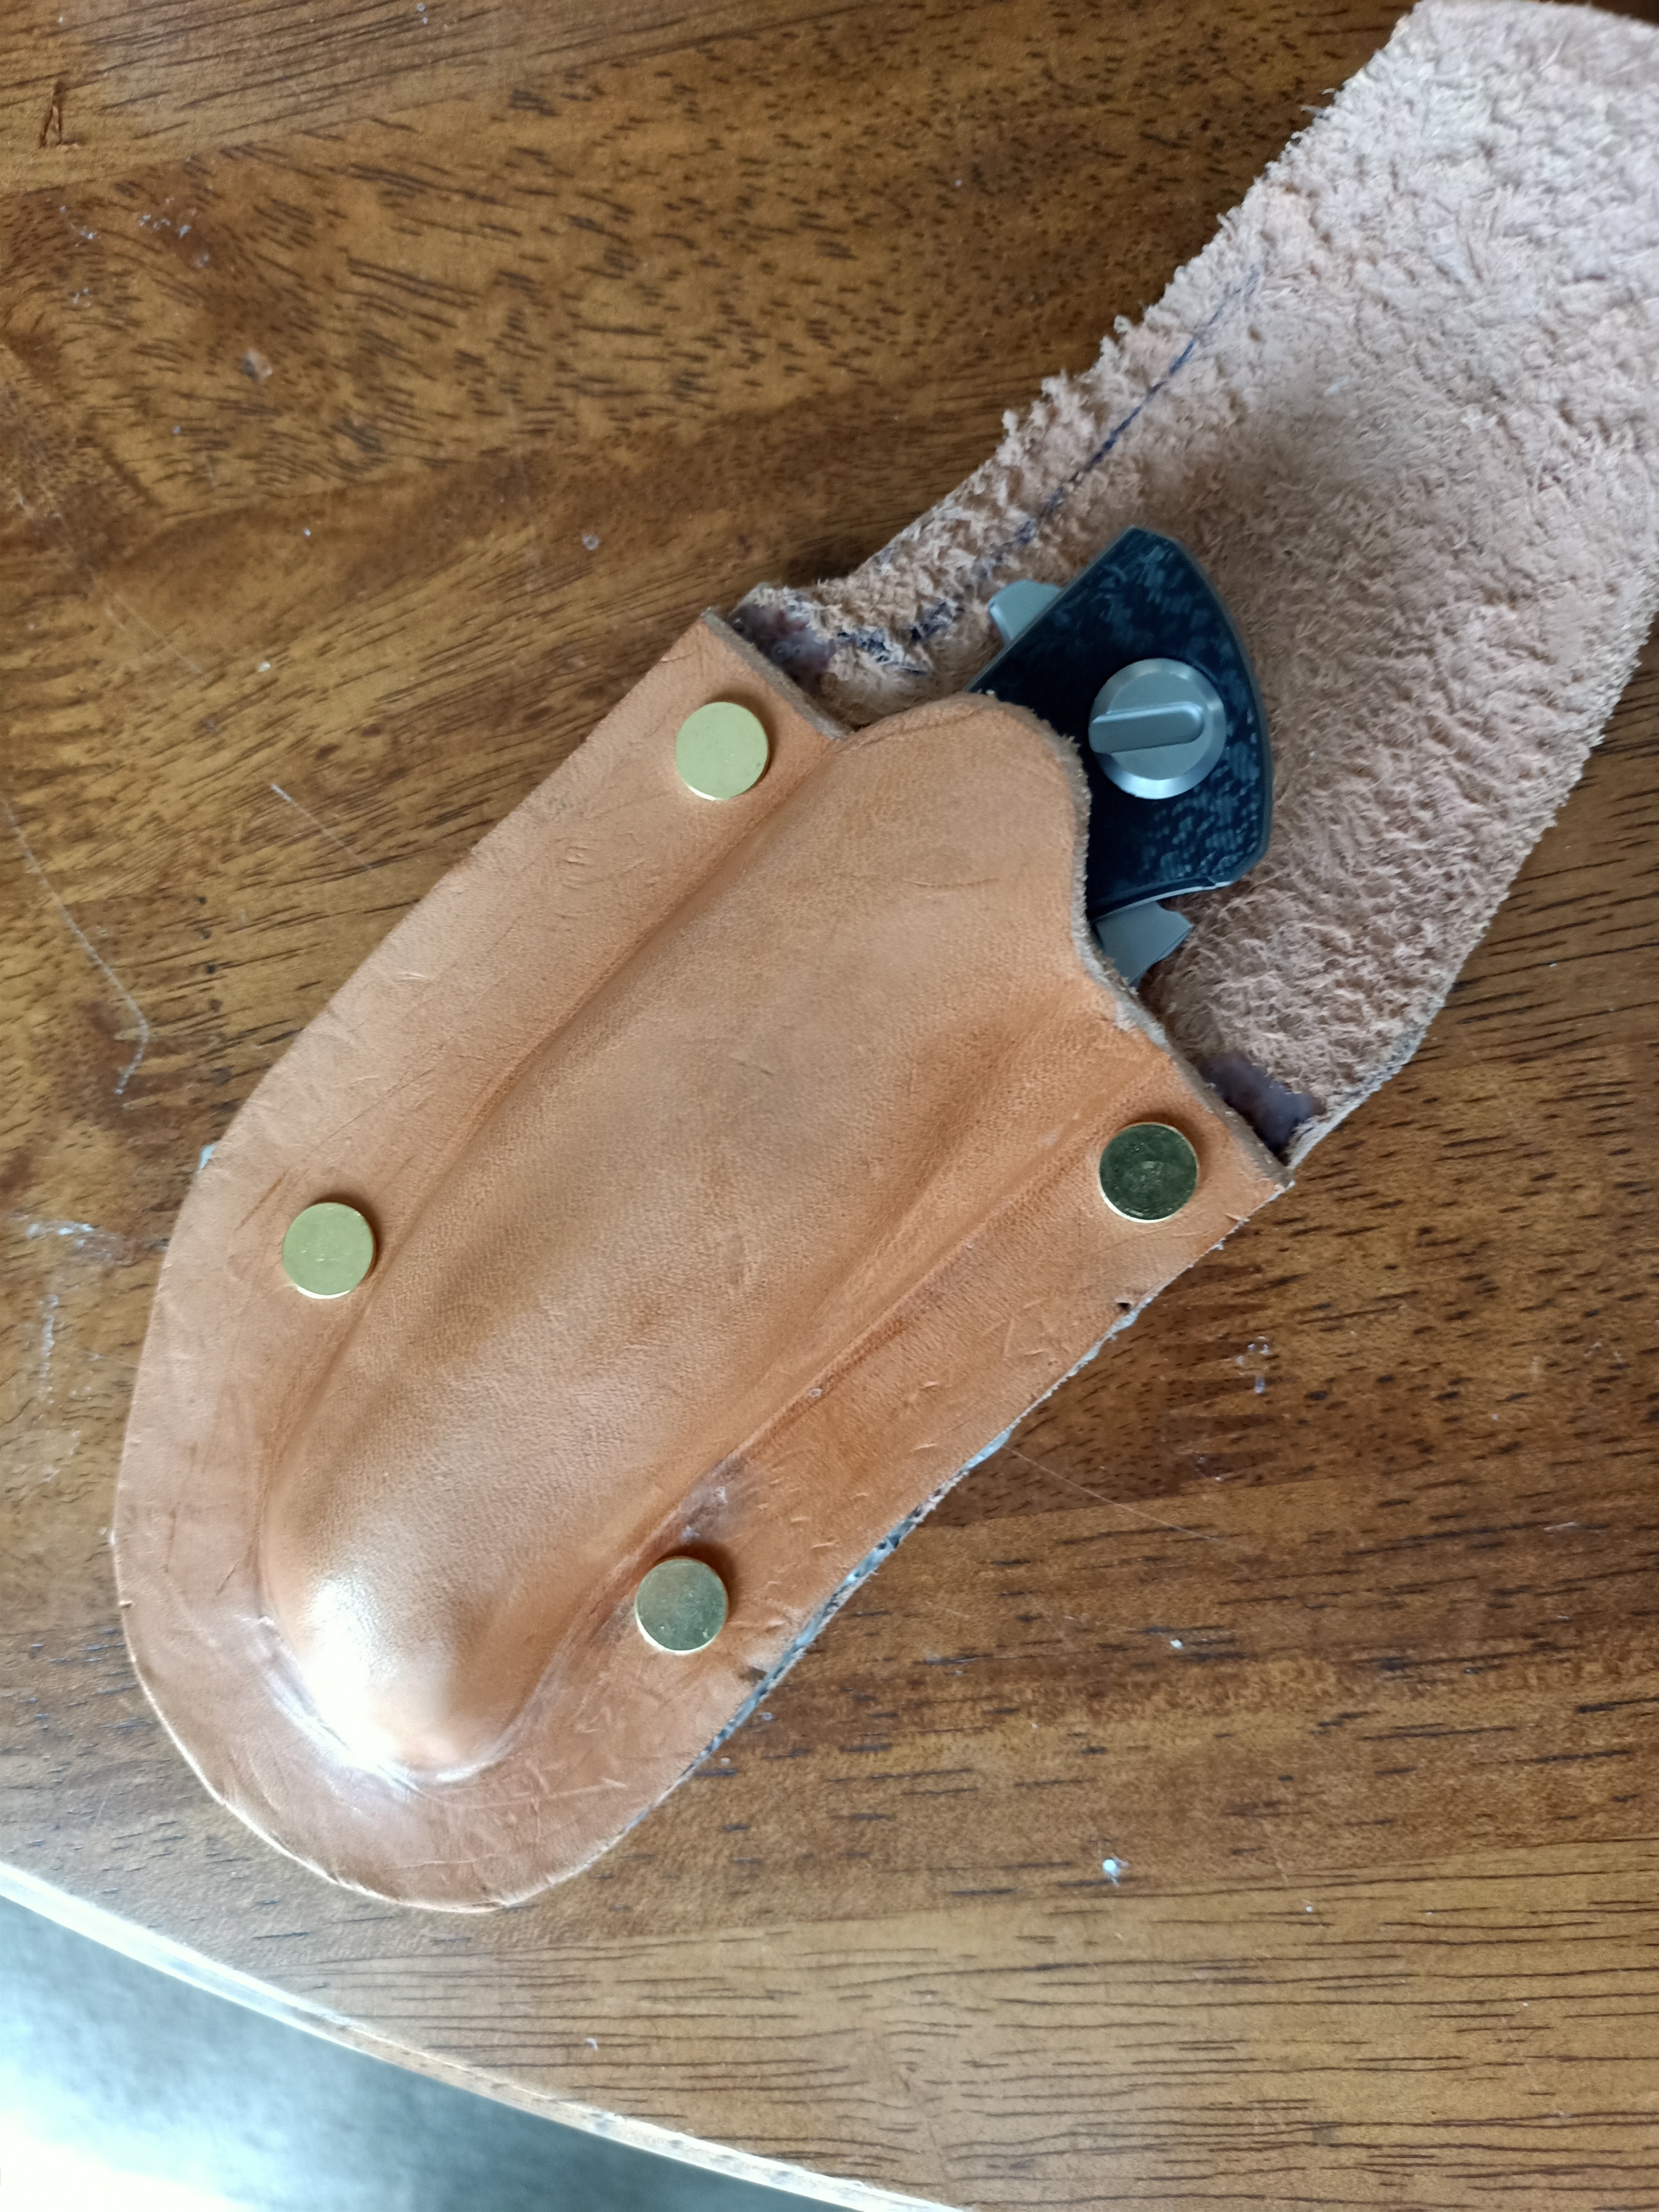
Thanks MD . I was a little dubious about the flap closure but turned out surprisingly secure .
Was going to use the standard popper setup for closing but decided I wanted to try something different and think also popper would have made it to bulky . Seriously considered making it button up and making a button out of antler but decided a bit over the top for something that is going to live in my bag and never be seen by anyone so just did the nice simple retaining strap instead ....born to hunt - forced to work
-
22-01-2022, 12:59 PM #4Member
- Join Date
- Sep 2019
- Location
- Ohakune.NZ
- Posts
- 463
That's some tidy work @Ftx325. What make is that knife?. Have often wondered how they would go.
I had a little play with a similar pouch design a while ago, but with a horizontal carry belt loop. The flap seems to be holding up OK but I also have doubts about them


Sent from my SM-G525F using Tapatalk
-
22-01-2022, 04:45 PM #5Member
- Join Date
- Jul 2020
- Location
- Nelson
- Posts
- 3,144
Hi Hunter . Thanks ...
I wouldn't have done the flap closure like that if I was belt mounting it but ok just in bag and the knife and blades are still a light friction fit in sheath so won't fall out anyway .
I left the flap leather normal to start but wasn't happy so soaked the flap up until about 3/4 of inch before the the mouth of sheath , slid it under strap and molded around sheath so it wraps around it then cooked it with a hairdryer . When dry the flap is stiff but the point above mouth is still flexible to allow it to bend to get open or closed and because leather is stiff you actually have to make an effort to open it as it doesn't want to bend to allow you to pull it out ... Make sense ?
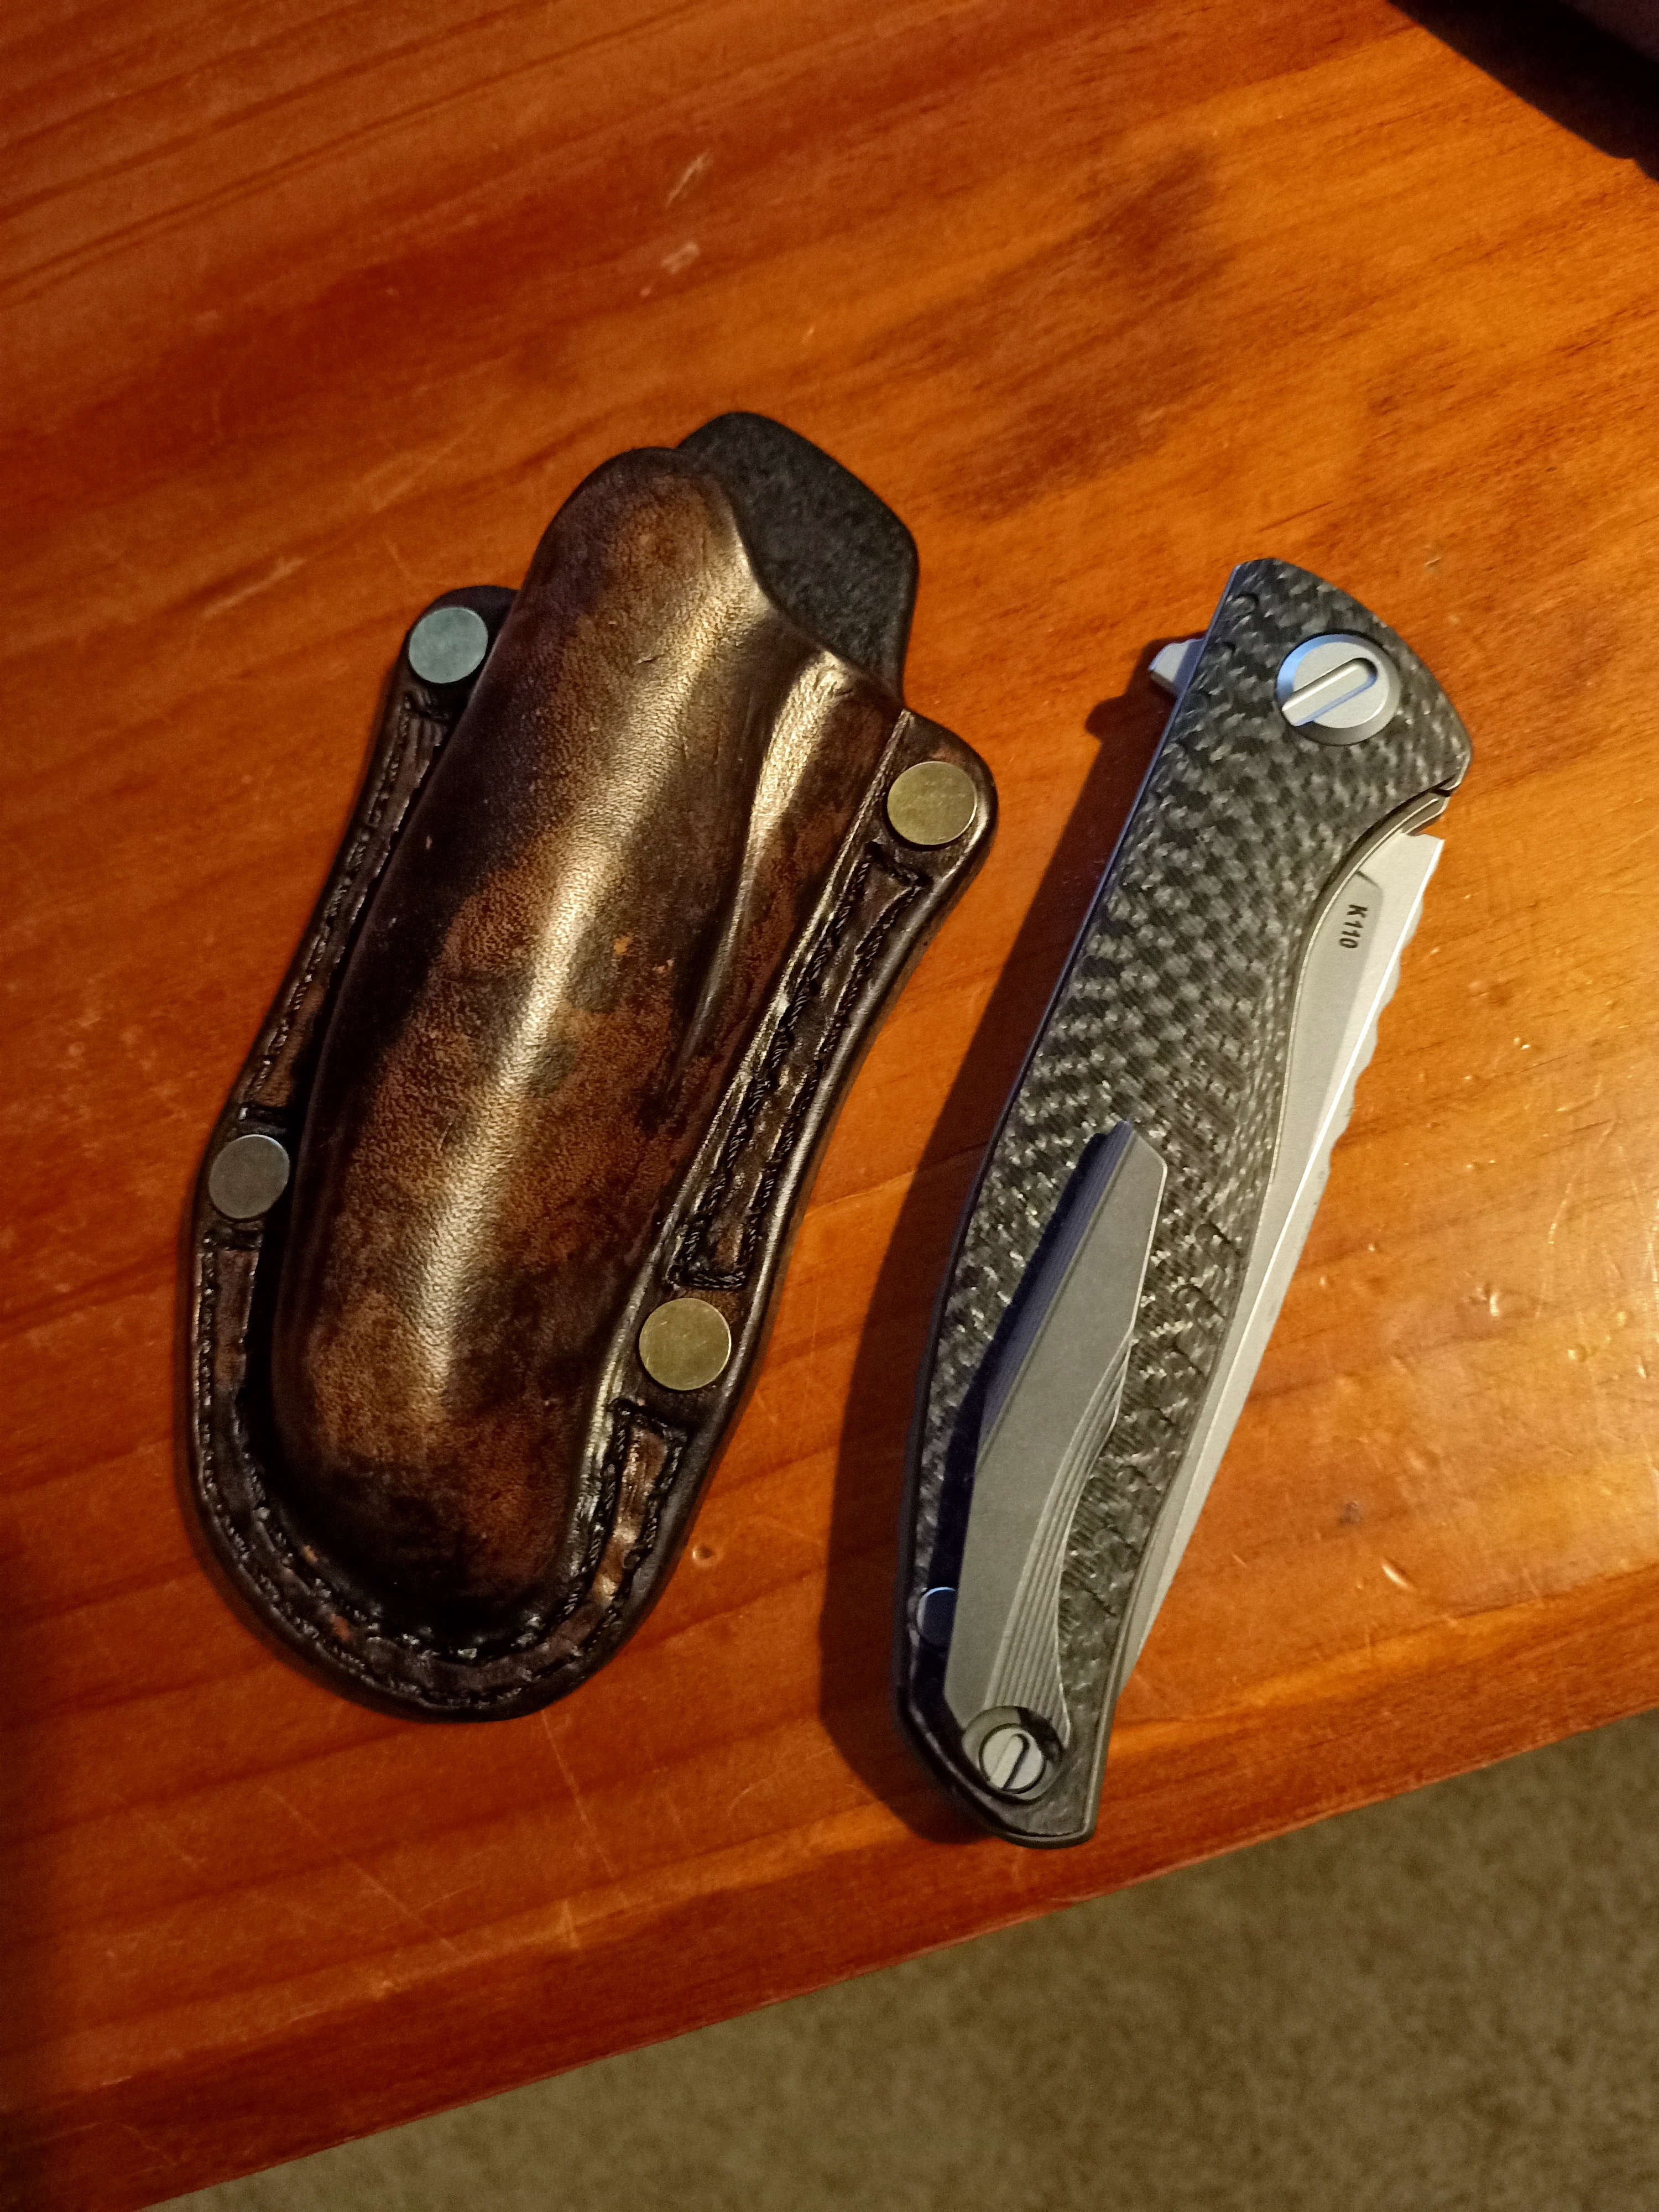
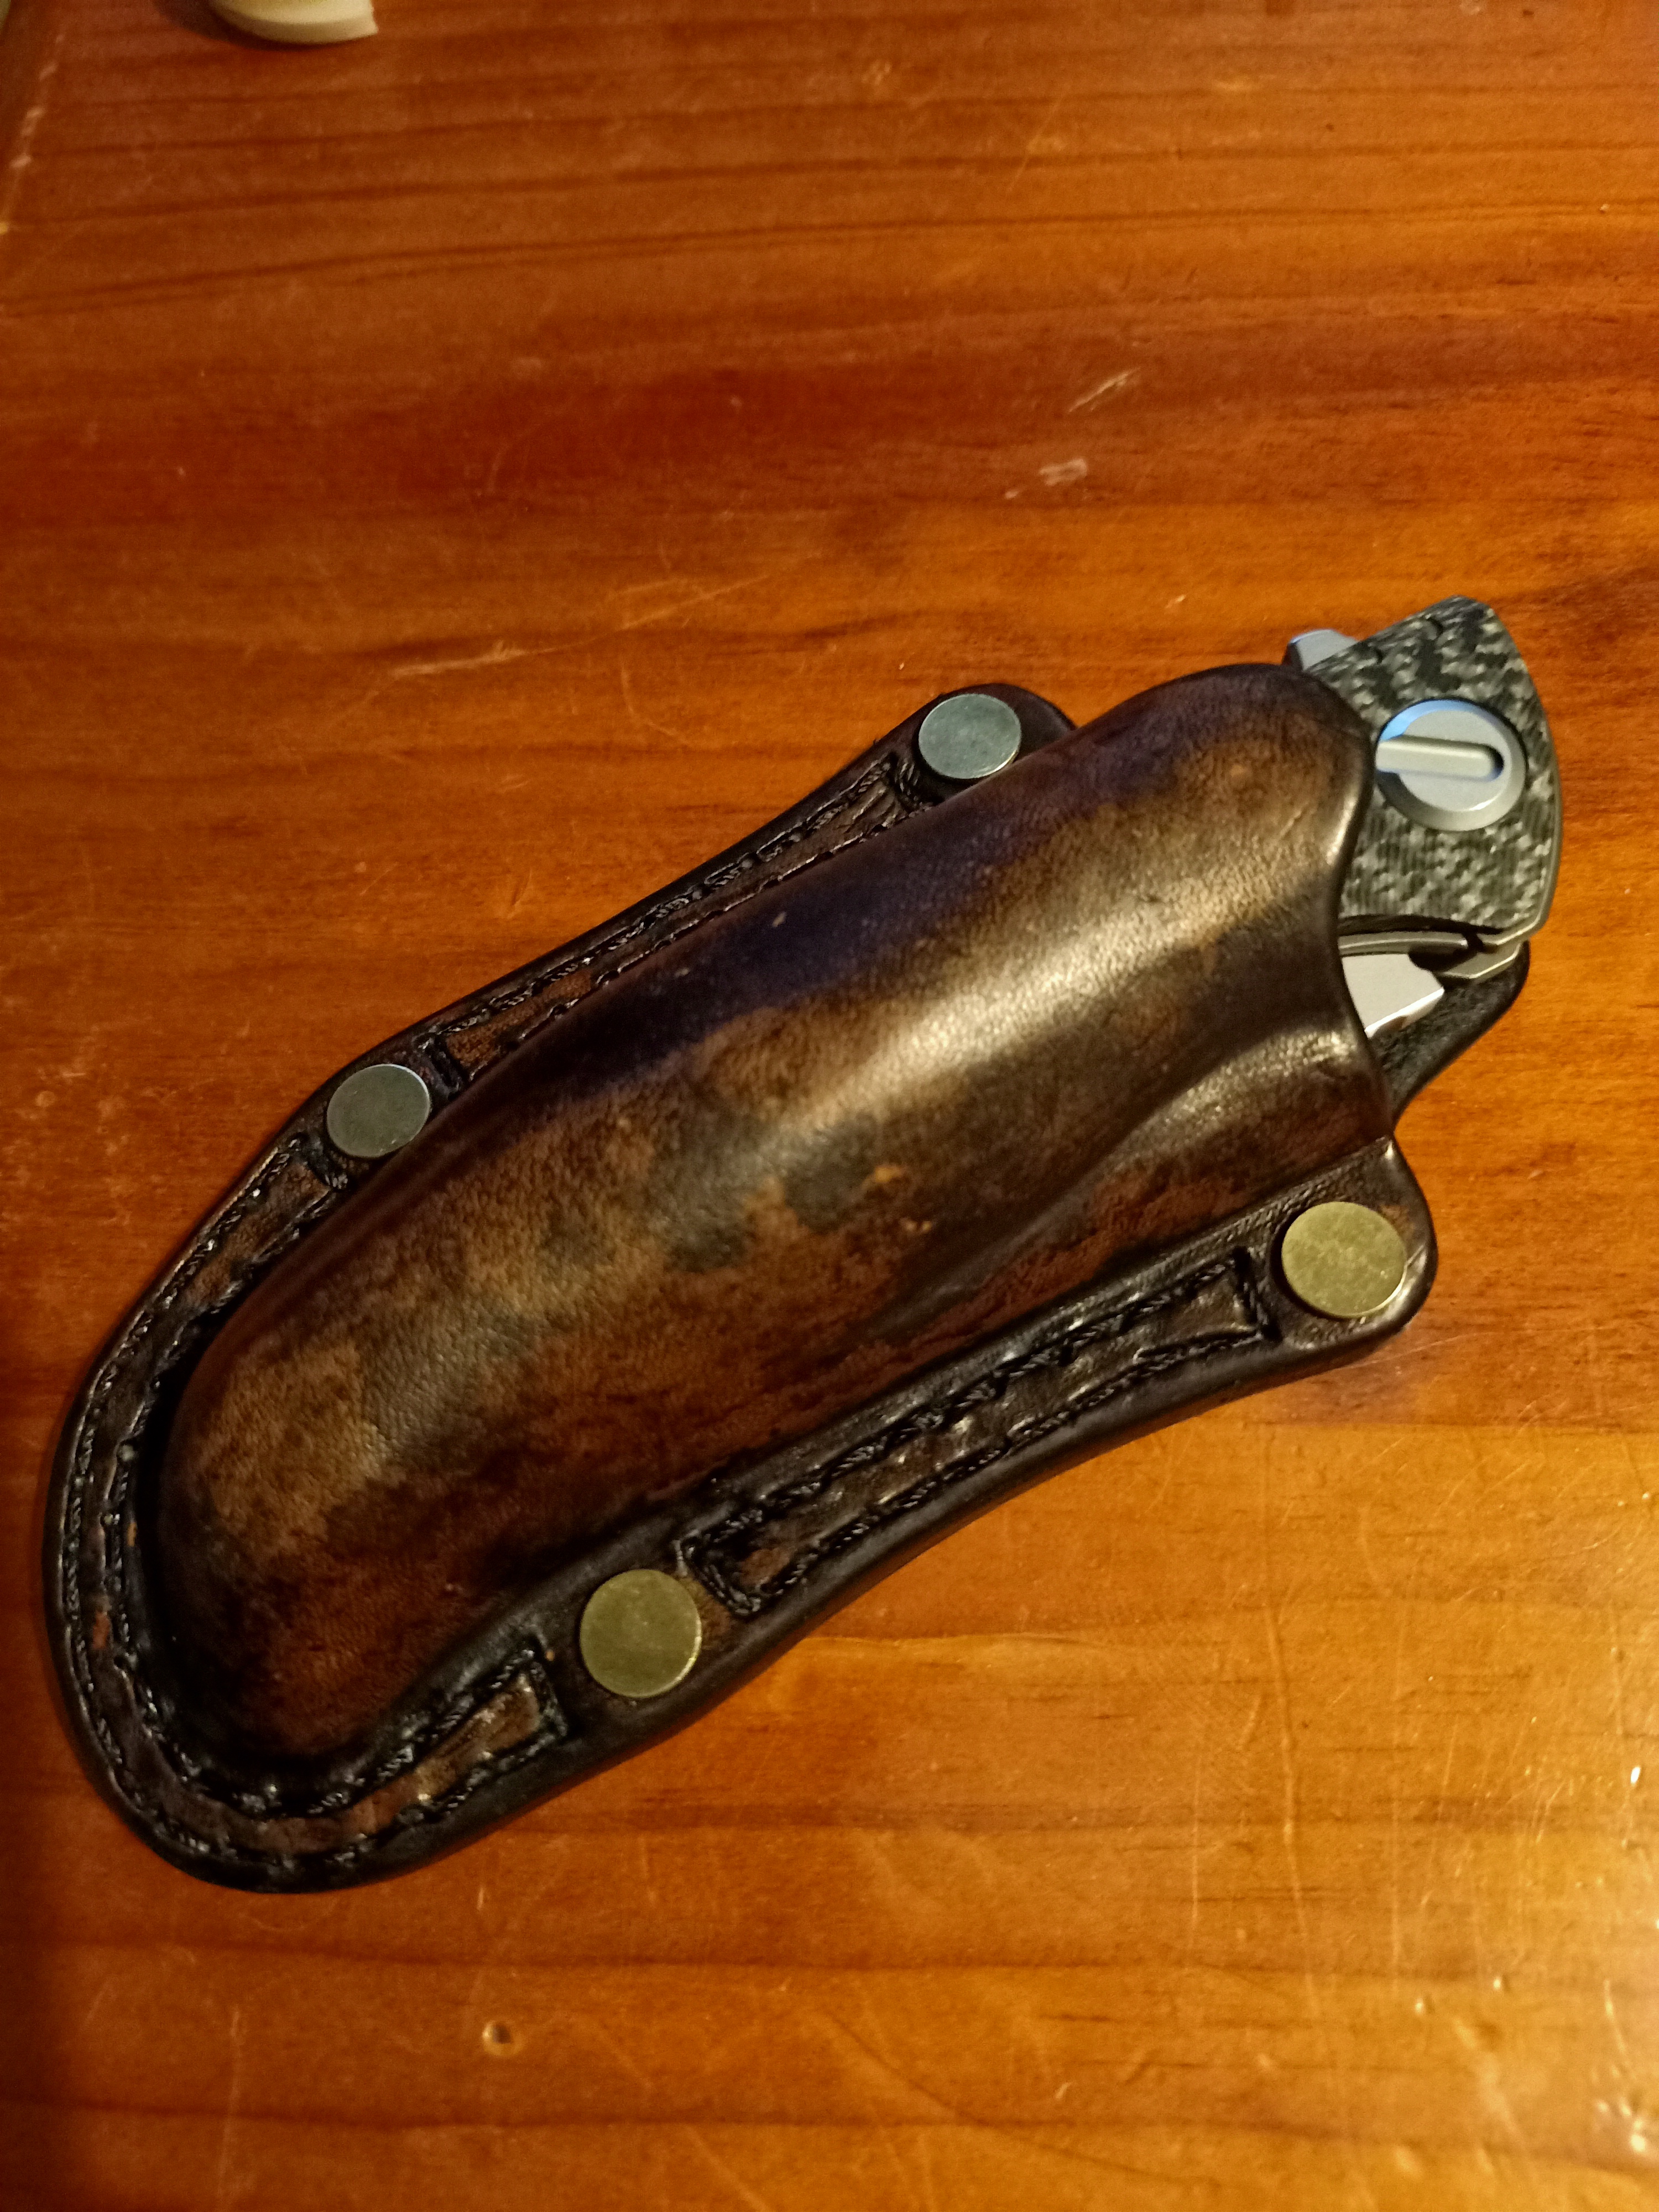
You can see in the 2nd pic where the flap is stuck up stiff and shaped to wrap from the tip to just after the bend where flexible leather starts .
The scalpel was from Ali express . The seller was tczuo edc . Have since ordered 4 more for the guys at work which arrived the other day .
I am considering ordering in a bunch more as 2 others now want one after seeing mine as well as my boy ....born to hunt - forced to work
-
22-01-2022, 05:51 PM #6Member
- Join Date
- Sep 2019
- Location
- Ohakune.NZ
- Posts
- 463
Thanks @Ftx325 will have a look at them.
I always find when you make stuff for yourself it is a good excuse to try different designs/techniques. If they work out it's good, if they fail then no one is pissed but yourself
Sent from my SM-G525F using Tapatalk
-
23-01-2022, 08:33 AM #7Mushroom juice ! Hic !

- Join Date
- Jun 2012
- Location
- Above the Hutt
- Posts
- 6,872
@Ftx325, looks mint ! very clever work on the flap. Should be nice and quiet.
 Viva la Howa ! R.I.P. Toby | Black rifles matter... | #illegitimate_ute
-
07-02-2022, 05:26 PM #8Member
- Join Date
- Sep 2019
- Location
- Ohakune.NZ
- Posts
- 463
Little rainy day E.D.C project. Victorinox Adventurer and a Wurkkos wk01. Little torch but puts out 120+ lumens, I'm quite impressed with it.

Sent from my SM-G525F using Tapatalk
-
07-02-2022, 06:25 PM #9Member
- Join Date
- Jul 2020
- Location
- Nelson
- Posts
- 3,144
Nice.... Funny I just started much the same thing for my pocket knife .
Wet molded again and the flap will be removed .
Obviously a work in progress .... Just started it yesterday with some more little scraps so the design is a compromise due lack of leather . Was going to add torch also but not big enough leather pieces for that unfortunately .born to hunt - forced to work
-
07-02-2022, 06:39 PM #10Member
- Join Date
- Sep 2019
- Location
- Ohakune.NZ
- Posts
- 463
Great minds huh!.Mine was reclaimed from the scrap box too.
Sent from my SM-G525F using Tapatalk
-
09-02-2022, 10:01 PM #11Member
- Join Date
- Jul 2020
- Location
- Nelson
- Posts
- 3,144
Just have to add a belt loop on the back which will just be a square bolted at the corners with those Chicago screws so will be able to carry vertical or horizontal .
In my usual preferred patchy colour finish my daughter has named 'bark camo' , which suits...done using Black dye
 born to hunt - forced to work
-
10-02-2022, 06:31 PM #12Member
- Join Date
- Sep 2019
- Location
- Ohakune.NZ
- Posts
- 463
Looks good mate.How do you do your "bark camo"?. Are you dabbing black dye over brown?
Sent from my SM-G525F using Tapatalk
-
11-02-2022, 11:49 AM #13Member
- Join Date
- Jul 2020
- Location
- Nelson
- Posts
- 3,144
nah ... all black dye . Just dab it on with a brush or rag in random splotches in camo-ish pattern , so a few random splatters first then leave a minute or two , then another bunch of random splatters and so on until covered whole surface area in what looks like an evenish coat. Then leave for half hr or so then hit with a rag and beeswax and rub the bejeezus out of it which removes a large amount of dye but ends up with a brown background colour and the patches that got hit with more random splotches than others come up a darker/black shade . Depending on how many layers of dye were dabbed on any particular part and how long it dried for gives a splotchier or darker finish . The belt loop I did last night on the back of that sheath I just painted the dye on and left several hours which gave an even almost black finish - not worried about camo finish as can't see it anyway . You can give it a slightly different camo look by applying the dye in brushstrokes rather than dabs but the same procedure , gives a more brushed look rather than camo splotches .
The earlier double sheaths were done the same way but only gave it 5 mins before waxing which gave a lot lighter colour finish and less splotchy but left black in the creases in the leather grain rather than camo like splotches . The sleeve was done with same dye but left a couple of hours before waxing so darker and more even in colour finish .
Does that make any sense @hunter Al.7mm08 ?born to hunt - forced to work
-
11-02-2022, 11:31 AM #14Member

- Join Date
- Dec 2011
- Location
- nelson/marlborough
- Posts
- 3,467
Some nice work done here. Im looking of a sheath for the wifes bark river fox featherweight. The Barkriver sheaths are pretty average and it wont hold securely Any one interested in a job? drop me a PM
CheersJust a slopy retrobate
-
11-02-2022, 02:02 PM #15Member
- Join Date
- Sep 2019
- Location
- Ohakune.NZ
- Posts
- 463
Yep makes perfect sense. I have had a few pieces of leather (mostly older stuff) that won't dye evenly so thinking your camo technique might solve that issue
Sent from my SM-G525F using Tapatalk


 Reply With Quote
Similar Threads
-
Playing around with my food
By mehtat in forum TaxidermyReplies: 4Last Post: 05-02-2018, 03:18 PM -
what's the weather playing at
By Willie in forum HuntingReplies: 5Last Post: 16-05-2015, 04:09 PM -
Playing with the Mauser 107 22LR
By Gillie in forum ShootingReplies: 7Last Post: 03-01-2015, 05:33 PM -
Anyone playing with 6.5 Grendel
By specweapon in forum Firearms, Optics and AccessoriesReplies: 4Last Post: 29-07-2014, 07:09 PM -
Playing with 300 Blackout - Video
By ishoot10s in forum Firearms, Optics and AccessoriesReplies: 8Last Post: 20-12-2012, 09:00 AM
Tags for this Thread
 Posting Permissions
- You may not post new threads
- You may not post replies
- You may not post attachments
- You may not edit your posts
Welcome to NZ Hunting and Shooting Forums! We see you're new here, or arn't logged in. Create an account, and Login for full access including our FREE BUY and SELL section Register NOW!!
All times are GMT +13. The time now is 05:31 PM.

Bookmarks